Overload Ocean - Stage 2: Difference between revisions
mNo edit summary |
m (Minor fixes.) |
||
| (18 intermediate revisions by 8 users not shown) | |||
| Line 1: | Line 1: | ||
{{Infobox-KPRStage | {{Infobox-KPRStage | ||
|image=[[File:Overload Ocean 2. | |image=[[File:KPR Overload Ocean Stage 2 1.png|350px]] | ||
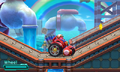
|caption=Kirby | |caption=Kirby happily rolls along. | ||
|level=[[Overload Ocean]] | |level=[[Overload Ocean]] | ||
|robobot={{Y}} | |robobot={{Y}} | ||
| Line 7: | Line 7: | ||
|sticker=3 | |sticker=3 | ||
|goldsticker=[[Gryll]] | |goldsticker=[[Gryll]] | ||
| | |theme music=[[File:KPR Pink Ball Activate Sample.oga]] | ||
|theme title="[[Pink Ball Activate!]]" | |||
|description=Clip of the music that primarily plays in Overload Ocean - Stage 2. | |||
|previousstage=[[Overload Ocean - Stage 1]] | |previousstage=[[Overload Ocean - Stage 1]] | ||
|nextstage=[[Overload Ocean - Stage 3]] | |nextstage=[[Overload Ocean - Stage 3]] | ||
}} | }} | ||
'''Overload Ocean - Stage 2''' is the second stage of [[Overload Ocean]]. There are three [[Code Cube]]s and three [[Sticker (Kirby: Planet Robobot)|sticker]]s in this stage. The rare sticker is one depicting [[Gryll]]. The [[Wheel Mode]] for the [[Robobot Armor]] debuts in this stage. | |||
'''Overload Ocean - Stage 2''' is the second stage of [[Overload Ocean]]. There are three [[Code Cube]]s and three [[Sticker (Kirby: Planet Robobot)|sticker]]s in this stage. The | |||
==Overview== | ==Overview== | ||
The stage begins with a quick jaunt across the water, with the [[Robobot Armor]] waiting on the other side. From there, Kirby can absorb a [[Wheelie]] using the armor to activate the [[ | The stage begins with a quick jaunt across the water, with the [[Robobot Armor]] waiting on the other side. From there, Kirby can absorb a [[Wheelie]] using the armor to activate the [[Wheel Mode]], which will be used for the rest of the stage. The Wheel Mode is capable of jumping between foreground and background without the use of a [[3D Warp Star]], allowing for quick shifting between paths in the two planes. | ||
At the very end, Kirby can rev up a laser which will carve out the stage exit for him given the right amount of power. | At the very end, Kirby can rev up a laser which will carve out the stage exit for him given the right amount of power. | ||
===Code Cube & | ===Code Cube & Rare Sticker Guide=== | ||
*'''Code Cube 1''' - While riding in the first area, Kirby can get this cube by jumping into the background where it appears. | *'''Code Cube 1''' - While riding in the first area, Kirby can get this cube by jumping into the background where it appears. | ||
*'''Code Cube 2''' - In the second driving area, a side door can be accessed after heading through a timed [[Switch]] gate. Through the door is a crumbling pathway which leads to the second cube. | *'''Code Cube 2''' - In the second driving area, a side door can be accessed after heading through a timed [[Switch]] gate. Through the door is a crumbling pathway which leads to the second cube. | ||
*'''Code Cube 3''' - In the third driving area, Kirby can get this cube by taking the upper path, which switches back and forth along various hanging docks, then jumping off the last one. | *'''Code Cube 3''' - In the third driving area, Kirby can get this cube by taking the upper path, which switches back and forth along various hanging docks, then jumping off the last one. | ||
*''' | *'''Rare Sticker''' - After getting the third Code Cube, a path in the background leads to a treasure chest which contains this sticker. | ||
==Enemies, Mid-Bosses and Abilities== | ==Enemies, Mid-Bosses and Abilities== | ||
| Line 35: | Line 36: | ||
{{col-break|width=33%}} | {{col-break|width=33%}} | ||
*[[Blipper]] | *[[Blipper]] | ||
*[[Craby]] | *[[Craby]] | ||
*[[Flotzo Borg]] | |||
{{col-break|width=33%}} | {{col-break|width=33%}} | ||
*[[Glunk]] | *[[Glunk]] | ||
*[[ | *[[Mamatee]] | ||
*[[Squishy]] | *[[Squishy]] | ||
{{col-break|width=34%}} | {{col-break|width=34%}} | ||
| Line 59: | Line 60: | ||
| | | | ||
{{col-begin}} | {{col-begin}} | ||
*[[Wheel | *[[Wheel Mode]] | ||
{{col-end}} | {{col-end}} | ||
|} | |} | ||
{{clear|right}} | |||
==Gallery== | |||
<gallery> | |||
KPR Overload Ocean Stage 2 2.png|[[Wheel Mode|Wheel]] turns white as it gets damaged | |||
KPR Overload Ocean Stage 2 3.png|Kirby attempts to go somewhere over the rainbow. | |||
KPR Overload Ocean Stage 2 4.png|Kirby speeds along. | |||
KPR Overload Ocean Stage 2 5.png|Kirby sculpts the end door out of the rock. | |||
KPR-map32.jpg|Stage map | |||
</gallery> | |||
{{Navbox- | {{Navbox-KPR}} | ||
Latest revision as of 06:02, 9 February 2024
| ||||||||||||||||
| ||||||||||||||||
| ||||||||||||||||
|
| ||||||||||||||||

Overload Ocean - Stage 2 is the second stage of Overload Ocean. There are three Code Cubes and three stickers in this stage. The rare sticker is one depicting Gryll. The Wheel Mode for the Robobot Armor debuts in this stage.
Overview[edit]
The stage begins with a quick jaunt across the water, with the Robobot Armor waiting on the other side. From there, Kirby can absorb a Wheelie using the armor to activate the Wheel Mode, which will be used for the rest of the stage. The Wheel Mode is capable of jumping between foreground and background without the use of a 3D Warp Star, allowing for quick shifting between paths in the two planes.
At the very end, Kirby can rev up a laser which will carve out the stage exit for him given the right amount of power.
Code Cube & Rare Sticker Guide[edit]
- Code Cube 1 - While riding in the first area, Kirby can get this cube by jumping into the background where it appears.
- Code Cube 2 - In the second driving area, a side door can be accessed after heading through a timed Switch gate. Through the door is a crumbling pathway which leads to the second cube.
- Code Cube 3 - In the third driving area, Kirby can get this cube by taking the upper path, which switches back and forth along various hanging docks, then jumping off the last one.
- Rare Sticker - After getting the third Code Cube, a path in the background leads to a treasure chest which contains this sticker.
Enemies, Mid-Bosses and Abilities[edit]
| Regular Enemies | Mid-Boss | ||||
|---|---|---|---|---|---|
|
|
| ||||
| Abilities | Robobot Armor Modes | ||||
|
|
|
Gallery[edit]
Wheel turns white as it gets damaged
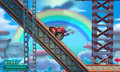
Kirby attempts to go somewhere over the rainbow.
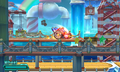
Kirby speeds along.
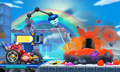
Kirby sculpts the end door out of the rock.
Stage map


