Butter Building - Stage 2: Difference between revisions
(split off here) |
Pinkyoshifan (talk | contribs) m (Text replacement - "(<tab name=".*)'(.*">)" to "$1’$2") |
||
| (33 intermediate revisions by 9 users not shown) | |||
| Line 1: | Line 1: | ||
{{Infobox-KAStage | {{Infobox-KAStage | ||
|image=[[File:Butter Building | |image=[[File:KNiDL Butter Building Stage 2.png]] | ||
|caption=Kirby ascends the tower in ''Nightmare in Dream Land''. | |caption=Kirby ascends the tower in ''Kirby: Nightmare in Dream Land''. | ||
|level=[[Butter Building]] | |level=[[Butter Building]] | ||
|midboss=[[Bugzzy]], [[Grand Wheelie]] | |midboss=[[Bugzzy]], [[Grand Wheelie]] | ||
|switch={{N}} | |switch={{N}} | ||
|theme music= | |||
<tabs> | |||
<tab name="Kirby’s Adventure"> | |||
[[File:Butter Building KA.oga]] | |||
</tab> | |||
<tab name="Kirby: Nightmare in Dream Land"> | |||
[[File:KNiDL Butter Building Sample.oga]] | |||
</tab> | |||
</tabs> | |||
|theme title="[[Butter Building (theme)|Butter Building]]" | |||
|description=Clips of the music that plays in Butter Building - Stage 2 | |||
|previousstage=[[Butter Building - Stage 1]] | |previousstage=[[Butter Building - Stage 1]] | ||
|nextstage=[[Butter Building - Stage 3]] | |nextstage=[[Butter Building - Stage 3]] | ||
| Line 11: | Line 22: | ||
==Overview== | ==Overview== | ||
This stage consists of seven primary rooms (six in ''Kirby's Adventure''). The first area is a tall room separated by slopes and walkways. Up top is a [[Poppy Bros. Jr.]] balancing on a [[Maxim Tomato]]. | |||
In the second room, Kirby finds himself inside a narrow tower which he must climb, past various foes on watch. | |||
The third room has Kirby climbing a cave-like series of vertical tunnels, with [[Rocky]]s falling from above. Keeping to the [[thin floor]]s can allow Kirby to avoid these as he ascends. | |||
The fourth room is a long and winding road past many [[spike]]s and other hazards. To make traversing this safer, Kirby can bust open a side-passage at the start and enter a room with a [[Grand Wheelie]]. Using its power makes this path a breeze. | |||
In the fifth room, Kirby enters a small room guarded by two [[Pengy]]s and containing two items that Kirby will need to be quick to obtain. | |||
The sixth room contains [[Bugzzy]], who needs to be defeated to advance. | |||
The last room is a romp through a hallway past multiple enemies to reach the stage exit. | |||
====Enemies | ===Differences between versions=== | ||
In the original ''Kirby's Adventure'', the second room is a 'spinning tower' section where Kirby walks along a tower balcony and dodges flying enemies. In ''Kirby: Nightmare in Dream Land'', this room is replaced with the one described in the overview above. | |||
! | |||
! | In addition, the original version had the stage exit appear right after defeating [[Bugzzy]]. In the ''Kirby: Nightmare in Dream Land'' version, one more room is added after this. | ||
|- | |||
| | ==Enemies and Mid-Bosses== | ||
{| width=50% | |||
|<tabs> | |||
<tab name="Enemies"> | |||
{| class="wikitable" | |||
!Sprite (''KA''/''KNiDL'') | |||
!Name | |||
!style="border-style: solid; border-width: 1px 3px 1px 1px"|Copy Ability | |||
!Sprite (''KA''/''KNiDL'') | |||
!Name | |||
!Copy Ability | |||
|- | |||
|align=center|[[File:KA Blade Knight sprite.png]] [[File:KNiDL Blade Knight sprite.png]] | |||
|[[Blade Knight]] | |||
|style="border-style: solid; border-width: 1px 3px 1px 1px"|[[Sword]] | |||
|align=center|[[File:KA Scarfy sprite.png]] [[File:KNiDL Scarfy sprite.png]] | |||
|[[Scarfy]] | |||
|N/A | |||
|- | |||
|align=center|[[File:KA Bounder sprite.png]] [[File:KNiDL Gip sprite.png]] | |||
| | |[[Bounder]]/[[Gip]] | ||
|style="border-style: solid; border-width: 1px 3px 1px 1px"|None | |||
|align=center|[[File:KA Sir Kibble sprite.png]] [[File:KNiDL Sir Kibble sprite.png]] | |||
|[[Sir Kibble]] | |||
|[[Cutter]] | |||
|- | |||
|align=center|[[File:KA Glunk sprite.png]] [[File:KNiDL Glunk sprite.png]] | |||
|[[Glunk]] | |||
|style="border-style: solid; border-width: 1px 3px 1px 1px"|None | |||
|align=center|[[File:KA Sparky sprite.png]] [[File:KNiDL Sparky sprite.png]] | |||
|[[Sparky]] | |||
|[[Spark]] | |||
|- | |||
|align=center|[[File:KA Gordo sprite.png]] [[File:KNiDL Gordo sprite.png]] | |||
|[[Gordo]] | |||
|style="border-style: solid; border-width: 1px 3px 1px 1px"|N/A | |||
|align=center|[[File:KA Togezo sprite.png]] [[File:KNiDL Needlous sprite.png]] | |||
|[[Togezo]]/[[Needlous]] | |||
|[[Needle]] | |||
|- | |||
|align=center|[[File:KA Hot Head sprite.png]] [[File:KNiDL Hot Head sprite.png]] | |||
|[[Hot Head]] | |||
|style="border-style: solid; border-width: 1px 3px 1px 1px"|[[Fire]] | |||
|align=center|[[File:KA Twizzy sprite.png]] [[File:KNiDL Twizzy sprite.png]] | |||
|[[Twizzy]] | |||
|None | |||
|- | |- | ||
|align=center|[[File:KA Pengi sprite.png]] [[File:KNiDL Pengi sprite.png]] | |||
|- | |[[Pengy]] | ||
| | |style="border-style: solid; border-width: 1px 3px 1px 1px"|[[Ice]] | ||
|align=center|[[File:KA Waddle Dee sprite.png]] [[File:KNiDL Waddle Dee sprite.png]] | |||
|[[Waddle Dee]] | |||
|None | |||
|- | |||
|align=center|[[File:KA Poppy Bros Jr sprite.png]] [[File:KNiDL Poppy Bros Jr sprite.png]] | |||
|[[Poppy Bros. Jr.]] | |||
|style="border-style: solid; border-width: 1px 3px 1px 1px"|None | |||
{ | |align=center|[[File:KA Waddle Doo sprite.png]] [[File:KNiDL Waddle Doo sprite.png]] | ||
|[[Waddle Doo]] | |||
|[[Beam]] | |||
|- | |||
|align=center|[[File:KA Rocky sprite.png]] [[File:KNiDL Rocky sprite.png]] | |||
|[[Rocky]] | |||
|style="border-style: solid; border-width: 1px 3px 1px 1px"|[[Stone]] | |||
!colspan=3| | |||
|} | |||
</tab> | |||
<tab name="Mid-Bosses"> | |||
{| class="wikitable" width=25% | |||
!Sprite (''KA''/''KNiDL'') | |||
!Name | |||
!Copy Ability | |||
|- | |||
|align=center|[[File:KA Bugzzy Sprite.png]] [[File:KNiDL Bugzzy sprite.png]] | |||
|[[Bugzzy]] | |||
|[[Backdrop]] | |||
|- | |||
|align=center|[[File:KA Grand Wheelie sprite.png]] [[File:KNiDL Grand Wheelie sprite.png]] | |||
|[[Grand Wheelie]] | |||
|[[Wheel]] | |||
|} | |} | ||
</tab> | |||
</tabs> | |||
|} | |||
==Gallery== | |||
<gallery> | |||
KA Butter Building Stage 2 screenshot 01.png|Kirby comes across the various inhabitants of the tower as he climbs upward. | |||
KA Butter Building Stage 2 screenshot 02.png|Kirby hops around the tower as it spins. | |||
KA Butter Building Stage 2 screenshot 03.png|Kirby flies up past the falling Rockys. | |||
KA Butter Building Stage 2 screenshot 04.png|Kirby spots a door leading to an optional mid-boss fight. | |||
KA Butter Building Stage 2 screenshot 05.png|Wheel Kirby rolls past the spikes in the winding hall. | |||
KA Butter Building Stage 2 screenshot 06.png|Kirby waits for the Pengys to tire of breathing ice before proceeding. | |||
KA Butter Building Stage 2 screenshot 07.png|Kirby battles Bugzzy in a grassy room. | |||
</gallery> | |||
{{clear}} | |||
{{ | {{Navbox-KA/KNiDL}} | ||
Latest revision as of 12:40, 21 April 2024
| ||||||||||||
| ||||||||||||
| ||||||||||||
|
| ||||||||||||

Butter Building - Stage 2 is the second stage of Butter Building, the third level of Kirby's Adventure and its remake, Kirby: Nightmare in Dream Land.
Overview[edit]
This stage consists of seven primary rooms (six in Kirby's Adventure). The first area is a tall room separated by slopes and walkways. Up top is a Poppy Bros. Jr. balancing on a Maxim Tomato.
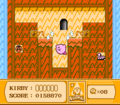
In the second room, Kirby finds himself inside a narrow tower which he must climb, past various foes on watch.
The third room has Kirby climbing a cave-like series of vertical tunnels, with Rockys falling from above. Keeping to the thin floors can allow Kirby to avoid these as he ascends.
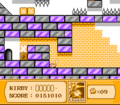
The fourth room is a long and winding road past many spikes and other hazards. To make traversing this safer, Kirby can bust open a side-passage at the start and enter a room with a Grand Wheelie. Using its power makes this path a breeze.
In the fifth room, Kirby enters a small room guarded by two Pengys and containing two items that Kirby will need to be quick to obtain.
The sixth room contains Bugzzy, who needs to be defeated to advance.
The last room is a romp through a hallway past multiple enemies to reach the stage exit.
Differences between versions[edit]
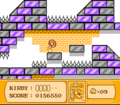
In the original Kirby's Adventure, the second room is a 'spinning tower' section where Kirby walks along a tower balcony and dodges flying enemies. In Kirby: Nightmare in Dream Land, this room is replaced with the one described in the overview above.
In addition, the original version had the stage exit appear right after defeating Bugzzy. In the Kirby: Nightmare in Dream Land version, one more room is added after this.
Enemies and Mid-Bosses[edit]
| |||||||||||||||||||||||||||||||||||||||||||||||||||||||||||||||
Gallery[edit]
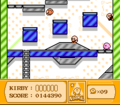
Kirby comes across the various inhabitants of the tower as he climbs upward.
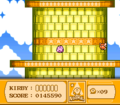
Kirby hops around the tower as it spins.
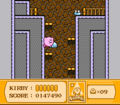
Kirby flies up past the falling Rockys.
Kirby spots a door leading to an optional mid-boss fight.
Wheel Kirby rolls past the spikes in the winding hall.
Kirby waits for the Pengys to tire of breathing ice before proceeding.
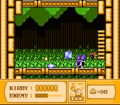
Kirby battles Bugzzy in a grassy room.


