|
|
| (47 intermediate revisions by 16 users not shown) |
| Line 1: |
Line 1: |
| {{image}} | | {{Special icon|This was WiKirby's 1000th article.}}{{Infobox-KTDLevel |
| {{construction}}
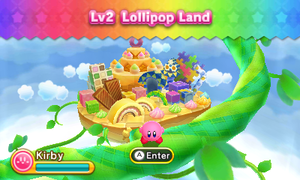
| | | image = [[File:Lollipop Land Entry.png|300px]] |
| | | | caption = Screenshot from ''Kirby: Triple Deluxe''. |
| {{Infobox-KTDLevel | | | level = 2 |
| |image= | | | stages = 5 |
| |caption=Screenshot from ''Kirby: Triple Deluxe''. | | | exstages = 1 |
| |level=2 | | | sunstone = 14 |
| |stages=5 | | | mid-boss = [[Grand Wheelie]] (2-1), [[Gigant Edge]] (2-3), [[Flame Galboros]] DX (2-EX) |
| |exstages=1 | | | hypernova = 2-2 |
| |sunstone=14 | | | boss = [[Paintra]] |
| |mid-boss= | | | previous = [[Fine Fields]] |
| |hypernova= | | | next = [[Old Odyssey]] |
| |boss=[[Paintra]] | |
| |previous=[[Fine Fields]] | |
| |next=[[Old Odyssey]] | |
| }} | | }} |
| '''Lollipop Land''' is the second level of [[Kirby: Triple Deluxe]] and the second of the six lands in the kingdom of [[Floralia]]. It has four regular stages, a boss stage, and an EX stage. The level is distinguished with various col{{ou}}rful (and sometimes edible) buildings and complexes, ranging from toy box cities to carnival houses. There are fourteen [[Sun Stone]]s to collect in this level, with one in Stage EX, three each in Stages 1, 3 and 4, and four in Stage 2. The boss is [[Paintra]]. | | '''Lollipop Land''' is the second level of ''[[Kirby: Triple Deluxe]]'' and the second of the six lands in the kingdom of [[Floralia]]. It has four regular stages, a boss stage, and an EX stage. The level is distinguished with various colorful (and sometimes edible) buildings and complexes, ranging from toy box cities to carnival big top tents. There are fourteen [[Sun Stone]]s to collect in this level, with one in Stage EX, three each in Stages 1, 3, and 4, and four in Stage 2. The boss is [[Paintra]]. |
|
| |
|
| ==Stages== | | {{clear|left}} |
| ===Stage 1=== | | == Stages == |
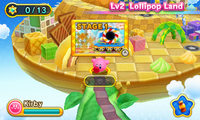
| Section 1: The stage begins atop a tower made of pastry. The sky bears a plaid design, and some of the clouds resemble doughnuts. As Kirby descends the tower's fall-through platforms, some [[Parasol Waddle Dee]]s can be seen floating down in the foreground and background. They can be swallowed for the [[Parasol]] [[Copy Ability]]. Further down, [[Sir Kibble]] and a [[Scarfy]] can be encountered just above the door to the next section.
| | For details on each stage individually, click the name of the stage. |
| | | {| class="sortable wikitable" border=1 cellpadding=2 |
| Section 2: The door leads to an open walkway, with the occasional slope. In the background, a Waddle Dee is piloting a large tank made of hard candy, and will attempt to fire candy cannon balls at Kirby. Though they look delicious, they cannot be inhaled, and should be avoided. As the path continues to the right, Kirby will need to navigate past a few enemies, including a snoozing [[Noddy]] and a [[Sparky]], while the tank plows through some Stone Blocks in the background. Up from one particular climb, a [[Keychain]] can be found in the air, and at a certain ledge, a wall section can be broken to reveal the first [[Sun Stone]] of the stage. From there, the door to the next section can be reached.
| | !class=unsortable|Stage |
| | | !class=unsortable|Unlock Req. |
| Section 3: The door leads to a hillside with block structures off in the distance. [[Bandana Waddle Dee]] appears up the hill to give Kirby a [[Food]] item to hold on to. Past a [[Parasol]] wielding [[Waddle Doo]] and a [[Whip]] [[Copy Pedestal]], the hill plateaus into a bowl-shaped arena where [[Grand Wheelie]] is fought. Swallowing it yields Kirby the [[Wheel]] ability. From there, Kirby can plow through some Star Blocks with food in them to reach the door to the next section.
| | !class=unsortable|Sun Stones |
| | | !class=unsortable|Hypernova? |
| Section 4: The door leads to another open walkway area, as a [[Wheelie]] comes charging down the slope at Kirby. Using Wheel, Kirby can easily ram through this enemy, as well as the others up the slope. Jumping a spike pit allows access to a 3-D [[Warp Star]] to reach the background, which is another slope going up to the left. At the top of the hill are some [[Gordo]]s blocking an optional doorway that leads to another Sun Stone. While in Wheel form, Kirby can pass these Gordos without incident. To the left of this region is the door to the next section.
| | !class=unsortable|Boss/Mid-Boss |
| | | !class=unsortable|Notes |
| Section 5: The door leads to an open walkway, as another Waddle Dee tank in the background comes crashing in to spoil the fun. If Kirby first veers left, he can find a box with another Keychain in it. Past a [[Hot Head]] and another Noddy is a fall-through platform that leads under a wall to the right. Further right in the floor is a breakable tile that yields a [[1Up]]. Past another wall, there is yet another Keychain-yielding box, and to the right of that, a dugout appears in the floor containing a Bomb Block that can be broken to cause barrier blocks in the background to vanish, dropping the tank into a pit if it hadn't already crossed that gap. This is ideal, since otherwise, the tank would drive into some stone blocks holding a chest above another pit, causing it to be lost. If Kirby saved the chest, he can go into the background from here to obtain its contents, the last Sun Stone of the stage. Meanwhile, the box to the right contains an [[Energy Drink]]. Just to the right on the main path is the stage exit.
| | |- |
| | | |{{center|[[File:KTD Lollipop Land Stage 1 select.png|200px]]<br>'''[[Lollipop Land - Stage 1|Stage 1]]'''}} |
| ====Enemies, Mid-bosses, and Abilities====
| | |N/A |
| {| style="border: 3px solid #E47575; {{round}};background: #F69D99" cellspacing="2"
| | |3 |
| ! width="420px" | '''Regular Enemies'''
| | |{{N}} |
| ! width="180px" | '''Mid-Boss'''
| | |[[Grand Wheelie]] |
| |- bgcolor="E47575"
| |
| | | | | |
| {{col-begin}}
| | |- |
| {{col-break|width=33%}} | | |{{center|[[File:KTD Lollipop Land Stage 2 select.png|200px]]<br>'''[[Lollipop Land - Stage 2|Stage 2]]'''}} |
| *[[Broom Hatter]]
| | |Complete Stage 1. |
| *[[Parasol Waddle Dee]]
| | |4 |
| *[[Waddle Dee]]
| | |{{Y}} |
| *[[Wheelie]]
| | |{{N}} |
| {{col-break|width=33%}}
| |
| *[[Gordo]]
| |
| *[[Noddy]]
| |
| *[[Parasol Waddle Doo]]
| |
| *[[Sir Kibble]]
| |
| {{col-break|width=34%}} | |
| *[[Hot Head]]
| |
| *[[Scarfy]]
| |
| *[[Sparky]]
| |
| *[[Waddle Doo]]
| |
| {{col-end}} | |
| | | | | |
| {{col-begin|width=50%}}
| |
| *[[Grand Wheelie]]
| |
| {{col-end}}
| |
| |- | | |- |
| ! width="420px"| '''Abilities'''
| | |{{center|[[File:KTD Lollipop Land Stage 3 select.png|200px]]<br>'''[[Lollipop Land - Stage 3|Stage 3]]'''}} |
| ! width="180px" | '''Special'''
| | |Complete Stage 2. |
| |- bgcolor="#E47575"
| | |3 |
| |
| | |{{N}} |
| {{col-begin}} | | |[[Gigant Edge]] |
| {{col-break|width=50%}}
| |
| *[[Beam]]
| |
| *[[Parasol]]
| |
| *[[Sleep]]
| |
| *[[Wheel]]
| |
| {{col-break|width=50%}}
| |
| *[[Cutter]]
| |
| *[[Fire]]
| |
| *[[Spark]]
| |
| *[[Whip]]
| |
| {{col-end}}
| |
| | | |
| {{col-begin}}
| |
| *N/A
| |
| {{col-end}}
| |
| |}
| |
| | |
| ===Stage 2===
| |
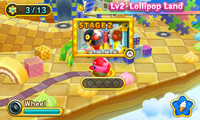
| Section 1: The stage begins in a hearty-looking toy box complex, on a flat walkway with a small fish tank with a [[Blipper]] swimming in it in the background. Just to the right, a new enemy, the [[Spynum]] lies in wait atop a floating Star Block. It will attempt to fire its bow at Kirby, but it can be swallowed to yield Kirby the third new Copy Ability, [[Archer]]. Up a step past another Spynum, the path continues to the right along a thin walkway, with more fish tanks in the background. The Blippers in these tanks will jump out and attempt to hit Kirby. The path continues over a bottomless pit spanned by breakable blocks as a [[Bronto Burt]] and Sir Kibble attempt to get in the way. On one particular platform, there is a Bomb Block in the ceiling that can easily be hit with Archer, yielding some collectible stars. From the next fish tank, a large [[Mamanti]] attempts to jump out at Kirby. Destroying a Bomb Block barrier at the far right yields the door to the next section.
| |
| | |
| Section 2: The door leads to the edge of a pool area where Kirby can, for the first time in this adventure, utilize his swimming skills. A [[Squishy]] bounces out of the water as the pool continues to the right, while a [[Lanzer]] can be seen patrolling on a separate path in the background. A 3-D Warp Star on the other side of the pool can take Kirby back there, where he can get the [[Spear]] ability from the Lanzer if he so desires. A box to the far left contains a Keychain. Meanwhile, the Blippers from the pool will attempt to jump into the background at this time. To the right, a Spynum stands guard on a suspended platform over another pool. Cutting the rope will cause it to fall in the water and drown. Another pool appears further right, with a [[Craby]] patrolling its floor. If Kirby still has Spear, he can use it to cut another rope platform to open the way to an optional door leading to the first Sun Stone of the stage. Out of the pool, to the right is the door to the next section.
| |
| | |
| Section 3: The door leads to a vertical shaft chamber with a Lanzer and a pool beneath an openable floor. Entering the water, the submerged path continues to the right into a larger aquatic chamber where Mamanti and Crabies patrol. In the background, a barrier can be seen in the ceiling, which a Bomb Block in the foreground will open up to reveal another Sun Stone. Opening another barrier in the floor will reveal a 3-D Warp Star so Kirby can go obtain it. Additionally, the breakable blocks the Craby patrols on hide a Keychain. Back in the foreground, the path continues to the right into an area where the surface can be reached. Up the left wall, another Keychain can be accessed if Kirby still has an ability that can cut ropes. To the right is the door to the next section.
| |
| | |
| Section 4: The door leads to an interior walkway, where a vine yielding a [[Miracle Fruit]] is found. After acquiring the [[Hypernova]] ability, Kirby proceeds to the right. A big toy truck is visible, which Kirby can pull using his inhale. This is necessary to weigh down a switch to keep a door to the right open. From there, Kirby encounters a laser-emitting box that blocks the way forward. If he pulls it into an alcove back left, he can block its lasers and proceed up a ladder. From here, Kirby has to use another toy truck to block the lasers of another mustachioed box. Past a tank with Mamanti in it, Kirby has to deal with another laser box. If he uses his inhale cleverly enough, he can use the laser box to thaw out a large ice block in the ceiling to yield an optional doorway that leads to another Sun Stone. Up another ladder, the path continues to the right, where Kirby must contend with a machine firing [[Big Missile]]s. Kirby can inhale these missiles and spit them back out to destroy the machine and get some items. Up another ladder, another Big Missile barrage must be dealt with. Up yet another ladder, a puzzle must be solved involving another laser box, some ice blocks, and a toy truck. Done correctly, the door to the next section will be thawed out, as well as another Keychain.
| |
| | |
| Section 5: The door leads to a room with a couple star poles in it. To the right, a large curtain roll can be found, which Kirby can inhale to unravel. He has to use the star poles to hook the roll and prevent it from rolling back. Unfurling the entire thing reveals a tapestry that resembles the original [[Green Greens]] stage from ''[[Kirby's Dream Land]]'', complete with depictions of the enemies there and its boss, [[Whispy Woods]]. Doing this also yields the last Sun Stone of the stage, and the stage exit.
| |
| | |
| ====Enemies, Mid-bosses, and Abilities====
| |
| {| style="border: 3px solid #E47575; {{round}};background: #F69D99" cellspacing="2"
| |
| ! width="420px" | '''Regular Enemies'''
| |
| ! width="180px" | '''Mid-Boss'''
| |
| |- bgcolor="E47575"
| |
| | | | | |
| {{col-begin}}
| |
| {{col-break|width=33%}}
| |
| *[[Lanzer]]
| |
| *[[Sir Kibble]]
| |
| *[[Spynum]]
| |
| {{col-break|width=33%}}
| |
| *[[Blipper]]
| |
| *[[Craby]]
| |
| *[[Mamanti]]
| |
| {{col-break|width=34%}}
| |
| *[[Big Missile]]
| |
| *[[Bronto Burt]]
| |
| *[[Squishy]]
| |
| {{col-end}}
| |
| |
| |
| {{col-begin|width=50%}}
| |
| *N/A
| |
| {{col-end}}
| |
| |- | | |- |
| ! width="420px"| '''Abilities'''
| | |{{center|[[File:KTD Lollipop Land Stage 4 select.png|200px]]<br>'''[[Lollipop Land - Stage 4|Stage 4]]'''}} |
| ! width="180px" | '''Special'''
| | |Complete Stage 3. |
| |- bgcolor="#E47575"
| | |3 |
| |
| | |{{N}} |
| {{col-begin}}
| | |{{N}} |
| {{col-break|width=50%}} | |
| *[[Archer]]
| |
| *[[Spear]]
| |
| {{col-break|width=50%}}
| |
| *[[Cutter]]
| |
| {{col-end}}
| |
| | | |
| {{col-begin}}
| |
| *[[Hypernova]]
| |
| {{col-end}}
| |
| |}
| |
| | |
| ===Stage 3===
| |
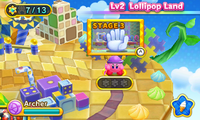
| Section 1: The stage begins in a small chamber in the toy box complex. A [[Moonja]] appears in the background, then vanishes, reappearing in the foreground to assault Kirby. It can be swallowed to obtain the [[Ninja]] ability. A ceiling switch opens the door to the right from which a ladder going up can be accessed. This leads to another chamber with more Moonjas in it. To the left lies the door to the next section.
| |
| | |
| Section 2: The door leads to an open walkway that proceeds to the right. Hand-shaped springs occupy the background, which periodically spring out into the foreground. If Kirby is hit by the hands, he will splat against the screen and lose his Copy Ability if he had one. (though he can only be hit when the hands extend, not as they retract) More hands and enemies must be encountered at the path continues, and eventually a [[Poppy Bros. Jr.]] appears in the background, guarding a Keychain and tossing bombs at Kirby. After a trio of hands, Kirby can access the background, and either use the door to the next section immediately, or go for the Keychain past the hands again.
| |
| | |
| Section 3: The door leads to an open walkway where a [[3-D Helmet Cannon]] can be accessed inside a Bomb Block barrier. Using this nifty head cannon, Kirby can fire at enemies in the background as he proceeds to the right. Along the way, he will need to hit Bomb Block switches to cause a pair of [[Shotzo]]s to fall. If Kirby is fast enough, he can use the cannon to break away some metal blocks in the background to uncover the first Sun Stone of the stage. After a brief trip to the background, the door to the next section is just to the right.
| |
| | |
| Section 4: The door leads to another walkway with hand springs. After the first set of hands, a 3-D Warp Star leads to the background to another hand path, though, if Kirby veers to the left, he can find an alcove with a Spynum and a Keychain. Past the next set of hands is the door to the next section.
| |
| | |
| Section 5: The door leads to a narrow hallway with a Waddle Doo and Waddle Dee on patrol. To the left, a ceiling switch drops a bundle of [[Timed Dynamite]], which Kirby must carry to use on a set of Metal Blocks up ahead before it detonates. Doing this correctly will yield a path to a 1Up. A [[Chilly]] guards the path down from there, as the path continues to the right past another Timed Dynamite bundle. In the background, a Sun Stone can be seen behind some metal blocks, making it clear what the Dynamite should be used on. To access it, Kirby has to use the Star Blocks up ahead as stepping stones to reach the 3-D Warp Star. If he destroys them by accident beforehand, he cannot get the Sun Stone. Back on the main path, past a Poppy Bros. Jr. is the door to the next section.
| |
| | |
| Section 6: The door leads to a solid walkway with ceilings in various places. A ceiling switch opens the door to the right, where a Whippy lies in wait. In the next room, a door closes behind Kirby, sealing him in, while the back wall falls inward. Kirby has to utilize the holes in the wall to avoid being crushed. Once the wall has fallen, both doors open, allowing Kirby to progress forward. Past a Sparky is another room with a falling wall. From there, a third falling wall room can be reached, this time with a [[Key]] inside. Kirby has to be quick to grab the Key before it is crushed, but if he got the [[Whip]] ability, he can use that to grab it from a safe distance. In the chamber to the right are two doors. If Kirby saved the Key, he can unlock the lower door, which will also reward him with a [[Maxim Tomato]]. Taking the upper door leads Kirby directly into Section 8.
| |
| | |
| Section 7: The lower door leads to a small room with a [[Search]] and the last Sun Stone in it. It may be pertinent for Kirby to swallow the Search to get the [[Crash]] ability here. To the right is the door to the next section.
| |
| | |
| Section 8: The door leads to an interior walkway, where Bandana Waddle Dee will give Kirby a food item. Past a Lanzer and a Sparky up some steps, a room is reached where [[Gigant Edge]] is fought. If Kirby still has Crash, he can use it to kill this Mid-Boss in one hit if he charges it up all the way. Swallowing Gigant Edge grants Kirby the [[Sword]] ability. From there, a 3-D Warp Star appears to take Kirby to the background, where the stage exit can be accessed. However, if Kirby hovers through a hole in the ceiling, he can get another Keychain, granted he has an ability that can strike a Bomb Block in the ceiling.
| |
| | |
| ====Enemies, Mid-bosses, and Abilities====
| |
| {| style="border: 3px solid #E47575; {{round}};background: #F69D99" cellspacing="2"
| |
| ! width="420px" | '''Regular Enemies'''
| |
| ! width="180px" | '''Mid-Boss'''
| |
| |- bgcolor="E47575"
| |
| | | | | |
| {{col-begin}}
| |
| {{col-break|width=33%}}
| |
| *[[Chilly]]
| |
| *[[Hot Head]]
| |
| *[[Kabu]]
| |
| *[[Moonja]]
| |
| *[[Poppy Bros. Jr.]]
| |
| *[[Search]]
| |
| {{col-break|width=33%}}
| |
| *[[Lanzer]]
| |
| *[[Shotzo]]
| |
| *[[Spynum]]
| |
| *[[Waddle Dee]]
| |
| *[[Whippy]]
| |
| {{col-break|width=34%}}
| |
| *[[Bronto Burt]]
| |
| *[[Hairy Dee]]
| |
| *[[Noddy]]
| |
| *[[Sparky]]
| |
| *[[Waddle Doo]]
| |
| {{col-end}}
| |
| |
| |
| {{col-begin|width=50%}}
| |
| *[[Gigant Edge]]
| |
| {{col-end}}
| |
| |- | | |- |
| ! width="420px"| '''Abilities'''
| | |{{center|[[File:KTD Lollipop Land Stage 5 select.png|200px]]<br>'''[[Lollipop Land - Stage 5|Stage 5]]'''}} |
| ! width="180px" | '''Special'''
| | |Collect 6 [[Sun Stone]]s from prior Lollipop Land stages and complete Stage 4. |
| |- bgcolor="#E47575"
| | |0 |
| |
| | |{{N}} |
| {{col-begin}} | | |[[Paintra]] |
| {{col-break|width=50%}}
| | |Completing this stage unlocks [[Old Odyssey]]. |
| *[[Archer]]
| |
| *[[Bomb]]
| |
| *[[Ice]]
| |
| *[[Ninja]]
| |
| *[[Spark]]
| |
| *[[Sword]]
| |
| {{col-break|width=50%}}
| |
| *[[Beam]]
| |
| *[[Crash]]
| |
| *[[Fire]]
| |
| *[[Spear]]
| |
| *[[Whip]]
| |
| {{col-end}}
| |
| | | |
| {{col-begin}}
| |
| *N/A
| |
| {{col-end}}
| |
| |}
| |
| | |
| ===Stage 4===
| |
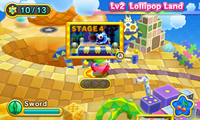
| Section 1: The stage begins out on the pastry plains, at the foot of some big top tents. In the floor is a Key and a [[Kabu]]. Taking the Key allows Kirby to unlock the door to the next section, which is located to the right at the face of the nearest big top. Dancing above the door is a new enemy, the [[Clown Acrobot]], which provides the last new Copy Ability, [[Circus]] when swallowed.
| |
| | |
| Section 2: The door leads into the tent itself, as an open walkway spans to the right. Some [[Horror Tramp]]s appear out of the air to ambush Kirby, as sections of the floor disappear to reveal spike pits. A Keychain lies in wait atop a series of fall-through platforms guarded by a Poppy Bros. Jr. The door to the next section appears at the end of the walkway, but attempting to use it reveals it as a [[Nidoo]] in disguise, which will then attempt to squish Kirby. The real door to the next section is located in a wall alcove a little bit further right.
| |
| | |
| Section 3: The door leads to a hallway with a gate containing an energy field. Passing through this field confiscates Kirby's Copy Ability if he has one, forcing him to go without it through the next area. Along the hallway, a large mirror appears in the background, reflecting the path forward. Certain elements visible in the mirror, such as Horror Tramps are invisible on the main path. As such, the reflection seen in the mirror is what should be believed when pressing forward. Just past the mirror is the door to the next section.
| |
| | |
| Section 4: The door leads to another mirrored hallway. [[Fuwa Rover]]s can be seen in the mirror which are invisible on the main path. A Nidoo will also attempt to fool Kirby past the first mirror. After the second mirror, the confiscation field returns. Passing through it returns the ability that was confiscated on a Copy Pedestal just to the right of the gate. Past another Nidoo, the door to the next section can be found to the right.
| |
| | |
| Section 5: The door leads to a box made of barrier blocks. Breaking the Bomb Block initiates a race with a [[CarryDee]] holding a Key in the background, down to the right. Kirby has to catch the CarryDee before it jumps into a spike pit to save the Key it is holding, dodging numerous obstacles along the way. Doing this successfully allows Kirby to obtain a Sun Stone from a locked room. Further right, a ladder leads up to the door to the next section, though there is an Energy Drink in the Star Block floor.
| |
| | |
| Section 6: The door leads to a chamber with numerous false doors in it. Additionally, there is a Moonja in this room as well as a Keychain hidden in a Star Block. In the background, a few more doors can be seen. To ascertain the correct door, Kirby must observe the doors to see if any look different from the others. Otherwise, he'll get a Nidoo pounding.
| |
| | |
| Section 7: The correct door leads to an open area, with a Sun Stone visible in a separate chamber in the background, as well as two other chambers with doors. Taking the 3-D Warp Star takes Kirby to the middle chamber, which leads to the next section.
| |
| | |
| Section 8: The door leads to the background of Section 6. To the right is the door to the next section, but there is also a hidden door that will take Kirby to the Sun Stone seen in the previous section.
| |
| | |
| Section 9: The door leads to the rightmost room in the background of Section 7. The door to the next section is located just up a ladder to the right.
| |
| | |
| Section 10: The door leads to a narrow hallway that steps downward. After passing through another confiscation gate, Kirby has to venture through another mirror chamber. This time, the mirror shows him what is behind certain obstructions in the foreground. Past a false optional doorway, a hidden path takes Kirby to the real optional doorway underneath. Along the way, Kirby can find a Keychain near a patrolling [[Scarfy]]. The optional doorway leads to the last Sun Stone of the stage. Once the remaining pitfalls are passed, Kirby is returned his Copy Ability and the door to the next section is located over a platform that will fade away to reveal a spike pit.
| |
| | |
| Section 11: The door leads back out of the big top tent, and the path continues to the right. The stage exit is located just to the right atop a soft platform.
| |
| | |
| ====Enemies, Mid-bosses, and Abilities====
| |
| {| style="border: 3px solid #E47575; {{round}};background: #F69D99" cellspacing="2"
| |
| ! width="420px" | '''Regular Enemies'''
| |
| ! width="180px" | '''Mid-Boss'''
| |
| |- bgcolor="E47575"
| |
| | | |
| {{col-begin}} | |
| {{col-break|width=33%}}
| |
| *[[Chip]]
| |
| *[[Kabu]]
| |
| *[[Poppy Bros. Jr.]]
| |
| *[[Sparky]]
| |
| *[[Waddle Dee]]
| |
| {{col-break|width=33%}}
| |
| *[[Clown Acrobot]]
| |
| *[[Gordo]]
| |
| *[[Nidoo]]
| |
| *[[Parasol Waddle Dee]]
| |
| *[[Scarfy]]
| |
| {{col-break|width=34%}}
| |
| *[[Cappy]]
| |
| *[[CarryDee]]
| |
| *[[Fuwa Rover]]
| |
| *[[Horror Tramp]]
| |
| *[[Moonja]]
| |
| {{col-end}}
| |
| |
| |
| {{col-begin|width=50%}}
| |
| *N/A
| |
| {{col-end}}
| |
| |- | | |- |
| ! width="420px"| '''Abilities'''
| | |{{center|[[File:KTD Lollipop Land Stage 6 EX select.png|200px]]<br>'''[[Lollipop Land - Stage 6 EX|Stage 6 EX]]'''}} |
| ! width="180px" | '''Special'''
| | |Collect all Sun Stones from prior Lollipop Land stages. |
| |- bgcolor="#E47575" | | |1 |
| | | | |{{N}} |
| {{col-begin}} | | |[[Flame Galboros]] DX |
| {{col-break|width=50%}}
| | |This is an EX stage, so completing it is not required to finish the game. |
| *[[Circus]]
| |
| *[[Ninja]]
| |
| *[[Spark]]
| |
| {{col-break|width=50%}}
| |
| *[[Bomb]]
| |
| *[[Parasol]]
| |
| {{col-end}}
| |
| |
| |
| {{col-begin}}
| |
| *N/A
| |
| {{col-end}}
| |
| |} | | |} |
|
| |
|
| ===Stage 5 (Boss: [[Paintra]])=== | | == In Dededetour! == |
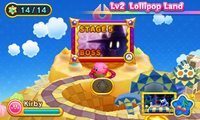
| The stage begins in a hilly section of the pastry countryside. The path continues up and to the right as [[Taranza]] is once again seen in the background carrying [[King Dedede]]. Bandana Waddle Dee appears to give Kirby a food item, and in the background are the [[Bell]], [[Circus]], and [[Spear]] Copy Pedestals. The door to the boss chamber is located up a ladder to the right, flanking a large magenta-col{{ou}}red mansion.
| | All stages of Lollipop Land are played in one sequence in [[Dededetour!]] except for [[Lollipop Land - Stage 6 EX|Stage EX]] and the sections of stages where [[Hypernova]] is used. Through this sequence, 3 [[Keychain]]s can be found. |
|
| |
|
| Inside the chamber itself, resembling a gigantic artist's pantry, Taranza casts a spell on a nearby painting, bringing it to life to do battle with Kirby as Taranza escapes with Dedede yet again. The painting in question, known as [[Paintra]], is a col{{ou}}rful witch-like being with paintbrushes for feet that floats about. It attacks by firing blasts of energy and swiping its paintbrushes around to spread paint on the screen.
| | In addition, many enemies are re-sized - changing their [[Health]] and also possibly movement speed - and [[Paintra]] and the [[Mid-Bosses]] are changed to their DX forms. |
|
| |
|
| Once knocked down to half health, Paintra will start painting on canvases, from which the paintings themselves will come to life and attack Kirby in various ways. Once defeated, Paintra is forced back into the painting it came from and the painting shatters, leaving Kirby to collect the second Grand Sun Stone and proceed to the next level.
| | Finally, in place of [[Sun Stone]]s, [[Warp Hole]]s can be found in many areas allowing [[King Dedede]] to skip parts of the stages. In Lollipop Land, there are 4 Warp Holes in total. |
|
| |
|
| ===Stage EX=== | | ==Names in other languages== |
| | | {{Names |
| ====Enemies, Mid-bosses, and Abilities==== | | |ja=ロリポップ ランド |
| | |jaR=Roripoppu Rando |
| | |jaM=Lollipop Land |
| | |fr=Lieux Ludiques |
| | |frM=Playful Places |
| | |de=Lolliland |
| | |deM=Lolliland |
| | |it=Idillio Infarcito |
| | |itM=Idyll Stuffing |
| | |ko=롤리팝 랜드 |
| | |koR=Lollipab Laendeu |
| | |koM=Lollipop Land |
| | |es=Lona Lúdica |
| | |esM=Playful Canvas |
| | }} |
|
| |
|
| ==Trivia==
| | {{clear}} |
| *The sounds made by the vanishing platforms, as well as the Nidoos and other ghostly creatures in Stage 4 all utilize the same sound clips that were used for the [[Sphere Doomer]]s in ''[[Kirby's Return to Dream Land]]''.
| | {{Navbox-KTD}} |
|
| |
|
| <br clear=all>
| | [[Category:Places]] |
| {{KirbyTD}}
| | [[Category:Levels in Kirby: Triple Deluxe]] |
| | [[Category:Floralia locations]] |
| | [[Category:Popstar locations]] |
