Rainbow Resort - Stage 5: Difference between revisions
Pinkyoshifan (talk | contribs) m (Text replacement - "(<tab name=".*)'(.*">)" to "$1’$2") |
|||
| (13 intermediate revisions by 7 users not shown) | |||
| Line 1: | Line 1: | ||
{{Infobox-KAStage | {{Infobox-KAStage | ||
|image=[[File:Rainbow Resort | |image=[[File:KNiDL Rainbow Resort Stage 5.png]] | ||
|caption=Kirby stares down a [[Flamer]] between windy pits. (''Kirby: Nightmare in Dream Land'') | |caption=Kirby stares down a [[Flamer]] between windy pits. (''Kirby: Nightmare in Dream Land'') | ||
|level=[[Rainbow Resort]] | |level=[[Rainbow Resort]] | ||
|midboss=[[Grand Wheelie]] | |midboss=[[Grand Wheelie]] | ||
|switch={{N}} | |switch={{N}} | ||
|theme music= | |||
<tabs> | |||
<tab name="Kirby’s Adventure"> | |||
[[File:Rainbow Resort KA.mp3]] | |||
</tab> | |||
<tab name="Kirby: Nightmare in Dream Land"> | |||
[[File:KNiDL Rainbow Resort Sample.oga]] | |||
</tab> | |||
</tabs> | |||
|theme title="[[Rainbow Resort (theme)|Rainbow Resort]]" | |||
|description=Clips of the music that plays in Rainbow Resort - Stage 5 | |||
|previousstage=[[Rainbow Resort - Stage 4]] | |previousstage=[[Rainbow Resort - Stage 4]] | ||
|nextstage=[[Rainbow Resort - Stage 6]] | |nextstage=[[Rainbow Resort - Stage 6]] | ||
| Line 12: | Line 22: | ||
==Overview== | ==Overview== | ||
This stage consists of four main | This stage consists of four main rooms. It starts Kirby off on a flat walkway with lots of [[Bomber]]s hanging from small platforms above. Kirby will need to be careful if he wants to make it through unscathed. | ||
In the | In the second room, Kirby faces off against [[Grand Wheelie]], who he must defeat to proceed. | ||
In the third room, Kirby has to make his way across alternating wind currents and platforms. The downward ones can sweep him into a [[bottomless pit]] if he is not careful. | |||
The last room is an exterior area with a small tunnel leading past a [[fuse]] to its [[ | The last room is an exterior area with a small tunnel leading past a [[fuse]] to its [[cannon]]. All three of the main fuse-lighting abilities can be obtained here from their respective enemies, though actually getting to the cannon in time to fire is tricky. However, the reward (5 [[1-Up]]s) is completely optional, so Kirby can proceed to the stage exit from here if he finds this too difficult. | ||
==Enemies and Mid-Boss== | ==Enemies and Mid-Boss== | ||
| Line 25: | Line 35: | ||
<tab name="Enemies"> | <tab name="Enemies"> | ||
{| class="wikitable" | {| class="wikitable" | ||
!Sprite ('' | !Sprite (''KA''/''KNiDL'') | ||
!Name | !Name | ||
!style="border-style: solid; border-width: 1px 3px 1px 1px"|Copy Ability | !style="border-style: solid; border-width: 1px 3px 1px 1px"|Copy Ability | ||
!Sprite ('' | !Sprite (''KA''/''KNiDL'') | ||
!Name | !Name | ||
!Copy Ability | !Copy Ability | ||
|- | |- | ||
|align=center|[[File:KA Bomber sprite.png]] [[File: | |align=center|[[File:KA Bomber sprite.png]] [[File:KNiDL Bomber sprite.png]] | ||
|[[Bomber]] | |[[Bomber]] | ||
|style="border-style: solid; border-width: 1px 3px 1px 1px"|[[Crash]] | |style="border-style: solid; border-width: 1px 3px 1px 1px"|[[Crash]] | ||
|align=center|[[File:KA Laser Ball sprite.png]] [[File: | |align=center|[[File:KA Laser Ball sprite.png]] [[File:KNiDL Laser Ball sprite.png]] | ||
|[[Laser Ball]] | |[[Laser Ball]] | ||
|[[Laser]] | |[[Laser]] | ||
|- | |- | ||
|align=center|[[File:KA Bounder sprite.png]] [[File: | |align=center|[[File:KA Bounder sprite.png]] [[File:KNiDL Gip sprite.png]] | ||
|[[Bounder]]/[[Gip]] | |[[Bounder]]/[[Gip]] | ||
|style="border-style: solid; border-width: 1px 3px 1px 1px"|None | |style="border-style: solid; border-width: 1px 3px 1px 1px"|None | ||
|align=center|[[File:KA Sparky sprite.png]] [[File: | |align=center|[[File:KA Sparky sprite.png]] [[File:KNiDL Sparky sprite.png]] | ||
|[[Sparky]] | |[[Sparky]] | ||
|[[Spark]] | |[[Spark]] | ||
|- | |- | ||
|align=center|[[File:KA Flamer sprite.png]] [[File: | |align=center|[[File:KA Flamer sprite.png]] [[File:KNiDL Flamer sprite.png]] | ||
|[[Flamer]] | |[[Flamer]] | ||
|style="border-style: solid; border-width: 1px 3px 1px 1px"|[[Burning|FireBall/Burning]] | |style="border-style: solid; border-width: 1px 3px 1px 1px"|[[Burning|FireBall/Burning]] | ||
|align=center|[[File:KA Wheelie sprite.png]] [[File: | |align=center|[[File:KA Wheelie sprite.png]] [[File:KNiDL Wheelie sprite.png]] | ||
|[[Wheelie]] | |[[Wheelie]] | ||
|[[Wheel]] | |[[Wheel]] | ||
|- | |- | ||
|align=center|[[File:KA Hot Head sprite.png]] [[File: | |align=center|[[File:KA Hot Head sprite.png]] [[File:KNiDL Hot Head sprite.png]] | ||
|[[Hot Head]] | |[[Hot Head]] | ||
|style="border-style: solid; border-width: 1px 3px 1px 1px"|[[Fire]] | |style="border-style: solid; border-width: 1px 3px 1px 1px"|[[Fire]] | ||
| Line 61: | Line 71: | ||
<tab name="Mid-Boss"> | <tab name="Mid-Boss"> | ||
{| class="wikitable" width=25% | {| class="wikitable" width=25% | ||
!Sprite ('' | !Sprite (''KA''/''KNiDL'') | ||
!Name | !Name | ||
!Copy Ability | !Copy Ability | ||
|- | |- | ||
|align=center|[[File:KA Grand Wheelie sprite.png]] [[File:Grand Wheelie | |align=center|[[File:KA Grand Wheelie sprite 2.png]] [[File:KNiDL Grand Wheelie sprite.png]] | ||
|[[Grand Wheelie]] | |[[Grand Wheelie]] | ||
|[[Wheel]] | |[[Wheel]] | ||
| Line 75: | Line 85: | ||
==Trivia== | ==Trivia== | ||
*The first room in this stage would be referenced much later by a similar room in [[Access Ark - Stage 1]] from ''[[Kirby: Planet Robobot]]''. | *The first room in this stage would be referenced much later by a similar room in [[Access Ark - Stage 1]] from ''[[Kirby: Planet Robobot]]''. | ||
*In ''3D Classics: Kirby's Adventure'', the room with the alternating vertical currents features animated star flows rather than the static ones seen in the original version. | |||
==Gallery== | ==Gallery== | ||
<gallery> | <gallery> | ||
KA Rainbow Resort Stage 5 screenshot 01.png|Kirby might be in trouble here if he doesn't get a move on. | |||
KA Rainbow Resort Stage 5 screenshot 02.png|Kirby attempts to battle Grand Wheelie with very little energy remaining. | |||
KA Rainbow Resort Stage 5 screenshot 03.png|Kirby floats on by between the alternating star currents. | |||
KA Rainbow Resort Stage 5 screenshot 04.png|Kirby spots an Energy Drink near the quickest fuse in the game. | |||
</gallery> | </gallery> | ||
| Line 85: | Line 98: | ||
{{Navbox-KA/KNiDL}} | {{Navbox-KA/KNiDL}} | ||
Latest revision as of 12:42, 21 April 2024
| ||||||||||||
| ||||||||||||
| ||||||||||||
|
| ||||||||||||

Rainbow Resort - Stage 5 is the fifth stage of Rainbow Resort in Kirby's Adventure and its remake, Kirby: Nightmare in Dream Land.
Overview[edit]
This stage consists of four main rooms. It starts Kirby off on a flat walkway with lots of Bombers hanging from small platforms above. Kirby will need to be careful if he wants to make it through unscathed.
In the second room, Kirby faces off against Grand Wheelie, who he must defeat to proceed.
In the third room, Kirby has to make his way across alternating wind currents and platforms. The downward ones can sweep him into a bottomless pit if he is not careful.
The last room is an exterior area with a small tunnel leading past a fuse to its cannon. All three of the main fuse-lighting abilities can be obtained here from their respective enemies, though actually getting to the cannon in time to fire is tricky. However, the reward (5 1-Ups) is completely optional, so Kirby can proceed to the stage exit from here if he finds this too difficult.
Enemies and Mid-Boss[edit]
Trivia[edit]
- The first room in this stage would be referenced much later by a similar room in Access Ark - Stage 1 from Kirby: Planet Robobot.
- In 3D Classics: Kirby's Adventure, the room with the alternating vertical currents features animated star flows rather than the static ones seen in the original version.
Gallery[edit]
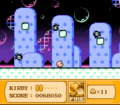
Kirby might be in trouble here if he doesn't get a move on.
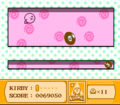
Kirby attempts to battle Grand Wheelie with very little energy remaining.
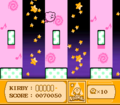
Kirby floats on by between the alternating star currents.
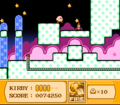
Kirby spots an Energy Drink near the quickest fuse in the game.


