Please remember that WiKirby contains spoilers, which you read at your own risk! See our general disclaimer for details.
Candy Constellation - Room 10: Difference between revisions
From WiKirby, your independent source of Kirby knowledge.
Jump to navigationJump to search
m (→Gallery) |
mNo edit summary |
||
| Line 1: | Line 1: | ||
{{Good}} | {{Good}} | ||
{{Infobox-K&TAMRoom | {{Infobox-K&TAMRoom | ||
|image= [[File:Candy Constellation Room 10.png]] | |image= [[File:KaTAM Candy Constellation Room 10.png]] | ||
|caption=[[Kirby]] makes a choice in '''Room 10'''. | |caption=[[Kirby]] makes a choice in '''Room 10'''. | ||
|area=[[Candy Constellation]] | |area=[[Candy Constellation]] | ||
Revision as of 17:13, 25 December 2021
| ||||||||||||||
|
| ||||||||||||||

Candy Constellation - Room 10 is a room in Candy Constellation, the ninth area of Kirby & The Amazing Mirror.
Links
This room links to Candy Constellation - Room 8 to the left, Candy Constellation - Room 11 in the middle, and Candy Constellation - Room 12 to the right.
Overview
This room consists of a long path over a void past star block platforms and enemies. To the right, the path splits in two, with a Treasure Chest visible in the upper path. Breaking the Bomb Block on one path will lock the other. The upper path leads to Room 11, while the lower path leads past a 1-Up and eventually to Room 12.
Enemies
| Sprite | Name | Copy Ability |
|---|---|---|
| Gordo | N/A | |
| Haley | None | |
| Snooter | None | |
| Waddle Doo | Beam |
Gallery

Composite map of the room
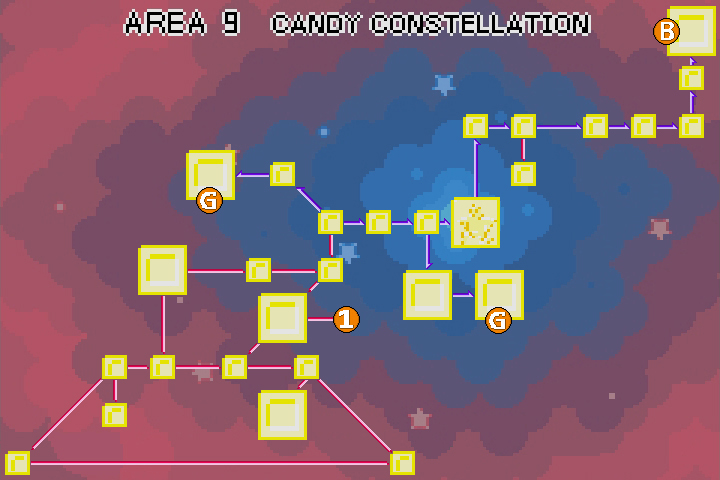
| Candy Constellation Area Map | |
|---|---|
 | |
| |||||||||||||||||||||||||||||