Kirby 64: The Crystal Shards/gallery: Difference between revisions
PotatoPlus (talk | contribs) mNo edit summary |
(→Bosses) |
||
| (99 intermediate revisions by 15 users not shown) | |||
| Line 1: | Line 1: | ||
{{DISPLAYTITLE: ''Kirby 64: The Crystal Shards''/gallery}} | |||
This is a gallery of images relating to ''[[Kirby 64: The Crystal Shards]]''. | |||
== | ==Boxarts and logos== | ||
<gallery> | <gallery> | ||
K64 The Crystal Shards box art.png|North American box art | K64 The Crystal Shards box art.png|North American box art | ||
K64 The Crystal Shards JP box art.jpg|Japanese box art | K64 The Crystal Shards JP box art.jpg|Japanese box art | ||
K64 logo.jpg|Logo | |||
</gallery> | </gallery> | ||
==Artwork== | ==Artwork== | ||
===Main characters=== | ===Main characters=== | ||
<gallery> | <gallery> | ||
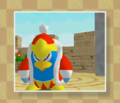
Kirby | K64 Kirby artwork.png|[[Kirby]] | ||
Kirby K64 artwork 2.jpg|Kirby | Kirby K64 artwork 2.jpg|Kirby | ||
Kirby K64 Artwork 3.png|Kirby | |||
Kirby K64 Artwork JP Website.png|Kirby | |||
Front-Facing Kirby K64 Artwork.png|Kirby | |||
Kirby K64 Happy Artwork.png|Kirby | |||
Kirby K64 Artwork 4.jpg|Kirby | |||
Kirby K64 Sitting Artwork.png|Kirby sitting | |||
Kirby K64 Sitting Artwork 2.jpg|Kirby sitting | |||
Kirby K64 Walking Artwork.png|Kirby walking | |||
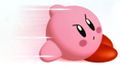
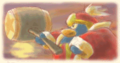
Kirby running K64 artwork.jpg|Kirby running | Kirby running K64 artwork.jpg|Kirby running | ||
Kirby | Kirby K64 Jumping Artwork.png|Kirby jumping | ||
Kirby K64 Flying Artwork.png|Kirby [[Hover|flying]] | |||
Kirby ducking K64 artwork.jpg|Kirby ducking | Kirby ducking K64 artwork.jpg|Kirby ducking | ||
Slide K64 artwork.jpg|Kirby performing a [[Slide]] | Slide K64 artwork.jpg|Kirby performing a [[Slide]] | ||
Kirby through platform K64 artwork.jpg|Kirby jumping down through a [[thin floor]] | |||
Kirby swimming K64 artwork.jpg|Kirby swimming | |||
Inhale K64 artwork.jpg|Kirby inhaling | Inhale K64 artwork.jpg|Kirby inhaling | ||
Kirby swallowing K64 artwork.jpg|Kirby swallowing | |||
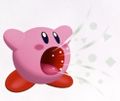
Star Bullet K64.jpg|Kirby spitting out a [[Star Bullet]] | |||
Kirby throwing K64 artwork.jpg|Kirby performing a throw | Kirby throwing K64 artwork.jpg|Kirby performing a throw | ||
Kirby holding Bronto Burt K64 artwork.png|Kirby holding a [[Bronto Burt]] | |||
K64 Kirby Throws Bronto Burt artwork.png|Kirby throwing a Bronto Burt | |||
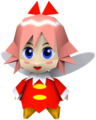
Ribbon.png|[[Ribbon]] | Kirby and Ability Star K64 artwork.jpg|Kirby holding a [[Ability Star|Power Star]] | ||
Kirby throwing Power Star K64 artwork.png|Kirby throwing a Power Star | |||
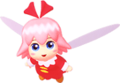
K64 Ribbon artwork 2.png|[[Ribbon]] holding a [[Crystal Shard]] | |||
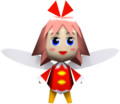
Ribbon K64 artwork.jpg|Ribbon | Ribbon K64 artwork.jpg|Ribbon | ||
K64 Ribbon Artwork. | K64 Ribbon Artwork.png|Ribbon | ||
K64 Waddle Dee Artwork | K64 Ribbon Artwork 3.png|[[Ribbon]] holding a Crystal Shard | ||
K64 Waddle Dee Artwork 3. | K64 Waddle Dee Artwork 1.jpg|[[Waddle Dee (Kirby 64: The Crystal Shards)|Waddle Dee]] | ||
K64 Waddle Dee Artwork 2.jpg|Waddle Dee | |||
K64 Waddle Dee Artwork 3.png|Waddle Dee | |||
K64 Waddle Dee Artwork 4.jpg|Waddle Dee | |||
K64 Waddle Dee Artwork 5.png|Waddle Dee | |||
K64 Kirby and Waddle Dee Artwork.jpg|Kirby and Waddle Dee | |||
K64 Adeleine artwork 1.png|[[Adeleine]] | K64 Adeleine artwork 1.png|[[Adeleine]] | ||
K64 Adeleine artwork 2.png|Adeleine | K64 Adeleine artwork 2.png|Adeleine | ||
K64 Adeleine artwork 3.png|Adeleine | K64 Adeleine artwork 3.png|Adeleine | ||
K64 Adeleine artwork 4.png|Adeleine | K64 Adeleine artwork 4.png|Adeleine | ||
King Dedede | K64 Adeleine Artwork 5.png|Adeleine | ||
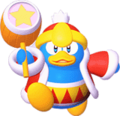
King Dedede | K64 King Dedede Artwork 1.jpg|[[King Dedede]] | ||
King Dedede | K64 King Dedede Artwork 2.jpg|King Dedede | ||
K64 | K64 King Dedede Artwork 3.png|King Dedede | ||
K64 | K64 King Dedede Artwork 4.jpg|King Dedede | ||
King Dedede and Kirby | K64 King Dedede and Kirby.png|King Dedede and Kirby | ||
Group artwork K64.jpg|Group artwork | Group artwork K64.jpg|Group artwork | ||
</gallery> | </gallery> | ||
| Line 44: | Line 63: | ||
<gallery> | <gallery> | ||
K64 Burn.jpg|[[Burning|Burn]] Kirby | K64 Burn.jpg|[[Burning|Burn]] Kirby | ||
Stone Kirby K64 art.jpg|[[ | Stone Kirby K64 art.jpg|[[Stone]] Kirby | ||
Needle K64.png|[[ | Needle K64.png|[[Needle]] Kirby | ||
K64Bomb.png|[[ | K64Bomb.png|[[Bomb]] Kirby | ||
</gallery> | </gallery> | ||
===Power Combos=== | ===Power Combos=== | ||
<gallery> | <gallery> | ||
Burn-Stone K64 artwork.png|[[ | Burn-Stone K64 artwork.png|[[Burning Stone]] | ||
Stone-Needle K64 artwork.png|[[Stone-Needle]] | Stone-Needle K64 artwork.png|[[Stone-Needle]] | ||
Double Needle K64 artwork.jpg|[[Needle-Needle]] | Double Needle K64 artwork.jpg|[[Needle-Needle]] | ||
| Line 59: | Line 78: | ||
===Enemies=== | ===Enemies=== | ||
<gallery> | <gallery> | ||
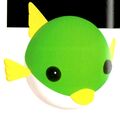
K64 Blowfish artwork.jpg|[[Blowfish]] | |||
K64 Blowfish artwork 2.jpg|Blowfish | |||
K64 Bouncy artwork.jpg|[[Bouncy]] | |||
Chacha K64 artwork.jpg|[[Chacha]] | Chacha K64 artwork.jpg|[[Chacha]] | ||
Chilly K64 artwork. | Chacha K64 artwork 2.jpg|Chacha | ||
Chilly K64 artwork.png|[[Chilly]] | |||
Emp K64 artwork.png|[[Emp]] | Emp K64 artwork.png|[[Emp]] | ||
Emp K64 artwork 2. | Emp K64 artwork 2.png|Emp | ||
K64ArtGlom.jpg|[[Glom]] | K64ArtGlom.jpg|[[Glom]] | ||
K64 Gordo artwork.jpg|[[Gordo]] | |||
K64 Kapar artwork.jpg|[[Kapar]] | |||
Mite K64 artwork.png|[[Mite]] | Mite K64 artwork.png|[[Mite]] | ||
Mite K64 artwork 2.jpg|Mite | Mite K64 artwork 2.jpg|Mite | ||
Nruff K64 artwork.jpg|[[Nruff]] | Nruff K64 artwork.jpg|[[Nruff]] | ||
K64 N-Z artwork.jpg|[[N-Z]] | |||
K64 N-Z artwork 2.jpg|N-Z | |||
K64ArtPunc.png|[[Punc]] | K64ArtPunc.png|[[Punc]] | ||
Sir Kibble K64 Artwork.png|[[Sir Kibble]] | |||
Yariko K64 artwork.png|[[Yariko]] | Yariko K64 artwork.png|[[Yariko]] | ||
Yariko K64 artwork 2.jpg|Yariko | Yariko K64 artwork 2.jpg|Yariko | ||
| Line 76: | Line 104: | ||
Whispy Woods K64 artwork.jpg|[[Whispy Woods]] | Whispy Woods K64 artwork.jpg|[[Whispy Woods]] | ||
Whispy Woods K64 artwork 2.jpg|Whispy Woods | Whispy Woods K64 artwork 2.jpg|Whispy Woods | ||
K64 Whispy Woods artwork 3.png|Whispy Woods | |||
K64 Acro artwork.jpg|[[Acro]] | |||
Magman K64 art.png|[[Magman]] | Magman K64 art.png|[[Magman]] | ||
HR-H artwork 2.jpg|[[HR-H]] | K64 HR-H artwork 2.jpg|[[HR-H]] | ||
HR-H artwork.jpg|HR-H | K64 HR-H artwork.jpg|HR-H | ||
HR-E artwork.jpg|HR-E | K64 HR-E artwork.jpg|HR-E | ||
</gallery> | </gallery> | ||
| Line 89: | Line 118: | ||
K64 wallpaper 3.jpg|Wallpaper | K64 wallpaper 3.jpg|Wallpaper | ||
K64 cover artwork.jpg|Wallpaper | K64 cover artwork.jpg|Wallpaper | ||
</gallery> | |||
===Credits art=== | |||
====Sketches==== | |||
<gallery> | |||
K64 02 credits sketch.png|[[0²]] sketch | |||
K64 Adeleine credits sketch.png|[[Adeleine]] sketch | |||
K64 Crystal credits sketch.png|[[Crystal Shard|Crystal]] sketch | |||
K64 cyclops enemies credits sketch.png|Sketch of [[I³]], [[Ghost Knight]], [[Maw]], and [[Mumbies]] | |||
K64 Dark Matter credits sketch.png|[[Dark Matter (cloud)|Dark Matter]] sketch | |||
K64 enemy line credits sketch.png|Sketch of [[Yariko]], [[Tick]], [[Galbo]], and [[Gabon]] | |||
K64 fairies credits sketch.png|Sketch of the [[Fairy|fairies]] | |||
K64 Flora credits sketch.png|[[Flora]] sketch | |||
K64 Mariel and Glom credits sketch.png|Sketch of [[Mariel]] and [[Glom]] | |||
K64 HR-H credits sketch.png|[[HR-H]] sketch | |||
K64 items credits sketch.png|Sketch of [[1-Up]], [[Invincible Candy]], and [[Maxim Tomato]] | |||
K64 King Dedede credits sketch.png|[[King Dedede]] sketch | |||
K64 Kirby credits sketch.png|[[Kirby]] sketch | |||
K64 mouth credits sketch.png|Sketch of the inside of a sea creature's mouth | |||
K64 Pix credits sketch.png|[[Pix]] sketch | |||
K64 Pop Star credits sketch.png|[[Popstar|Pop Star]] sketch | |||
K64 Queen mirror credits sketch.png|Sketch of the Ripple Star [[Queen]] at her bathroom mirror | |||
K64 Ribbon credits sketch.png|[[Ribbon]] sketch | |||
K64 Waddle Dee credits sketch.png|[[Waddle Dee (Kirby 64: The Crystal Shards)|Waddle Dee]] sketch | |||
K64 Whispy Jr credits sketch.png|[[Whispy Woods Jr.]] sketch | |||
</gallery> | |||
====Illustrations==== | |||
<gallery> | |||
K64 02 credits illustration.png|[[0²]] illustration | |||
K64 Adeleine credits illustration.png|[[Adeleine]] illustration | |||
K64 Crystal credits illustration.png|[[Crystal Shard|Crystal]] illustration | |||
K64 cyclops enemies credits illustration.png|Illustration of [[I³]], [[Ghost Knight]], [[Maw]], and [[Mumbies]] | |||
K64 Dark Matter credits illustration.png|[[Dark Matter (cloud)|Dark Matter]] illustration | |||
K64 enemy line credits illustration.png|Illustration of [[Yariko]], [[Tick]], [[Galbo]], and [[Gabon]] | |||
K64 Fairies Credits.png|Illustration of the [[Fairy|fairies]] | |||
K64 Flora credits illustration.png|[[Flora]] illustration | |||
K64 Glom credits illustration.png|Illustration of [[Glom]] | |||
K64 HR-H credits illustration.png|[[HR-H]] illustration | |||
K64 items credits illustration.png|Illustration of [[1-Up]], [[Invincible Candy]], and [[Maxim Tomato]] | |||
K64 King Dedede credits illustration.png|[[King Dedede]] illustration | |||
K64 Kirby credits illustration.png|[[Kirby]] illustration | |||
K64 mouth credits illustration.png|Illustration of the inside of a sea creature's mouth | |||
K64 Pix credits illustration.png|[[Pix]] illustration | |||
K64 Pop Star credits illustration.png|[[Popstar|Pop Star]] illustration | |||
K64 Queen mirror credits illustration.png|Illustration of the Ripple Star [[Queen]] at her bathroom mirror | |||
K64 Ribbon credits illustration.png|[[Ribbon]] illustration | |||
K64 Waddle Dee credits illustration.png|[[Waddle Dee (Kirby 64: The Crystal Shards)|Waddle Dee]] illustration | |||
K64 Whispy Jr credits illustration.png|[[Whispy Woods Jr.]] illustration | |||
</gallery> | |||
===Concept art=== | |||
<gallery> | |||
K64 Grassland concept art.jpg|Concept art of a grass land | |||
K64 Giant laboratory concept art.jpg|Concept art of laboratory disproportionate to Kirby's size | |||
K64 Skeleton drawbridge concept art.jpg|Concept art of Kirby crossing a skeleton drawbridge | |||
K64 Whale concept art.jpg|Concept art of a whale with Kirby on it | |||
K64 Plant field concept art.jpg|Concept art of field with variety of plants | |||
K64 Web concept art.jpg|Concept art of Kirby climbing a spider web | |||
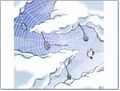
K64 Meteor shower concept art.jpg|Concept art of Kirby amidst a meteor shower | |||
</gallery> | </gallery> | ||
| Line 94: | Line 183: | ||
===[[Enemy Info Card]] icons=== | ===[[Enemy Info Card]] icons=== | ||
<gallery> | <gallery> | ||
K64 Enemy Info Card 1.png|[[Whispy Woods]] | |||
K64 Enemy Info Card 2.png|[[Whispy Woods Jr.]] | |||
K64 Enemy Info Card 3.png|[[Pix]] | |||
K64 Enemy Info Card 4.png|[[Acro]] | |||
K64 Enemy Info Card 5.png|[[Magman]] | |||
K64 Enemy Info Card 6.png|[[HR-H]] | |||
K64 Enemy Info Card 7.png|[[HR-E]] | |||
K64 Enemy Info Card 8.png|[[Miracle Matter]] | |||
K64 Enemy Info Card 9.png|[[0²]] | |||
K64 Enemy Info Card 10.png|[[N-Z]] | |||
K64 Enemy Info Card 11.png|[[Rocky]] | |||
K64 Enemy Info Card 12.png|[[Bronto Burt]] | |||
K64 Enemy Info Card 13.png|[[Skud]] | |||
K64 Enemy Info Card 14.png|[[Gordo]] | |||
K64 Enemy Info Card 15.png|[[Shotzo]] | |||
K64 Enemy Info Card 16.png|[[Spark-i]] | |||
K64 Enemy Info Card 17.png|[[Bouncy]] | |||
K64 Enemy Info Card 18.png|[[Glunk]] | |||
K64 Enemy Info Card 19.png|[[Slushy]] | |||
K64 Enemy Info Card 20.png|[[Chilly]] | |||
K64 Enemy Info Card 21.png|[[Propeller]] | |||
K64 Enemy Info Card 22.png|[[Glom]] | |||
K64 Enemy Info Card 23.png|[[Mahall]] | |||
K64 Enemy Info Card 24.png|[[Poppy Bros. Jr.]] | |||
K64 Enemy Info Card 25.png|[[Splinter]] | |||
K64 Enemy Info Card 26.png|[[Gobblin]] | |||
K64 Enemy Info Card 27.png|[[Kany]] | |||
K64 Enemy Info Card 28.png|[[Bivolt]] | |||
K64 Enemy Info Card 29.png|[[Sirkibble]] | |||
K64 Enemy Info Card 30.png|[[Gabon]] | |||
K64 Enemy Info Card 31.png|[[Mariel]] | |||
K64 Enemy Info Card 32.png|[[I³]] | |||
K64 Enemy Info Card 33.png|[[Snipper]] | |||
K64 Enemy Info Card 34.png|[[Blowfish]] | |||
K64 Enemy Info Card 35.png|[[Bonehead]] | |||
K64 Enemy Info Card 36.png|[[Squibby]] | |||
K64 Enemy Info Card 37.png|[[Bobo]] | |||
K64 Enemy Info Card 38.png|[[Bo]] | |||
K64 Enemy Info Card 39.png|[[Punc]] | |||
K64 Enemy Info Card 40.png|[[Mite]] | |||
K64 Enemy Info Card 41.png|[[Sandman]] | |||
K64 Enemy Info Card 42.png|[[Flopper]] | |||
K64 Enemy Info Card 43.png|[[Kapar]] | |||
K64 Enemy Info Card 44.png|[[Maw]] | |||
K64 Enemy Info Card 45.png|[[Drop]] | |||
K64 Enemy Info Card 46.png|[[Pedo]] | |||
K64 Enemy Info Card 47.png|[[Noo]] | |||
K64 Enemy Info Card 48.png|[[Tick]] | |||
K64 Enemy Info Card 49.png|[[Cairn]] | |||
K64 Enemy Info Card 50.png|[[Pompey]] | |||
K64 Enemy Info Card 51.png|[[Hack]] | |||
K64 Enemy Info Card 52.png|[[Burnis]] | |||
K64 Enemy Info Card 53.png|[[Fishbone]] | |||
K64 Enemy Info Card 54.png|[[Frigis]] | |||
K64 Enemy Info Card 55.png|[[Sawyer]] | |||
K64 Enemy Info Card 56.png|[[Turbite]] | |||
K64 Enemy Info Card 57.png|[[Plugg]] | |||
K64 Enemy Info Card 58.png|[[Ghost Knight]] | |||
K64 Enemy Info Card 59.png|[[Zoos]] | |||
K64 Enemy Info Card 60.png|[[Kacti]] | |||
K64 Enemy Info Card 61.png|[[Rockn]] | |||
K64 Enemy Info Card 62.png|[[Chacha]] | |||
K64 Enemy Info Card 63.png|[[Galbo]] | |||
K64 Enemy Info Card 64.png|[[Bumber]] | |||
K64 Enemy Info Card 65.png|[[Scarfy]] | |||
K64 Enemy Info Card 66.png|[[Nruff]] | |||
K64 Enemy Info Card 67.png|[[Emp]] | |||
K64 Enemy Info Card 68.png|[[Magoo]] | |||
K64 Enemy Info Card 69.png|[[Yariko]] | |||
K64 Enemy Info Card 70.png|[[Flutter]] | |||
K64 Enemy Info Card 71.png|[[Wall Shotzo]] | |||
K64 Enemy Info Card 72.png|[[Keke]] | |||
K64 Enemy Info Card 73.png|[[Sparky]] | |||
K64 Enemy Info Card 74.png|[[Ignus]] | |||
K64 Enemy Info Card 75.png|[[Flora]] | |||
K64 Enemy Info Card 76.png|[[Putt]] | |||
K64 Enemy Info Card 77.png|[[Pteran]] | |||
K64 Enemy Info Card 78.png|[[Mumbies]] | |||
K64 Enemy Info Card 79.png|[[Pupa]] | |||
K64 Enemy Info Card 80.png|[[Mopoo]] | |||
K64 Enemy Info Card 81.png|[[Zebon]] | |||
</gallery> | </gallery> | ||
| Line 191: | Line 280: | ||
<gallery> | <gallery> | ||
K64 PC DoubleBurn.png|[[Burn-Burn]] | K64 PC DoubleBurn.png|[[Burn-Burn]] | ||
K64 PC BurnStone.png|[[ | K64 PC BurnStone.png|[[Burning Stone]] | ||
K64 PC BurnIce.png|[[Burn-Ice]] | K64 PC BurnIce.png|[[Burn-Ice]] | ||
K64 PC BurnNeedle.png|[[Burn-Needle]] | K64 PC BurnNeedle.png|[[Burn-Needle]] | ||
| Line 219: | Line 308: | ||
K64 PC DoubleCutter.png|[[Cutter-Cutter]] | K64 PC DoubleCutter.png|[[Cutter-Cutter]] | ||
K64 PC WingCrystal.png|[[Ribbon's Crystal]] | K64 PC WingCrystal.png|[[Ribbon's Crystal]] | ||
</gallery> | |||
==Models== | |||
===In-game models=== | |||
<gallery> | |||
K64Gabon.png|[[Gabon]] | |||
K64I3.png|[[I³]] | |||
K64Punc.png|[[Punc]] | |||
K64Sandman.png|[[Sandman]] | |||
K64Scarfy.png|[[Scarfy]] | |||
K64Rick.png|[[Stone-Cutter]] statue of [[Rick]] | |||
K64Kine.png|Stone-Cutter statue of [[Kine]] | |||
K64Nago.png|Stone-Cutter statue of [[Nago]] | |||
K64ChuChu.png|Stone-Cutter statue of [[ChuChu]] | |||
K64Pitch.png|Stone-Cutter statue of [[Pitch]] | |||
</gallery> | |||
===Data-rendered models=== | |||
====Main and supporting characters==== | |||
<gallery> | |||
K64 Kirby model.png|[[Kirby]] | |||
K64 Ribbon model.png|[[Ribbon]] | |||
K64 Ribbon low-poly model.png|Ribbon (low-poly) | |||
K64 Ribbon lower-poly model.png|Ribbon (lower-poly) | |||
K64 Ribbon lowest-poly model.png|Ribbon (lowest-poly) | |||
K64 Waddle Dee model.png|[[Waddle Dee (Kirby 64: The Crystal Shards)|Waddle Dee]] | |||
K64 Adeleine high-poly model.png|[[Adeleine]] (high-poly) | |||
K64 Adeleine model.png|Adeleine | |||
K64 Adeleine low-poly model.png|Adeleine (low-poly) | |||
K64 Adeleine lower-poly model.png|Adeleine (lower-poly) | |||
K64 Adeleine lowest-poly model.png|Adeleine (lowest poly) | |||
K64 King Dedede model.png|[[King Dedede]] | |||
K64 King Dedede low-poly model.png|King Dedede (low-poly) | |||
K64 Fairy Queen model.png|[[Queen]] | |||
</gallery> | |||
====Enemies==== | |||
<gallery> | |||
K64 Blowfish model.png|[[Blowfish]] | |||
K64 Bo model.png|[[Bo]] | |||
K64 Bobo model.png|[[Bobo]] | |||
K64 Bonehead model.png|[[Bonehead]] | |||
K64 Bouncy model.png|[[Bouncy]] | |||
K64 Bronto Burt model.png|[[Bronto Burt]] | |||
K64 Bumber model.png|[[Bumber]] | |||
K64 Cairn model.png|[[Cairn]] | |||
K64 Chacha model.png|[[Chacha]] | |||
K64 Fishbone model.png|[[Fishbone]] | |||
K64 Flopper model.png|[[Flopper]] | |||
K64 Gabon model.png|[[Gabon]] | |||
K64 Ghost Knight model.png|[[Ghost Knight]] | |||
K64 Glom model.png|[[Glom]] | |||
K64 Glom hiding model.png|Glom about to appear from its hole | |||
K64 Glunk model.png|[[Glunk]] | |||
K64 Gobblin model.png|[[Gobblin]] | |||
K64 Gordo model.png|[[Gordo]] | |||
K64 Hack model.png|[[Hack]] | |||
K64 I3 model.png|[[I³]] | |||
K64 Kacti model.png|[[Kacti]] | |||
K64 Kany model.png|[[Kany]] | |||
K64 Kapar model.png|[[Kapar]] | |||
K64 Mite model.png|[[Mite]] | |||
K64 Mumbies model.png|[[Mumbies]] | |||
K64 N-Z model.png|[[N-Z]] | |||
K64 Noo model.png|[[Noo]] | |||
K64 Pedo model.png|[[Pedo]] | |||
K64 Plugg model.png|[[Plugg]] | |||
K64 Poppy Bros Jr model.png|[[Poppy Bros. Jr.]] | |||
K64 Punc model.png|[[Punc]] | |||
K64 Rocky model.png|[[Rocky]] | |||
K64 Sandman model.png|[[Sandman]] | |||
K64 Skud model.png|[[Skud]] | |||
K64 Snipper model.png|[[Snipper]] | |||
K64 Spark-i model.png|[[Spark-i]] | |||
K64 Sparky model.png|[[Sparky]] | |||
K64 Splinter model.png|[[Splinter]] | |||
K64 Squibby model.png|[[Squibby]] | |||
K64 Tick model.png|[[Tick]] | |||
K64 Wall Shotzo model.png|[[Wall Shotzo]] | |||
</gallery> | |||
====Bosses==== | |||
<gallery> | |||
K64 Waddle Doo model.png|[[Waddle Doo]] | |||
K64 Waddle Doo low-poly model.png|Waddle Doo (low-poly) | |||
K64 Pix model.png|[[Pix]] | |||
K64 Pix blades model.png|Pix with its blades out | |||
K64 deactivated Pix model.png|Pix upon defeat | |||
K64 Pix projectiles model.png|Pix's projectiles | |||
K64 02 model.png|[[0²]] | |||
</gallery> | |||
====Items==== | |||
<gallery> | |||
K64 Ability Stars model.png|[[Ability Star]]s | |||
K64 Enemy Info Card model.png|[[Enemy Info Card]] | |||
K64 Maxim Tomato model.png|[[Maxim Tomato]] | |||
</gallery> | |||
====Other==== | |||
<gallery> | |||
K64 Waddle Dees Boat model.png|[[Waddle Dee (Kirby 64: The Crystal Shards)|Waddle Dee]]'s boat | |||
K64 Early Dark Matter model.png|[[Dark Matter (cloud)|Dark Matter]]'s model in the cutscene where it is expelled from Waddle Dee's body. The eye is normally not visible in-game.<ref>[https://tcrf.net/Kirby_64:_The_Crystal_Shards#Early_Dark_Matter Kirby 64: The Crystal Shards] - The Cutting Room Floor. Retrieved October 16, 2023.</ref> | |||
</gallery> | </gallery> | ||
==Screenshots== | ==Screenshots== | ||
{{ | {{incomplete|needs abilities, ability combos, and enemies}} | ||
===Cutscenes=== | |||
<gallery> | <gallery> | ||
K64 RibbonEscape.png|Ribbon's escape | K64 RibbonEscape.png|Ribbon's escape | ||
K64 Kirbys Quest scene 1.png|Kirby finding the first [[Crystal Shard]] | |||
K64 Kirbys Quest scene 2.png|Kirby and Ribbon combining their shards into one | |||
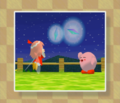
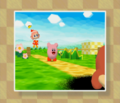
K64 RibbonMeetsKirby.png|Ribbon, explaining her trouble to Kirby | K64 RibbonMeetsKirby.png|Ribbon, explaining her trouble to Kirby | ||
K64 | K64 Kirbys Quest scene 3.png|Kirby pledging to help Ribbon | ||
K64 Waddle Dee scene 1.png|[[Waddle Dee (Kirby 64: The Crystal Shards)|Waddle Dee]] being stalked by [[Dark Matter (cloud)|Dark Matter]] | |||
K64 Waddle Dee scene 2.png|Kirby and Ribbon stumbling onto Waddle Dee being possessed | |||
K64 Waddle Dee scene 3.png|Waddle Dee being transformed into [[Waddle Doo]] | |||
K64 Waddle Dee scene 4.png|Kirby inviting the freed Waddle Dee to join him on the adventure | |||
K64 Adeleine scene 1.png|Adeleine finding a [[Crystal Shard]] in a cutscene | |||
K64 Adeleine scene 2.png|Adeleine being marauded by Dark Matter | |||
K64 Adeleine scene 3.png|Kirby and friends encountering Adeleine, who is acting strangely | |||
K64 Adeleine scene 4.png|Adeleine becoming hostile after her possession | |||
K64 Adeleine scene 5.png|Adeleine joining Kirby's team after being returned to normal | |||
K64 King Dedede scene 1.png|King Dedede finding a Crystal Shard | |||
K64 King Dedede scene 2.png|King Dedede stopping Kirby from collecting the shard | |||
K64 King Dedede scene 3.png|Kirby and King Dedede arguing over the shard | |||
K64 King Dedede scene 4.png|King Dedede being possessed by Dark Matter | |||
K64 King Dedede scene 5.png|King Dedede recovering from his possession | |||
K64 King Dedede scene 6.png|Waddle Dee trying to convince King Dedede to come with them | |||
K64 King Dedede scene 7.png|King Dedede giving into guilty feelings, resulting in him joining the team | |||
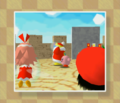
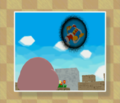
K64 On to Rock Star scene.png|Portal opening to [[Rock Star]] after completing the Pop Star level | |||
K64 Desert Desserts scene 1.png|Kirby starts to lag behind the group due to hunger. | |||
K64 Desert Desserts scene 2.png|Kirby's vision skews in his hunger, seeing his friends as food. | |||
K64 Desert Desserts scene 3.png|Kirby is fed by Adeleine's magic paintings. | |||
K64 Desert Desserts scene 4.png|Adeleine paints an apple on her canvas which turns into the real fruit. | |||
K64 Desert Desserts scene 5.png|The portal to [[Aqua Star]] opens. | |||
K64 All Washed Up scene 1.png|The team looks out to sea. | |||
K64 All Washed Up scene 2.png|Adeleine starts tossing rocks into the water, prompting the others to do the same. | |||
K64 All Washed Up scene 3.png|Kirby winds up a toss, while the others spot something coming. | |||
K64 All Washed Up scene 4.png|Kirby blindly finishes his toss as a big wave rolls in to wash him away. | |||
K64 All Washed Up scene 5.png|Kirby is washed ashore as the others jump into the portal to the next world. | |||
K64 Group.png|Kirby and his friends gathering around the partially-completed crystal | |||
K64 Hot Waddle Dawdle scene 1.png|A nearby volcano erupts on [[Neo Star]], putting the group in danger. | |||
K64 Hot Waddle Dawdle scene 2.png|King Dedede helps Adeleine into the portal to Shiver Star. | |||
K64 Hot Waddle Dawdle scene 3.png|Kirby uses his inhale to extract Waddle Dee through the portal. | |||
K64 Ripple Rescue scene 1.png|The portal begins to open to [[Ripple Star]]. | |||
K64 Ripple Rescue scene 2.png|Ribbon is appalled to see the state of her home world. | |||
K64 Ripple Rescue scene 3.png|Ripple Star is shown utterly swarmed by Dark Matter. | |||
K64 Ripple Rescue scene 4.png|Kirby attempts to lead the charge into the portal, but trips. | |||
K64 Ripple Rescue scene 5.png|Ribbon carries Kirby through the portal after he is trampled accidentally by his friends. | |||
K64 Queen scene.png|The [[Queen]] | |||
K64 S DarkMatter.png|[[Dark Matter (cloud)|Dark Matter]] | K64 S DarkMatter.png|[[Dark Matter (cloud)|Dark Matter]] | ||
K64 Darkness Calls scene 01.png|The crystal radiates power to chase Dark Matter out of Ripple Star. | |||
K64 Darkness Calls scene 02.png|The shroud of darkness recedes from Ripple Star's skies. | |||
K64 Darkness Calls scene 03.png|The dark cloud recedes from the planet. | |||
K64 Darkness Calls scene 04.png|The Dark Matter previously menacing Ripple Star explodes out in space. | |||
K64 Darkness Calls scene 05.png|Kirby and his team celebrate their victory. | |||
K64 Darkness Calls scene 06.png|The crystal shoots the Queen with a beam, dispelling the Dark Matter inside her. | |||
K64 Darkness Calls scene 07.png|The dark matter from the queen recedes to space and turns into [[Dark Star]]. | |||
K64 Darkness Calls scene 08.png|Ribbon grows concerned over the growing darkness. | |||
K64 Darkness Calls scene 09.png|Kirby pulls out his [[Cell Phone]] from hammerspace. | |||
K64 Darkness Calls scene 10.png|Kirby calls the [[Warp Star]] to ferry him and his friends to Dark Star. | |||
K64 Darkness Calls scene 11.png|Kirby waves to the fairies as he and his team head to the final encounter. | |||
K64 Crystal Clear scene 01.png|Dark Star is destroyed after [[0²]] is defeated. | |||
K64 Crystal Clear scene 02.png|Kirby and his team escape as Dark Star explodes. | |||
K64 Crystal Clear scene 03.png|Celebrations commence back in Ripple Star. | |||
K64 Crystal Clear scene 04.png|Kirby's team are formally honored by the Queen for their heroic deeds. | |||
K64 Crystal Clear scene 05.png|King Dedede stoically receives his medal. | |||
K64 Crystal Clear scene 06.png|Adeleine admires her medal. | |||
K64 Crystal Clear scene 07.png|Kirby receives his medal. | |||
K64 Crystal Clear scene 08.png|Ribbon gives Kirby a gentle kiss on the head as an additional reward. | |||
K64 Crystal Clear scene 09.png|Kirby stumbles down the stairs of the palace in his infatuated stupor, ending the scene on this freeze-frame. | |||
</gallery> | |||
===Stages=== | |||
====[[Pop Star (Kirby 64: The Crystal Shards)|Pop Star]]==== | |||
<gallery> | |||
Pop Star K64 space.png|Pop Star as seen from the level select | |||
K64 Pop Star Stage 1 screenshot 01.png|A new adventure begins for [[Kirby]], now with half of the third dimension | |||
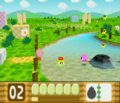
K64 Pop Star Stage 1 screenshot 02.png|A river crossing guarded by two landlocked [[Glunk]]s | |||
K64 Pop Star Stage 1 screenshot 03.png|Finding a [[Maxim Tomato|tasty snack]] in front of the wooden shed | |||
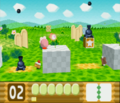
K64 Pop Star Stage 1 screenshot 04.png|Battle with Big [[N-Z]] | |||
K64 Pop Star Stage 1 screenshot 05.png|Crossing blocks and [[Shotzo]]s | |||
K64 Pop Star Stage 1 screenshot 06.png|Moving through another shallow waterway | |||
K64 Pop Star Stage 1 screenshot 07.png|Reaching a fenced enclosure | |||
K64 Pop Star Stage 1 screenshot 08.png|Battle with [[Waddle Doo]] | |||
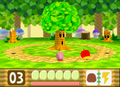
K64 Pop Star Stage 2 screenshot 01.png|Kirby enters the autumnal woods | |||
K64 Pop Star Stage 2 screenshot 02.png|Kirby takes a [[Bumber]] sailing through the autumnal woods | |||
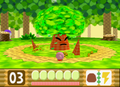
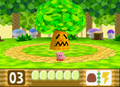
K64 Pop Star Stage 2 screenshot 03.png|Reaching a large hollow tree | |||
K64 Pop Star Stage 2 screenshot 04.png|Climbing the inside of the hollow tree | |||
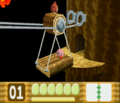
K64 Pop Star Stage 2 screenshot 05.png|Waddle Dee gives Kirby a ride on his gondola | |||
K64 Pop Star Stage 2 screenshot 06.png|Kirby and Waddle Dee reach the other side | |||
K64 Pop Star Stage 2 screenshot 07.png|Finding a large hole to dive into in another hollow tree | |||
K64 Pop Star Stage 2 screenshot 08.png|Taking a moment to nab some extra goodies | |||
K64 Pop Star Stage 2 screenshot 09.png|Battle with Big [[Bouncy]] | |||
K64 Pop Star Stage 2 screenshot 10.png|Kirby battles Adeleine's minor painted minions | |||
K64 Pop Star Stage 2 screenshot 11.png|Battle with the [[Ice Dragon]] drawing | |||
K64 Pop Star Stage 2 screenshot 12.png|Battle with the [[Dark Matter]] painting | |||
K64 Pop Star Stage 2 screenshot 13.png|Adeleine runs out of paint and other options | |||
K64 Pop Star Stage 3 screenshot 01.png|Starting outside the castle | |||
K64 Pop Star Stage 3 screenshot 02.png|Kirby crosses the drawbridge into [[King Dedede]]'s castle with a [[Burn-Cutter|flaming sword]] | |||
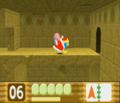
K64 Pop Star Stage 3 screenshot 03.png|Entering the main castle hall | |||
K64 Pop Star Stage 3 screenshot 04.png|Taking a moving platform inside the castle | |||
K64 Pop Star Stage 3 screenshot 05.png|Reaching a narrow tower interior | |||
K64 Pop Star Stage 3 screenshot 06.png|Running along the castle walls | |||
K64 Pop Star Stage 3 screenshot 07.png|Getting a [[1-Up]] from Adeleine | |||
K64 Pop Star Stage 3 screenshot 08.png|Running up the spiraling castle interior | |||
K64 Pop Star Stage 3 screenshot 09.png|Climbing chains inside the castle | |||
K64 Pop Star Stage 3 screenshot 10.png|Battle with King Dedede, in phase 1 | |||
K64 Pop Star Stage 3 screenshot 11.png|Battle with King Dedede, in phase 2 | |||
K64 Whispy Woods Battle.png|Kirby battles with [[Whispy Woods]] and [[Whispy Woods Jr.|his children]] | |||
Whispy Woods K64 2.png|Whispy attacking in the second phase of the battle | |||
Whispy Woods K64 Defeat.png|Whispy Woods is defeated | |||
</gallery> | |||
====[[Rock Star]]==== | |||
<gallery> | |||
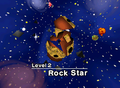
Rock Star K64 space.png|Rock Star as shown from the level selection | |||
K64 Rock Star Stage 1 screenshot 01.png|Finding a lone [[Kacti]] out in the desert | |||
K64 Rock Star Stage 1 screenshot 02.png|[[Kirby]] [[Needle-Needle|Swiss army knifes]] his way through the arid desert regions. | |||
K64 Rock Star Stage 1 screenshot 03.png|Entering the [[Kabu]]-faced ruins | |||
K64 Rock Star Stage 1 screenshot 04.png|Moving past [[I³]] in the ruins | |||
K64 Rock Star Stage 1 screenshot 05.png|Battle with Big Kacti | |||
K64 Rock Star Stage 1 screenshot 06.png|Moving quickly to escape a room filling with sand | |||
K64 Rock Star Stage 1 screenshot 07.png|Waddle Dee busts a hole in the ceiling (somehow) | |||
K64 Rock Star Stage 1 screenshot 08.png|Hopping over the one green hill in the desert | |||
K64 Rock Star Stage 1 screenshot 09.png|Grabbing a snack between the [[Gobblin]]s | |||
K64 Rock Star Stage 2 screenshot 01.png|Kirby is met by the [[Hack]] guarding the pillars | |||
K64 Rock Star Stage 2 screenshot 02.png|Kirby traverses pillars that fall in his vicinity | |||
K64 Rock Star Stage 2 screenshot 03.png|Kirby spots the [[Rocky]] that is looking to drop on him | |||
K64 Rock Star Stage 2 screenshot 04.png|Kirby falls through a fragile floor in the ruins | |||
K64 Rock Star Stage 2 screenshot 05.png|Kirby makes his way to a more substantial structure | |||
K64 Rock Star Stage 2 screenshot 06.png|Kirby dodges the [[Noo]]s' fire | |||
K64 Rock Star Stage 2 screenshot 07.png|Kirby should not linger here for long | |||
K64 Rock Star Stage 2 screenshot 08.png|Moving past the last rising platform | |||
K64 Rock Star Stage 2 screenshot 09.png|Traversing the battlements | |||
K64 Rock Star Stage 2 screenshot 10.png|[[King Dedede]] appears and offers Kirby a lift | |||
K64 Rock Star Stage 2 screenshot 11.png|King Dedede gives Kirby a lift and takes the lead in the ruins | |||
K64 Rock Star Stage 2 screenshot 12.png|King Dedede reaches the last doorway | |||
K64 Rock Star Stage 3 screenshot 01.png|Kirby hops down a hole into the cave, as he frequently does | |||
K64 Rock Star Stage 3 screenshot 02.png|Kirby finds a trio of [[Bo]]s guarding a massive fossil in a big cavernous region. | |||
K64 Rock Star Stage 3 screenshot 03.png|Finding a sand vortex leading further down | |||
K64 Rock Star Stage 3 screenshot 04.png|Making a choice of vortexes to descend further | |||
K64 Rock Star Stage 3 screenshot 05.png|Battling Big Fishbone using [[Burn-Cutter]] | |||
K64 Rock Star Stage 3 screenshot 06.png|Hopping into yet another sand pit | |||
K64 Rock Star Stage 3 screenshot 07.png|Crossing a [[Snipper]] den | |||
K64 Rock Star Stage 3 screenshot 08.png|Finding pools of water in the cave | |||
K64 Rock Star Stage 3 screenshot 09.png|Emerging from a pool fed by a waterfall | |||
K64 Rock Star Stage 3 screenshot 10.png|[[Mariel]] guards the edge of the sand pit. | |||
K64 Rock Star Stage 3 screenshot 11.png|Swimming through a fully submerged portion of the cave | |||
K64 Rock Star Stage 3 screenshot 12.png|Following a line of [[Point Star]]s in the underwater cave | |||
K64 Rock Star Stage 3 screenshot 13.png|Avoiding pieces of falling fossil spine fragments | |||
K64 Rock Star Stage 3 screenshot 14.png|Reaching the exit, shaped like a dragon's mouth | |||
K64 Rock Star Stage 4 screenshot 01.png|Kirby makes his way toward the big black structure in the desert | |||
K64 Rock Star Stage 4 screenshot 02.png|Kirby crosses a gorge using a black stone bridge | |||
K64 Rock Star Stage 4 screenshot 03.png|Kirby reaches the elevator and enters the structure | |||
K64 Rock Star Stage 4 screenshot 04.png|Kirby jumps carefully to avoid the [[Wall Shotzo]]s' fire as he rides the elevator up through an inverted techno-pyramid | |||
K64 Rock Star Stage 4 screenshot 05.png|A room with shifting platform belts | |||
K64 Rock Star Stage 4 screenshot 06.png|A dark area where [[Adeleine]] looks at black screens | |||
K64 Rock Star Stage 4 screenshot 07.png|Kirby uses [[Bomb-Spark]] to reveal the clue | |||
K64 Rock Star Stage 4 screenshot 08.png|Kirby enters a room full of switches with symbols on them | |||
K64 Rock Star Stage 4 screenshot 09.png|Finding a hidden [[Maxim Tomato]] in the big platform area | |||
K64 Rock Star Stage 4 screenshot 10.png|Finding a hidden [[1-Up]] in the big platform area | |||
K64 Rock Star Stage 4 screenshot 11.png|Crossing the big platform room | |||
K64 Rock Star Stage 4 screenshot 12.png|Battle with Big [[Spark-i]] | |||
K64 Rock Star Stage 4 screenshot 13.png|Climbing wires in the final room | |||
K64 Rock Star Stage 5 screenshot 01.png|The first piece of [[Pix]] appears | |||
K64 Rock Star Stage 5 screenshot 02.png|The second appears to coordinate an attack with the first | |||
K64 Rock Star Stage 5 screenshot 03.png|The third appears to coordinate one more attack | |||
K64 Rock Star Stage 5 screenshot 04.png|Kirby battles Pix atop the pyramid | |||
K64 Rock Star Stage 5 screenshot 05.png|Pix becomes vulnerable as the atoms appear on stage | |||
K64 Rock Star Stage 5 screenshot 06.png|Pix explodes once all three pieces are disabled | |||
</gallery> | |||
====[[Aqua Star]]==== | |||
<gallery> | |||
Aqua Star K64 space.png|Aqua Star as featured in the level select | |||
K64 Aqua Star Stage 1 screenshot 01.png|Encountering an angry [[Pompey]] on the road | |||
K64 Aqua Star Stage 1 screenshot 02.png|Moving past [[Flopper]] holes | |||
K64 Aqua Star Stage 1 screenshot 03.png|Dealing with foes on platforms | |||
K64 Aqua Star Stage 1 screenshot 04.png|[[Kirby]] crosses a bridge over shallow pools in the pleasant tropical climate of Aqua Star | |||
K64 Aqua Star Stage 1 screenshot 05.png|Reaching a grotto in the cliff face | |||
K64 Aqua Star Stage 1 screenshot 06.png|[[Kany]] guards a helpful [[Zebon]] | |||
K64 Aqua Star Stage 1 screenshot 07.png|Ducking into a small pit to avoid [[Glom]] | |||
K64 Aqua Star Stage 1 screenshot 08.png|Moving past waterfalls in the caves | |||
K64 Aqua Star Stage 1 screenshot 09.png|Battle with Big [[Tick]] | |||
K64 Aqua Star Stage 1 screenshot 10.png|[[Adeleine]] paints Kirby his favorite treat | |||
K64 Aqua Star Stage 1 screenshot 11.png|Encounter with [[Zoos]] at the edge of a massive waterfall | |||
K64 Aqua Star Stage 1 screenshot 12.png|Reaching the end of the road, looking similar to the beginning | |||
K64 Aqua Star Stage 2 screenshot 01.png|Encounter with [[Poppy Bros. Jr.]] along the shallow river | |||
K64 Aqua Star Stage 2 screenshot 02.png|Crossing a log bridge guarded by [[Gordo]] and Kany | |||
K64 Aqua Star Stage 2 screenshot 03.png|Crossing a crumbling stone bridge in a cave | |||
K64 Aqua Star Stage 2 screenshot 04.png|Reaching the cave exit | |||
K64 Aqua Star Stage 2 screenshot 05.png|Fighting Big Kany in a grotto | |||
K64 Aqua Star Stage 2 screenshot 06.png|[[Waddle Dee (Kirby 64: The Crystal Shards)|Waddle Dee]] shows up with a box-boat to speed things up a bit. | |||
K64 Aqua Star Stage 2 screenshot 07.png|Dodging an obstacle by jumping the boat | |||
K64 Aqua Star Stage 2 screenshot 08.png|Kirby and Waddle Dee take a fall from their small boat. Thankfully, Kirby is his own air bag. | |||
K64 Aqua Star Stage 2 screenshot 09.png|Finding [[Invincible Candy]] further down the river | |||
K64 Aqua Star Stage 2 screenshot 10.png|Rushing through enemies without a care in the world | |||
K64 Aqua Star Stage 2 screenshot 11.png|Caught between three different foes | |||
K64 Aqua Star Stage 2 screenshot 12.png|Dodging the last set of [[Splinter]]s | |||
K64 Aqua Star Stage 3 screenshot 01.png|[[Chacha]] says do not pass. | |||
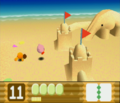
K64 Aqua Star Stage 3 screenshot 02.png|Kirby stumbles onto a sandcastle along his path on the beach | |||
K64 Aqua Star Stage 3 screenshot 03.png|Kirby works his way through the Shotzo fire on the beach front | |||
K64 Aqua Star Stage 3 screenshot 04.png|Kirby dips into the deeper waters | |||
K64 Aqua Star Stage 3 screenshot 05.png|Kirby takes a ride on a plank shot up by a water geyser | |||
K64 Aqua Star Stage 3 screenshot 06.png|A secret grotto atop the sea stack | |||
K64 Aqua Star Stage 3 screenshot 07.png|Riding a rock up a powerful geyser to exit the grotto | |||
K64 Aqua Star Stage 3 screenshot 08.png|Moving quickly to avoid being shoved into the Gordos | |||
K64 Aqua Star Stage 3 screenshot 09.png|King Dedede applies Newton's laws to help Kirby move forward | |||
K64 Aqua Star Stage 3 screenshot 10.png|Moving across precarious log platforms | |||
K64 Aqua Star Stage 3 screenshot 11.png|Reaching another sea stack grotto, though more substantial | |||
K64 Aqua Star Stage 3 screenshot 12.png|Battle with Big [[Kapar]] | |||
K64 Aqua Star Stage 3 screenshot 13.png|The Splinter platforms are not stable at all. | |||
K64 Aqua Star Stage 3 screenshot 14.png|Making the last leap toward the end of the stage | |||
K64 Aqua Star Stage 4 screenshot 01.png|Kirby dives down a deep coral reef | |||
K64 Aqua Star Stage 4 screenshot 02.png|Reaching the bottom of the reef | |||
K64 Aqua Star Stage 4 screenshot 03.png|Kirby hijacks a Flopper to help him traverse the deep waters. | |||
K64 Aqua Star Stage 4 screenshot 04.png|Swimming toward a bed with [[Pedo]]s shooting out | |||
K64 Aqua Star Stage 4 screenshot 05.png|Reaching an opening in the rock face | |||
K64 Aqua Star Stage 4 screenshot 06.png|Following tunnels with [[Point Star]]s in them | |||
K64 Aqua Star Stage 4 screenshot 07.png|Dodging the [[Turbite]]s | |||
K64 Aqua Star Stage 4 screenshot 08.png|Finding the tunnel entrance going forward | |||
K64 Aqua Star Stage 4 screenshot 09.png|Dodging [[Glunk]]s in a narrow channel | |||
K64 Aqua Star Stage 4 screenshot 10.png|Battle with Big [[Blowfish]] | |||
K64 Aqua Star Stage 4 screenshot 11.png|Swimming through a treacherous channel with boulders moving through | |||
K64 Aqua Star Stage 4 screenshot 12.png|Reaching the last exit of the stage | |||
K64 Aqua Star Stage 5 screenshot 01.png|Kirby faces off against [[Acro]]. | |||
K64 Aqua Star Stage 5 screenshot 02.png|Acro spits a [[Bonehead]] at Kirby | |||
K64 Aqua Star Stage 5 screenshot 03.png|Acro performs one of its "acrobatics" | |||
K64 Aqua Star Stage 5 screenshot 04.png|Phase 1 is concluded when Acro is presumably defeated, and the area starts to crumble. | |||
K64 Aqua Star Stage 5 screenshot 05.png|Acro returns from below and starts firing Pedos from its mouth. | |||
K64 Aqua Star Stage 5 screenshot 06.png|Kirby retaliates at Acro | |||
K64 Aqua Star Stage 5 screenshot 07.png|Acro swims down through the background after a charge | |||
</gallery> | |||
====[[Neo Star]]==== | |||
<gallery> | |||
Neo Star K64 space.png|Neo Star as shown from the level select menu | |||
K64 Neo Star Stage 1 screenshot 01.png|Taking the first steps into the jungle | |||
K64 Neo Star Stage 1 screenshot 02.png|Nabbing a sandwich above a [[spike]] pit | |||
K64 Neo Star Stage 1 screenshot 03.png|Reaching the base of the cliffs | |||
K64 Neo Star Stage 1 screenshot 04.png|[[Kirby]] climbs vines along tight cliffs in a verdant Mesozoic-like jungle | |||
K64 Neo Star Stage 1 screenshot 05.png|Climbing to the top of the cliff area | |||
K64 Neo Star Stage 1 screenshot 06.png|Swinging across vines high in the canopy | |||
K64 Neo Star Stage 1 screenshot 07.png|Riding a moving vine to collect [[Point Star]]s | |||
K64 Neo Star Stage 1 screenshot 08.png|Moving past the [[Pupa]] that guard a doorway | |||
K64 Neo Star Stage 1 screenshot 09.png|Battle with Big [[Galbo]] | |||
K64 Neo Star Stage 1 screenshot 10.png|Riding swinging log platforms | |||
K64 Neo Star Stage 1 screenshot 11.png|Finding some [[Invincible Candy]] | |||
K64 Neo Star Stage 1 screenshot 12.png|Rushing through the upper jungle cliffs | |||
K64 Neo Star Stage 1 screenshot 13.png|Reaching the final doorway of the stage | |||
K64 Neo Star Stage 2 screenshot 01.png|Kirby falls into yet another great cave | |||
K64 Neo Star Stage 2 screenshot 02.png|Kirby motions to [[Waddle Dee (Kirby 64: The Crystal Shards)|Waddle Dee]] to get in after enough pushing. | |||
K64 Neo Star Stage 2 screenshot 03.png|Spotting an obstacle on the track | |||
K64 Neo Star Stage 2 screenshot 04.png|Kirby and Waddle Dee ride the old mine cart track in the deep caves of Neo Star. | |||
K64 Neo Star Stage 2 screenshot 05.png|Another ride ending in a crash | |||
K64 Neo Star Stage 2 screenshot 06.png|Moving along the cavern floor | |||
K64 Neo Star Stage 2 screenshot 07.png|Passing a barricade with a [[Shotzo]] in it | |||
K64 Neo Star Stage 2 screenshot 08.png|Hopping along pillars, with enemies [[Drop|Dropping]] from the ceiling | |||
K64 Neo Star Stage 2 screenshot 09.png|Passing shallow pools | |||
K64 Neo Star Stage 2 screenshot 10.png|An ambush of Drops | |||
K64 Neo Star Stage 2 screenshot 11.png|Moving into the [[crusher]] area | |||
K64 Neo Star Stage 2 screenshot 12.png|Snatching the goodies along the crusher path | |||
K64 Neo Star Stage 2 screenshot 13.png|Reaching the end of the stage | |||
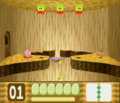
K64 Neo Star Stage 3 screenshot 01.png|The first opponent attempts to block Kirby's path. | |||
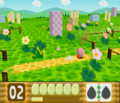
K64 Neo Star Stage 3 screenshot 02.png|[[Rocky]]s lay in wait on [[Star Block]]s. | |||
K64 Neo Star Stage 3 screenshot 03.png|Kirby drills through the foes in his way. | |||
K64 Neo Star Stage 3 screenshot 04.png|The walkway starts to break up into smaller isolated pieces. | |||
K64 Neo Star Stage 3 screenshot 05.png|The path continues high in the craggy cliffs, as the platforming becomes increasingly perilous. | |||
K64 Neo Star Stage 3 screenshot 06.png|[[Adeleine]] offers a clue on her canvas. | |||
K64 Neo Star Stage 3 screenshot 07.png|Every Star Block array has a sculpture in it, and it is Kirby's job here to find it. | |||
K64 Neo Star Stage 3 screenshot 08.png|The rocky and segmented path continues. | |||
K64 Neo Star Stage 3 screenshot 09.png|Kirby hops across impossibly-floating stacks of rock that crumble when he steps on them. | |||
K64 Neo Star Stage 3 screenshot 10.png|Reaching a taller cliff | |||
K64 Neo Star Stage 3 screenshot 11.png|Finding goodies in the small nooks in the cliff | |||
K64 Neo Star Stage 3 screenshot 12.png|KIR- | |||
K64 Neo Star Stage 3 screenshot 13.png|-BY | |||
K64 Neo Star Stage 4 screenshot 01.png|Kirby ventures straight into an active volcano. Nothing new, really. | |||
K64 Neo Star Stage 4 screenshot 02.png|Moving across the first rivers of magma | |||
K64 Neo Star Stage 4 screenshot 03.png|Aiming for a snack floating above the fiery river | |||
K64 Neo Star Stage 4 screenshot 04.png|Moving across precariously thin platforms | |||
K64 Neo Star Stage 4 screenshot 05.png|[[King Dedede]] steps in to bust some obstacles in the way. | |||
K64 Neo Star Stage 4 screenshot 06.png|King Dedede clobbers foes on the path. | |||
K64 Neo Star Stage 4 screenshot 07.png|More pillars to smash | |||
K64 Neo Star Stage 4 screenshot 08.png|King Dedede tosses Kirby forward after finishing his part of the trip. | |||
K64 Neo Star Stage 4 screenshot 09.png|Moving along bridges of rock over large lava lakes | |||
K64 Neo Star Stage 4 screenshot 10.png|More platform hopping | |||
K64 Neo Star Stage 4 screenshot 11.png|Sneaking under lavafalls | |||
K64 Neo Star Stage 4 screenshot 12.png|Fleeing from an advancing wave of molten rock | |||
K64 Neo Star Stage 4 screenshot 13.png|Entering the last caldera | |||
K64 Neo Star Stage 4 screenshot 14.png|Climbing up the stranded platforms to escape the rising heat | |||
K64 Neo Star Stage 4 screenshot 15.png|Reaching the top and safety | |||
K64 Neo Star Stage 5 screenshot 01.png|Kirby does battle with [[Magman]] to claim the last shard of the planet. | |||
K64 Neo Star Stage 5 screenshot 02.png|Kirby attacks Magman's tendrils using [[Ice-Needle]]. | |||
K64 Neo Star Stage 5 screenshot 03.png|Magman chases Kirby down to a different arena between phases. | |||
K64 Neo Star Stage 5 screenshot 04.png|Kirby attacks Magman's body using Ice-Needle. | |||
</gallery> | |||
====[[Shiver Star]]==== | |||
<gallery> | |||
K64 ShiverStar.png|Shiver Star as shown from the level selection menu | |||
K64 Shiver Star Stage 1 screenshot 01.png|Taking the first steps into the snowy landscape | |||
K64 Shiver Star Stage 1 screenshot 02.png|[[Kirby]] blasts across the tundra | |||
K64 Shiver Star Stage 1 screenshot 03.png|Caught between several different ability-providing foes | |||
K64 Shiver Star Stage 1 screenshot 04.png|Climbing a cliff while being harassed by [[Pteran]]s | |||
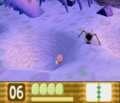
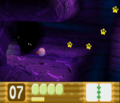
K64 Shiver Star Stage 1 screenshot 05.png|Sledding down a hill with [[Waddle Dee (Kirby 64: The Crystal Shards)|Waddle Dee]] | |||
K64 Shiver Star Stage 1 screenshot 06.png|About to run over three [[Chilly]]s | |||
K64 Shiver Star Stage 1 screenshot 07.png|Crashing into a big igloo | |||
K64 Shiver Star Stage 1 screenshot 08.png|Fight against Big Chilly | |||
K64 Shiver Star Stage 1 screenshot 09.png|Coming out of the igloo to cross a frozen pond | |||
K64 Shiver Star Stage 1 screenshot 10.png|Slipping through a crack in the ice to get at things on the water | |||
K64 Shiver Star Stage 1 screenshot 11.png|Dealing with a [[Propeller]] on the other side of the pond | |||
K64 Shiver Star Stage 1 screenshot 12.png|An unfortunate time to jump | |||
K64 Shiver Star Stage 1 screenshot 13.png|Using an elevated position to avoid [[Putt]]'s attack | |||
K64 Shiver Star Stage 1 screenshot 14.png|Dodging [[Maw]]s that come out of cracks in the ice | |||
K64 Shiver Star Stage 2 screenshot 01.png|Kirby climbs the first hill in the stage. | |||
K64 Shiver Star Stage 2 screenshot 02.png|Hopping into the [[Zebon]] up top the hill | |||
K64 Shiver Star Stage 2 screenshot 03.png|Kirby flies up into the clouds. | |||
K64 Shiver Star Stage 2 screenshot 04.png|Hopping onto the cloud walkways | |||
K64 Shiver Star Stage 2 screenshot 05.png|Moving toward a snack propped up by [[Star Block]]s | |||
K64 Shiver Star Stage 2 screenshot 06.png|Traversing small platforms in the air | |||
K64 Shiver Star Stage 2 screenshot 07.png|Facing off against Pterans | |||
K64 Shiver Star Stage 2 screenshot 08.png|Finding an interior cloud space | |||
K64 Shiver Star Stage 2 screenshot 09.png|Moving through cloud caverns | |||
K64 Shiver Star Stage 2 screenshot 10.png|Minding a [[Mopoo]] that springs from the ceiling | |||
K64 Shiver Star Stage 2 screenshot 11.png|Carefully navigating past the [[Tick]]s | |||
K64 Shiver Star Stage 2 screenshot 12.png|A Mopoo jumps over Kirby's head. | |||
K64 Shiver Star Stage 2 screenshot 13.png|Moving past the waiting [[Maw]]s | |||
K64 Shiver Star Stage 2 screenshot 14.png|Battle with Big Mopoo | |||
K64 Shiver Star Stage 3 screenshot 01.png|Kirby finds the main entrance to the enemy-filled shopping complex. | |||
K64 Shiver Star Stage 3 screenshot 02.png|A snack is spotted on the awning above the door. | |||
K64 Shiver Star Stage 3 screenshot 03.png|Kirby ascends the shopping mall escalators. | |||
K64 Shiver Star Stage 3 screenshot 04.png|Entering the first set of rooms from the elevator | |||
K64 Shiver Star Stage 3 screenshot 05.png|Passing by a [[Glom]] in another room | |||
K64 Shiver Star Stage 3 screenshot 06.png|Careful timing will be needed to pass these guys. | |||
K64 Shiver Star Stage 3 screenshot 07.png|Battle with Big [[Pupa]] | |||
K64 Shiver Star Stage 3 screenshot 08.png|[[Adeleine]] gives Kirby a hint in pictographic fashion. | |||
K64 Shiver Star Stage 3 screenshot 09.png|Kirby finds a room full of colored switches. | |||
K64 Shiver Star Stage 3 screenshot 10.png|Narrowly avoiding [[Yariko]]'s spear in another room | |||
K64 Shiver Star Stage 3 screenshot 11.png|Kirby should watch out. Those wardrobes are not stable. | |||
K64 Shiver Star Stage 3 screenshot 12.png|Swimming through a large fish tank | |||
K64 Shiver Star Stage 3 screenshot 13.png|Moving through a room full of bolts and screws | |||
K64 Shiver Star Stage 3 screenshot 14.png|Moving past [[Plugg]] in a room full of televisions | |||
K64 Shiver Star Stage 3 screenshot 15.png|Passing through the final area with [[Shotzo]]s in the middle and cover to hide behind | |||
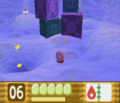
K64 Shiver Star Stage 4 screenshot 01.png|Finding a hatch opening leading into the complex | |||
K64 Shiver Star Stage 4 screenshot 02.png|Climbing down the first ladder | |||
K64 Shiver Star Stage 4 screenshot 03.png|Avoiding the [[Rockn]] that fire in this one and only location in the game | |||
K64 Shiver Star Stage 4 screenshot 04.png|Finding time between Shotzo fire to clear out the way to a [[Crystal Shard]] | |||
K64 PowerCombo.png|Kirby creating a [[Power Combo]] | |||
K64 Shiver Star Stage 4 screenshot 05.png|[[King Dedede]] steps in to pound down some shutters. | |||
K64 Shiver Star Stage 4 screenshot 06.png|Waiting between strikes from a [[Squeaky Hammer Machine]] | |||
K64 Shiver Star Stage 4 screenshot 07.png|Moving through a long conveyor portion | |||
K64 Shiver Star Stage 4 screenshot 08.png|Kirby studies the factory. | |||
K64 Shiver Star Stage 4 screenshot 09.png|Spotting strange creatures in tanks in the background | |||
K64 Shiver Star Stage 4 screenshot 10.png|Nearing the end of the area | |||
K64 Shiver Star Stage 4 screenshot 11.png|Battle with Big [[Burnis]] | |||
K64 Shiver Star Stage 4 screenshot 12.png|Approaching one of the most dangerous areas of the factory | |||
K64 Shiver Star Stage 4 screenshot 13.png|Moving through the last of the crushers | |||
K64 Shiver Star Stage 4 screenshot 14.png|Entering the final room, where Plugg waltzes in | |||
K64 Shiver Star Stage 4 screenshot 15.png|Running from a bulldozing robot | |||
K64 Shiver Star Stage 4 screenshot 16.png|Reaching the end of the factory tour | |||
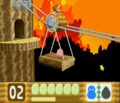
K64 Shiver Star Stage 5 screenshot 01.png|[[HR-H]] appears on the scene to dispose of the pink threat. | |||
K64 Shiver Star Stage 5 screenshot 02.png|HR-H firing missiles | |||
K64 Shiver Star Stage 5 screenshot 03.png|HR-H using its laser attack | |||
K64 Shiver Star Stage 5 screenshot 04.png|HR-H using its pound attack | |||
K64 Shiver Star Stage 5 screenshot 05.png|HR-H swiping with its left arm | |||
K64 Shiver Star Stage 5 screenshot 06.png|HR-E on the move | |||
K64 Shiver Star Stage 5 screenshot 07.png|HR-E using its claws | |||
K64 Shiver Star Stage 5 screenshot 08.png|HR-E firing a low-flying rocket | |||
</gallery> | |||
====[[Ripple Star]]==== | |||
<gallery> | |||
Ripple Star K64 space.png|Ripple Star as shown from the level selection menu | |||
K64 Ripple Star Stage 1 screenshot 01.png|[[Kirby]] swallows a snack at the start of the path. | |||
K64 Ripple Star Stage 1 screenshot 02.png|Kirby walks a path through a colorful plain that is familiar in layout. | |||
K64 Ripple Star Stage 1 screenshot 03.png|Nabbing a [[Maxim Tomato]] in front of a fancy building | |||
K64 Ripple Star Stage 1 screenshot 04.png|Battle with Big [[Sawyer]] | |||
K64 Ripple Star Stage 1 screenshot 05.png|Exiting the building | |||
K64 Ripple Star Stage 1 screenshot 06.png|Leaping over blocks interspersed with Shotzos | |||
K64 Ripple Star Stage 2 screenshot 01.png|Kirby approaches the eerie palace swathed in darkness. | |||
K64 Ripple Star Stage 2 screenshot 02.png|[[Waddle Dee (Kirby 64: The Crystal Shards)|Waddle Dee]] points the way forward. | |||
K64 Ripple Star Stage 2 screenshot 03.png|Kirby dives into the sewer system of Ripple Star's palace to gain entry. | |||
K64 Ripple Star Stage 2 screenshot 04.png|Kirby swims through the underwater channels beneath the palace. | |||
K64 Ripple Star Stage 2 screenshot 05.png|[[King Dedede]] shows up to clear out a cave-in. | |||
K64 Ripple Star Stage 2 screenshot 06.png|Kirby can progress thanks to Dedede's efforts. | |||
K64 Ripple Star Stage 2 screenshot 07.png|Spotting a Maxim Tomato in a separate chamber | |||
K64 Ripple Star Stage 2 screenshot 08.png|Swimming through more underwater channels | |||
K64 Ripple Star Stage 2 screenshot 09.png|[[Adeleine]] paints an Invincible Candy for Kirby to make use of. | |||
K64 Ripple Star Stage 2 screenshot 10.png|Kirby rushes through the [[Star Block]]s ahead using his invincibility. | |||
K64 Ripple Star Stage 2 screenshot 11.png|An elevator is found connecting to the palace interior. | |||
K64 Ripple Star Stage 3 screenshot 01.png|The first room Kirby finds himself in after riding the elevator from Stage 2 | |||
K64 Ripple Star Stage 3 screenshot 02.png|The first enemy ambush | |||
K64 Ripple Star Stage 3 screenshot 03.png|The base of the tree stairway | |||
K64 Ripple Star Stage 3 screenshot 04.png|The second enemy ambush | |||
K64 Ripple Star Stage 3 screenshot 05.png|The second portion of the tree stairway | |||
K64 Ripple Star Stage 3 screenshot 06.png|The third enemy ambush | |||
K64 Ripple Star Stage 3 screenshot 07.png|The third portion of the tree stairway | |||
K64 Ripple Star Stage 3 screenshot 08.png|The fourth enemy ambush | |||
K64 Ripple Star Stage 3 screenshot 09.png|The fourth and final portion of the tree stairway | |||
K64 Ripple Star Stage 3 screenshot 10.png|The last enemy ambush | |||
K64 Ripple Star Stage 3 screenshot 11.png|Kirby reaches the top of the palace and approaches the menacing darkness | |||
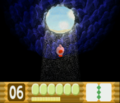
K64 Ripple Star Stage 4 screenshot 01.png|The [[Miracle Matter|sinister polygonal]] foe who rules over Ripple Star - in its default appearance | |||
K64 Ripple Star Stage 4 screenshot 02.png|Miracle Matter uses his Bomb form against Kirby. | |||
K64 Ripple Star Stage 4 screenshot 03.png|Miracle Matter uses his Cutter form against Kirby. | |||
K64 Ripple Star Stage 4 screenshot 04.png|Miracle Matter uses his Stone form against Kirby. | |||
K64 Ripple Star Stage 4 screenshot 05.png|Miracle Matter uses his Ice form against Kirby. | |||
K64 Ripple Star Stage 4 screenshot 06.png|Miracle Matter uses his Spark form against Kirby. | |||
K64 Ripple Star Stage 4 screenshot 07.png|Miracle Matter uses his Needle form against Kirby. | |||
K64 Ripple Star Stage 4 screenshot 08.png|Miracle Matter uses his Burn form against Kirby. | |||
K64 Ripple Star Stage 4 screenshot 09.png|Miracle Matter defeated after it runs out of forms to use | |||
</gallery> | |||
====[[Dark Star]]==== | |||
<gallery> | |||
Dark Star K64 space.png|Dark Star as shown from the level selection | |||
K64 Dark Star screenshot 01.png|Taking the first steps on the translucent platforms inside Dark Star | |||
K64 Dark Star screenshot 02.png|Waddle Dee busts a hole in the floor to allow Kirby to progress. | |||
K64 Dark Star screenshot 03.png|Adeleine paints Kirby a Maxim Tomato for the fight ahead. | |||
K64 Dark Star screenshot 04.png|King Dedede gives Kirby the last boost he needs to launch him into the final encounter. | |||
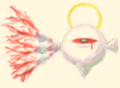
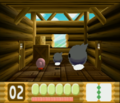
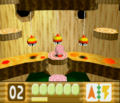
K64 Dark Star screenshot 05.png|[[0²]]'s less threatening initial face, before fighting begins | |||
K64 Dark Star screenshot 06.png|The Dark Star is held together and supplied by 0², the monster at its core. | |||
K64 Dark Star screenshot 07.png|Attacking 0²'s halo while it is stunned | |||
K64 Dark Star screenshot 08.png|0²'s weak point is exposed. | |||
K64 Dark Star screenshot 09.png|Taking out 0²'s wings to reduce its mobility | |||
K64 Dark Star screenshot 10.png|Attacking 0²'s weak point | |||
K64 Dark Star screenshot 11.png|0² is defeated. | |||
</gallery> | |||
==Promotional material== | |||
<gallery> | |||
K64 Bonus Game promotional artwork.jpg|Promotional artwork featuring the [[Bonus Game]] | |||
K64 Memory Match web game.png|Promotional memory match ShockWave web game from Cartoon Network | |||
</gallery> | |||
==Audio== | |||
===Main stage themes=== | |||
<gallery> | |||
K64 Pop Star Theme.mp3|[[Planet Popstar (theme from Kirby 64: The Crystal Shards)|Planet Popstar]] | |||
K64 Quiet Forest theme.mp3|[[Quiet Forest]] | |||
K64 Inside The Castle theme.mp3|[[The Last Iceberg|Inside the Castle]] | |||
K64 Rock Star theme.mp3|[[Rock Star (theme)|Rock Star]] | |||
K64 Ruins Theme Cut.oga|[[Ruins]] | |||
K64 Inside the Ruins theme.mp3|[[Inside the Ruins]] | |||
K64 Aqua Star theme.mp3|[[Aqua Star (theme)|Aqua Star]] | |||
K64 Down the Mountain Stream.mp3|[[Grass Land (1)|Down the Mountain Stream]] | |||
K64 Neo Star theme.mp3|[[Neo Star (theme)|Neo Star]] | |||
K64 Shiver Star theme.mp3|[[Shiver Star (theme)|Shiver Star]] | |||
Butter Building K64.oga|[[Butter Building (theme)|Above the Clouds]] | |||
K64 Studying the Factory Sample.mp3|[[Studying the Factory]] | |||
K64 Ripple Star Catacombs.mp3|[[Catacombs]] | |||
K64 Ripple Star theme.mp3|[[Ripple Star (theme)|Ripple Star]] | |||
K64 Dark Star theme.mp3|[[Heading for 0²]] | |||
</gallery> | |||
===Boss themes=== | |||
<gallery> | |||
Room Guarder K64.mp3|[[Room Guarder]] | |||
K64 Battle with Friends Waddle Dee.mp3|[[Battle with Friends: Waddle Dee]] | |||
K64 Adeleine Battle Theme.mp3|[[Battle with Friends: Adeleine]] | |||
K64 Battle with Friends 3 - vs. King Dedede.mp3|[[Battle with Friends: King Dedede]] | |||
K64 Boss theme.mp3|[[Boss (theme from Kirby 64: The Crystal Shards)|Boss]] | |||
K64 Miracle Matter theme.mp3|[[Miracle Matter (theme)|Miracle Matter]] | |||
K64 02 Battle.oga|[[0² Battle]] | |||
</gallery> | </gallery> | ||
===Menu and select themes=== | |||
<gallery> | |||
K64 Select Screen.mp3|[[Select Screen]] | |||
K64 Pop Star Stage Select.mp3|[[Pop Star: Stage Select]] | |||
K64 Rock Star Stage Select theme.mp3|[[Rock Star: Stage Select]] | |||
K64 Aqua Star Stage Select theme.mp3|[[Aqua Star: Stage Select]] | |||
K64 Neo Star Stage Select theme.mp3|[[Neo Star: Stage Select]] | |||
K64 Shiver Star Stage Select theme.mp3|[[Shiver Star: Stage Select]] | |||
K64 Ripple Star Select Sample.oga|[[Ripple Star: Stage Select]] | |||
K64 Entrance Sample.mp3|[[Entrance|Enemy Info]] | |||
K64 Sub Game Menu.mp3|[[Sub-Game Menu (theme from Kirby 64: The Crystal Shards)|Sub-Game Menu]] | |||
K64 Theater sample.mp3|[[Friends (2)|Theater]] | |||
</gallery> | |||
===Sub-Game themes=== | |||
<gallery> | |||
Gourmet Race K64.oga|[[Gourmet Race (theme)|100-Yard Hop]] | |||
K64 Bumper Crop Bump.mp3|[[Bumper Crop Bump (theme)|Bumper Crop Bump]] | |||
K64 Checkerboard Chase.mp3|[[Checkerboard Chase (theme)|Checkerboard Chase]] | |||
</gallery> | |||
===Special themes=== | |||
<gallery> | |||
Training K64.mp3|[[Training (theme)|Training]] | |||
K64 Game Over.mp3|[[Game Over (themes)|Game Over]] | |||
K64 Goal Game theme.mp3|[[Sparkling Stars (theme)|Bonus Game]] | |||
K64 Invincible.mp3|[[Invincible Candy (theme from Kirby 64: The Crystal Shards)|Invincible Candy]] | |||
K64 Art Attack Sample.oga|[[Art Attack]] | |||
K64 Project K64.mp3|[[Project K-64]] | |||
Kirby voice sample - K64.mp3|A sample of [[Kirby's voice]] | |||
</gallery> | |||
===Unused=== | |||
<gallery> | |||
K64 Kirby Dance Long.mp3|[[Kirby Dance (theme)|Kirby Dance]] (long) | |||
K64 Kirby Dance Short.mp3|Kirby Dance (short) | |||
</gallery> | |||
{{ref}} | |||
{{Navbox-Galleries}} | |||
{{Navbox-K64}} | |||
[[Category:Galleries]] | [[Category:Galleries]] | ||
Latest revision as of 21:33, 29 April 2024
This is a gallery of images relating to Kirby 64: The Crystal Shards.
Boxarts and logos[edit]
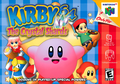
North American box art
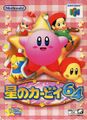
Japanese box art
Logo


Artwork[edit]
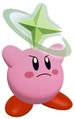
Main characters[edit]

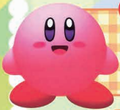
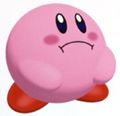
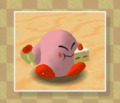
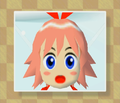
Kirby
Kirby

Kirby
Kirby
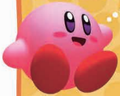
Kirby
Kirby
Kirby sitting
Kirby sitting
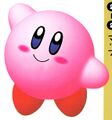
Kirby walking
Kirby running

Kirby jumping

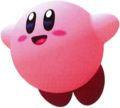
Kirby flying
Kirby ducking
Kirby performing a Slide
Kirby jumping down through a thin floor
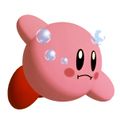
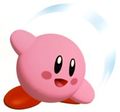
Kirby swimming
Kirby inhaling
Kirby swallowing
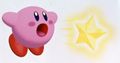
Kirby spitting out a Star Bullet
Kirby performing a throw
Kirby holding a Bronto Burt
Kirby throwing a Bronto Burt
Kirby holding a Power Star

Kirby throwing a Power Star
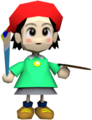
Ribbon holding a Crystal Shard
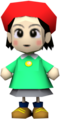
Ribbon
Ribbon
Ribbon holding a Crystal Shard
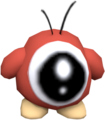
Waddle Dee
Waddle Dee
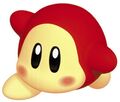
Waddle Dee
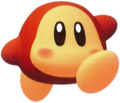
Waddle Dee
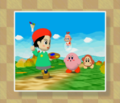
Kirby and Waddle Dee
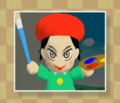
Adeleine
Adeleine
Adeleine
Adeleine
King Dedede
King Dedede

King Dedede

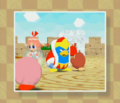
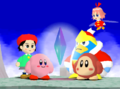
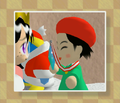
King Dedede and Kirby
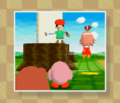
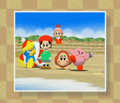
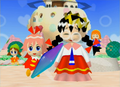
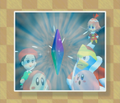
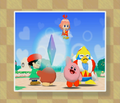
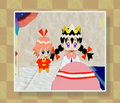
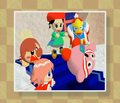
Group artwork


Regular Powers[edit]


Power Combos[edit]


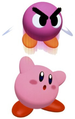
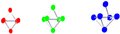
Enemies[edit]
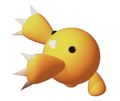
Blowfish

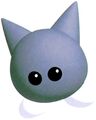
Chacha
Emp
Mite
N-Z

Yariko


Bosses[edit]
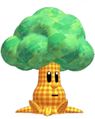
Whispy Woods
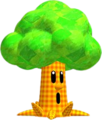
Whispy Woods

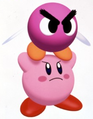
HR-H
HR-E


Scenes[edit]
Wallpaper
Wallpaper
Wallpaper
Wallpaper


Credits art[edit]
Sketches[edit]
0² sketch
Adeleine sketch
Crystal sketch
Sketch of I³, Ghost Knight, Maw, and Mumbies

Dark Matter sketch
Sketch of the fairies
Flora sketch
HR-H sketch
Sketch of 1-Up, Invincible Candy, and Maxim Tomato
King Dedede sketch
Kirby sketch
Sketch of the inside of a sea creature's mouth

Pix sketch
Pop Star sketch
Sketch of the Ripple Star Queen at her bathroom mirror
Ribbon sketch
Waddle Dee sketch

Whispy Woods Jr. sketch


Illustrations[edit]
0² illustration
Adeleine illustration
Crystal illustration
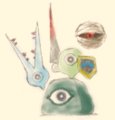
Illustration of I³, Ghost Knight, Maw, and Mumbies

Dark Matter illustration
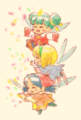
Illustration of the fairies
Flora illustration
Illustration of Glom
HR-H illustration

Illustration of 1-Up, Invincible Candy, and Maxim Tomato
King Dedede illustration

Kirby illustration
Illustration of the inside of a sea creature's mouth
Pix illustration
Pop Star illustration
Illustration of the Ripple Star Queen at her bathroom mirror
Ribbon illustration
Waddle Dee illustration

Whispy Woods Jr. illustration


Concept art[edit]
Concept art of a grass land
Concept art of laboratory disproportionate to Kirby's size
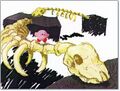
Concept art of Kirby crossing a skeleton drawbridge
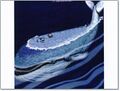
Concept art of a whale with Kirby on it
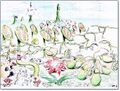
Concept art of field with variety of plants
Concept art of Kirby climbing a spider web
Concept art of Kirby amidst a meteor shower


Icons[edit]
Enemy Info Card icons[edit]


Regular Powers[edit]


Ability Combos[edit]


Models[edit]
In-game models[edit]

Stone-Cutter statue of Rick

Stone-Cutter statue of Kine

Stone-Cutter statue of Nago

Stone-Cutter statue of ChuChu

Stone-Cutter statue of Pitch


Data-rendered models[edit]
Main and supporting characters[edit]
Ribbon (low-poly)
Ribbon (lower-poly)
Ribbon (lowest-poly)
Adeleine (high-poly)
Adeleine
Adeleine (low-poly)
Adeleine (lower-poly)
Adeleine (lowest poly)

King Dedede (low-poly)


Enemies[edit]

Glom about to appear from its hole


Bosses[edit]
Waddle Doo (low-poly)

Pix with its blades out
Pix upon defeat
Pix's projectiles


Items[edit]


Other[edit]
Waddle Dee's boat
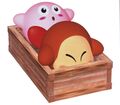
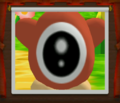
![Dark Matter's model in the cutscene where it is expelled from Waddle Dee's body. The eye is normally not visible in-game.[1]](https://cdn.wikirby.com/thumb/d/d2/K64_Early_Dark_Matter_model.png/120px-K64_Early_Dark_Matter_model.png)
Dark Matter's model in the cutscene where it is expelled from Waddle Dee's body. The eye is normally not visible in-game.[1]

![Dark Matter's model in the cutscene where it is expelled from Waddle Dee's body. The eye is normally not visible in-game.[1]](/wiki/File:K64_Early_Dark_Matter_model.png)
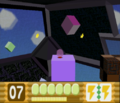
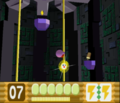
Screenshots[edit]

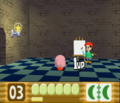
Cutscenes[edit]
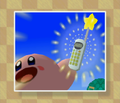
Ribbon's escape
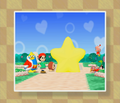
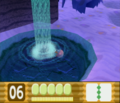
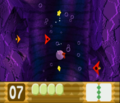
Kirby finding the first Crystal Shard
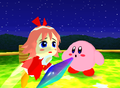
Kirby and Ribbon combining their shards into one
Ribbon, explaining her trouble to Kirby
Kirby pledging to help Ribbon
Waddle Dee being stalked by Dark Matter
Kirby and Ribbon stumbling onto Waddle Dee being possessed
Waddle Dee being transformed into Waddle Doo
Kirby inviting the freed Waddle Dee to join him on the adventure
Adeleine finding a Crystal Shard in a cutscene

Adeleine being marauded by Dark Matter
Kirby and friends encountering Adeleine, who is acting strangely
Adeleine becoming hostile after her possession
Adeleine joining Kirby's team after being returned to normal
King Dedede finding a Crystal Shard

King Dedede stopping Kirby from collecting the shard
Kirby and King Dedede arguing over the shard
King Dedede being possessed by Dark Matter
King Dedede recovering from his possession
Waddle Dee trying to convince King Dedede to come with them
King Dedede giving into guilty feelings, resulting in him joining the team
Portal opening to Rock Star after completing the Pop Star level
Kirby starts to lag behind the group due to hunger.
Kirby's vision skews in his hunger, seeing his friends as food.
Kirby is fed by Adeleine's magic paintings.
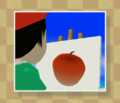
Adeleine paints an apple on her canvas which turns into the real fruit.
The portal to Aqua Star opens.
The team looks out to sea.

Adeleine starts tossing rocks into the water, prompting the others to do the same.
Kirby winds up a toss, while the others spot something coming.
Kirby blindly finishes his toss as a big wave rolls in to wash him away.
Kirby is washed ashore as the others jump into the portal to the next world.
Kirby and his friends gathering around the partially-completed crystal
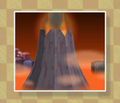
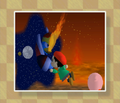
A nearby volcano erupts on Neo Star, putting the group in danger.
King Dedede helps Adeleine into the portal to Shiver Star.
Kirby uses his inhale to extract Waddle Dee through the portal.
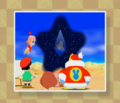
The portal begins to open to Ripple Star.
Ribbon is appalled to see the state of her home world.
Ripple Star is shown utterly swarmed by Dark Matter.

Kirby attempts to lead the charge into the portal, but trips.
Ribbon carries Kirby through the portal after he is trampled accidentally by his friends.
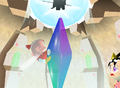
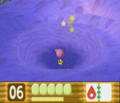
The Queen
The crystal radiates power to chase Dark Matter out of Ripple Star.
The shroud of darkness recedes from Ripple Star's skies.
The dark cloud recedes from the planet.
The Dark Matter previously menacing Ripple Star explodes out in space.
Kirby and his team celebrate their victory.
The crystal shoots the Queen with a beam, dispelling the Dark Matter inside her.
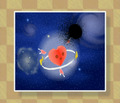
The dark matter from the queen recedes to space and turns into Dark Star.
Ribbon grows concerned over the growing darkness.
Kirby pulls out his Cell Phone from hammerspace.
Kirby calls the Warp Star to ferry him and his friends to Dark Star.
Kirby waves to the fairies as he and his team head to the final encounter.
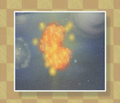
Dark Star is destroyed after 0² is defeated.
Kirby and his team escape as Dark Star explodes.
Celebrations commence back in Ripple Star.
Kirby's team are formally honored by the Queen for their heroic deeds.
King Dedede stoically receives his medal.
Adeleine admires her medal.
Kirby receives his medal.
Ribbon gives Kirby a gentle kiss on the head as an additional reward.
Kirby stumbles down the stairs of the palace in his infatuated stupor, ending the scene on this freeze-frame.


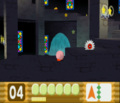
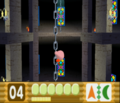
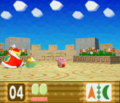
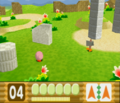
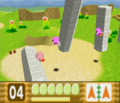
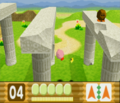
Stages[edit]
Pop Star[edit]
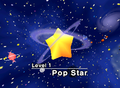
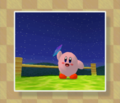
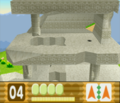
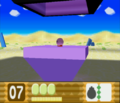
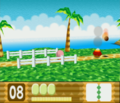
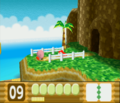
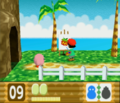
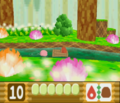
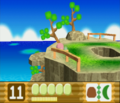
Pop Star as seen from the level select
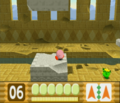
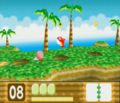
A new adventure begins for Kirby, now with half of the third dimension
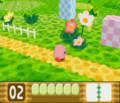
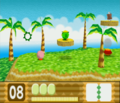
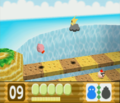
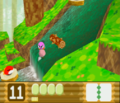
A river crossing guarded by two landlocked Glunks
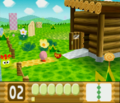
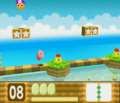
Finding a tasty snack in front of the wooden shed
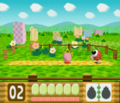
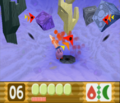
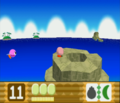
Battle with Big N-Z
Crossing blocks and Shotzos
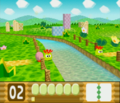
Moving through another shallow waterway
Reaching a fenced enclosure
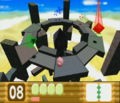
Battle with Waddle Doo
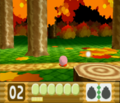
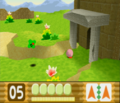
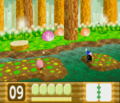
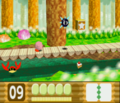
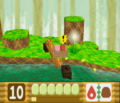
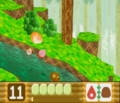
Kirby enters the autumnal woods
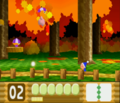
Kirby takes a Bumber sailing through the autumnal woods
Reaching a large hollow tree
Climbing the inside of the hollow tree
Waddle Dee gives Kirby a ride on his gondola
Kirby and Waddle Dee reach the other side
Finding a large hole to dive into in another hollow tree
Taking a moment to nab some extra goodies
Battle with Big Bouncy
Kirby battles Adeleine's minor painted minions
Battle with the Ice Dragon drawing
Battle with the Dark Matter painting
Adeleine runs out of paint and other options
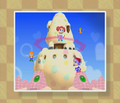
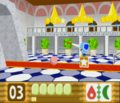
Starting outside the castle
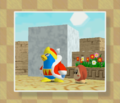
Kirby crosses the drawbridge into King Dedede's castle with a flaming sword
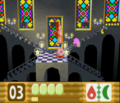
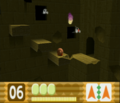
Entering the main castle hall
Taking a moving platform inside the castle
Reaching a narrow tower interior
Running along the castle walls
Getting a 1-Up from Adeleine
Running up the spiraling castle interior
Climbing chains inside the castle
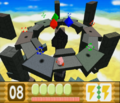
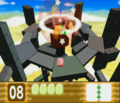
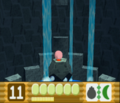
Battle with King Dedede, in phase 1

Battle with King Dedede, in phase 2
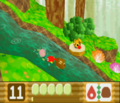
Kirby battles with Whispy Woods and his children
Whispy attacking in the second phase of the battle
Whispy Woods is defeated


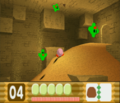
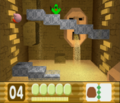
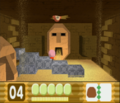
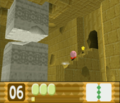
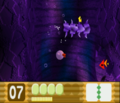
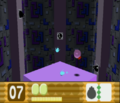
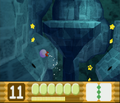
Rock Star[edit]
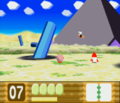
Rock Star as shown from the level selection
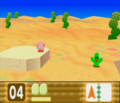
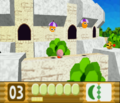
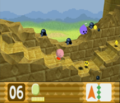
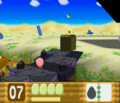
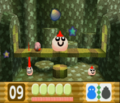
Finding a lone Kacti out in the desert
Kirby Swiss army knifes his way through the arid desert regions.
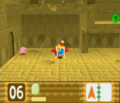
Entering the Kabu-faced ruins
Moving past I³ in the ruins
Battle with Big Kacti
Moving quickly to escape a room filling with sand
Waddle Dee busts a hole in the ceiling (somehow)
Hopping over the one green hill in the desert
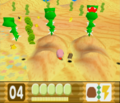
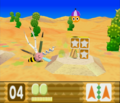
Grabbing a snack between the Gobblins
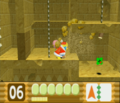
Kirby is met by the Hack guarding the pillars
Kirby traverses pillars that fall in his vicinity
Kirby spots the Rocky that is looking to drop on him
Kirby falls through a fragile floor in the ruins
Kirby makes his way to a more substantial structure
Kirby dodges the Noos' fire
Kirby should not linger here for long
Moving past the last rising platform
Traversing the battlements
King Dedede appears and offers Kirby a lift
King Dedede gives Kirby a lift and takes the lead in the ruins
King Dedede reaches the last doorway
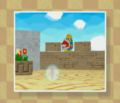
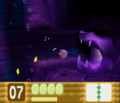
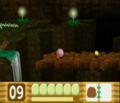
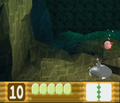
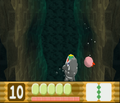
Kirby hops down a hole into the cave, as he frequently does

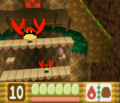
Kirby finds a trio of Bos guarding a massive fossil in a big cavernous region.
Finding a sand vortex leading further down
Making a choice of vortexes to descend further
Battling Big Fishbone using Burn-Cutter
Hopping into yet another sand pit
Crossing a Snipper den
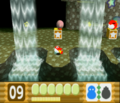
Finding pools of water in the cave
Emerging from a pool fed by a waterfall
Mariel guards the edge of the sand pit.
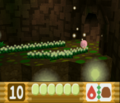
Swimming through a fully submerged portion of the cave
Following a line of Point Stars in the underwater cave
Avoiding pieces of falling fossil spine fragments
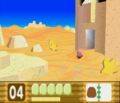
Reaching the exit, shaped like a dragon's mouth
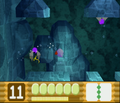
Kirby makes his way toward the big black structure in the desert
Kirby crosses a gorge using a black stone bridge
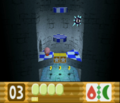
Kirby reaches the elevator and enters the structure
Kirby jumps carefully to avoid the Wall Shotzos' fire as he rides the elevator up through an inverted techno-pyramid
A room with shifting platform belts
A dark area where Adeleine looks at black screens
Kirby uses Bomb-Spark to reveal the clue
Kirby enters a room full of switches with symbols on them
Finding a hidden Maxim Tomato in the big platform area
Finding a hidden 1-Up in the big platform area
Crossing the big platform room

Battle with Big Spark-i
Climbing wires in the final room
The first piece of Pix appears

The second appears to coordinate an attack with the first
The third appears to coordinate one more attack
Kirby battles Pix atop the pyramid
Pix becomes vulnerable as the atoms appear on stage
Pix explodes once all three pieces are disabled


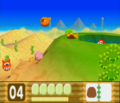
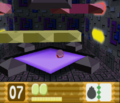
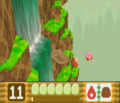
Aqua Star[edit]
Aqua Star as featured in the level select
Encountering an angry Pompey on the road
Moving past Flopper holes
Dealing with foes on platforms
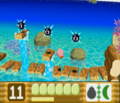
Kirby crosses a bridge over shallow pools in the pleasant tropical climate of Aqua Star
Reaching a grotto in the cliff face
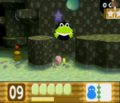
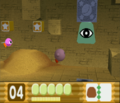
Ducking into a small pit to avoid Glom
Moving past waterfalls in the caves
Battle with Big Tick
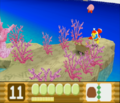
Adeleine paints Kirby his favorite treat
Encounter with Zoos at the edge of a massive waterfall
Reaching the end of the road, looking similar to the beginning
Encounter with Poppy Bros. Jr. along the shallow river
Crossing a log bridge guarded by Gordo and Kany
Crossing a crumbling stone bridge in a cave
Reaching the cave exit
Fighting Big Kany in a grotto
Waddle Dee shows up with a box-boat to speed things up a bit.
Dodging an obstacle by jumping the boat
Kirby and Waddle Dee take a fall from their small boat. Thankfully, Kirby is his own air bag.
Finding Invincible Candy further down the river
Rushing through enemies without a care in the world
Caught between three different foes
Dodging the last set of Splinters
Chacha says do not pass.
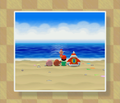
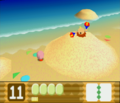
Kirby stumbles onto a sandcastle along his path on the beach
Kirby works his way through the Shotzo fire on the beach front
Kirby dips into the deeper waters
Kirby takes a ride on a plank shot up by a water geyser
A secret grotto atop the sea stack
Riding a rock up a powerful geyser to exit the grotto
Moving quickly to avoid being shoved into the Gordos
King Dedede applies Newton's laws to help Kirby move forward

Moving across precarious log platforms
Reaching another sea stack grotto, though more substantial
Battle with Big Kapar

The Splinter platforms are not stable at all.
Making the last leap toward the end of the stage
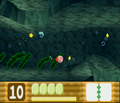
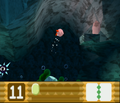
Kirby dives down a deep coral reef
Reaching the bottom of the reef
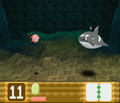
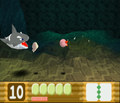
Kirby hijacks a Flopper to help him traverse the deep waters.
Swimming toward a bed with Pedos shooting out
Reaching an opening in the rock face
Following tunnels with Point Stars in them
Dodging the Turbites
Finding the tunnel entrance going forward
Dodging Glunks in a narrow channel

Battle with Big Blowfish
Swimming through a treacherous channel with boulders moving through
Reaching the last exit of the stage
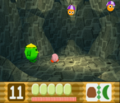
Kirby faces off against Acro.
Acro spits a Bonehead at Kirby
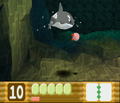
Acro performs one of its "acrobatics"
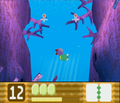
Phase 1 is concluded when Acro is presumably defeated, and the area starts to crumble.
Acro returns from below and starts firing Pedos from its mouth.
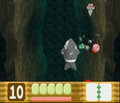
Kirby retaliates at Acro
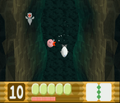
Acro swims down through the background after a charge


Neo Star[edit]
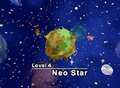
Neo Star as shown from the level select menu
Taking the first steps into the jungle
Nabbing a sandwich above a spike pit
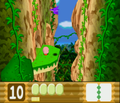
Reaching the base of the cliffs
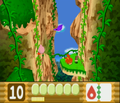
Kirby climbs vines along tight cliffs in a verdant Mesozoic-like jungle
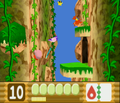
Climbing to the top of the cliff area
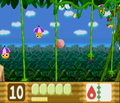
Swinging across vines high in the canopy
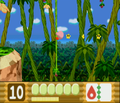
Riding a moving vine to collect Point Stars
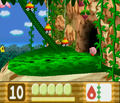
Moving past the Pupa that guard a doorway
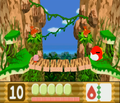
Battle with Big Galbo
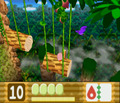
Riding swinging log platforms

Finding some Invincible Candy
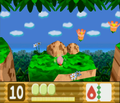
Rushing through the upper jungle cliffs
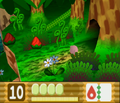
Reaching the final doorway of the stage
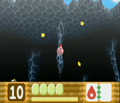
Kirby falls into yet another great cave
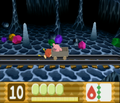
Kirby motions to Waddle Dee to get in after enough pushing.
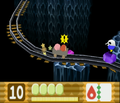
Spotting an obstacle on the track
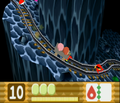
Kirby and Waddle Dee ride the old mine cart track in the deep caves of Neo Star.
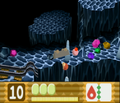
Another ride ending in a crash
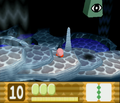
Moving along the cavern floor
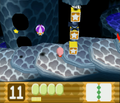
Passing a barricade with a Shotzo in it
Hopping along pillars, with enemies Dropping from the ceiling
Passing shallow pools
An ambush of Drops
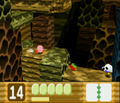
Moving into the crusher area
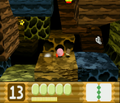
Snatching the goodies along the crusher path
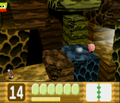
Reaching the end of the stage
The first opponent attempts to block Kirby's path.
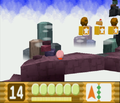
Rockys lay in wait on Star Blocks.
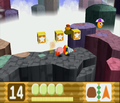
Kirby drills through the foes in his way.
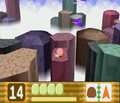
The walkway starts to break up into smaller isolated pieces.
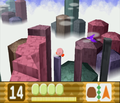
The path continues high in the craggy cliffs, as the platforming becomes increasingly perilous.
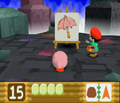
Adeleine offers a clue on her canvas.
Every Star Block array has a sculpture in it, and it is Kirby's job here to find it.
The rocky and segmented path continues.
Kirby hops across impossibly-floating stacks of rock that crumble when he steps on them.
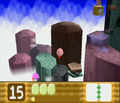
Reaching a taller cliff
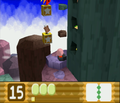
Finding goodies in the small nooks in the cliff
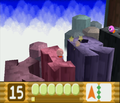
KIR-
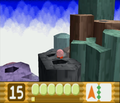
-BY
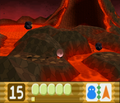
Kirby ventures straight into an active volcano. Nothing new, really.
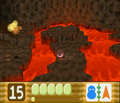
Moving across the first rivers of magma
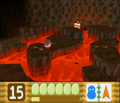
Aiming for a snack floating above the fiery river
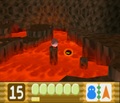
Moving across precariously thin platforms
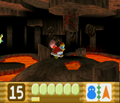
King Dedede steps in to bust some obstacles in the way.
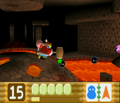
King Dedede clobbers foes on the path.
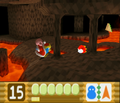
More pillars to smash
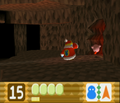
King Dedede tosses Kirby forward after finishing his part of the trip.
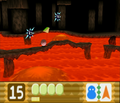
Moving along bridges of rock over large lava lakes
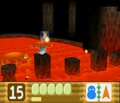
More platform hopping
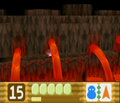
Sneaking under lavafalls
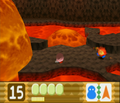
Fleeing from an advancing wave of molten rock
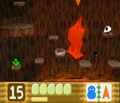
Entering the last caldera

Climbing up the stranded platforms to escape the rising heat
Reaching the top and safety
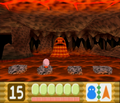
Kirby does battle with Magman to claim the last shard of the planet.
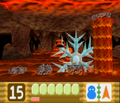
Kirby attacks Magman's tendrils using Ice-Needle.

Magman chases Kirby down to a different arena between phases.
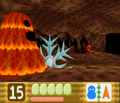
Kirby attacks Magman's body using Ice-Needle.


Shiver Star[edit]
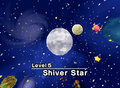
Shiver Star as shown from the level selection menu
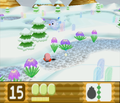
Taking the first steps into the snowy landscape
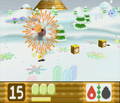
Kirby blasts across the tundra
Caught between several different ability-providing foes
Climbing a cliff while being harassed by Pterans
Sledding down a hill with Waddle Dee
About to run over three Chillys
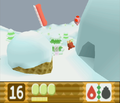
Crashing into a big igloo
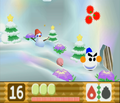
Fight against Big Chilly
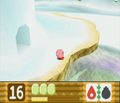
Coming out of the igloo to cross a frozen pond
Slipping through a crack in the ice to get at things on the water
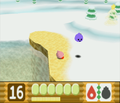
Dealing with a Propeller on the other side of the pond
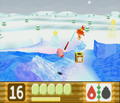
An unfortunate time to jump
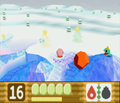
Using an elevated position to avoid Putt's attack
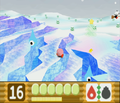
Dodging Maws that come out of cracks in the ice

Kirby climbs the first hill in the stage.
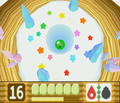
Hopping into the Zebon up top the hill
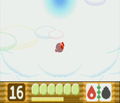
Kirby flies up into the clouds.
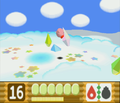
Hopping onto the cloud walkways

Moving toward a snack propped up by Star Blocks
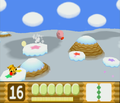
Traversing small platforms in the air
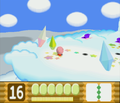
Facing off against Pterans
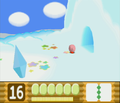
Finding an interior cloud space
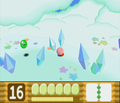
Moving through cloud caverns
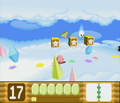
Minding a Mopoo that springs from the ceiling
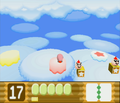
Carefully navigating past the Ticks

A Mopoo jumps over Kirby's head.
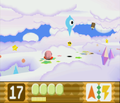
Moving past the waiting Maws
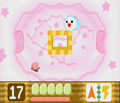
Battle with Big Mopoo
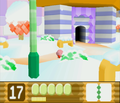
Kirby finds the main entrance to the enemy-filled shopping complex.
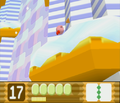
A snack is spotted on the awning above the door.
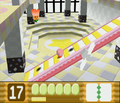
Kirby ascends the shopping mall escalators.
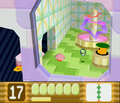
Entering the first set of rooms from the elevator
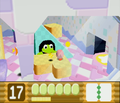
Passing by a Glom in another room
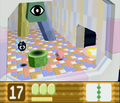
Careful timing will be needed to pass these guys.
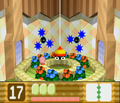
Battle with Big Pupa
Adeleine gives Kirby a hint in pictographic fashion.
Kirby finds a room full of colored switches.
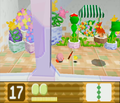
Narrowly avoiding Yariko's spear in another room
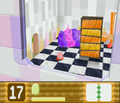
Kirby should watch out. Those wardrobes are not stable.
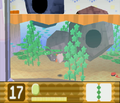
Swimming through a large fish tank
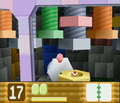
Moving through a room full of bolts and screws
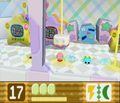
Moving past Plugg in a room full of televisions

Passing through the final area with Shotzos in the middle and cover to hide behind
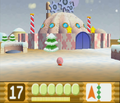
Finding a hatch opening leading into the complex

Climbing down the first ladder
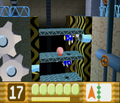
Avoiding the Rockn that fire in this one and only location in the game
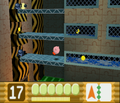
Finding time between Shotzo fire to clear out the way to a Crystal Shard
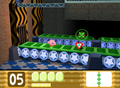
Kirby creating a Power Combo
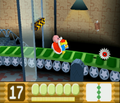
King Dedede steps in to pound down some shutters.
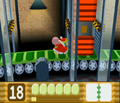
Waiting between strikes from a Squeaky Hammer Machine
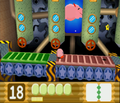
Moving through a long conveyor portion
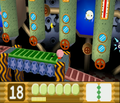
Kirby studies the factory.
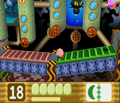
Spotting strange creatures in tanks in the background
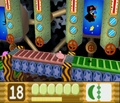
Nearing the end of the area
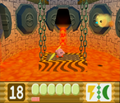
Battle with Big Burnis
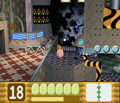
Approaching one of the most dangerous areas of the factory
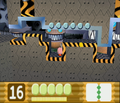
Moving through the last of the crushers
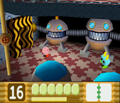
Entering the final room, where Plugg waltzes in
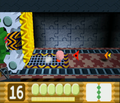
Running from a bulldozing robot
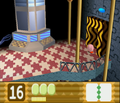
Reaching the end of the factory tour
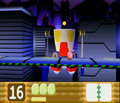
HR-H appears on the scene to dispose of the pink threat.
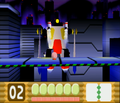
HR-H firing missiles
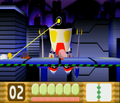
HR-H using its laser attack
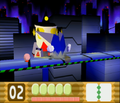
HR-H using its pound attack
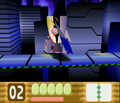
HR-H swiping with its left arm
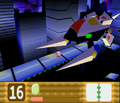
HR-E on the move
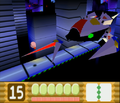
HR-E using its claws
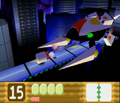
HR-E firing a low-flying rocket


Ripple Star[edit]
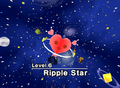
Ripple Star as shown from the level selection menu
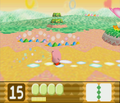
Kirby swallows a snack at the start of the path.
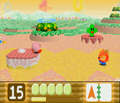
Kirby walks a path through a colorful plain that is familiar in layout.
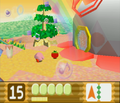
Nabbing a Maxim Tomato in front of a fancy building
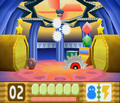
Battle with Big Sawyer

Exiting the building
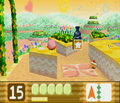
Leaping over blocks interspersed with Shotzos
Kirby approaches the eerie palace swathed in darkness.
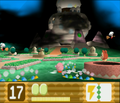
Waddle Dee points the way forward.
Kirby dives into the sewer system of Ripple Star's palace to gain entry.
Kirby swims through the underwater channels beneath the palace.
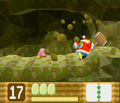
King Dedede shows up to clear out a cave-in.
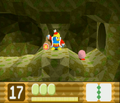
Kirby can progress thanks to Dedede's efforts.
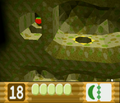
Spotting a Maxim Tomato in a separate chamber
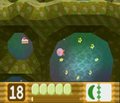
Swimming through more underwater channels
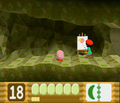
Adeleine paints an Invincible Candy for Kirby to make use of.
Kirby rushes through the Star Blocks ahead using his invincibility.
An elevator is found connecting to the palace interior.
The first room Kirby finds himself in after riding the elevator from Stage 2
The first enemy ambush
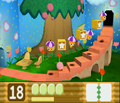
The base of the tree stairway
The second enemy ambush
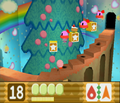
The second portion of the tree stairway
The third enemy ambush
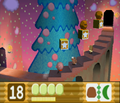
The third portion of the tree stairway
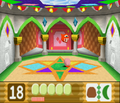
The fourth enemy ambush
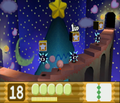
The fourth and final portion of the tree stairway
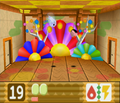
The last enemy ambush
Kirby reaches the top of the palace and approaches the menacing darkness
The sinister polygonal foe who rules over Ripple Star - in its default appearance
Miracle Matter uses his Bomb form against Kirby.
Miracle Matter uses his Cutter form against Kirby.
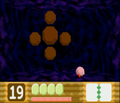
Miracle Matter uses his Stone form against Kirby.
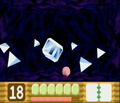
Miracle Matter uses his Ice form against Kirby.
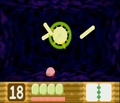
Miracle Matter uses his Spark form against Kirby.

Miracle Matter uses his Needle form against Kirby.
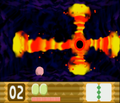
Miracle Matter uses his Burn form against Kirby.
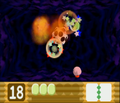
Miracle Matter defeated after it runs out of forms to use


Dark Star[edit]
Dark Star as shown from the level selection
Taking the first steps on the translucent platforms inside Dark Star
Waddle Dee busts a hole in the floor to allow Kirby to progress.
Adeleine paints Kirby a Maxim Tomato for the fight ahead.
King Dedede gives Kirby the last boost he needs to launch him into the final encounter.
0²'s less threatening initial face, before fighting begins
The Dark Star is held together and supplied by 0², the monster at its core.
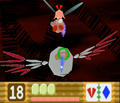
Attacking 0²'s halo while it is stunned
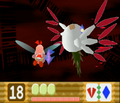
0²'s weak point is exposed.
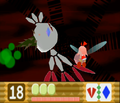
Taking out 0²'s wings to reduce its mobility
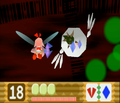
Attacking 0²'s weak point
0² is defeated.


Promotional material[edit]
Promotional artwork featuring the Bonus Game
Promotional memory match ShockWave web game from Cartoon Network


Audio[edit]
Main stage themes[edit]
Boss themes[edit]
Menu and select themes[edit]
Sub-Game themes[edit]
Special themes[edit]
A sample of Kirby's voice
Unused[edit]
Kirby Dance (long)
Kirby Dance (short)
References
- ↑ Kirby 64: The Crystal Shards - The Cutting Room Floor. Retrieved October 16, 2023.
| |||||||||||||||||||||||||||||