Kirby and the Rainbow Curse/gallery
A gallery of media pertaining to Kirby and the Rainbow Curse.
Boxart and logos[edit]
North American cover art
Japanese cover art

European cover art

American logo
British English logo


Artwork[edit]
Main characters[edit]

Kirby

Kirby

Kirby

Kirby charging up a Star Dash
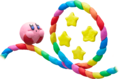
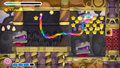
Kirby on a Rainbow Rope
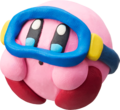
Kirby with goggles
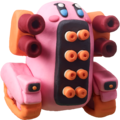
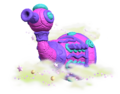
Mega Kirby Tank
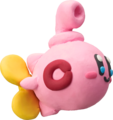
Kirby Submarine

Kirby Rocket

Injured Kirby
Artwork of compatible amiibo and their powers

Kirby after scanning certain amiibo

Kirby after scanning Kirby amiibo

Kirby after scanning Meta Knight amiibo

Kirby after scanning King Dedede amiibo
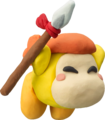
Yellow Waddle Dee
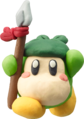
Green Waddle Dee

Elline

Elline in her paintbrush form
Group artwork of Kirby, Elline, and Bandana Waddle Dee
Previous group artwork with a background
Group artwork of Kirby on a Rainbow Rope and Bandana Waddle Dee
Kirby and Bandana Waddle Dee defend Elline from Grab Hands
Group artwork of Kirby with the three Waddle Dees
Artwork featuring Kirby on a Rainbow Rope with several enemies and a clay version of the Kirby series' logo


Enemies[edit]


Bosses[edit]

Whispy Woods

Whispy Woods

Hooplagoon
Bastron
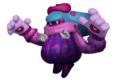
Claycia


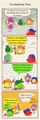
Food[edit]
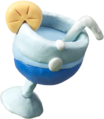
Blue Punch
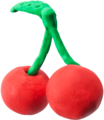
Cherries
Grapes

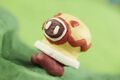
Hot Dog
Ice Cream
Milk

Pizza
Snap Pea


Other[edit]


Miscellaneous[edit]

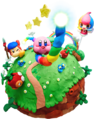
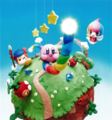
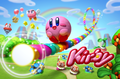
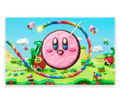
Key art
Key art without the foreground elements
Key art background

Kirby from the key art
Icon used for Past Adventures menus in future games


Models[edit]
Enemies[edit]
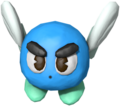
Blue Bronto Burt


Items[edit]

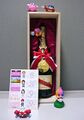
Figurines[edit]
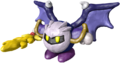
Meta Knight (rigged)
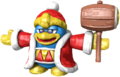
King Dedede (rigged)


Other[edit]

King Dedede hat amiibo costume
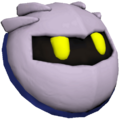
Meta Knight mask amiibo costume


Icons[edit]

Icon for music from Kirby's Dream Land

Icon for music from Kirby's Adventure

Icon for music from Kirby's Dream Course
Icon for music from Kirby's Dream Land 2
Icon for music from Kirby Super Star

Icon for music from Kirby's Dream Land 3
Icon for music from Kirby 64: The Crystal Shards

Icon for music from Kirby Air Ride

Icon for music from Kirby & The Amazing Mirror

Icon for music from Kirby: Squeak Squad
Icon for music from Kirby Mass Attack
Icon for music from Kirby's Return to Dream Land

Icon for music from Kirby: Triple Deluxe

Icon for music from Kirby and the Rainbow Curse
Screenshots[edit]
Start Screen[edit]

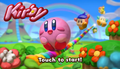
American English start screen

Japanese start screen
Title Screen of the E3 2014 Demo which shows a fourth Bandana Waddle Dee with cyan skin and a white bandana not seen in the final game.


Main Menu[edit]

American English main menu
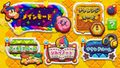
Japanese main menu


Game Modes[edit]
Challenge Mode menu

Secret Diary menu
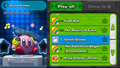
Music Room menu


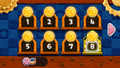
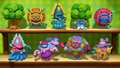
Figurine Showcase[edit]
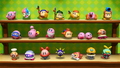
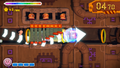
Shelf 1 of the Figurine Showcase
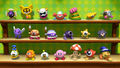
Shelf 2 of the Figurine Showcase
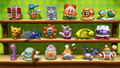
Shelf 3 of the Figurine Showcase
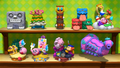
Shelf 4 of the Figurine Showcase
Shelf 5 of the Figurine Showcase


Opening scene[edit]

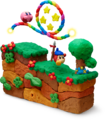
Dream Land, depicted in clay
Kirby on a hill with his apple
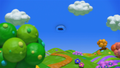
A hole opens up in the sky.

Waddle Dee notices the hole in the sky while Kirby finds his apple.
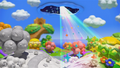
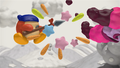
A ray shines over Dream Land, robbing it of its colors.
Dream Land residents panic as the colors are taken away.
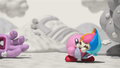
Kirby and Waddle Dee are frozen solid without color.

Elline emerges from the hole in the sky.
Elline attempts to flee from the Grab Hands.
Elline paints Waddle Dee and Kirby back to life.
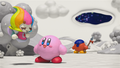
Kirby rescues Elline from the Grab Hands.
Waddle Dee bats the hands away with his spear.
Elline thanks her new friends for the save.
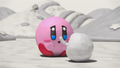
Kirby looks on in despair at his colorless apple.

Kirby and Waddle Dee agree to help Elline get the colors back.
Elline paints a Rainbow Rope for Kirby and Waddle Dee to follow into Seventopia.


Stages[edit]
The Adventure Begins[edit]
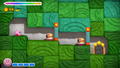
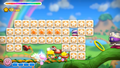
The stage begins with a short tutorial section. This is the first room in that section, teaching the Touch Dash technique.
The second tutorial room features Cottas, which can be defeated using the Touch Dash.
The third and last room instructs the player how to draw Rainbow Ropes.
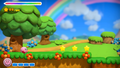
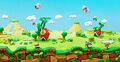
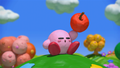
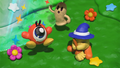
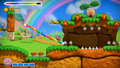
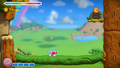
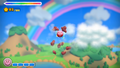
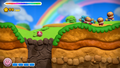
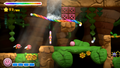
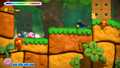
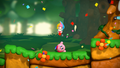
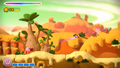
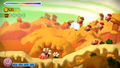
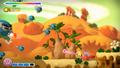
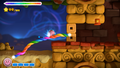
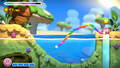
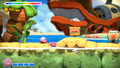
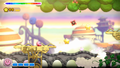
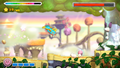
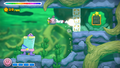
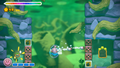
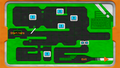
Kirby starts his adventure in a lush green grassland, as he almost always does.
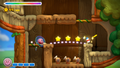
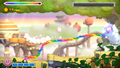
Kirby is visibly excited to be bouncing off these springs.
Discovering a hidden 1-Up room
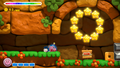
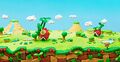
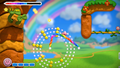
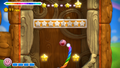
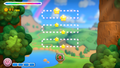
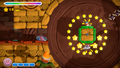
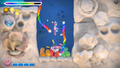
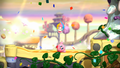
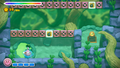
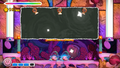
The third area begins with a ring of ten medium Point Stars which can give Kirby the ability to use a Star Dash.
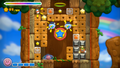
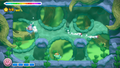
Kirby encounters some soft clay, which can be cleared away using the stylus.
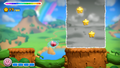
Discovering a hidden Point Star cache in the fourth area.
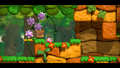
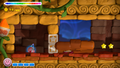
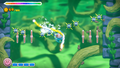
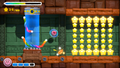
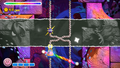
Preparing to launch into the Gray Zone

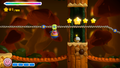
Launching up to the area where the third treasure chest can be found
Uncovering the door to the challenge room and the fourth treasure chest
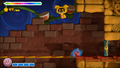
Slipping through a small grotto, atop which is a Launch Cannon
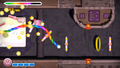
Collecting rings of point stars above the cannon site
Slipping through the tunnel to reach the end of the stage


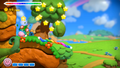
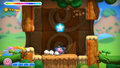
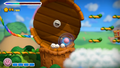
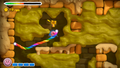
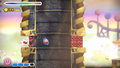
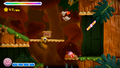
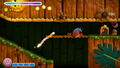
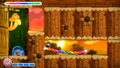
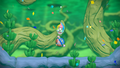
Up the Big 'Ol Tree[edit]
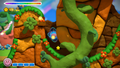
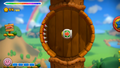
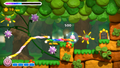
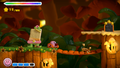
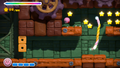
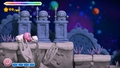
Approaching the "Big Ol' Tree"
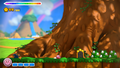
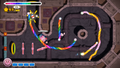
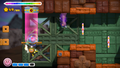
Riding up the hollow tree trunk using Rainbow Ropes.
A hint is provided for how to deal with these Cannon Cottas.
Approaching the top of the tree, and finding a chamber that's best dealt with using a Star Dash
Approaching a Gray Zone in the heights of the tree
Entering a room with a timed Point Star inside
Approaching the door to the Challenge Room
Timing a launch past some moving Point Stars
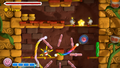
Riding into a spinning barrel
Timing a launch out of another spinning barrel
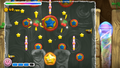
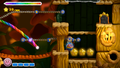
Partaking in the bonus pachinko area

Finding some Candy near the end of the stage
Blazing through the barricades and enemies using the Candy's effects
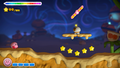
Shooting up toward the final area in the stage


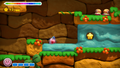
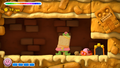
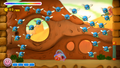
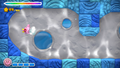
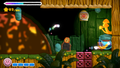
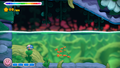
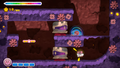
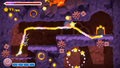
Great Cave Escape[edit]
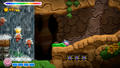
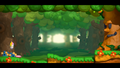
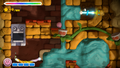
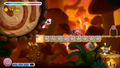
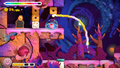
Kirby falls into the eponymous "great cave", which he must now escape...
...though it is not clear why he cannot simply ride a rope back out from the start.
Kirby decides against better logic to go through the cave to escape it.
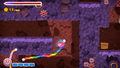
Falling into a deeper portion of the cave...Kirby better hope this cave has another exit.
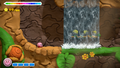
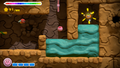
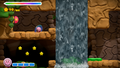
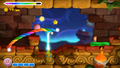
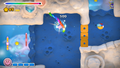
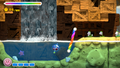
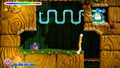
Using rainbow rope to block a waterfall
Stumbling onto a soft clay cache
Reaching the cannon at the left end of this area, which will launch Kirby all the way back to the right
Approaching the cannon which will lead even deeper into the cave
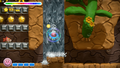
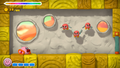
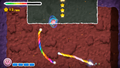
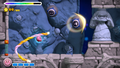
Spotting Carpas swimming up a waterfall
Accessing a hidden switch in an alcove
Riding toward a Bomb Block that will release a massive waterfall, and the way forward
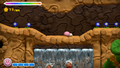
Spotting another cache on the left
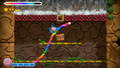
Timing a shot through some Carpas in a big waterfall
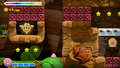
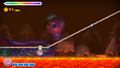
Gliding past a hall full of Gordos
Blocking the last waterfall so Kirby can well and truly escape this great cave


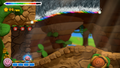
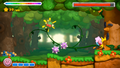
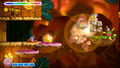
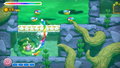
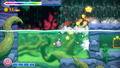
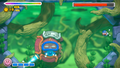
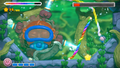
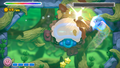
The Forest of Whispy Woods[edit]
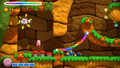
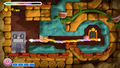
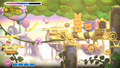
The beginning area of the stage
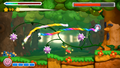
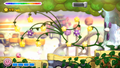
Spiky flowers appear behind Kirby.
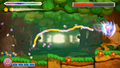
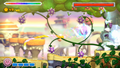
Kirby passes through more spiky flowers to reach the door.
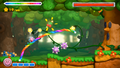
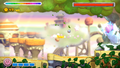
Whispy Woods reveals himself.
Kirby slips through the first set of flowers.
Whispy Woods gets pummeled by Kirby's Touch Dash.
Kirby slips through another blockade.
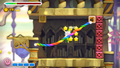
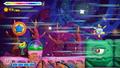
Kirby uses a Star Dash to really put the hurt on Whispy.
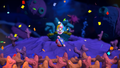
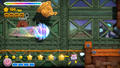
Kirby and Elline celebrate their victory.


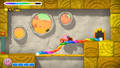
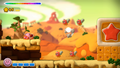
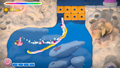
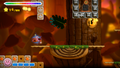
Dig and Dash[edit]
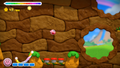
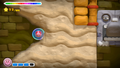
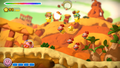
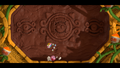
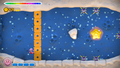
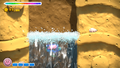
Rolling around on dry sand dunes
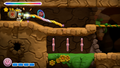
Passing through a sandstone column
The end of the stage is within sight, but not within reach.
Clearing away a big sand bed to reveal some stars

Being ambushed by a Drill Cotta

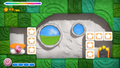
The first of many marble puzzles in this stage
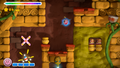
Finding a key in the sand
Drill Cotta demonstrates what not to do when dealing with Grindarrs.
A Grindarr falls at the end of this hall, revealing a Launch Cannon.
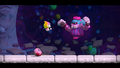
Kirby meets up with Mega Grindarr, who will be a lasting companion for this part of the stage.
Clearing away the sand beneath Mega Grindarr's feet to let him keep moving
Acquiring the key on the left split path
Solving the puzzle to get the third key in this area
Uncovering the hidden door to the fifth treasure chest

Kirby is about to be ambushed by a wave of Big Drill Cottas.
Kirby spots Mega Grindarr still falling as he rockets through the last part of the stage to exit the underground complex.


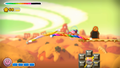
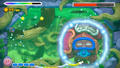
Deploy the Kirby Tank![edit]
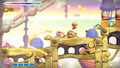
Kirby starts off on a high perch overlooking the open dunes.
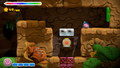
A switch can be found on the other side that opens up a hidden doorway.
Elline prepares to transform Kirby into a tank.
The Kirby Tank rolls through the door.
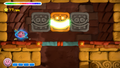
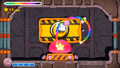
A brief tutorial teaching the player how to fire using the Kirby Tank's gun
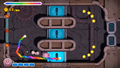
Second tutorial room showing how to guide the tank using the rainbow rope
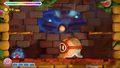
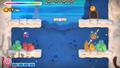
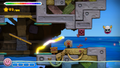
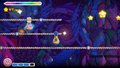
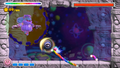
The stage begins proper as the Kirby Tank fires upon some Bronto Burts.
The Kirby Tank contends with a horde of Bouncies.
Another Bouncy horde is joined by a fleet of Bombzway.
The Kirby Tank takes the high road, gunning for the second treasure chest.
The Kirby Tank opens up a cache to get a 1-Up.
The Kirby Tank approaches a really big Star Block in his way.
Guiding the Kirby Tank toward the challenge room door
Taking the star-studded path to the end of the main area
Ambushed by tons of blue Bronto Burts
Retreating from the Bronto Burt armada to reach the end of the stage


The Long-Lost Ruins[edit]
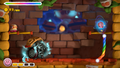
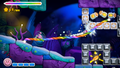
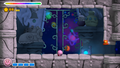
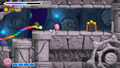
Kirby spots a Bzztbulb guarding the entrance to the moonlit ruins.
Kirby passes a laser safely thanks to the rainbow rope.
Kirby spots a big circular chamber containing a Blado on patrol.
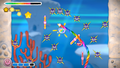
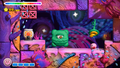
Kirby makes his way through the many star spinners.
Kirby watches a Cotta get squished by a falling wall.
The key turned out to be evil. This should not be allowed.
Another circular chamber patrolled by Blados
This room serves to demonstrate how the light panels work.
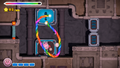
Falling into a deeper part of the ruins
Uncovering the door to the challenge room
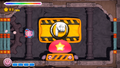
Mecha Cotta appears on the scene.
Kirby does severe damage to Mecha Cotta, but also needs to recover from a few nasty shocks.
Neutralizing the lasers to move forward
A cryptic hint is written in the stars here...
There's no time to take in the scenery. Kirby was too slow to act.


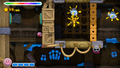
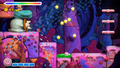
Hooplagoon, Relic of the Ruins[edit]
Kirby entering the ruins
Moving the Grindarr out of the way
Slipping into the door
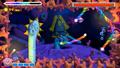
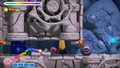
Hooplagoon is initially hidden in the wall.
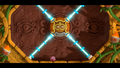
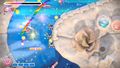
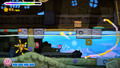
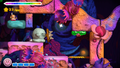
Hooplagoon appears and demonstrates his laser cannons.
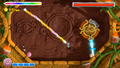
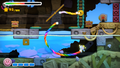
A rainbow rope is thrown up as a shield against the laser.
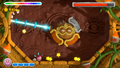
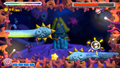
Hooplagoon gets bigger after his first plate is broken.
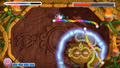
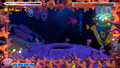
Hooplagoon conjures an electric field around himself and goes after Kirby.
Hooplagoon grows enraged as he loses his third plate.

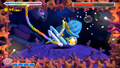
Kirby scores the final hit on Hooplagoon.
Kirby and Elline celebrate their victory.


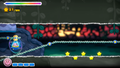
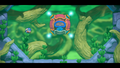
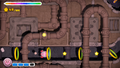
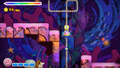
Swept Out to Sea[edit]
Heading toward the first pipe
Swinging around the first underwater channel
Learning how to control Kirby underwater
Heading for an inkwell

Collecting stars along the first vertical chute
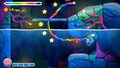
Aiming for the large Point Star in the strong current
Encountering Blippers at the end of the first chute area
Heading down a side passage to get a 1-Up
Spotting a Maxim Tomato and the door to the challenge room
Passing by heavy lines of Gordos
Riding the long snacking water channel
Another section of the snaking channel
Reaching the cyclical chamber at the end of the long snaking channel
Riding a geyser back to the surface


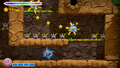
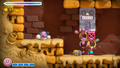
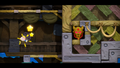
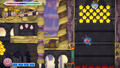
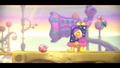
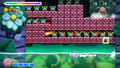
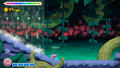
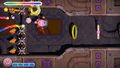
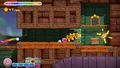
The Haunted Ship[edit]
Preparing to enter the cannon to infiltrate the pirate ship
Falling down past many Dethskullks, who are rather slow to react
Kirby has plenty of time to make his move, as these Dethskullks are fairly slow.
Slipping past more Dethskullks in the next room
Spotting a key and some candy in the larger room of the ship
Slipping down to the lower portion of the large room
Aiming for a switch in the lowest portion of the large room
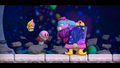
The Dethskullk King appears.
Collecting another key
Using the cannon to escape the ship
Passing under the waterfall to reach the end of the stage


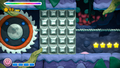
Kirby Submarine's Torpedo Time[edit]
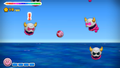
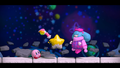
Kirby surveys the starting pool.
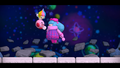
Elline prepares to paint Kirby into an armed submersible.
The first tutorial room for the Kirby Submarine

The second tutorial room for the Kirby Submarine
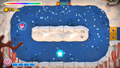
A relatively easy starting area to get the player more used to how Kirby Submarine is controlled
Using a Star Torpedo to blast through some metal blocks
The stage begins proper with a slowly-scrolling area deep in the underwater tunnels.
Using the rainbow rope to guide Kirby Submarine's torpedoes toward the stars
Using torpedoes to open up clam shells
Gathering stars after breaking some long Star Blocks in the ceiling
Firing at the Crabbos to get them out of the way
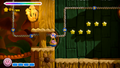
Opening up some food caches with more torpedoes
Accessing the challenge room by hitting a switch
Defeating the Mini Deepsees
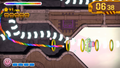
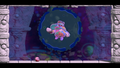
Battling Deepsee
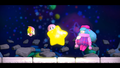
Kirby is back to normal now, and rolls out of the water to reach the end of the stage.


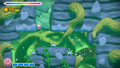
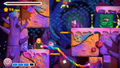
The Claykken's Lair[edit]
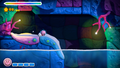
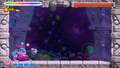
The first area of the stage, descending into an underwater cave
Slipping past the Sawgills on patrol
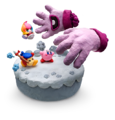
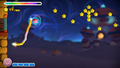
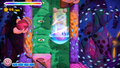
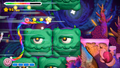
The Claykken reveals himself.
Trying to attack Kirby with one tentacle
Trying to attack with both tentacles
The Claykken fully enters the battlefield (though he's a bit smaller than he ought to be based on how he looked from the background).
The Claykken thrusts himself across the battlefield like a torpedo.
Kirby finds an opening to attack The Claykken.
Another boss whupped, and another dance


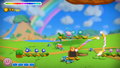
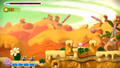
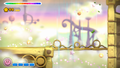
Rainbow Across the Skies[edit]
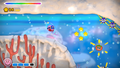
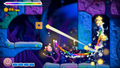
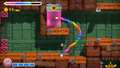
Kirby heads for the cannon at the beginning of the stage.
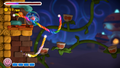
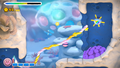
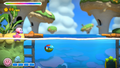
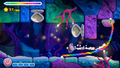
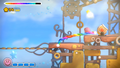
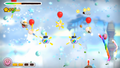
Using rainbow ropes to traverse the open skies

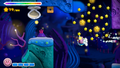
Heading for a big formation of point stars
Entering the wind current to be swept further aloft
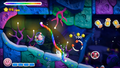
Being ambushed by Trakkers
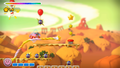
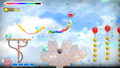
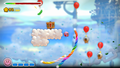
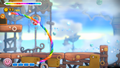
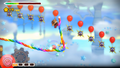
Aiming for the candy on balloons
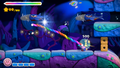
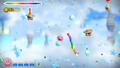
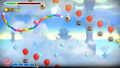
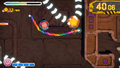
Timing a launch to get lots of stars
Heading for the challenge room before it's too late
Moving through the weak link in the Gordo line
Preparing to pass through the Bzztbulbs in the Gordo line
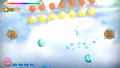
Clearing out the clouds at the end of the stage


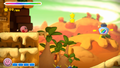
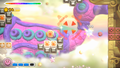
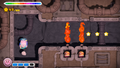
The Wild Red Yonder[edit]
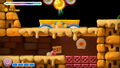
Dealing with the first set of Cottas
Clearing out a Bomb block barrier in the way while collecting stars
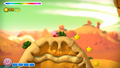
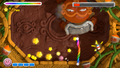
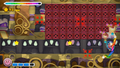
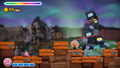
Bastron makes its first appearance.
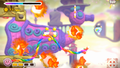
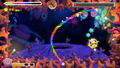
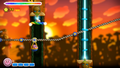
Kirby has to navigate past the lingering flames left by Bastron's projectiles.
Navigating past some Cotta Generals to get more stars
Breaking a big Bomb Block barrier in the second area
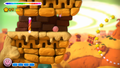
Ascending the tower at the end of the second area
Launching past the Spear Cotta Knights, who react too slowly to hit Kirby
Bastron returns in the high clouds
Navigating through the difficult third area
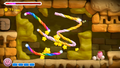
Using Bastron's fire to open the way to a challenge room
Taking the cannon at the end of the third area
Blasting through some towers to reach the end of the stage


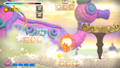
Kirby Rocket's Big Blastoff[edit]
Riding the first wind current
Elline prepares to turn Kirby into a rocket.
Kirby Rocket flies into Bastron.

Kirby takes shelter from a Shotzo's fire as he moves down the halls.
Passing through more star spinners
Heading up the chute after collecting more stars in the circular room

Flying past metal block formations
Activating some background panels
Activating the second set of background panels to move forward
To be fair, the sign did point toward the switch...
Kirby activates Bastron's self-destruct sequence.
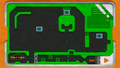
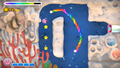
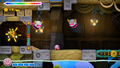
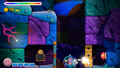
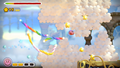
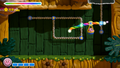
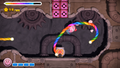
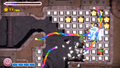
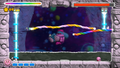
The map of the main area of Bastron, where an escape route can be planned
Following the guide line to collect a big point star
Flying toward a timer extension pickup
Heading out of the Bastron with plenty of time left
The Bastron explodes behind Kirby as he reaches the end of the stage.


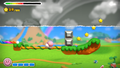
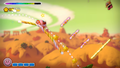
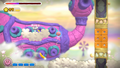
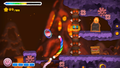
Sky-High Whispy Woods[edit]
Moving past the first set of falling bombs
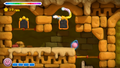
Heading toward the door to Whispy's new abode

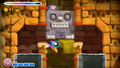
Whispy Woods turns to metal for this fight.
One of the many vine patterns that Whispy can create
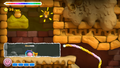
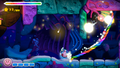
Kirby rushes toward Whispy using a Star Dash.
Kirby crashes into Whispy's face.
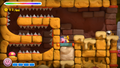
Whispy blows Kirby away and calls on some Barampas.
Kirby lands the final hit on Whispy Woods.
Seems Whispy cannot win no matter what he tries.


Woodland Battle[edit]
The Kirby Tank is ready to roll out again.

Shooting at a rolling log to make it go away
Making the first turn
Heading through the door at the end of the first scrolling section
Using an Explortle to clear the path forward
Spotting the challenge room door, blocked off by metal blocks
Spotting a switch guarded by Cotta Knights
Fending off relentless opponents on the fragile bridge
The giant rolling log appears.
Seems shooting this log is ineffective.
Reaching the end of the rolling log section
Kirby is back to his usual roly-poly self.


Gondola Ride[edit]
This area teaches the player how to use gondolas.
Casually riding a gondola in the second area
Passing by a Bzztbulb
Slipping past a post to get some stars
Slipping past a Gondola Bzztbulb, electrifying the wire in the hall
Switching to a different line to avoid running into a buzz-saw
Blocking a laser to allow safe passage
Lots of parallel lines to choose from
Taking the alternate line to head to a secret area
Grabbing the point star in the secret area
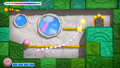
Solving the marble puzzle to move forward
Clearing away the clay covering the challenge room door and the cannon
Entering the hall with the giant buzz-saw
Riding the last gondola of the stage


Deep-Divin' Kirby Submarine[edit]
The pool at the start of the stage
Kirby Submarine is ready to go once again.
Opening the way to the staging area
Kirby Submarine can ride up waterfalls. Of course he can.

Defeating a Dangle Sloth
Opening the way to the door at the bottom of the vertical descent
Battling Blippers in the ambush room
Spotting the door to the challenge room
Dodging the sinking Gordos
Preparing to release the last wave of Gordos at the top of the last auto-scrolling area
Kirby is back to normal and at the end of the stage.


Hooplagoon of the Lake[edit]
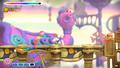
Heading down the water currents in the pre-boss area
Hooplagoon is back for more.
Firing a laser (in the wrong direction)
Chasing after Kirby using an electric field
Trying to fire all four lasers at once for once
Kirby scores the final hit on Hooplagoon.
Kirby and Elline celebrate their victory.


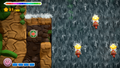
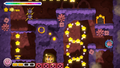
Burning Secrets[edit]
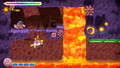
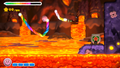
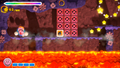
Preparing to grab the first set of stars over a lava pool
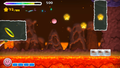
Hopping over another lava pool using a dash ring
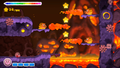
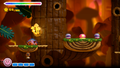
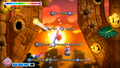
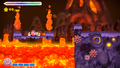
Encounter with three Hot Heads
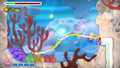
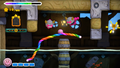
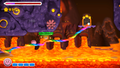
A lavafall is no match for the Rainbow Ropes
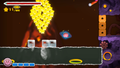
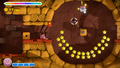
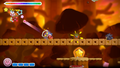
Finding a big Point Star formation shaped like a diamond

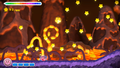
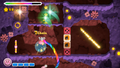
A lavafall is briefly transformed into a starfall.
Uncovering the door to a challenge room
Passing a much larger lavafall
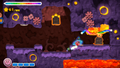
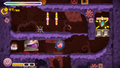
A side chamber with two Cotta Generals
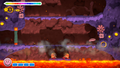
Dodging falling slabs of rock
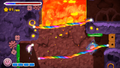
Heading toward a hidden side area

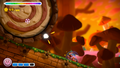
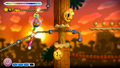
Another rainbow rope will be needed to keep Kirby safe on this gondola ride.
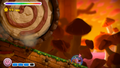
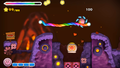
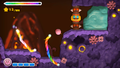
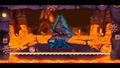
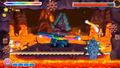
Bastron returns near the end of the stage.


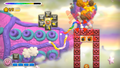
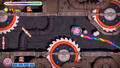
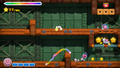
Back to the Battleship[edit]
Heading toward the cannon, revealed by the crumbling terrain
Blasting off toward Bastron a second time
Aiming for a cannon to move forward inside Bastron
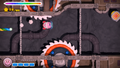
Dodging giant buzz saws in the halls
Flying through the Soarar formations
Contending with gouts of fire
Using a series of dash rings to move quickly through the thin corridor
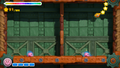
Breaking into the metal block cache
Dodging more giant buzz saws

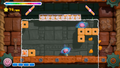
Hitting the switch after avoiding more foes
Aiming for the background panels
Preparing to press the switch again
The map of the second big interior room that needs to be navigated through
Making it out of the main timer room, cutting it a bit close
Flying through the collapsing hall to escape Bastron
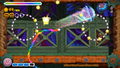
Getting showered in stars at the end of the stage


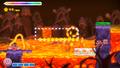
Volcanic Panic[edit]
Heading toward the cannon that leads forward
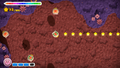
Spotting a hidden item cache guarded by Thornsby
Observing the lava rise to engulf some Cottas
Stopping to access a big star spinner
Preparing to tackle the Cotta General
The door runs away from Kirby as he nears the top.
Reaching the door after some close calls with the rising magma
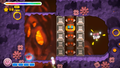
Approaching the challenge room door, guarded by another Thornsby
Making a geyser shoot out, creating some stars
Spotting a 1-Up that is overly guarded
The start of the second rising lava area
Using a Star Dash to move more quickly through the tunnels
Taking a series of cannons to escape the rising lava
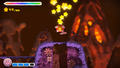
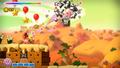
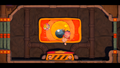
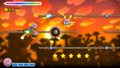
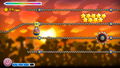
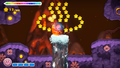
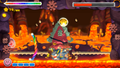
Kirby causes several stars to "erupt" at the end of the stage.


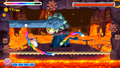
The Claykken's Sea of Fire[edit]
Passing the initial gouts of fire in the pre-boss area
Heading toward the door to the boss fight
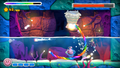
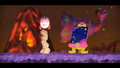
The Claykken appears to be out of his element.
Attacking The Claykken's tentacle
Avoiding a tentacle attack from the lava below

Heading toward two tentacles in the ceiling
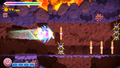
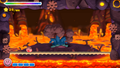
The Claykken emerges from the lava to start launching himself across the stage again.
The Claykken is defeated for a second time. He should probably go back to the water.


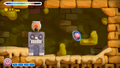
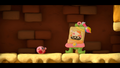
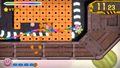
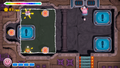
Infiltrate the Junk Factory![edit]
Kirby surveys the first open area in this stage.
Using a scanner field to open the way forward

Happening across a small puzzle to obtain a key
Using the three keys to open the way forward
Spotting the door to the challenge room in an area with Shockcreepas
Opening the wall wide to collect lots of stars
Spotting some Invincible Candy with which the Shockcreepas can be defeated

Passing through a pipe with Shockcreepas crawling on it
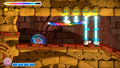
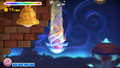
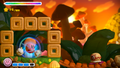
Star Dashing through an open room and dislodging a bell

Heading up to the door after collecting the shower of stars
Preparing to traverse the last obstacle to reach the end of the stage


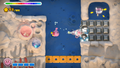
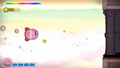
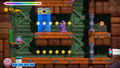
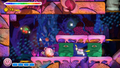
Kirby + Kirby[edit]
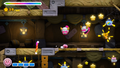
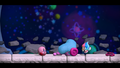
Kirby accesses the hidden Point Star cache at the start of the stage.
The path splits, so Kirby must split as well.
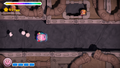
The two Kirbys must now move independently.
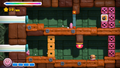
The Two Kirbys work their way through the long hall.
Working together to collect stars and other goodies
A Soarar soars in at the start of the elevator section.
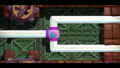
The Kirbys pass through a Gray Zone together, exchanging momentum to bust the blocks.
One of the Kirbys initiates a Star Dash, bouncing the other one around vigorously.
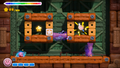
The Kirbys must battle three Cannon Cottas.
Kirby re-merges into one, and then finds a hidden challenge room door.


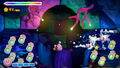
Wonder Space[edit]
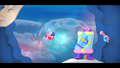
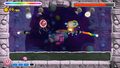
Close encounter with the first kind of Warpspace at the start of the stage
Making note of the Shieldster's behavior
Spotting a constellation of Point Stars
Heading for the challenge room door
Scaring the Warpspaces using a Star Dash
Riding a gondola out into the open space
Crossing tracks to avoid a Gordo
Racing against Gondola Bzztbulb
Heading into the secret area using a Star Dash, but missing the first turn
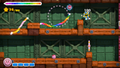
Trying to avoid the Warpspaces while battling Grinkey
Entering a windy zone with lots of Warpspaces
Bypassing the last obstacles to reach the end of the stage


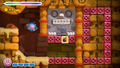
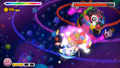
The Final Battle[edit]
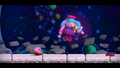
Claycia ignores Elline's pleas.
Claycia beckons as the battle begins.

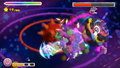
Claycia tosses out a Clay Ball.
Kirby knocks the Clay Ball right back at Claycia.
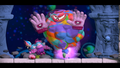
Kirby pummels Claycia while she is stunned.
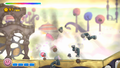
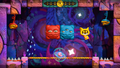
Claycia reads a book while her lasers sweep the battlefield.
Some Cannon Cottas appear to fire bombs at Kirby.
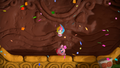
Clay fists come crashing through the walls, causing stars to drop.

More lasers are blocked using the rainbow rope.
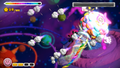
Kirby Star Dashes into Claycia to finish the fight.


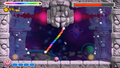
Pursuing Dark Crafter with the Kirby Rocket
Initiating a Star Dash to go for the enemy
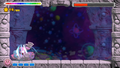
Landing the first hit on Dark Crafter
Landing the second hit
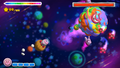
Landing the final hit
Dark Crafter is defeated and dissipates.


The entry point for the stage
The top of the elevator ride
Heading for the first Clay Ball
Launching the Clay Ball into the statue
Heading for the door to the boss room


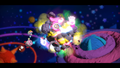
Claycia collapses after Dark Crafter leaves her.
Elline and Claycia are reunited.
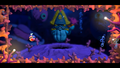
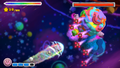
Dark Crafter emerges and scares everyone.
Kirby Rocket is ready to chase after Dark Crafter.


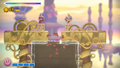
Kirby shakes hands with Claycia for a job well done.
Claycia and Elline paint a Warp Star for Kirby to fly home on.
The trio prepare to head out.


Miscellaneous[edit]
Comics[edit]
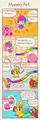
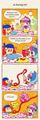
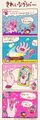
"Mystery Art"
"The Waddle Dee Three"
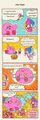
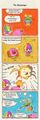
"Star Dash"
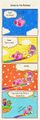
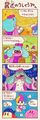
"Saved by the Rainbow"
"An Evening Out"

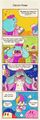
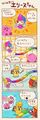
"So Pretty"
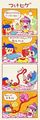
"Claycia's Change"
"The Messenger"
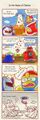
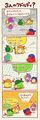
"In the Name of Fashion"
"Mystery Art" (Japanese)
"The Waddle Dee Three" (Japanese)

"Star Dash" (Japanese)
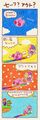
"Saved by the Rainbow" (Japanese)
"An Evening Out" (Japanese)
"So Pretty" (Japanese)
"Claycia's Change" (Japanese)
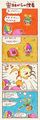
"The Messenger" (Japanese)
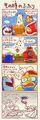
"In the Name of Fashion" (Japanese)
Behind the scenes[edit]
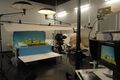
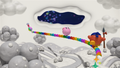
Wide view of setup for photographing the opening banner art
The set for the opening banner
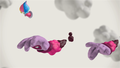
Multiple Ellines consider entering the fray
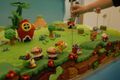
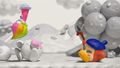
Bandana Waddle Dees begin lining up at the front

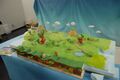
Stratifying ground layers
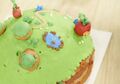
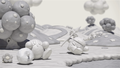
The clay planet used in promotional art

Scrubbing terrain

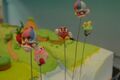
Tweaking tree roots

A clay building surrounded by some clay flora
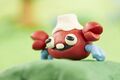
A Crabbo ready for its close-up
A Cotta, likely actually made from Plasticine rather than literal clay
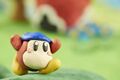
Bandana Waddle Dee running through the clay world

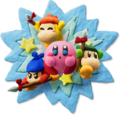
An array of Kirby and Elline models
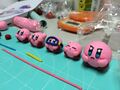
Variations on Kirby in a line
Kirby and friends celebrate a Famitsu gold score with some champagne
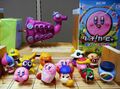
Some of the clay models created for the game


Videos[edit]
Wii U - Kirby and the Rainbow Curse E3 2014 Announcement Trailer
|
Wii U - Kirby and the Rainbow Curse - Gameplay Trailer
|
Wii U - Kirby and the Rainbow Curse - Accolades Trailer
|
DIY – How to Make Your Own Clay Kirby - Play Nintendo
|
Official Kirby Portal video showcasing the game's transformations
|
| |||||||||||||||||||||||