Shiver Star - Stage 2: Difference between revisions
No edit summary |
m (Text replacement - "\|theme title=\[\[(.*)\]\]" to "|theme title="$1"") |
||
| (6 intermediate revisions by 4 users not shown) | |||
| Line 1: | Line 1: | ||
{{Infobox-K64Stage | {{Infobox-K64Stage | ||
|image=[[File:K64 Shiver Star Stage 2 screenshot 03.png|300px]] | |image=[[File:K64 Shiver Star Stage 2 screenshot 03.png|300px]] | ||
| Line 8: | Line 7: | ||
|friend={{N}} | |friend={{N}} | ||
|theme music=[[File:Butter Building K64.oga]] | |theme music=[[File:Butter Building K64.oga]] | ||
|theme title=[[Butter Building (theme)|Above the Clouds]] | |theme title="[[Butter Building (theme)|Above the Clouds]]" | ||
|description=Clip of the stage music for Shiver Star - Stage 2. | |description=Clip of the stage music for Shiver Star - Stage 2. | ||
|previous=[[Shiver Star - Stage 1|Stage 1]] | |previous=[[Shiver Star - Stage 1|Stage 1]] | ||
| Line 100: | Line 99: | ||
|align=center|[[Image:K64 Needle Sprite.png|link=Needle]] | |align=center|[[Image:K64 Needle Sprite.png|link=Needle]] | ||
|- | |- | ||
|align=center|[[Image:K64 Poppy Bros | |align=center|[[Image:K64 Poppy Bros Jr Sprite.png]] | ||
|[[Poppy Bros. Jr.]] | |[[Poppy Bros. Jr.]] | ||
|style="border-style: solid; border-width: 1px 3px 1px 1px" align=center|[[Image:K64 Bomb Sprite.png|link=Bomb]] | |style="border-style: solid; border-width: 1px 3px 1px 1px" align=center|[[Image:K64 Bomb Sprite.png|link=Bomb]] | ||
| Line 112: | Line 111: | ||
|- | |- | ||
|} | |} | ||
== Gallery == | == Gallery == | ||
| Line 121: | Line 117: | ||
K64 Shiver Star Stage 2 screenshot 02.png|Hopping into the [[Zebon]] up top the hill | K64 Shiver Star Stage 2 screenshot 02.png|Hopping into the [[Zebon]] up top the hill | ||
K64 Shiver Star Stage 2 screenshot 04.png|Hopping onto the cloud walkways | K64 Shiver Star Stage 2 screenshot 04.png|Hopping onto the cloud walkways | ||
K64 Shiver Star Stage 2 screenshot 05.png|Moving toward a snack propped up by Star | K64 Shiver Star Stage 2 screenshot 05.png|Moving toward a snack propped up by [[Star Block]]s | ||
K64 Shiver Star Stage 2 screenshot 06.png|Traversing small platforms in the air | K64 Shiver Star Stage 2 screenshot 06.png|Traversing small platforms in the air | ||
K64 Shiver Star Stage 2 screenshot 07.png|Facing off against [[Pteran]]s | K64 Shiver Star Stage 2 screenshot 07.png|Facing off against [[Pteran]]s | ||
K64 Shiver Star Stage 2 screenshot 08.png|Finding an interior cloud space | K64 Shiver Star Stage 2 screenshot 08.png|Finding an interior cloud space | ||
K64 Shiver Star Stage 2 screenshot 09.png|Moving through cloud caverns | K64 Shiver Star Stage 2 screenshot 09.png|Moving through cloud caverns | ||
K64 Shiver Star Stage 2 screenshot 10.png|Minding | K64 Shiver Star Stage 2 screenshot 10.png|Minding a [[Mopoo]] that springs from the ceiling | ||
K64 Shiver Star Stage 2 screenshot 11.png|Carefully navigating past the [[Tick]]s | K64 Shiver Star Stage 2 screenshot 11.png|Carefully navigating past the [[Tick]]s | ||
K64 Shiver Star Stage 2 screenshot 12.png|A Mopoo jumps over Kirby's head. | K64 Shiver Star Stage 2 screenshot 12.png|A Mopoo jumps over Kirby's head. | ||
Latest revision as of 20:31, 19 January 2024
| ||||||||||||||
| ||||||||||||||
| ||||||||||||||
|
| ||||||||||||||

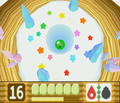
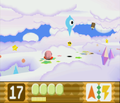
Shiver Star - Stage 2 is the second stage of Shiver Star in Kirby 64: The Crystal Shards. This stage takes place up in the clouds, with walkable cloud passages and tunnels.
Overview[edit]
The stage begins at the base of a small mountain. At the top is a Zebon waiting to blast Kirby way up into the clouds.
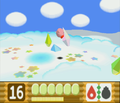
Kirby leaps out of a hole in the clouds, then continues along the cloud tops to the right. Being so high up, Kirby should try to avoid falling along the way.
The next room contains a framework of Zebon that will fire Kirby even higher into the clouds.
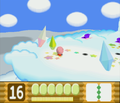
The following area is another cloudy path, though more substantial than the last one.
Along the proceeding cloud path, several enemies lie in ambush.
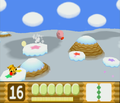
The final area is a small room containing a giant Mopoo and some Propellers to act as guards. A crystal shard appears after the Mopoo is destroyed, though contained in a barrier. The stage exit also opens.
Crystal Shard guide[edit]
| Crystal Shard locations in Shiver Star - Stage 2 | ||||
|---|---|---|---|---|
 Shard 1 |
The first shard can be found underneath one of the cloud platforms on the first walkway. | |||
 Shard 2 |
The second shard can be collected in the area with many Zebon. Kirby has to fire to the upper-left through a line of Scarfies to get it. | |||
 Shard 3 |
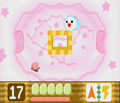
In the chamber with the Mid-Boss Mopoo, a rectangular barrier lies in the middle made of orange and yellow material. Kirby has to use the Needle-Spark ability to break it open. | |||
Enemies, mid-bosses and abilities[edit]
| Image | Name | Copy Ability | Image | Name | Copy Ability |
|---|---|---|---|---|---|
| Bronto Burt | None | Propeller | |||
| Cairn | Pteran | None | |||
| Fishbone | Scarfy | N/A | |||
| Gabon | None | Sirkibble | |||
| Keke | N/A | Skud | |||
| Maw | N/A | Sparky | |||
| Mopoo | None | Tick | |||
| Poppy Bros. Jr. | Zebon | N/A | |||
| Mid-Bosses | |||||
| Big Mopoo | |||||
Gallery[edit]

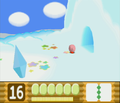
Kirby climbs the first hill in the stage.
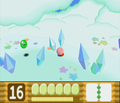
Hopping into the Zebon up top the hill
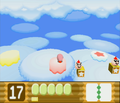
Hopping onto the cloud walkways

Moving toward a snack propped up by Star Blocks
Traversing small platforms in the air
Facing off against Pterans
Finding an interior cloud space
Moving through cloud caverns
Minding a Mopoo that springs from the ceiling
Carefully navigating past the Ticks

A Mopoo jumps over Kirby's head.
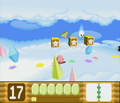
Moving past the waiting Maws
Battle with Big Mopoo


