Please remember that WiKirby contains spoilers, which you read at your own risk! See our general disclaimer for details.
Mustard Mountain - Room 3: Difference between revisions
From WiKirby, your independent source of Kirby knowledge.
Jump to navigationJump to search
m (Text replacement - "{{AMMM2NavMap" to "{{Navmap-KaTAM-MuM") |
m (Text replacement - "\|theme title=\[\[(.*)\]\]" to "|theme title="$1"") |
||
| (8 intermediate revisions by 4 users not shown) | |||
| Line 1: | Line 1: | ||
{{Infobox-K&TAMRoom | {{Infobox-K&TAMRoom | ||
|image= [[File:Mustard Mountain Room 3.png]] | |image= [[File:KaTAM Mustard Mountain Room 3.png]] | ||
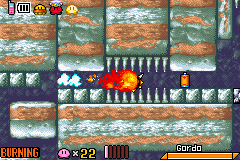
|caption=[[Kirby]] blasts through the [[Gordo]] on patrol in '''Room 3'''. | |caption=[[Kirby]] blasts through the [[Gordo]] on patrol in '''Room 3'''. | ||
|area=[[Mustard Mountain]] | |area=[[Mustard Mountain]] | ||
| Line 6: | Line 6: | ||
|to=[[Mustard Mountain - Room 2|Room 2]]<br>[[Mustard Mountain - Hub|Hub]] | |to=[[Mustard Mountain - Room 2|Room 2]]<br>[[Mustard Mountain - Hub|Hub]] | ||
|chest={{N}} | |chest={{N}} | ||
|theme music=[[File:Cave Rocky Area KaTAM.mp3]] | |||
|theme title="[[Forest Stage|Cave/Rocky Area]]" | |||
|description=Clip of the "Cave/Rocky Area" theme from ''[[Kirby & The Amazing Mirror]]'' | |||
}} | }} | ||
'''Mustard Mountain - Room 3''' is a room in [[Mustard Mountain]], the fourth area of ''[[Kirby & The Amazing Mirror]]''. | '''Mustard Mountain - Room 3''' is a room in [[Mustard Mountain]], the fourth area of ''[[Kirby & The Amazing Mirror]]''. | ||
| Line 13: | Line 16: | ||
==Overview== | ==Overview== | ||
This room is essentially a two-way maze. Two [[Gordo]]s on the top right of the room guard two items: a [[1-Up]] and cell phone [[battery]], while [[Giant Rocky|Giant Rockies]] and other foes patrol the area below. Past this section, there should be a shortcut that leads to the door to Room 2. | This room is essentially a two-way maze. Two [[Gordo]]s on the top right of the room guard two items: a [[1-Up]] and cell phone [[Battery (Kirby & The Amazing Mirror)|battery]], while [[Giant Rocky|Giant Rockies]] and other foes patrol the area below. Past this section, there should be a shortcut that leads to the door to Room 2. | ||
==Enemies== | ==Enemies== | ||
| Line 21: | Line 24: | ||
!Copy Ability | !Copy Ability | ||
|- | |- | ||
|align=center|[[File: | |align=center|[[File:KNiDL Flamer sprite.png]] | ||
|[[Flamer]] | |[[Flamer]] | ||
|[[Burning]] | |[[Burning]] | ||
| Line 29: | Line 32: | ||
|[[Stone]] | |[[Stone]] | ||
|- | |- | ||
|align=center|[[File: | |align=center|[[File:KNiDL Gordo sprite.png]] | ||
|[[Gordo]] | |[[Gordo]] | ||
|N/A | |N/A | ||
|- | |- | ||
|align=center|[[File: | |align=center|[[File:KNiDL Sword Knight sprite.png]] | ||
|[[Sword Knight]] | |[[Sword Knight]] | ||
|[[Sword]] | |[[Sword]] | ||
|- | |- | ||
|align=center|[[File: | |align=center|[[File:KNiDL Waddle Doo sprite.png]] | ||
|[[Waddle Doo]] | |[[Waddle Doo]] | ||
|[[Beam]] | |[[Beam]] | ||
| Line 44: | Line 47: | ||
==Gallery== | ==Gallery== | ||
<gallery> | <gallery> | ||
KaTAM 4-3 Map.png|Composite map of the room | |||
</gallery> | </gallery> | ||
Latest revision as of 19:40, 19 January 2024
| ||||||||||||||
| ||||||||||||||
|
| ||||||||||||||
Mustard Mountain - Room 3 is a room in Mustard Mountain, the fourth area of Kirby & The Amazing Mirror.
Links[edit]
This room links to Mustard Mountain - Hub on the left and Mustard Mountain - Room 2 on the right.
Overview[edit]
This room is essentially a two-way maze. Two Gordos on the top right of the room guard two items: a 1-Up and cell phone battery, while Giant Rockies and other foes patrol the area below. Past this section, there should be a shortcut that leads to the door to Room 2.
Enemies[edit]
| Sprite | Name | Copy Ability |
|---|---|---|
| Flamer | Burning | |
| Giant Rocky | Stone | |
| Gordo | N/A | |
| Sword Knight | Sword | |
| Waddle Doo | Beam |
Gallery[edit]
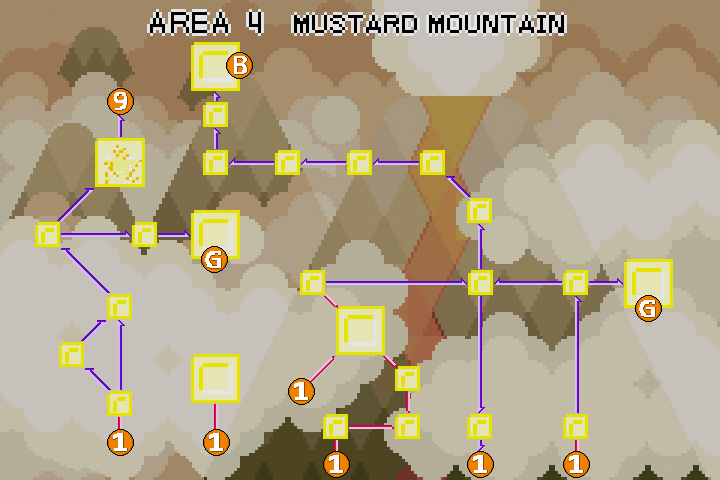
| Mustard Mountain Area Map | |
|---|---|
 | |
| |||||||||||||||||||||||||||||
