Bonkers/gallery: Difference between revisions
(→Other) |
|||
| (11 intermediate revisions by 4 users not shown) | |||
| Line 10: | Line 10: | ||
KSSU Bonkers Laurel artwork.png|Bonkers laurel from the instruction manual for ''Kirby Super Star Ultra'' | KSSU Bonkers Laurel artwork.png|Bonkers laurel from the instruction manual for ''Kirby Super Star Ultra'' | ||
KPR Manga Bonkers Sticker.png|Manga Bonkers [[Sticker (Kirby: Planet Robobot)|Sticker]] from ''[[Kirby: Planet Robobot]]'' | KPR Manga Bonkers Sticker.png|Manga Bonkers [[Sticker (Kirby: Planet Robobot)|Sticker]] from ''[[Kirby: Planet Robobot]]'' | ||
TKCD Bonkers Art.png|In-game artwork from ''[[Team Kirby Clash Deluxe]]'' | |||
KSA Zap Bonkers Artwork.png|Artwork as a [[Helper|Friend]] with [[Power Effect|Zap Hammer]] from ''[[Kirby Star Allies]]'' | KSA Zap Bonkers Artwork.png|Artwork as a [[Helper|Friend]] with [[Power Effect|Zap Hammer]] from ''[[Kirby Star Allies]]'' | ||
KSA Bonkers Pause Screen Artwork.png|Pause screen artwork from ''Kirby Star Allies'' | KSA Bonkers Pause Screen Artwork.png|Pause screen artwork from ''Kirby Star Allies'' | ||
SKC Bonkers Art.png|In-game | SKC Bonkers Art.png|In-game artwork from ''[[Super Kirby Clash]]'' | ||
SKC Team Heavy Hitter.png|In-game artwork of Team Heavy Hitter from ''Super Kirby Clash'', which includes Bonkers | |||
Piggyback KGCN artwork.png|Bonkers in a piggyback from the [[Kirby for Nintendo GameCube|canceled ''Kirby'' game]] for Nintendo GameCube | Piggyback KGCN artwork.png|Bonkers in a piggyback from the [[Kirby for Nintendo GameCube|canceled ''Kirby'' game]] for Nintendo GameCube | ||
SSBB Bonkers Sticker artwork.png|Sticker from ''[[Super Smash Bros. Brawl]]'' based on his artwork from ''Kirby: Squeak Squad'' | SSBB Bonkers Sticker artwork.png|Sticker from ''[[Super Smash Bros. Brawl]]'' based on his artwork from ''Kirby: Squeak Squad'' | ||
K25AOC Bonkers Artwork.png|[[Kirby 25th Anniversary Orchestra Concert]] | K25AOC Bonkers Artwork.png|[[Kirby 25th Anniversary Orchestra Concert]] | ||
Vividria concept art.png|Concept art of [[Vividria]] for ''Kirby Star Allies'', with a sketch comparing her height to Bonkers | |||
</gallery> | </gallery> | ||
===[[Kirby JP Twitter]] illustrations=== | ===[[Kirby JP Twitter]] illustrations=== | ||
| Line 31: | Line 34: | ||
KA Bonkers QD sprite.png|Sprite from [[Quick Draw]] in ''Kirby's Adventure'' | KA Bonkers QD sprite.png|Sprite from [[Quick Draw]] in ''Kirby's Adventure'' | ||
KSS Bonkers.png|''[[Kirby Super Star]]'' (as a mid-boss) | KSS Bonkers.png|''[[Kirby Super Star]]'' (as a mid-boss) | ||
KSS Bonkers sprite 2.png|''Kirby Super Star'' (as a mid-boss in [[Milky Way Wishes]]) | |||
KSS Bonkers sprite 3.png|''Kirby Super Star'' (as a mid-boss in Milky Way Wishes) | |||
KSS Bonkers Sprite.png|''Kirby Super Star'' (as a helper) | KSS Bonkers Sprite.png|''Kirby Super Star'' (as a helper) | ||
KSS Bonkers Icon.png|Icon from ''Kirby Super Star'' | KSS Bonkers Icon.png|Icon from ''Kirby Super Star'' | ||
KSS Bonkers sprite 4.png|Unused palette from ''Kirby Super Star'' | |||
KNiDL Bonkers sprite.png|''[[Kirby: Nightmare in Dream Land]]'', ''[[Kirby & The Amazing Mirror]]'', and ''[[Kirby: Squeak Squad]]'' | KNiDL Bonkers sprite.png|''[[Kirby: Nightmare in Dream Land]]'', ''[[Kirby & The Amazing Mirror]]'', and ''[[Kirby: Squeak Squad]]'' | ||
KSSU Bonkers Sprite.png|''[[Kirby Super Star Ultra]]'' (as a mid-boss) | KSSU Bonkers Sprite.png|''[[Kirby Super Star Ultra]]'' (as a mid-boss) | ||
| Line 38: | Line 44: | ||
KSSU Bonkers Helper to Hero sprite.png|''Kirby Super Star Ultra'' ([[Helper to Hero]]) | KSSU Bonkers Helper to Hero sprite.png|''Kirby Super Star Ultra'' ([[Helper to Hero]]) | ||
KSSU Bonkers Icon.png|Icon from ''Kirby Super Star Ultra'' | KSSU Bonkers Icon.png|Icon from ''Kirby Super Star Ultra'' | ||
KSSU Mid-Boss All Stars 1 Arena Icon.png|Mid-Boss All Stars 1 icon from ''Kirby Super Star Ultra'' ([[The Arena]]) | |||
KSSU Mid-Boss All Stars 1 Helper to Hero Icon.png|Mid-Boss All Stars 1 icon from ''Kirby Super Star Ultra'' ([[Helper to Hero]]) | |||
KSSU King Dedede Helper to Hero Icon.png|[[King Dedede]] Helper to Hero icon from ''Kirby Super Star Ultra'' | |||
Bonkers CardSwipe KSSU.png|Card from [[Kirby Card Swipe]] in ''Kirby Super Star Ultra'' | Bonkers CardSwipe KSSU.png|Card from [[Kirby Card Swipe]] in ''Kirby Super Star Ultra'' | ||
Bonkers KirbyontheDraw KSSU.png|Target from [[Kirby on the Draw]] in ''Kirby Super Star Ultra'' | Bonkers KirbyontheDraw KSSU.png|Target from [[Kirby on the Draw]] in ''Kirby Super Star Ultra'' | ||
Keychain Bonkers1.png|Keychain from ''[[Kirby: Triple Deluxe]]'' | Keychain Bonkers1.png|Keychain from ''[[Kirby: Triple Deluxe]]'' | ||
Keychain Bonkers2.png|Keychain from ''Kirby: Triple Deluxe'' | Keychain Bonkers2.png|Keychain from ''Kirby: Triple Deluxe'' | ||
KRtDLD Bonkers Mask Icon.png|[[Dress-Up Mask]] from ''[[Kirby's Return to Dream Land Deluxe]]'' | KSA Ambush Type A TUC Preview.png|Ambush Type A icon from [[The Ultimate Choice]] in ''[[Kirby Star Allies]]'' | ||
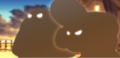
KSA Ambush Type C TUC Preview.png|Ambush Type C icon from The Ultimate Choice in ''Kirby Star Allies'' | |||
KSA Ambush Type E TUC Preview.png|Ambush Type E icon from The Ultimate Choice in ''Kirby Star Allies'' | |||
KRtDLD Bonkers Mask Icon.png|[[Mask#Kirby's Return to Dream Land Deluxe|Dress-Up Mask]] from ''[[Kirby's Return to Dream Land Deluxe]]'' | |||
</gallery> | </gallery> | ||
| Line 75: | Line 87: | ||
KRtDLD Bonkers screenshot.png|''[[Kirby's Return to Dream Land Deluxe]]'' | KRtDLD Bonkers screenshot.png|''[[Kirby's Return to Dream Land Deluxe]]'' | ||
KRtDLD Bonkers EX screenshot.png|Bonkers EX in ''Kirby's Return to Dream Land Deluxe'' | KRtDLD Bonkers EX screenshot.png|Bonkers EX in ''Kirby's Return to Dream Land Deluxe'' | ||
KRtDLD Bonkers Mask.jpg|Kirby wearing the Bonkers [[Dress-Up Mask]] in ''Kirby's Return to Dream Land Deluxe'' | KRtDLD Bonkers Mask.jpg|Kirby wearing the Bonkers [[Mask#Kirby's Return to Dream Land Deluxe|Dress-Up Mask]] in ''Kirby's Return to Dream Land Deluxe'' | ||
KRtDLD Bonkers target screenshot.png|Target from [[Kirby on the Draw]] in ''Kirby's Return to Dream Land Deluxe'' | KRtDLD Bonkers target screenshot.png|Target from [[Kirby on the Draw]] in ''Kirby's Return to Dream Land Deluxe'' | ||
Kirby GCN icy area.jpg|Kirby, Bonkers, [[Chilly]] and [[Knuckle Joe]] in an icy area from ''[[Kirby for Nintendo GameCube]]'' | Kirby GCN icy area.jpg|Kirby, Bonkers, [[Chilly]] and [[Knuckle Joe]] in an icy area from ''[[Kirby for Nintendo GameCube]]'' | ||
| Line 97: | Line 109: | ||
KDB Zap Hammer Bonkers character treat.png|Zap Hammer Bonkers Character Treat from ''Kirby's Dream Buffet'', depicting artwork from ''Kirby Star Allies'' | KDB Zap Hammer Bonkers character treat.png|Zap Hammer Bonkers Character Treat from ''Kirby's Dream Buffet'', depicting artwork from ''Kirby Star Allies'' | ||
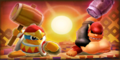
KRtDLD Main Credits picture 17.png|Main Mode credits picture from ''[[Kirby's Return to Dream Land Deluxe]]'', featuring Kirby and King Dedede guarding Bonkers' attack | KRtDLD Main Credits picture 17.png|Main Mode credits picture from ''[[Kirby's Return to Dream Land Deluxe]]'', featuring Kirby and King Dedede guarding Bonkers' attack | ||
V7 Illustration 6.png|Mechanized Bonkers in the novel ''[[Kirby and the Great Planet Robobot Adventure!]]'' | |||
FK1 OS Bonkers.png|Bonkers in the book ''[[Find Kirby!!]]'' | |||
IKT4 Bonkers Illustration.png|Bonkers in the book ''[[It's Kirby Time: Kirby's Tiny World]]'' | |||
IKT5 Bonkers Illustration.png|Bonkers in the book ''[[It's Kirby Time: Thank You]]'' | |||
Dedede Directory 8 - Bonkers.jpg|[[Dedede Directory]] about Bonkers | Dedede Directory 8 - Bonkers.jpg|[[Dedede Directory]] about Bonkers | ||
</gallery> | </gallery> | ||
{{Navbox-Galleries}} | {{Navbox-Galleries}} | ||
[[Category:Galleries]] | [[Category:Galleries]] | ||
Latest revision as of 07:49, 23 April 2024
A gallery of images relating to Bonkers.
Artwork[edit]
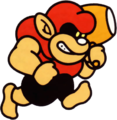
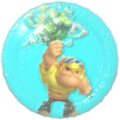
Artwork from Kirby's Adventure, which depicts Bonkers with eyes
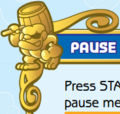
Bonkers laurel from the instruction manual for Kirby Super Star Ultra
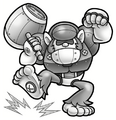
Manga Bonkers Sticker from Kirby: Planet Robobot
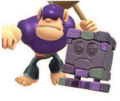
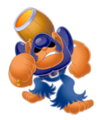
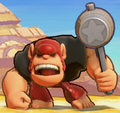
In-game artwork from Team Kirby Clash Deluxe
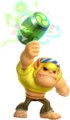
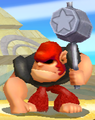
Artwork as a Friend with Zap Hammer from Kirby Star Allies
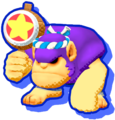
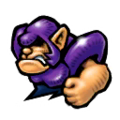
Pause screen artwork from Kirby Star Allies
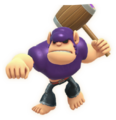
In-game artwork from Super Kirby Clash
In-game artwork of Team Heavy Hitter from Super Kirby Clash, which includes Bonkers
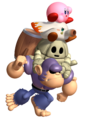
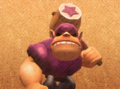
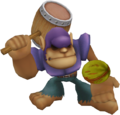
Bonkers in a piggyback from the canceled Kirby game for Nintendo GameCube
Sticker from Super Smash Bros. Brawl based on his artwork from Kirby: Squeak Squad
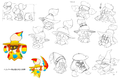
Concept art of Vividria for Kirby Star Allies, with a sketch comparing her height to Bonkers


Kirby JP Twitter illustrations[edit]
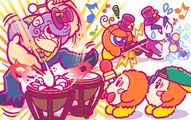
Kirby 25th Anniversary Orchestra Concert prelude, where Bonkers breaks his drums by hitting them too hard
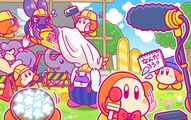
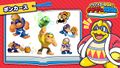
Rebranding preparations
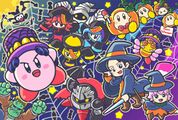
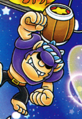
Halloween 2018, featuring Bonkers dressed as Frankenstein's monster
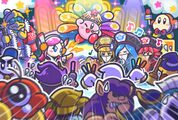
New Year's Eve 2019


Sprites[edit]

Kirby's Adventure (alternate palette)

Sprite from Quick Draw in Kirby's Adventure

Kirby Super Star (as a mid-boss)

Kirby Super Star (as a mid-boss in Milky Way Wishes)

Kirby Super Star (as a mid-boss in Milky Way Wishes)

Kirby Super Star (as a helper)

Icon from Kirby Super Star

Unused palette from Kirby Super Star

Kirby Super Star Ultra (as a mid-boss)

Kirby Super Star Ultra (as a helper)

Kirby Super Star Ultra (Helper to Hero)

Icon from Kirby Super Star Ultra
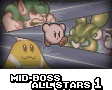
Mid-Boss All Stars 1 icon from Kirby Super Star Ultra (The Arena)
Mid-Boss All Stars 1 icon from Kirby Super Star Ultra (Helper to Hero)

King Dedede Helper to Hero icon from Kirby Super Star Ultra

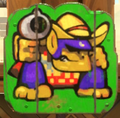
Card from Kirby Card Swipe in Kirby Super Star Ultra

Target from Kirby on the Draw in Kirby Super Star Ultra

Keychain from Kirby: Triple Deluxe

Keychain from Kirby: Triple Deluxe
Ambush Type A icon from The Ultimate Choice in Kirby Star Allies

Ambush Type C icon from The Ultimate Choice in Kirby Star Allies

Ambush Type E icon from The Ultimate Choice in Kirby Star Allies


Models[edit]
Bonkers EX from Kirby's Return to Dream Land
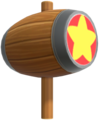
Bonkers' hammer from Kirby Star Allies, which is also used by Hammer Kirby
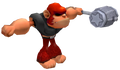
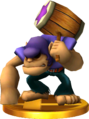
Model used for his trophy from Super Smash Bros. Brawl
Trophy from Super Smash Bros. for Nintendo 3DS


Screenshots[edit]
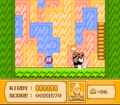
Kirby battling Bonkers in Kirby's Adventure
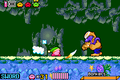
Kirby battles Bonkers in Olive Ocean, in Kirby & The Amazing Mirror

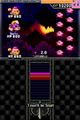
Kirby battles Bonkers in Stage 13 of Kirby Quest in Kirby Mass Attack
Kirby battles Bonkers alongside two Oohroos in Stage 37 of Kirby Quest in Kirby Mass Attack
Bonkers EX in Kirby's Return to Dream Land
Bonkers DX in Kirby: Triple Deluxe

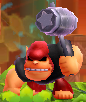
Bonkers 2.0 in Kirby: Planet Robobot
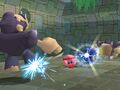
The tougher variant in Kirby Star Allies
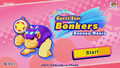
Title screen for Guest Star Bonkers: Banana Mania in Kirby Star Allies
Bonkers EX in Kirby's Return to Dream Land Deluxe
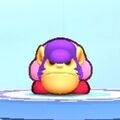
Kirby wearing the Bonkers Dress-Up Mask in Kirby's Return to Dream Land Deluxe
Target from Kirby on the Draw in Kirby's Return to Dream Land Deluxe
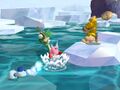
Kirby, Bonkers, Chilly and Knuckle Joe in an icy area from Kirby for Nintendo GameCube
Kirby and Knuckle Joe fighting two Bonkers from Kirby for Nintendo GameCube
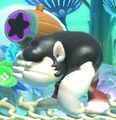
Bonkers in the episode Goin' Bonkers from Kirby: Right Back at Ya!
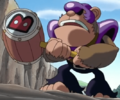
Bonkers inquiring about Kirby's whereabouts (Kirby: Right Back at Ya!)
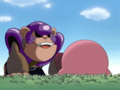
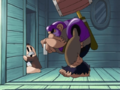
Bonkers finding Kirby (Kirby: Right Back at Ya!)
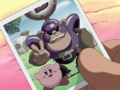
Bonkers holding a picture of him posing with Kirby (Kirby: Right Back at Ya!)


Other[edit]
Main Mode credits picture from Kirby's Return to Dream Land, featuring Kirby and King Dedede guarding Bonkers' attack
Dededetour! credits picture from Kirby: Triple Deluxe, featuring King Dedede and Bonkers DX preparing to strike each other
Story Mode credits picture from Kirby Star Allies, featuring Kirby calling upon everyone to defeat Void Termina
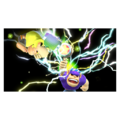
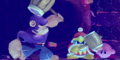
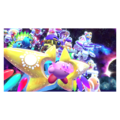
Guest Star ???? Star Allies Go! credits picture from Kirby Star Allies, featuring Bonkers helping his fellow comrade to gain the Zap element
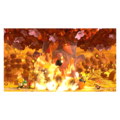
Guest Star ???? Star Allies Go! credits picture from Kirby Star Allies, featuring Bonkers helping the group roast Yggy Woods
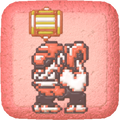
Character Treat from Kirby's Dream Buffet, depicting Bonkers' sprite from Kirby's Adventure
Zap Hammer Bonkers Character Treat from Kirby's Dream Buffet, depicting artwork from Kirby Star Allies

Main Mode credits picture from Kirby's Return to Dream Land Deluxe, featuring Kirby and King Dedede guarding Bonkers' attack
Mechanized Bonkers in the novel Kirby and the Great Planet Robobot Adventure!
Bonkers in the book Find Kirby!!

Bonkers in the book It's Kirby Time: Kirby's Tiny World

Bonkers in the book It's Kirby Time: Thank You
Dedede Directory about Bonkers


