Cloudy Park - Stage 2 (Kirby's Dream Land 2): Difference between revisions
Trig Jegman (talk | contribs) mNo edit summary |
mNo edit summary |
||
| (12 intermediate revisions by 6 users not shown) | |||
| Line 1: | Line 1: | ||
{{ | {{DISPLAYTITLE: Cloudy Park - Stage 2 (''Kirby's Dream Land 2'')}}{{Infobox-KDL2Stage | ||
{{Infobox-KDL2Stage | |||
|title=Cloudy Park - Stage 2 | |title=Cloudy Park - Stage 2 | ||
|image=[[File: | |image=[[File:KDL2 Cloudy Park 2-3.png]] | ||
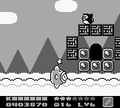
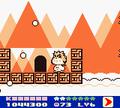
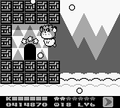
|caption=[[Kirby]] and [[Kine]] reach the center of the puzzle. | |caption=[[Kirby]] and [[Kine]] reach the center of the puzzle. | ||
|level=[[Cloudy Park (Kirby's Dream Land 2)|Cloudy Park]] | |level=[[Cloudy Park (Kirby's Dream Land 2)|Cloudy Park]] | ||
| Line 22: | Line 21: | ||
The door leads to a chamber with another animal bag and two [[Shotzo]]s. To free [[Coo]] from the bag, the Shotzos need to be dumped by breaking the spark-weak blocks under them with Rick. From there, the door leads to a wind-swept plain that only Coo can resist. A door can be found against the current which leads to a fight with [[Waiu]] to obtain the [[Cutter]] ability. Downwind, another room can be found where that ability can be used to obtain the sixth [[Rainbow Drop]]. The stage exit can be found further downwind. | The door leads to a chamber with another animal bag and two [[Shotzo]]s. To free [[Coo]] from the bag, the Shotzos need to be dumped by breaking the spark-weak blocks under them with Rick. From there, the door leads to a wind-swept plain that only Coo can resist. A door can be found against the current which leads to a fight with [[Waiu]] to obtain the [[Cutter]] ability. Downwind, another room can be found where that ability can be used to obtain the sixth [[Rainbow Drop]]. The stage exit can be found further downwind. | ||
==Enemies and | ==Enemies and Mid-Bosses== | ||
{| width=50% | {| width=50% | ||
|<tabs> | |<tabs> | ||
| Line 34: | Line 33: | ||
!Copy Ability | !Copy Ability | ||
|- | |- | ||
|align=center|[[File: | |align=center|[[File:KDL2 Blade sprite.png]] | ||
|[[Blade]] | |[[Blade]] | ||
|style="border-style: solid; border-width: 1px 3px 1px 1px"|N/A | |style="border-style: solid; border-width: 1px 3px 1px 1px"|N/A | ||
|align=center|[[File: | |align=center|[[File:KDL2 Gordo sprite.png]] | ||
|[[Gordo]] | |[[Gordo]] | ||
|N/A | |N/A | ||
|- | |- | ||
|align=center|[[File: | |align=center|[[File:KDL2 Bronto Burt sprite.png]] | ||
|[[Bronto Burt]] | |[[Bronto Burt]] | ||
|style="border-style: solid; border-width: 1px 3px 1px 1px"|None | |style="border-style: solid; border-width: 1px 3px 1px 1px"|None | ||
|align=center|[[File: | |align=center|[[File:KDL2 Masher sprite.png]] | ||
|[[Masher]] | |[[Masher]] | ||
|N/A | |N/A | ||
|- | |- | ||
|align=center|[[File: | |align=center|[[File:KDL2 Broom Hatter sprite.png]] | ||
|[[Broom Hatter]] | |[[Broom Hatter]] | ||
|style="border-style: solid; border-width: 1px 3px 1px 1px"|None | |style="border-style: solid; border-width: 1px 3px 1px 1px"|None | ||
|align=center|[[File: | |align=center|[[File:KDL2 Master Pengy sprite.png]] | ||
|[[Pengy|Master Pengy]] | |[[Pengy|Master Pengy]] | ||
|[[Ice]] | |[[Ice]] | ||
|- | |- | ||
|align=center|[[File: | |align=center|[[File:KDL2 Butch sprite.png]] | ||
|[[Butch]] | |[[Butch]] | ||
|style="border-style: solid; border-width: 1px 3px 1px 1px"|N/A | |style="border-style: solid; border-width: 1px 3px 1px 1px"|N/A | ||
|align=center|[[File: | |align=center|[[File:KDL2 Shotzo sprite.png]] | ||
|[[Shotzo]] | |[[Shotzo]] | ||
|N/A | |N/A | ||
|- | |- | ||
|align=center|[[File: | |align=center|[[File:KDL2 Glunk sprite.png]] | ||
|[[Glunk]] | |[[Glunk]] | ||
|style="border-style: solid; border-width: 1px 3px 1px 1px"|None | |style="border-style: solid; border-width: 1px 3px 1px 1px"|None | ||
|align=center|[[File: | |align=center|[[File:KDL2 Waddle Dee sprite.png]] | ||
|[[Waddle Dee]] | |[[Waddle Dee]] | ||
|None | |None | ||
| Line 76: | Line 75: | ||
!Copy Ability | !Copy Ability | ||
|- | |- | ||
|align=center|[[File: | |align=center|[[File:KDL2 Blocky sprite.png]] | ||
|[[Blocky]] | |[[Blocky]] | ||
|[[Stone]] | |[[Stone]] | ||
|- | |- | ||
|align=center|[[File: | |align=center|[[File:KDL2 Master Green sprite.png]] | ||
|[[Master Green]] | |[[Master Green]] | ||
|[[Spark]] | |[[Spark]] | ||
|- | |- | ||
|align=center|[[File: | |align=center|[[File:KDL2 Waiu sprite.png]] | ||
|[[Waiu]] | |[[Waiu]] | ||
|[[Cutter]] | |[[Cutter]] | ||
| Line 94: | Line 93: | ||
==Gallery== | ==Gallery== | ||
<gallery> | <gallery> | ||
KDL2 Cloudy Park 2-1.png|A simple but effective stopgap | |||
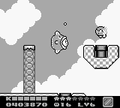
KDL2 Cloudy Park 2-2.png|Riding the currents | |||
KDL2 Cloudy Park 2-4.png|Battle with [[Master Green]] | |||
KDL2 Cloudy Park 2-5.png|Battle with [[Blocky]] | |||
KDL2 Cloudy Park 2-6.png|Dispatching the [[Shotzo]]s | |||
KDL2 Cloudy Park 2-7.png|Fighting the blizzard | |||
KDL2 Cloudy Park 2-8.png|Battle with [[Waiu]] | |||
KDL2 Rainbow Drop location 6.png|Reaching the door as intended | |||
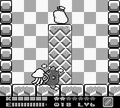
KDL2 Cloudy Park 2-9.png|The Rainbow Drop is reachable with the proper tools. | |||
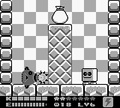
KDL2 Cloudy Park 2-10.png|The stage exit lies just ahead. | |||
</gallery> | </gallery> | ||
{{clear}} | {{clear}} | ||
{{Navbox- | |||
{{Navbox-KDL2}} | |||
Latest revision as of 12:27, 21 September 2022
| ||||||||||||||||
| ||||||||||||||||
|
| ||||||||||||||||

- This article is about the stage in Kirby's Dream Land 2. For the stage in Kirby's Dream Land 3, see Cloudy Park - Stage 2 (Kirby's Dream Land 3).
Cloudy Park - Stage 2 is the second stage of Cloudy Park in Kirby's Dream Land 2. The Rainbow Drop can be found in this stage.
Overview[edit]
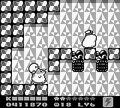
The stage begins in a flat cloudy plain studded by the occasional platform. Along the way, a 1-Up can be collected by breaking away blocks using an Ice power. At the end of the path, the door to the next area can only be accessed with the Ice ability.
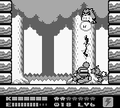
The door leads to an open area with wind pipes guarded by Bronto Burts. In the lower-middle, a side chamber can be found which leads to a wide flowing water tube. At the downstream end leads to a fight with Blocky and will allow Kirby to free Rick from the bag. If Kirby has Kine, they can swim upstream to find another room where Master Green can be fought for the Spark ability and Gooey can be freed from the bag for some extra points.
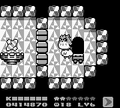
The door leads to a chamber with another animal bag and two Shotzos. To free Coo from the bag, the Shotzos need to be dumped by breaking the spark-weak blocks under them with Rick. From there, the door leads to a wind-swept plain that only Coo can resist. A door can be found against the current which leads to a fight with Waiu to obtain the Cutter ability. Downwind, another room can be found where that ability can be used to obtain the sixth Rainbow Drop. The stage exit can be found further downwind.
Enemies and Mid-Bosses[edit]
|
Gallery[edit]
A simple but effective stopgap
Riding the currents
Battle with Master Green
Battle with Blocky
Dispatching the Shotzos

Fighting the blizzard
Battle with Waiu
Reaching the door as intended
The Rainbow Drop is reachable with the proper tools.
The stage exit lies just ahead.


| |||||||||||||||||||||||