Dangerous Dinner - Stage 3: Difference between revisions
m (Text replacement - "{{Navbox-RtDL}}" to "{{Navbox-KRtDL}}") |
m (Minor fix) |
||
| (22 intermediate revisions by 8 users not shown) | |||
| Line 1: | Line 1: | ||
{{Infobox-KRtDLStage | {{Infobox-KRtDLStage | ||
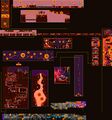
|image=[[File: | |image=[[File:KRtDLD Dangerous Dinner Stage 3 select screenshot.png|350px]] | ||
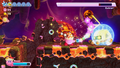
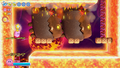
|caption= | |caption='''Dangerous Dinner - Stage 3''' in the [[level hub]]. | ||
|level=[[Dangerous Dinner]] | |level=[[Dangerous Dinner]] | ||
|super=[[Ultra Sword]] | |super=[[Ultra Sword]] | ||
|sphere=5 | |sphere=5 | ||
|midboss=All standard Mid-Bosses, two [[Sphere Doomer]]s ( | |midboss=All standard Mid-Bosses, two [[Sphere Doomer]]s (Fire and neutral) | ||
|theme music=[[File:Limitless Power sample KRtDL.oga]] | |||
|theme title="[[Limitless Power]]" | |||
|description=Clip of the theme that primarily plays in Dangerous Dinner - Stage 3. | |||
|previousstage=[[Dangerous Dinner - Stage 2]] | |previousstage=[[Dangerous Dinner - Stage 2]] | ||
|nextstage=[[ | |nextstage=[[Dangerous Dinner - Stage 4]] | ||
}} | }} | ||
'''Dangerous Dinner - Stage 3''' (simply called '''Stage 3''' or '''7-3''' in-game) is the third stage of [[Dangerous Dinner]] in ''[[Kirby's Return to Dream Land]]'' and its remake—''[[Kirby's Return to Dream Land Deluxe]]'', and the last standard stage in the main game. There are five [[Energy Sphere]]s in this stage. | |||
'''Dangerous Dinner - Stage 3''' is the third stage of [[Dangerous Dinner]] in '' | |||
==Overview== | ==Overview== | ||
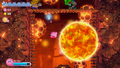
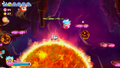
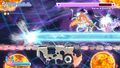
The stage begins at the top of a cave, with a cannon aimed downward. It fires Kirby and his friends down to another cannon, which must fire carefully in order avoid getting its cargo crushed by moving walls. At the bottom, two [[Knuckle Joe]]s stand guard on a platform hanging over a bizarre floating orb of fire. Below are a bunch of [[Halcandle Dee]]s which guard the door to the next section. | [[File:KRtDLD Dangerous Dinner Stage 3 screenshot 13.png|thumb|left|250px|Kirby flies on his Warp Star to get around the burning planetoids and to his final destination.]] | ||
The stage begins at the top of a cave, with a [[cannon]] aimed downward. It fires Kirby and his friends down to another cannon, which must fire carefully in order avoid getting its cargo crushed by moving walls. At the bottom, two [[Knuckle Joe]]s stand guard on a platform hanging over a bizarre floating orb of fire. Below are a bunch of [[Halcandle Dee]]s which guard the door to the next section. | |||
The door leads to an exterior area. The background has become a nauseating blend of the fiery terrain seen thus far, and elements from | The door leads to an exterior area. The background has become a nauseating blend of the fiery terrain seen thus far, and elements from [[Another Dimension]]. To the right, Kirby must dodge more fire orbs as they drift across the terrain. Bridges of breakable blocks span over [[bottomless pit]]s, which the fire orbs will easily plow through. From there, Kirby will have to move past walls of breakable blocks, which the fire orbs also happily destroy. The last wall is broken through to reveal the door to the next section. | ||
The door leads to another bridge area, this time with the orbs swaying back and forth. Kirby has to maneuver past them carefully and systematically to avoid colliding with them. Ahead, teetering pillars of boiling rock will fall over if Kirby gets too close, and more fire orbs wait even further in. Just beyond them lies the door to the next section. | The door leads to another bridge area, this time with the orbs swaying back and forth. Kirby has to maneuver past them carefully and systematically to avoid colliding with them. Ahead, teetering pillars of boiling rock will fall over if Kirby gets too close, and more fire orbs wait even further in. Just beyond them lies the door to the next section. | ||
In the next area, Kirby finds himself in a cave with a continuously scrolling floor. Interspersed in the floor are bottomless pits and inlets containing various enemies with Copy Abilities or food items. A chamber in this cave lies ahead where [[Dubior]] must be fought, as the floor continues to shift and provide different enemies and food. Defeating Dubior provides the [[Spark]] ability, but only if it doesn't fall into one of the pits. Further in, a ceiling inlet can be accessed to get some stars and a Maxim Tomato, but again, the pits must be minded here. To the right, the door to the next section can be found on a separate platform. | In the next area, Kirby finds himself in a cave with a continuously scrolling floor. Interspersed in the floor are bottomless pits and inlets containing various enemies with [[Copy Ability|Copy Abilities]] or food items. A chamber in this cave lies ahead where [[Dubior]] must be fought, as the floor continues to shift and provide different enemies and food. Defeating Dubior provides the [[Spark]] ability, but only if it doesn't fall into one of the pits. Further in, a ceiling inlet can be accessed to get some stars and a [[Maxim Tomato]], but again, the pits must be minded here. To the right, the door to the next section can be found on a separate platform. | ||
The door leads to an open area, with sparse platforms and many huge fire orbs. Many [[Parasol Waddle Dee]] | The door leads to an open area, with sparse platforms and many huge fire orbs. Many [[Parasol Waddle Dee|Parasol Halcandle Dees]] are encountered here, as well as many other foes. Kirby will have to proceed to the right to move forward. | ||
Up ahead is a vertical shaft with a [[Prism Shield]] waiting atop a ceiling barrier. Pressing a switch opens the barrier, and causes the floor to begin rising up. Kirby will need to make use of the Shield to block oncoming enemies from above. | Up ahead is a vertical shaft with a [[Prism Shield]] waiting atop a ceiling barrier. Pressing a switch opens the barrier, and causes the floor to begin rising up. Kirby will need to make use of the Shield to block oncoming enemies from above. At the top, Kirby can recover a [[key]] from a [[Key Dee]] before going through the door. | ||
The next area is another vertical shaft, this time with platforms leading up and fire orbs crossing horizontally. It's a brutal climb to the top with the | The next area is another vertical shaft, this time with platforms leading up and fire orbs crossing horizontally. It's a brutal climb to the top with the key, and one slip up can cause the key to break, so Kirby must proceed with both speed and caution. If Kirby has the Spark ability from Dubior, it will help immensely here. After passing the fire orbs, Kirby must then contend with [[Iron Barbar]]s coming out of the ceilings and walls before finally making it to the top. | ||
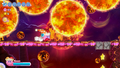
In the following area, Kirby has to make his way through an elaborate tunnel with lots and lots of [[Mid-Boss]]es in his way. Thankfully, Kirby gains access to the [[Ultra Sword]] here, and can use it against these fiends. After cleaning his way through these obstacles, Kirby can find a caldera at the top and cut it in half with his sword, revealing the rift. | In the following area, Kirby has to make his way through an elaborate tunnel with lots and lots of [[Mid-Boss]]es in his way. Thankfully, Kirby gains access to the [[Ultra Sword]] here, and can use it against these fiends to take them out in a single hit. After cleaning his way through these obstacles, Kirby can find a caldera at the top and cut it in half with his sword, revealing the rift. | ||
=== | ===Another Dimension rift=== | ||
In this rift, Kirby needs to progress past a great many obstacles while also avoiding the fire orbs from the main portion of the stage. Kirby will have to contend with practically everything he has faced in these realms up to this point before reaching the end, where he has | In this rift, Kirby needs to progress past a great many obstacles while also avoiding the fire orbs from the main portion of the stage. Kirby will have to contend with practically everything he has faced in these realms up to this point before reaching the end, where he has to fight two [[Sphere Doomer]]s at once. Once cleared, Kirby can return to the main path, and take a [[Warp Star]] waiting for him. | ||
After flying through many alien areas in the sky, Kirby finds himself in a bowl where he can access the stage exit. | After flying through many alien areas in the sky, Kirby finds himself in a bowl where he can access the stage exit. | ||
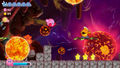
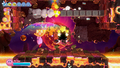
===Secret | ===Secret area=== | ||
[[File:KRtDLD Dangerous Dinner Stage 3 screenshot 14.png|thumb|250px|Kirby falling through a line of Point Stars in the secret area]] | |||
In the very last room, Kirby can access a hidden doorway in the sky above the stage exit. In the following room, Kirby can fall a great distance while collecting many goodies in lines. Another stage exit can be found at the bottom. | In the very last room, Kirby can access a hidden doorway in the sky above the stage exit. In the following room, Kirby can fall a great distance while collecting many goodies in lines. Another stage exit can be found at the bottom. | ||
===Energy Sphere | ===Energy Sphere guide=== | ||
*In the third area, Kirby can find the sphere under a bridge, above which some burning orbs patrol. Kirby will need some kind of ability to bust the breakable blocks at the end of the bridge and get underneath. | *In the third area, Kirby can find the first sphere under a bridge, above which some burning orbs patrol. Kirby will need some kind of ability to bust the breakable blocks at the end of the bridge and get underneath. | ||
*In the wide open area where the fire spheres move, one of the larger ones conceals a round-trip door. Inside, Kirby will have to contend with a difficult [[Stomper Boot]] challenge to obtain | *In the wide open area where the fire spheres move, one of the larger ones conceals a round-trip door. Inside, Kirby will have to contend with a difficult [[Stomper Boot]] challenge to obtain the second sphere. | ||
*At the top of the [[Prism Shield]] area, Kirby can obtain a | *At the top of the [[Prism Shield]] area, Kirby can obtain a key from a Key Dee up above. Kirby must then carry this key all the way through the next section and reach the top in order to unlock the gate holding the third sphere. | ||
*The last two spheres can be obtained from the | *The last two spheres can be obtained from the Sphere Doomers at the end of the rift. | ||
==Enemies, Mid-Bosses and | ==Enemies, Mid-Bosses and abilities== | ||
{| style="border: 3px solid #E47575; {{round}};background: #F69D99" cellspacing="2" | {| style="border: 3px solid #E47575; {{round}};background: #F69D99" cellspacing="2" | ||
! width="420px" | '''Regular Enemies''' | ! width="420px" | '''Regular Enemies''' | ||
| Line 52: | Line 55: | ||
{{col-begin}} | {{col-begin}} | ||
{{col-break|width=33%}} | {{col-break|width=33%}} | ||
*[[Armoroid]] <small>(KRtDLD only)</small> | |||
*[[Blade Knight]] | *[[Blade Knight]] | ||
*[[Bouncy]] | *[[Bouncy]] | ||
*[[Bowby]] | *[[Bowby]] | ||
*[[Bronto Burt]] | *[[Bronto Burt]] | ||
*[[Chilly]] | *[[Chilly]] | ||
*[[Gordo]] | *[[Gordo]] | ||
| Line 62: | Line 65: | ||
*[[Degout|Hunter Degout]] | *[[Degout|Hunter Degout]] | ||
{{col-break|width=33%}} | {{col-break|width=33%}} | ||
*[[Don Puffle]] <small>(KRtDLD only)</small> | |||
*[[Scarfy|Hunter Scarfy]] | *[[Scarfy|Hunter Scarfy]] | ||
*[[Iron Barbar]] | *[[Iron Barbar]] | ||
*[[Kabu]] | *[[Kabu]] | ||
*[[Key Dee]] | |||
*[[Knuckle Joe]] | *[[Knuckle Joe]] | ||
*[[Lanzer]] | *[[Lanzer]] | ||
*[[Leafan]] | *[[Leafan]] | ||
*[[Mumbies]]* | |||
*[[Owgulf]] | *[[Owgulf]] | ||
{{col-break|width=34%}} | |||
*[[Parasol Waddle Dee|Parasol Halcandle Dee]] | *[[Parasol Waddle Dee|Parasol Halcandle Dee]] | ||
*[[Rocky]] | *[[Rocky]] | ||
*[[Sandran]] <small>(KRtDLD only)</small> | |||
*[[Sir Kibble]] | *[[Sir Kibble]] | ||
*[[Super Blade Knight]] | *[[Super Blade Knight]] | ||
| Line 87: | Line 94: | ||
*[[King Doo]] | *[[King Doo]] | ||
*[[Moundo]] | *[[Moundo]] | ||
*Two [[Sphere Doomer]]s ( | *Two [[Sphere Doomer]]s (Fire & neutral) | ||
*[[Water Galboros]] | *[[Water Galboros]] | ||
{{col-end}} | {{col-end}} | ||
| Line 100: | Line 107: | ||
*[[Beam]] | *[[Beam]] | ||
*[[Cutter]] | *[[Cutter]] | ||
*[[Festival]] <small>(KRtDLD only)</small> | |||
*[[Fighter]] | *[[Fighter]] | ||
*[[Fire]] | *[[Fire]] | ||
*[[Ice]] | *[[Ice]] | ||
*[[Leaf]] | *[[Leaf]] | ||
*[[Mecha]] <small>(KRtDLD only)</small> | |||
*[[Mike]] | *[[Mike]] | ||
*[[Needle]] | *[[Needle]] | ||
{{col-break|width=50%}} | |||
*[[Parasol]] | *[[Parasol]] | ||
*[[Sand]] <small>(KRtDLD only)</small> | |||
*[[Sleep]] | *[[Sleep]] | ||
*[[Spark]] | *[[Spark]] | ||
| Line 122: | Line 132: | ||
{{col-end}} | {{col-end}} | ||
|} | |} | ||
<small>*Only appears in Extra Mode in ''Kirby's Return to Dream Land Deluxe''</small> | |||
==Gallery== | ==Gallery== | ||
=== ''Kirby's Return to Dream Land'' === | |||
<gallery> | |||
KRtDL Dangerous Dinner Stage 3.jpg|As Kirby and friends near their destination, the barriers between dimensions begin to wane. | |||
KRtDL Dangerous Dinner Stage 3-1.jpg|Kirby is double-protected. | |||
KRtDL Dangerous Dinner Stage 3-2.jpg|Three [[King Doo]]s are about to take a super hit. | |||
KRtDL Dangerous Dinner Stage 3-3.jpg|Kirby tackles searing orbs passing through bars of water in the rift. | |||
KRTDL-map-B-7-3.jpg|Stage map | |||
</gallery> | |||
=== ''Kirby's Return to Dream Land Deluxe'' === | |||
<gallery> | <gallery> | ||
KRtDLD Dangerous Dinner Stage 3 screenshot 01.png|Kirby falls past the first of many large fiery orbs. | |||
KRtDLD Dangerous Dinner Stage 3 screenshot 02.png|Kirby makes his way across the perilous breakable path. | |||
KRtDLD Dangerous Dinner Stage 3 screenshot 03.png|Kirby times his movement so as not to get sizzled by the orbs moving back and forth. | |||
KRtDLD Dangerous Dinner Stage 3 screenshot 04.png|Kirby faces off against Dubior in an area with a moving floor. | |||
KRtDLD Dangerous Dinner Stage 3 screenshot 05.png|Kirby moves close to a fire orb to grab a 1-Up. | |||
KRtDLD Dangerous Dinner Stage 3 screenshot 06.png|Kirby rides a fire orb using a Stomper Boot in a side area. | |||
KRtDLD Dangerous Dinner Stage 3 screenshot 07.png|Kirby uses his Prism Shield to grab a key. | |||
KRtDLD Dangerous Dinner Stage 3 screenshot 08.png|Kirby waits for two Iron Barbars to retract before moving forward. | |||
KRtDLD Dangerous Dinner Stage 3 screenshot 09.png|Kirby uses the Ultra Sword to dispatch three King Doos at once. | |||
KRtDLD Dangerous Dinner Stage 3 screenshot 10.png|Kirby slices a caldera in half. | |||
KRtDLD Dangerous Dinner Stage 3 screenshot 11.png|Kirby waits for the fire orb to pass through the water, creating steam as it does. | |||
KRtDLD Dangerous Dinner Stage 3 screenshot 12.png|Mike Kirby shouts at two Sphere Doomers. | |||
KRtDLD Mecha Kirby firing at Sphere Doomers screenshot.jpg|Mecha Kirby fires his Full-Charge Blaster. | |||
</gallery> | </gallery> | ||
==Video | ==Video walkthroughs== | ||
{{Youtube|DKmZk70Xb9c|300|100% walkthrough of Dangerous Dinner - Stage 3.}} | {{Youtube|DKmZk70Xb9c|300|100% walkthrough of Dangerous Dinner - Stage 3 in ''Kirby's Return to Dream Land''.}} | ||
{{Youtube|GiZ_8uyB9Jo|300|100% walkthrough of Dangerous Dinner - Stage 3 in Extra Mode in ''Kirby's Return to Dream Land Deluxe''.}} | |||
{{clear}} | {{clear}} | ||
{{Navbox-KRtDL}} | {{Navbox-KRtDL/KRtDLD}} | ||
Latest revision as of 14:05, 23 June 2023
| ||||||||||||||
| ||||||||||||||
| ||||||||||||||
|
| ||||||||||||||

Dangerous Dinner - Stage 3 (simply called Stage 3 or 7-3 in-game) is the third stage of Dangerous Dinner in Kirby's Return to Dream Land and its remake—Kirby's Return to Dream Land Deluxe, and the last standard stage in the main game. There are five Energy Spheres in this stage.
Overview[edit]

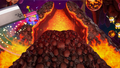
The stage begins at the top of a cave, with a cannon aimed downward. It fires Kirby and his friends down to another cannon, which must fire carefully in order avoid getting its cargo crushed by moving walls. At the bottom, two Knuckle Joes stand guard on a platform hanging over a bizarre floating orb of fire. Below are a bunch of Halcandle Dees which guard the door to the next section.
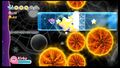
The door leads to an exterior area. The background has become a nauseating blend of the fiery terrain seen thus far, and elements from Another Dimension. To the right, Kirby must dodge more fire orbs as they drift across the terrain. Bridges of breakable blocks span over bottomless pits, which the fire orbs will easily plow through. From there, Kirby will have to move past walls of breakable blocks, which the fire orbs also happily destroy. The last wall is broken through to reveal the door to the next section.
The door leads to another bridge area, this time with the orbs swaying back and forth. Kirby has to maneuver past them carefully and systematically to avoid colliding with them. Ahead, teetering pillars of boiling rock will fall over if Kirby gets too close, and more fire orbs wait even further in. Just beyond them lies the door to the next section.
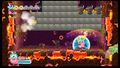
In the next area, Kirby finds himself in a cave with a continuously scrolling floor. Interspersed in the floor are bottomless pits and inlets containing various enemies with Copy Abilities or food items. A chamber in this cave lies ahead where Dubior must be fought, as the floor continues to shift and provide different enemies and food. Defeating Dubior provides the Spark ability, but only if it doesn't fall into one of the pits. Further in, a ceiling inlet can be accessed to get some stars and a Maxim Tomato, but again, the pits must be minded here. To the right, the door to the next section can be found on a separate platform.
The door leads to an open area, with sparse platforms and many huge fire orbs. Many Parasol Halcandle Dees are encountered here, as well as many other foes. Kirby will have to proceed to the right to move forward.
Up ahead is a vertical shaft with a Prism Shield waiting atop a ceiling barrier. Pressing a switch opens the barrier, and causes the floor to begin rising up. Kirby will need to make use of the Shield to block oncoming enemies from above. At the top, Kirby can recover a key from a Key Dee before going through the door.
The next area is another vertical shaft, this time with platforms leading up and fire orbs crossing horizontally. It's a brutal climb to the top with the key, and one slip up can cause the key to break, so Kirby must proceed with both speed and caution. If Kirby has the Spark ability from Dubior, it will help immensely here. After passing the fire orbs, Kirby must then contend with Iron Barbars coming out of the ceilings and walls before finally making it to the top.
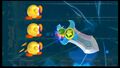
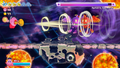
In the following area, Kirby has to make his way through an elaborate tunnel with lots and lots of Mid-Bosses in his way. Thankfully, Kirby gains access to the Ultra Sword here, and can use it against these fiends to take them out in a single hit. After cleaning his way through these obstacles, Kirby can find a caldera at the top and cut it in half with his sword, revealing the rift.
Another Dimension rift[edit]
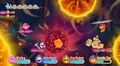
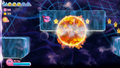
In this rift, Kirby needs to progress past a great many obstacles while also avoiding the fire orbs from the main portion of the stage. Kirby will have to contend with practically everything he has faced in these realms up to this point before reaching the end, where he has to fight two Sphere Doomers at once. Once cleared, Kirby can return to the main path, and take a Warp Star waiting for him.
After flying through many alien areas in the sky, Kirby finds himself in a bowl where he can access the stage exit.
Secret area[edit]

In the very last room, Kirby can access a hidden doorway in the sky above the stage exit. In the following room, Kirby can fall a great distance while collecting many goodies in lines. Another stage exit can be found at the bottom.
Energy Sphere guide[edit]
- In the third area, Kirby can find the first sphere under a bridge, above which some burning orbs patrol. Kirby will need some kind of ability to bust the breakable blocks at the end of the bridge and get underneath.
- In the wide open area where the fire spheres move, one of the larger ones conceals a round-trip door. Inside, Kirby will have to contend with a difficult Stomper Boot challenge to obtain the second sphere.
- At the top of the Prism Shield area, Kirby can obtain a key from a Key Dee up above. Kirby must then carry this key all the way through the next section and reach the top in order to unlock the gate holding the third sphere.
- The last two spheres can be obtained from the Sphere Doomers at the end of the rift.
Enemies, Mid-Bosses and abilities[edit]
| Regular Enemies | Mid-Bosses | ||||
|---|---|---|---|---|---|
|
| ||||
| Abilities | Super Ability | ||||
|
|
|
*Only appears in Extra Mode in Kirby's Return to Dream Land Deluxe
Gallery[edit]
Kirby's Return to Dream Land[edit]
As Kirby and friends near their destination, the barriers between dimensions begin to wane.
Kirby is double-protected.
Three King Doos are about to take a super hit.
Kirby tackles searing orbs passing through bars of water in the rift.
Stage map


Kirby's Return to Dream Land Deluxe[edit]
Kirby falls past the first of many large fiery orbs.
Kirby makes his way across the perilous breakable path.
Kirby times his movement so as not to get sizzled by the orbs moving back and forth.
Kirby faces off against Dubior in an area with a moving floor.
Kirby moves close to a fire orb to grab a 1-Up.
Kirby rides a fire orb using a Stomper Boot in a side area.
Kirby uses his Prism Shield to grab a key.
Kirby waits for two Iron Barbars to retract before moving forward.

Kirby uses the Ultra Sword to dispatch three King Doos at once.
Kirby slices a caldera in half.
Kirby waits for the fire orb to pass through the water, creating steam as it does.
Mike Kirby shouts at two Sphere Doomers.
Mecha Kirby fires his Full-Charge Blaster.


Video walkthroughs[edit]
100% walkthrough of Dangerous Dinner - Stage 3 in Kirby's Return to Dream Land.
|
100% walkthrough of Dangerous Dinner - Stage 3 in Extra Mode in Kirby's Return to Dream Land Deluxe.
|