Kirby's Dream Course/gallery: Difference between revisions
m (→Obstacles) |
WillIdleAway (talk | contribs) m (→Ending: of course there actually was one) |
||
| (38 intermediate revisions by 3 users not shown) | |||
| Line 5: | Line 5: | ||
<gallery> | <gallery> | ||
KDC Cover.jpg|North American boxart | KDC Cover.jpg|North American boxart | ||
KDC NA Back Cover.png|North American back cover | |||
Kirby Dream Course Japan box art.jpg|Japanese boxart | Kirby Dream Course Japan box art.jpg|Japanese boxart | ||
Special Tee Shot box art.jpg|Early boxart for ''Special Tee Shot'', the game that eventually became ''Kirby's Dream Course'' | Special Tee Shot box art.jpg|Early boxart for ''Special Tee Shot'', the game that eventually became ''Kirby's Dream Course'' | ||
| Line 12: | Line 13: | ||
==Artwork== | ==Artwork== | ||
===Main characters=== | |||
<gallery> | <gallery> | ||
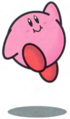
KDC Kirby artwork.png|[[Kirby]] holding two flags | KDC Kirby walking artwork.png|[[Kirby]] | ||
KDC Kirby artwork.png|Kirby holding two flags | |||
KDC Kirby teaching artwork.png|Kirby holding a pointer stick | |||
KDC Kirby jumping artwork.png|Kirby jumping | |||
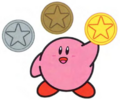
KDC Kirby medals artwork.png|Kirby holding each type of [[medal]] | |||
KDC Kirby looking forward artwork.png|Kirby looking forward | |||
KDC Kirby looking down artwork.png|Kirby looking down | |||
KDC Kirby side view artwork.png|Kirby from the side | |||
KDC Kirby Ball artwork.png|Kirby in [[Kirby Ball|ball form]] | |||
KDC Sad Kirby Ball artwork.png|Sad Kirby | |||
KDC Mad Kirby Ball artwork.png|Mad Kirby | |||
KDC Disappointed Kirby Ball artwork.png|Disappointed Kirby | |||
KDC Kirby Ball Side artwork.png|Kirby from the side | |||
KDC Kirby Ball Backside artwork.png|Kirby's backside | |||
KDC Kirby Power Shot artwork.png|Kirby performing a power shot | |||
KDC Kirby Roll artwork.png|Kirby rolling | |||
KDC Kirby Dash artwork.png|Kirby dashing | |||
KDC Kirby waving artwork.png|Kirby waving | |||
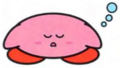
KDC Kirby sleeping artwork.png|Kirby sleeping | |||
KDC King Dedede artwork.png|[[King Dedede]] | |||
KeebyKDC.png|[[Keeby]] | KeebyKDC.png|[[Keeby]] | ||
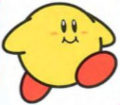
KDC Keeby walking artwork.png|Keeby | |||
KDC Keeby Ball artwork.png|Keeby in ball form | |||
KDC Mad Keeby Ball artwork.png|Mad Keeby | |||
KDC Disappointed Keeby Ball artwork.png|Disappointed Keeby | |||
KDC Keeby Ball oohing artwork.png|Surprised Keeby | |||
KDC Keeby Ball Side artwork.png|Keeby from the side | |||
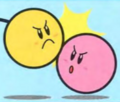
KDC Kirby and Keeby crashing artwork.png|Keeby crashing into Kirby | |||
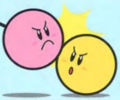
KDC Kirby and Keeby crashing artwork 2.png|Kirby crashing into Keeby | |||
</gallery> | |||
===Copy abilities=== | |||
<gallery> | |||
KDC Hi-Jump Kirby artwork.png|[[Hi-Jump]] | |||
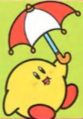
KDC Parasol Kirby artwork.png|[[Parasol]] | |||
KDC Spark Kirby artwork.png|[[Spark]] | |||
KDC Wheel Kirby artwork.png|[[Wheel]] | |||
KDC Stone Kirby artwork.png|[[Stone]] | |||
KDC Freeze Kirby artwork.png|[[Freeze]] | |||
KDC Tornado Kirby artwork.png|[[Tornado]] | |||
KDC Needle Kirby artwork.png|[[Needle]] | |||
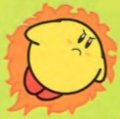
KDC Fireball Kirby artwork.png|[[Burning|Fireball]] | |||
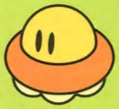
KDC UFO Kirby artwork.png|[[UFO]] | |||
KDC Parasol Keeby artwork.png|Parasol Keeby | |||
KDC Fireball Keeby artwork.png|Fireball Keeby | |||
KDC UFO Keeby artwork.png|UFO Keeby | |||
</gallery> | |||
===Items and objects=== | |||
<gallery> | |||
KDC Energy Tomato artwork.png|An [[Food|Energy Tomato]] | |||
KDC Cup artwork.png|A cup | |||
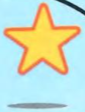
KDC Pink Point Star artwork.png|A pink [[Point Star]] that has been claimed by Kirby | |||
KDC Yellow Point Star artwork.png|A yellow Point Star that has been claimed by Keeby | |||
KDC Gray Point Stars artwork.png|Two gray, unclaimed Point Stars hovering over a cup | |||
KDC Purple Warp Panel artwork.png|Keeby using a directional [[Warp Panel]] | |||
KDC Red Warp Panel artwork.png|Kirby using a free Warp Panel | |||
</gallery> | |||
===[[Heads-up display]] elements=== | |||
<gallery> | |||
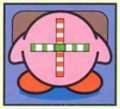
KDC HUD artwork.png|The [[heads-up display]], with each part labeled | |||
KDC 2P HUD artwork.png|The 2P Game heads-up display, with each part labeled | |||
KDC Shot Panel artwork.png|The Shot Panel | |||
KDC Shot Panel Power Meter artwork.png|The Shot Panel, with the Power Meter labeled | |||
KDC Shot Panel Bar artwork.png|The Shot Panel, with the bar labeled | |||
KDC Shot Panel Marker artwork.png|The Shot Panel, with the marker labeled | |||
KDC Shot Panel Full Power artwork.png|The Shot Panel at full power | |||
KDC Shot Panel Low Power artwork.png|The Shot Panel at low power | |||
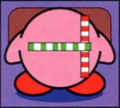
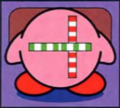
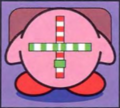
KDC Spin Panel artwork.png|The Spin Panel | |||
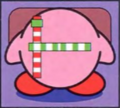
KDC Spin Panel Left Spin artwork.png|The Spin Panel aiming a left spin | |||
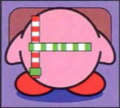
KDC Spin Panel Slow Left Spin artwork.png|The Spin Panel aiming a slow left spin | |||
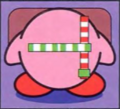
KDC Spin Panel Right Spin artwork.png|The Spin Panel aiming a right spin | |||
KDC Spin Panel Slow Right Spin artwork.png|The Spin Panel aiming a slow right spin | |||
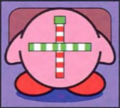
KDC Spin Panel Top Spin artwork.png|The Spin Panel aiming a top spin | |||
KDC Spin Panel Slow Top Spin artwork.png|The Spin Panel aiming a slow top spin | |||
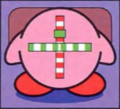
KDC Spin Panel Back Spin artwork.png|The Spin Panel aiming a back spin | |||
KDC Spin Panel Slow Back Spin artwork.png|The Spin Panel aiming a slow back spin | |||
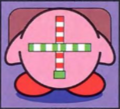
KDC Spin Panel Top Left Spin artwork.png|The Spin Panel aiming a top left spin | |||
KDC Spin Panel Top Right Spin artwork.png|The Spin Panel aiming a top right spin | |||
KDC Spin Panel Back Left Spin artwork.png|The Spin Panel aiming a back left spin | |||
KDC Spin Panel Back Right Spin artwork.png|The Spin Panel aiming a back right spin | |||
</gallery> | |||
===Scenes=== | |||
<gallery> | |||
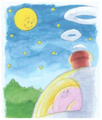
KDCArtStory1.png|Kirby looking up at the stars, from the instruction booklet | |||
KDCArtStory2.png|Kirby looking at the starless sky, from the instruction booklet | |||
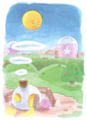
KDCArtStory3.png|King Dedede stealing the stars, as depicted in the instruction booklet | |||
KDCArtStory4.png|Kirby venturing out to get the stars back from Dedede, as depicted in the instruction booklet | |||
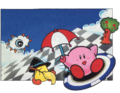
KDC Group artwork.png|American/European group artwork | KDC Group artwork.png|American/European group artwork | ||
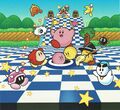
KDC key art JP.jpg|Japanese group artwork | KDC key art JP.jpg|Japanese group artwork | ||
| Line 24: | Line 113: | ||
<gallery style="image-rendering:pixelated;"> | <gallery style="image-rendering:pixelated;"> | ||
KDC KirbyKids.png|[[Kirby]] | KDC KirbyKids.png|[[Kirby]] | ||
Keeby.png|[[Keeby]], as he appears in his icon display | KDC 2P icon Kirby sprite.png|Kirby in the 2P Game menu | ||
KDC Keeby sprite.png|[[Keeby]] | |||
Keeby.png|Keeby, as he appears in his icon display | |||
Keeby Sprite.png|Keeby in the 2P Game menu | Keeby Sprite.png|Keeby in the 2P Game menu | ||
</gallery> | </gallery> | ||
| Line 44: | Line 135: | ||
===Icon displays=== | ===Icon displays=== | ||
<gallery style="image-rendering:pixelated;"> | <gallery style="image-rendering:pixelated;"> | ||
KDC Kirby icon.png|[[Kirby]] | |||
KDC Kirby rolling icon.png|Kirby rolling | |||
KDCFireballIcon.png|[[Burning|Fireball]] | KDCFireballIcon.png|[[Burning|Fireball]] | ||
KDCFreezeIcon.png|[[Freeze]] | KDCFreezeIcon.png|[[Freeze]] | ||
| Line 89: | Line 182: | ||
KDC Danger Zone sprite.png|[[Danger Zone]] | KDC Danger Zone sprite.png|[[Danger Zone]] | ||
KDC Dash Panel sprite.png|[[Dash Panel]] | KDC Dash Panel sprite.png|[[Dash Panel]] | ||
KDC Day Switch sprite.png|[[Day and Night Switch]] (Day) | KDC Day Switch sprite.png|[[Day and Night Switch]] (Day) | ||
KDC Night Switch sprite.png|Day and Night Switch (Night) | KDC Night Switch sprite.png|Day and Night Switch (Night) | ||
| Line 103: | Line 195: | ||
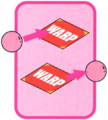
KDC Warp Panel sprite 1.png|[[Warp Panel]] (purple) | KDC Warp Panel sprite 1.png|[[Warp Panel]] (purple) | ||
KDC Warp Panel sprite 2.png|Warp Panel (red) | KDC Warp Panel sprite 2.png|Warp Panel (red) | ||
</gallery> | |||
===1P Game icon stamps=== | |||
<gallery style="image-rendering:pixelated;"> | |||
KDC icon stamp 1-Up sprite.png|[[1-Up]] | |||
KDC icon stamp Face sprite.png|[[Kirby]]'s face | |||
KDC icon stamp Maxim Tomato sprite.png|[[Maxim Tomato]] | |||
KDC icon stamp Star sprite.png|Star | |||
KDC icon stamp Small Oval sprite.png|Small oval | |||
KDC icon stamp Invincible Candy sprite.png|[[Invincible Candy]] | |||
KDC icon stamp Large Circle sprite.png|Large circle | |||
</gallery> | </gallery> | ||
| Line 111: | Line 214: | ||
KDC Kracko Course icon.png|[[Kracko Course]] | KDC Kracko Course icon.png|[[Kracko Course]] | ||
KDC Gordo Course icon.png|[[Gordo Course]] | KDC Gordo Course icon.png|[[Gordo Course]] | ||
</gallery> | |||
===[[Medal]]s=== | |||
<gallery style="image-rendering:pixelated;"> | |||
KDC Gold Medal sprite.png|Gold Medal | |||
KDC Silver Medal sprite.png|Silver Medal | |||
KDC Bronze Medal sprite.png|Bronze Medal | |||
KDC Gold Medal map sprite.png|Gold Medal (world map) | |||
KDC Silver Medal map sprite.png|Silver Medal (world map) | |||
KDC Bronze Medal map sprite.png|Bronze Medal (world map) | |||
KDC Gold Medal ranking sprite.png|Gold Medal (ranking screen) | |||
KDC Silver Medal ranking sprite.png|Silver Medal (ranking screen) | |||
KDC Bronze Medal ranking sprite.png|Bronze Medal (ranking screen) | |||
</gallery> | |||
===Placeholder scoreboard icons=== | |||
<gallery style="image-rendering:pixelated;"> | |||
KDC Bomber icon.png|[[Bomber]] | |||
KDC Poppy Bros Jr icon.png|[[Poppy Bros. Jr.]] | |||
KDC Bounder icon.png|[[Bounder]] | |||
KDC Gordo icon.png|[[Gordo]] | |||
KDC Meta Knight icon.png|[[Meta Knight]] | |||
</gallery> | </gallery> | ||
| Line 121: | Line 246: | ||
KDC course background 6.png|[[Course 6]] background | KDC course background 6.png|[[Course 6]] background | ||
KDC course background 8.png|[[Course 8]] background | KDC course background 8.png|[[Course 8]] background | ||
</gallery> | |||
===Demoplay icons=== | |||
<gallery style="image-rendering:pixelated;"> | |||
KDC Demoplay Icon 1.png|Basic Rule | |||
KDC Demoplay Icon 2.png|Scroll and Guide | |||
KDC Demoplay Icon 3.png|Fly and Grounder | |||
KDC Demoplay Icon 4.png|Direction | |||
KDC Demoplay Icon 5.png|Left/Right Spin | |||
KDC Demoplay Icon 6.png|Top Spin and Back Spin | |||
KDC Demoplay Icon 7.png|Shot on the Water | |||
KDC Demoplay Icon 8.png|Go for it | |||
KDC Demoplay Icon 9.png|Objects | |||
KDC Demoplay Icon 10.png|Finally... | |||
</gallery> | </gallery> | ||
===Other=== | ===Other=== | ||
<gallery style="image-rendering:pixelated;"> | <gallery style="image-rendering:pixelated;"> | ||
KDC Point Star sprite.png|[[Point Star]] | |||
KDC Kirby Warp Star sprite.png|Kirby riding a [[Warp Star]] | |||
KDC Kirby Warp Star ship sprite.png|Kirby riding a Warp Star ship | |||
KDC King Dedede.png|[[King Dedede]] | |||
KDC Robo Dedede sprite.png|[[Robo Dedede]] | |||
KDC Chibi Dedede sprite.png|Chibi Dedede | |||
KDC Bronto Burt sprite.png|[[Bronto Burt]] | |||
KDC Flapper sprite.png|[[Flapper]] | KDC Flapper sprite.png|[[Flapper]] | ||
KDC Mr Shine sprite.png|[[Mr. Shine & Mr. Bright|Mr. Shine]] | |||
KDC Mr Bright sprite.png|[[Mr. Shine & Mr. Bright|Mr. Bright]] | |||
KDC Kirbys House sprite.png|[[Kirby's House]] | |||
</gallery> | |||
===Unused=== | |||
<gallery style="image-rendering:pixelated;"> | |||
KDC unused Mix icon.png|Icon for [[Mix]] | |||
KDC early icon stamp Solid Square sprite.png|1P Game icon stamp of a solid square | |||
KDC early icon stamp Kirby sprite.png|1P Game icon stamp of [[Kirby]] | |||
KDC early icon stamp Solid Star sprite.png|1P Game icon stamp of a solid star | |||
KDC early icon stamp Hollow Star sprite.png|1P Game icon stamp of a hollow star | |||
KDC early icon stamp Solid Circle sprite.png|1P Game icon stamp of a solid circle | |||
KDC early icon stamp Hollow Circle sprite.png|1P Game icon stamp of a hollow circle | |||
KDC early icon stamp Hollow Square sprite.png|1P Game icon stamp of a hollow square | |||
</gallery> | </gallery> | ||
==Screenshots== | ==Screenshots== | ||
===General=== | ===General=== | ||
<gallery> | <gallery> | ||
| Line 137: | Line 297: | ||
KDC Course completion.png|Completing a course | KDC Course completion.png|Completing a course | ||
KDC Starry transition screen.png|The starry transition effect seen after completing a course | KDC Starry transition screen.png|The starry transition effect seen after completing a course | ||
KDC 2P Game course menu.png|The course menu for 2P Game | KDC 2P Game course menu.png|The course menu for 2P Game | ||
KDC 2P Game handicap menu.png|The handicap menu for 2P Game | KDC 2P Game handicap menu.png|The handicap menu for 2P Game | ||
| Line 186: | Line 345: | ||
KDC Course 2 Hole 8 screenshot 01.png|Lining up the path up the slope ([[Course 2 - Hole 8|Hole 8]]) | KDC Course 2 Hole 8 screenshot 01.png|Lining up the path up the slope ([[Course 2 - Hole 8|Hole 8]]) | ||
KDC Course 2 Hole 8 screenshot 02.png|Riding the [[Air Curtain]] to reach the left side (Hole 8) | KDC Course 2 Hole 8 screenshot 02.png|Riding the [[Air Curtain]] to reach the left side (Hole 8) | ||
</gallery> | |||
===[[Course 3]]=== | |||
<gallery> | |||
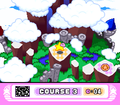
KDC Course 3 select.png|Course 3 on the map screen | |||
KDC Course 3 intro.png|A still from the opening cutscene for Course 3 | |||
KDC Course 3 Hole 1 screenshot 01.png|Preparing to leap up to the cliffs region ([[Course 3 - Hole 1|Hole 1]]) | |||
KDC Course 3 Hole 1 screenshot 02.png|Preparing a shot onto the highest cliff (Hole 1) | |||
KDC Course 3 Hole 2 screenshot 01.png|Preparing the first shot carefully ([[Course 3 - Hole 2|Hole 2]]) | |||
KDC Course 3 Hole 2 screenshot 02.png|Navigating the maze of conveyor belts (Hole 2) | |||
KDC Course 3 Hole 3 screenshot 01.png|Surveying the surrounding board ([[Course 3 - Hole 3|Hole 3]]) | |||
KDC Course 3 Hole 3 screenshot 02.png|Planning a leap over Whispy Woods (Hole 3) | |||
KDC Course 3 Hole 4 screenshot 01.png|Surveying Kracko's hill ([[Course 3 - Hole 4|Hole 4]]) | |||
KDC Course 3 Hole 4 screenshot 02.png|Planning a shot from the left side (Hole 4) | |||
KDC Course 3 Hole 5 screenshot 01.png|Using [[Stone]] to slide down toward the last [[Rocky]] ([[Course 3 - Hole 5|Hole 5]]) | |||
KDC Course 3 Hole 5 screenshot 02.png|Planning a water crossing (Hole 5) | |||
KDC Course 3 Hole 6 screenshot 01.png|A choice of paths to take at the beginning ([[Course 3 - Hole 6|Hole 6]]) | |||
KDC Course 3 Hole 6 screenshot 02.png|Riding the Air Curtain to certain victory (Hole 6) | |||
KDC Course 3 Hole 7 screenshot 01.png|A round of ice skating in a game of golf ([[Course 3 - Hole 7|Hole 7]]) | |||
KDC Course 3 Hole 7 screenshot 02.png|Planning a shot from the bottom of a pond (Hole 7) | |||
KDC Course 3 Hole 8 screenshot 01.png|Kirby takes in his surroundings on the board ([[Course 3 - Hole 8|Hole 8]]) | |||
KDC Course 3 Hole 8 screenshot 02.png|Kirby causes the pond to reappear behind him (Hole 8) | |||
</gallery> | |||
===[[Course 4]]=== | |||
<gallery> | |||
KDC Course 4 select.png|Course 4 on the map screen | |||
KDC Course 4 intro.png|A still from the opening cutscene for Course 4 | |||
KDC Course 4 Hole 1 screenshot 01.png|Lining up a curving shot ([[Course 4 - Hole 1|Hole 1]]) | |||
KDC Course 4 Hole 1 screenshot 02.png|Using [[Tornado]] to move swiftly by the Whispy Woods (Hole 1) | |||
KDC Course 4 Hole 2 screenshot 01.png|Taking note of the surrounding enemies ([[Course 4 - Hole 2|Hole 2]]) | |||
KDC Course 4 Hole 3 screenshot 01.png|Preparing a shot over the cliff face ([[Course 4 - Hole 3|Hole 3]]) | |||
KDC Course 4 Hole 4 screenshot 01.png|Rolling down the trail of [[Squishy]]s ([[Course 4 - Hole 4|Hole 4]]) | |||
KDC Course 4 Hole 4 screenshot 02.png|Slipping by the Gordos (Hole 4) | |||
KDC Course 4 Hole 5 screenshot 01.png|This shot must be planned carefully. ([[Course 4 - Hole 5|Hole 5]]) | |||
KDC Course 4 Hole 6 screenshot 01.png|Using the [[Dash Panel]] to launch over the [[Danger Zone]]s ([[Course 4 - Hole 6|Hole 6]]) | |||
KDC Course 4 Hole 6 screenshot 02.png|Reaching the Kabu on the other side (Hole 6) | |||
KDC Course 4 Hole 7 screenshot 01.png|Preparing to ride down the slope ([[Course 4 - Hole 7|Hole 7]]) | |||
KDC Course 4 Hole 7 screenshot 02.png|Using [[Needle]] to stop from falling off the edge (Hole 7) | |||
KDC Course 4 Hole 8 screenshot 01.png|Skipping past the spiky hazard zone ([[Course 4 - Hole 8|Hole 8]]) | |||
KDC Course 4 Hole 8 screenshot 02.png|Freezing the pond to cross it (Hole 8) | |||
</gallery> | |||
===[[Course 5]]=== | |||
<gallery> | |||
KDC Course 5 select.png|Course 5 on the map screen | |||
KDC Course 5 intro.png|A still from the opening cutscene for Course 5 | |||
KDC Course 5 Hole 1 screenshot 01.png|Using a Dash Panel to boost across the upper walkway ([[Course 5 - Hole 1|Hole 1]]) | |||
KDC Course 5 Hole 1 screenshot 02.png|Using Needle to stop from bouncing into the ponds (Hole 1) | |||
KDC Course 5 Hole 2 screenshot 01.png|This shot requires some precision. ([[Course 5 - Hole 2|Hole 2]]) | |||
KDC Course 5 Hole 2 screenshot 02.png|Freezing another pond (Hole 2) | |||
KDC Course 5 Hole 3 screenshot 01.png|Moving across the bunker-laden path ([[Course 5 - Hole 3|Hole 3]]) | |||
KDC Course 5 Hole 3 screenshot 02.png|Making the last shot over some tricky terrain (Hole 3) | |||
KDC Course 5 Hole 4 screenshot 01.png|Surveying the nearby enemies ([[Course 5 - Hole 4|Hole 4]]) | |||
KDC Course 5 Hole 4 screenshot 02.png|Crossing the pond with [[Freeze]] (Hole 4) | |||
KDC Course 5 Hole 5 screenshot 01.png|Twisting on by the Whispys ([[Course 5 - Hole 5|Hole 5]]) | |||
KDC Course 5 Hole 5 screenshot 02.png|Leaping onto the high cliff (Hole 5) | |||
KDC Course 5 Hole 6 screenshot 01.png|Leaping over the chasm ([[Course 5 - Hole 6|Hole 6]]) | |||
KDC Course 5 Hole 6 screenshot 02.png|Reaching the far side of the right platform (Hole 6) | |||
KDC Course 5 Hole 7 screenshot 01.png|Kirby works his way down the [[Waddle Dee]] steps. ([[Course 5 - Hole 7|Hole 7]]) | |||
KDC Course 5 Hole 7 screenshot 02.png|Leaping toward the last Waddle Dee (Hole 7) | |||
KDC Course 5 Hole 8 screenshot 01.png|Blasting through the Whispys ([[Course 5 - Hole 8|Hole 8]]) | |||
KDC Course 5 Hole 8 screenshot 02.png|Riding the Air Curtain to the last cup (Hole 8) | |||
</gallery> | |||
===[[Course 6]]=== | |||
<gallery> | |||
KDC Course 6 select.png|Course 6 on the map screen | |||
KDC Course 6 intro.png|A still from the opening cutscene for Course 6 | |||
KDC Course 6 Hole 1 screenshot 01.png|Blasting through all the enemies ([[Course 6 - Hole 1|Hole 1]]) | |||
KDC Course 6 Hole 1 screenshot 02.png|Just barely missing the cup at the end (Hole 1) | |||
KDC Course 6 Hole 2 screenshot 01.png|Blasting through the lower portion of the course ([[Course 6 - Hole 2|Hole 2]]) | |||
KDC Course 6 Hole 2 screenshot 02.png|Using the panels to ride the higher walkway (Hole 2) | |||
KDC Course 6 Hole 3 screenshot 01.png|Hopping over the first spike pit ([[Course 6 - Hole 3|Hole 3]]) | |||
KDC Course 6 Hole 3 screenshot 02.png|Pondering the best move across the wide ramp (Hole 3) | |||
KDC Course 6 Hole 4 screenshot 01.png|Planning the perfect shot ([[Course 6 - Hole 4|Hole 4]]) | |||
KDC Course 6 Hole 4 screenshot 02.png|Executing the perfect shot (Hole 4) | |||
KDC Course 6 Hole 5 screenshot 01.png|Smacking the [[Starman]] with Tornado at the bottom of the board ([[Course 6 - Hole 5|Hole 5]]) | |||
KDC Course 6 Hole 5 screenshot 02.png|Leaping over Whispy Woods using Hi-Jump (Hole 5) | |||
KDC Course 6 Hole 6 screenshot 01.png|Moving across the panels in the middle ([[Course 6 - Hole 6|Hole 6]]) | |||
KDC Course 6 Hole 6 screenshot 02.png|Making the loop at the top (Hole 6) | |||
KDC Course 6 Hole 7 screenshot 01.png|Making the bounce ([[Course 6 - Hole 7|Hole 7]]) | |||
KDC Course 6 Hole 7 screenshot 02.png|Scrolling to the Waddle Dee who will shortly be the cup (Hole 7) | |||
KDC Course 6 Hole 8 screenshot 01.png|Planning the first shot ([[Course 6 - Hole 8|Hole 8]]) | |||
KDC Course 6 Hole 8 screenshot 02.png|Rocketing off the hill using [[Burning|Fireball]] (Hole 8) | |||
</gallery> | |||
===[[Course 7]]=== | |||
<gallery> | |||
KDC Course 7 select.png|Course 7 on the map screen | |||
KDC Course 7 intro.png|A still from the opening cutscene for Course 7 | |||
KDC Course 7 Hole 1 screenshot 01.png|Lining up a shot that will capture the [[UFO (enemy)|UFO]] ([[Course 7 - Hole 1|Hole 1]]) | |||
KDC Course 7 Hole 1 screenshot 02.png|Using the [[UFO]] ability to cross a chasm (Hole 1) | |||
KDC Course 7 Hole 2 screenshot 01.png|Dashing along the upper walkway ([[Course 7 - Hole 2|Hole 2]]) | |||
KDC Course 7 Hole 2 screenshot 02.png|Spinning through the lower bowl (Hole 2) | |||
KDC Course 7 Hole 3 screenshot 01.png|Taking note of the surrounding hazards ([[Course 7 - Hole 3|Hole 3]]) | |||
KDC Course 7 Hole 3 screenshot 02.png|Warping from ear to ear (Hole 3) | |||
KDC Course 7 Hole 4 screenshot 01.png|Riding up the right conveyor belt ([[Course 7 - Hole 4|Hole 4]]) | |||
KDC Course 7 Hole 4 screenshot 02.png|Riding down the left conveyor belt (Hole 4) | |||
KDC Course 7 Hole 5 screenshot 01.png|Leaping over left Kracko ([[Course 7 - Hole 5|Hole 5]]) | |||
KDC Course 7 Hole 5 screenshot 02.png|Leaping over right Kracko (Hole 5) | |||
KDC Course 7 Hole 6 screenshot 01.png|Riding the lower belt ([[Course 7 - Hole 6|Hole 6]]) | |||
KDC Course 7 Hole 6 screenshot 02.png|Riding the upper belt (Hole 6) | |||
KDC Course 7 Hole 7 screenshot 01.png|Launching off the ramp with Spark activated ([[Course 7 - Hole 7|Hole 7]]) | |||
KDC Course 7 Hole 7 screenshot 02.png|Making the last shot against the [[Mr. P. Umpkin]]s (Hole 7) | |||
KDC Course 7 Hole 8 screenshot 01.png|Approaching the left platform with UFO ([[Course 7 - Hole 8|Hole 8]]) | |||
KDC Course 7 Hole 8 screenshot 02.png|Leaving the left platform with UFO (better move quick!) (Hole 8) | |||
</gallery> | |||
===[[Course 8]]=== | |||
<gallery> | |||
KDC Course 8 select.png|Course 8 on the map screen | |||
KDC Course 8 intro.png|A still from the opening cutscene for Course 8 | |||
KDC Course 8 Hole 1 screenshot 01.png|Rolling down the massive slope ([[Course 8 - Hole 1|Hole 1]]) | |||
KDC Course 8 Hole 1 screenshot 02.png|Reaching the Squishy area (Hole 1) | |||
KDC Course 8 Hole 2 screenshot 01.png|Rolling toward the Dash Panel ([[Course 8 - Hole 2|Hole 2]]) | |||
KDC Course 8 Hole 2 screenshot 02.png|Making use of the trampoline across the pond (Hole 2) | |||
KDC Course 8 Hole 3 screenshot 01.png|Using the bouncy slopes ([[Course 8 - Hole 3|Hole 3]]) | |||
KDC Course 8 Hole 3 screenshot 02.png|Rolling toward the lower lawn (Hole 3) | |||
KDC Course 8 Hole 4 screenshot 01.png|Admiring the Air Curtain rows ([[Course 8 - Hole 4|Hole 4]]) | |||
KDC Course 8 Hole 4 screenshot 02.png|Leaping to the top of the cliff (Hole 4) | |||
KDC Course 8 Hole 5 screenshot 01.png|Breaking out of the bumper fencing ([[Course 8 - Hole 5|Hole 5]]) | |||
KDC Course 8 Hole 5 screenshot 02.png|Using Tornado to rip through the enemies down the slope (Hole 5) | |||
KDC Course 8 Hole 6 screenshot 01.png|Kirby lines his sights on the UFO. ([[Course 8 - Hole 6|Hole 6]]) | |||
KDC Course 8 Hole 6 screenshot 02.png|Using UFO to scale this board (Hole 6) | |||
KDC Course 8 Hole 7 screenshot 01.png|Eyeballing the Dash Panel ([[Course 8 - Hole 7|Hole 7]]) | |||
KDC Course 8 Hole 7 screenshot 02.png|Using the various abilities to dispatch the enemies (Hole 7) | |||
KDC Course 8 Hole 8 screenshot 01.png|Defeating Whispy using Spark ([[Course 8 - Hole 8|Hole 8]]) | |||
KDC Course 8 Hole 8 screenshot 02.png|Catching [[Wheelie]] using Stone (Hole 8) | |||
KDC Course 8 Hole 8 screenshot 03.png|Crossing a pond using Wheel (Hole 8) | |||
KDC Course 8 Hole 8 screenshot 04.png|Using UFO to clear out the [[Gaspar]]s (Hole 8) | |||
KDC Course 8 Hole 8 screenshot 05.png|Leaping over the last Whispy (Hole 8) | |||
</gallery> | |||
===[[Robo Dedede|Dedede]]=== | |||
<gallery> | |||
KDC Course Dedede select.png|Course Dedede on the map screen | |||
KDC Robo Dedede.png|[[Robo Dedede]] appears | |||
KDC Robo Dedede fight.png|Battle against Robo Dedede | |||
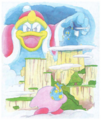
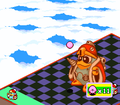
KDC Robo Dededefeated.png|Robo Dedede is defeated and vanishes, leaving [[King Dedede|its pilot]] exposed. | |||
KDC Castle Dededestruction.png|Castle Dedede is destroyed, freeing all the stars that were stolen. | |||
</gallery> | |||
===Ending=== | |||
<gallery> | |||
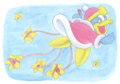
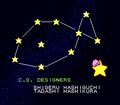
KDC staff roll hammer screenshot.png|A hammer-shaped constellation, returned to the night sky | |||
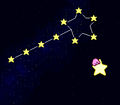
KDC staff roll tomato screenshot.png|A tomato-shaped constellation | |||
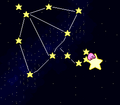
KDC staff roll fish screenshot.png|A fish-shaped constellation | |||
KDC staff roll star screenshot.png|Stars in the shape of a star | |||
KDC staff roll parasol screenshot.png|A parasol-shaped constellation | |||
KDC staff roll Star Rod screenshot.png|Stars in the shape of the Star Rod | |||
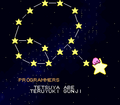
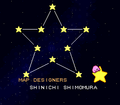
KDC staff roll Kirby screenshot.png|A Kirby-shaped constellation | |||
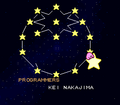
KDC End credits.png|The final constellation | |||
</gallery> | |||
===[[Whispy Woods Course]]=== | |||
<gallery> | |||
KDC Whispy Woods Course intro.png|Intro cutscene for Whispy Woods Course | |||
KDC Whispy Woods Course Hole 1 screenshot 01.png|[[Keeby]] plans his first shot ([[Whispy Woods Course - Hole 1|Hole 1]]) | |||
KDC Whispy Woods Course Hole 1 screenshot 02.png|Nearly making it into the cup (Hole 1) | |||
KDC Whispy Woods Course Hole 1 screenshot 03.png|[[Kirby]] pushes Keeby out of the way (Hole 1) | |||
KDC Whispy Woods Course Hole 2 screenshot 01.png|Kirby plans to launch himself onto a Squishy ([[Whispy Woods Course - Hole 2|Hole 2]]) | |||
KDC Whispy Woods Course Hole 2 screenshot 02.png|Dealing with the foe on the right (Hole 2) | |||
KDC Whispy Woods Course Hole 2 screenshot 03.png|Keeby barges in to take the middle enemy (Hole 2) | |||
KDC Whispy Woods Course Hole 3 screenshot 01.png|Kirby aims for two enemies ([[Whispy Woods Course - Hole 3|Hole 3]]) | |||
KDC Whispy Woods Course Hole 3 screenshot 02.png|Keeby hopping over a pond (Hole 3) | |||
KDC Whispy Woods Course Hole 3 screenshot 03.png|Mopping up the remaining foes (Hole 3) | |||
KDC Whispy Woods Course Hole 4 screenshot 01.png|Bouncing along the bumpy terrain ([[Whispy Woods Course - Hole 4|Hole 4]]) | |||
KDC Whispy Woods Course Hole 4 screenshot 02.png|Keeby lining up a shot (Hole 4) | |||
KDC Whispy Woods Course Hole 4 screenshot 03.png|Kirby using Tornado to try and snag the cup (Hole 4) | |||
KDC Whispy Woods Course Hole 5 screenshot 01.png|Kirby watches Keeby rolling ([[Whispy Woods Course - Hole 5|Hole 5]]) | |||
KDC Whispy Woods Course Hole 5 screenshot 02.png|A collision of puffballs sends both reeling. (Hole 5) | |||
KDC Whispy Woods Course Hole 5 screenshot 03.png|Keeby goes a bit off-course using Tornado. (Hole 5) | |||
KDC Whispy Woods Course Hole 6 screenshot 01.png|Kirby prepares to bounce along the course. ([[Whispy Woods Course - Hole 6|Hole 6]]) | |||
KDC Whispy Woods Course Hole 6 screenshot 02.png|Kirby rolls to the right. (Hole 6) | |||
KDC Whispy Woods Course Hole 6 screenshot 03.png|Keeby rolls to the left. (Hole 6) | |||
KDC Whispy Woods Course Hole 7 screenshot 01.png|Keeby, about to turn on the turntables ([[Whispy Woods Course - Hole 7|Hole 7]]) | |||
KDC Whispy Woods Course Hole 7 screenshot 02.png|Keeby tries not to get too dizzy. (Hole 7) | |||
KDC Whispy Woods Course Hole 7 screenshot 03.png|Attempting a shot from afar (Hole 7) | |||
KDC Whispy Woods Course Hole 8 screenshot 01.png|Kirby twists his way to a tomato. ([[Whispy Woods Course - Hole 8|Hole 8]]) | |||
KDC Whispy Woods Course Hole 8 screenshot 02.png|The game carries on into the night. (Hole 8) | |||
KDC Whispy Woods Course Hole 8 screenshot 03.png|Kirby tries to nab the cup using the Parasol. (Hole 8) | |||
</gallery> | |||
===[[Mr. Shine & Mr. Bright Course]]=== | |||
<gallery> | |||
KDC Shine and Bright Course intro.png|Intro cutscene for Mr. Shine & Mr. Bright Course | |||
KDC Shine and Bright Course Hole 1 screenshot 01.png|Kirby rolls toward the air curtain ([[Mr. Shine & Mr. Bright Course - Hole 1|Hole 1]]) | |||
KDC Shine and Bright Course Hole 1 screenshot 02.png|Keeby sneaks behind [[Parasol Waddle Doo]] to get at the Day and Night Switch. (Hole 1) | |||
KDC Shine and Bright Course Hole 1 screenshot 03.png|Kirby gets stuck in a bunker (Hole 1) | |||
KDC Shine and Bright Course Hole 2 screenshot 01.png|Kirby right before smacking into [[Chilly]] ([[Mr. Shine & Mr. Bright Course - Hole 2|Hole 2]]) | |||
KDC Shine and Bright Course Hole 2 screenshot 02.png|Keeby attempts to climb a short hill on the edge (Hole 2) | |||
KDC Shine and Bright Course Hole 2 screenshot 03.png|Keeby needs a nap. (Hole 2) | |||
KDC Shine and Bright Course Hole 3 screenshot 01.png|Keeby aims at the [[Broom Hatter|Broomhatter]] in front of him ([[Mr. Shine & Mr. Bright Course - Hole 3|Hole 3]]) | |||
KDC Shine and Bright Course Hole 3 screenshot 02.png|Kirby lands near the bottom of the board (Hole 3) | |||
KDC Shine and Bright Course Hole 3 screenshot 03.png|Kirby spins right into the bunker trench (Hole 3) | |||
KDC Shine and Bright Course Hole 4 screenshot 01.png|Kirby rollin' on the lawn ([[Mr. Shine & Mr. Bright Course - Hole 4|Hole 4]]) | |||
KDC Shine and Bright Course Hole 4 screenshot 02.png|Keeby flares up to tackle the foes on the right (Hole 4) | |||
KDC Shine and Bright Course Hole 4 screenshot 03.png|Kirby makes his way over to the lower-left (Hole 4) | |||
KDC Shine and Bright Course Hole 5 screenshot 01.png|Kirby about to make his shot ([[Mr. Shine & Mr. Bright Course - Hole 5|Hole 5]]) | |||
KDC Shine and Bright Course Hole 5 screenshot 02.png|Keeby twists through the lawn as Kirby watches. (Hole 5) | |||
KDC Shine and Bright Course Hole 5 screenshot 03.png|Kirby moves back up the hill. (Hole 5) | |||
KDC Shine and Bright Course Hole 6 screenshot 01.png|Kirby uses Needle to stop right after hitting an enemy. ([[Mr. Shine & Mr. Bright Course - Hole 6|Hole 6]]) | |||
KDC Shine and Bright Course Hole 6 screenshot 02.png|Keeby smolders as he races past. (Hole 6) | |||
KDC Shine and Bright Course Hole 6 screenshot 03.png|Keeby tries carefully to reach the cup around the Kick Panel. (Hole 6) | |||
KDC Shine and Bright Course Hole 7 screenshot 01.png|Kirby makes his way up a slope ([[Mr. Shine & Mr. Bright Course - Hole 7|Hole 7]]) | |||
KDC Shine and Bright Course Hole 7 screenshot 02.png|Keeby freezes Kirby solid as he passes by. (Hole 7) | |||
KDC Shine and Bright Course Hole 7 screenshot 03.png|Kirby spins over a very precarious position. (Hole 7) | |||
KDC Shine and Bright Course Hole 8 screenshot 01.png|Aiming into the cluster of air curtains ([[Mr. Shine & Mr. Bright Course - Hole 8|Hole 8]]) | |||
KDC Shine and Bright Course Hole 8 screenshot 02.png|Kirby and Keeby get mired in the central pit. (Hole 8) | |||
KDC Shine and Bright Course Hole 8 screenshot 03.png|Keeby goes for the last putt. (Hole 8) | |||
</gallery> | |||
===[[Kracko Course]]=== | |||
<gallery> | |||
KDC Kracko Course intro.png|Intro cutscene for Kracko Course | |||
KDC Kracko Course Hole 1 screenshot 01.png|Keeby looks at the deceptively plain board. ([[Kracko Course - Hole 1|Hole 1]]) | |||
KDC Kracko Course Hole 1 screenshot 02.png|Keeby tries to maneuver around the turntable-covered floor. (Hole 1) | |||
KDC Kracko Course Hole 1 screenshot 03.png|Kirby makes a graceful jump over Keeby. (Hole 1) | |||
KDC Kracko Course Hole 2 screenshot 01.png|Kirby plans his bounces carefully. ([[Kracko Course - Hole 2|Hole 2]]) | |||
KDC Kracko Course Hole 2 screenshot 02.png|Tornado Keeby gets stuck in a corner. (Hole 2) | |||
KDC Kracko Course Hole 2 screenshot 03.png|Tornado Kirby moves along the board. (Hole 2) | |||
KDC Kracko Course Hole 3 screenshot 01.png|Kirby rolls toward a Squishy. ([[Kracko Course - Hole 3|Hole 3]]) | |||
KDC Kracko Course Hole 3 screenshot 02.png|UFO Kirby slides on across the board. (Hole 3) | |||
KDC Kracko Course Hole 3 screenshot 03.png|Freeze Keeby tries to close the distance. (Hole 3) | |||
KDC Kracko Course Hole 4 screenshot 01.png|Kirby jumps over the lawn. ([[Kracko Course - Hole 4|Hole 4]]) | |||
KDC Kracko Course Hole 4 screenshot 02.png|Keeby leaps toward the central part of the board. (Hole 4) | |||
KDC Kracko Course Hole 4 screenshot 03.png|Keeby makes use of the Dash Panel in the corner. (Hole 4) | |||
KDC Kracko Course Hole 5 screenshot 01.png|Kirby is launched ahead by a Dash Panel. ([[Kracko Course - Hole 5|Hole 5]]) | |||
KDC Kracko Course Hole 5 screenshot 02.png|Keeby leaps, but may have overshot a bit... (Hole 5) | |||
KDC Kracko Course Hole 5 screenshot 03.png|Kirby needs a break. (Hole 5) | |||
KDC Kracko Course Hole 6 screenshot 01.png|Kirby aims at the three Squishys. ([[Kracko Course - Hole 6|Hole 6]]) | |||
KDC Kracko Course Hole 6 screenshot 02.png|Keeby sneaks on over to the top pocket. (Hole 6) | |||
KDC Kracko Course Hole 6 screenshot 03.png|Kirby ricochets wildly off the bumper fence. (Hole 6) | |||
KDC Kracko Course Hole 7 screenshot 01.png|Keeby burns his way at a Twister. ([[Kracko Course - Hole 7|Hole 7]]) | |||
KDC Kracko Course Hole 7 screenshot 02.png|Keeby leaps over Kracko. (Hole 7) | |||
KDC Kracko Course Hole 7 screenshot 03.png|Keeby makes it into the hole after a fair amount of pain. (Hole 7) | |||
KDC Kracko Course Hole 8 screenshot 01.png|Keeby rolls his way toward a big bump. ([[Kracko Course - Hole 8|Hole 8]]) | |||
KDC Kracko Course Hole 8 screenshot 02.png|Keeby brakes himself with a Parasol. (Hole 8) | |||
KDC Kracko Course Hole 8 screenshot 03.png|Kirby spins around on a Conveyor Belt. (Hole 8) | |||
</gallery> | |||
===[[Gordo Course]]=== | |||
<gallery> | |||
KDC Gordo Course intro.png|Intro cutscene for Gordo Course | |||
KDC Gordo Course Hole 1 screenshot 01.png|Kirby plans his first move. ([[Gordo Course - Hole 1|Hole 1]]) | |||
KDC Gordo Course Hole 1 screenshot 02.png|Kirby descends the steps of the ziggurat. (Hole 1) | |||
KDC Gordo Course Hole 1 screenshot 03.png|Tornado Keeby rushes by Kirby along the lowest floor. (Hole 1) | |||
KDC Gordo Course Hole 2 screenshot 01.png|Keeby aims for the Broomhatter. ([[Gordo Course - Hole 2|Hole 2]]) | |||
KDC Gordo Course Hole 2 screenshot 02.png|Freeze Kirby slides by the edge. (Hole 2) | |||
KDC Gordo Course Hole 2 screenshot 03.png|Keeby aims for the cup. (Hole 2) | |||
KDC Gordo Course Hole 3 screenshot 01.png|Needle Keeby stops right before the Gordo. ([[Gordo Course - Hole 3|Hole 3]]) | |||
KDC Gordo Course Hole 3 screenshot 02.png|UFO Kirby cleans house. (Hole 3) | |||
KDC Gordo Course Hole 3 screenshot 03.png|Keeby aims for the cup once more. (Hole 3) | |||
KDC Gordo Course Hole 4 screenshot 01.png|Stone Kirby sits at the top of the slopes. ([[Gordo Course - Hole 4|Hole 4]]) | |||
KDC Gordo Course Hole 4 screenshot 02.png|Keeby twists it all around. (Hole 4) | |||
KDC Gordo Course Hole 4 screenshot 03.png|Kirby may have overshot just a little bit... (Hole 4) | |||
KDC Gordo Course Hole 5 screenshot 01.png|Keeby struggling in the massive spike pit ([[Gordo Course - Hole 5|Hole 5]]) | |||
KDC Gordo Course Hole 5 screenshot 02.png|Kirby tries his best to avoid getting poked for the 20th time by spikes. (Hole 5) | |||
KDC Gordo Course Hole 5 screenshot 03.png|This is a very tiring stage. (Hole 5) | |||
KDC Gordo Course Hole 6 screenshot 01.png|Kirby rolls along to reach a Broomhatter. ([[Gordo Course - Hole 6|Hole 6]]) | |||
KDC Gordo Course Hole 6 screenshot 02.png|Keeby makes the desperate leap across the gap, and hopefully he'll find a surface to land on. (Hole 6) | |||
KDC Gordo Course Hole 6 screenshot 03.png|Kirby and Keeby relax a bit after the jump. (Hole 6) | |||
KDC Gordo Course Hole 7 screenshot 01.png|Kirby rolls through the huge lawn. ([[Gordo Course - Hole 7|Hole 7]]) | |||
KDC Gordo Course Hole 7 screenshot 02.png|Keeby slips behind Kabu in the corner. (Hole 7) | |||
KDC Gordo Course Hole 7 screenshot 03.png|Kirby will have a hard time making this shot. (Hole 7) | |||
KDC Gordo Course Hole 8 screenshot 01.png|Kirby aims between the ability-providing enemies. ([[Gordo Course - Hole 8|Hole 8]]) | |||
KDC Gordo Course Hole 8 screenshot 02.png|Kirby skips off one of the ramps. (Hole 8) | |||
KDC Gordo Course Hole 8 screenshot 03.png|Kirby makes one last attempt to take the cup from underwater. (Hole 8) | |||
</gallery> | </gallery> | ||
| Line 347: | Line 774: | ||
KDC Course 8 Hole 8 map.png|[[Course 8 - Hole 1|Hole 8]] (Main Game) | KDC Course 8 Hole 8 map.png|[[Course 8 - Hole 1|Hole 8]] (Main Game) | ||
KDC Course 8 Hole 8 extra map.png|Hole 8 (Extra Game) | KDC Course 8 Hole 8 extra map.png|Hole 8 (Extra Game) | ||
</gallery> | |||
==Other related images== | |||
<gallery> | |||
Channel PPP - KDL3 and KDCrs on NSO.jpg|2019 [[Channel PPP Crew|Channel PPP]] post from the [[Kirby JP Twitter]], informing that ''[[Kirby's Dream Land 3]]'' and ''Kirby's Dream Course'' are now available on [[Nintendo Switch]] via Nintendo Switch Online. | |||
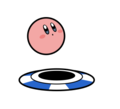
K30A Kirby 19.png|Kirby #19 from the [[Kirby Anniversary|Kirby 30th Anniversary]] site, based on ''Kirby's Dream Course'' | |||
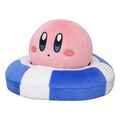
Sanei Kirby 30th Anniversary Hole in One.jpg|"Hole in One" plushie of Kirby, based on the previous artwork | |||
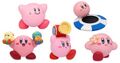
Gashapon Kirby 30th Anniversary Figurines.jpg|Gashapon Kirby figurines by Bandai, created for Kirby's 30th Anniversary | |||
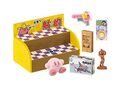
Kirby Pupupu Japanese Festival Shooting Gallery Figure.jpg|"Shooting Gallery" miniature set from the "Kirby Pupupu Japanese Festival" merchandise line, featuring a stand inspired by ''Kirby's Dream Course'' | |||
</gallery> | |||
==Audio== | |||
===Main themes=== | |||
<gallery> | |||
KDC 2P Game sample.mp3|[[2P Game (theme from Kirby's Dream Course)|2P Game]] | |||
KDC Float Islands Sample.oga|[[Float Islands (theme)|Float Islands]] | |||
KDC Yogurt Yard clip.mp3|[[Mountain Stage]] | |||
KDC Iceberg Ocean Theme.mp3|[[Iceberg Ocean]] | |||
KDC VS Robo Dedede.mp3|[[VS. Robo Dedede]] | |||
KDC VS Robo Dedede Pinch.mp3|[[VS. Robo Dedede: Pinch]] | |||
KDC Ending.mp3|[[Ending (theme from Kirby's Dream Course)|Ending]] | |||
</gallery> | |||
===Special themes=== | |||
<gallery> | |||
KDC Game Over theme.mp3|[[Game Over (themes)|Game Over]] | |||
KDC Kirby Dance.mp3|[[Kirby Dance (theme)|Kirby Dance]] | |||
</gallery> | </gallery> | ||
Latest revision as of 13:12, 21 December 2023
A gallery of images relating to Kirby's Dream Course.
Boxart and logos[edit]
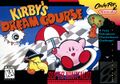
North American boxart
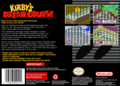
North American back cover
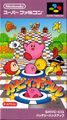
Japanese boxart
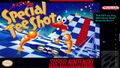
Early boxart for Special Tee Shot, the game that eventually became Kirby's Dream Course

English logo

Japanese logo


Artwork[edit]
Main characters[edit]

Kirby holding two flags

Kirby holding a pointer stick
Kirby jumping
Kirby holding each type of medal

Kirby looking forward

Kirby looking down

Kirby from the side

Kirby in ball form

Sad Kirby

Mad Kirby

Disappointed Kirby

Kirby from the side
Kirby's backside
Kirby performing a power shot

Kirby rolling

Kirby dashing

Kirby waving
Kirby sleeping
Keeby

Keeby in ball form

Mad Keeby

Disappointed Keeby

Surprised Keeby

Keeby from the side
Keeby crashing into Kirby
Kirby crashing into Keeby


Copy abilities[edit]
Parasol Keeby
Fireball Keeby
UFO Keeby


Items and objects[edit]

A cup
A pink Point Star that has been claimed by Kirby
A yellow Point Star that has been claimed by Keeby

Two gray, unclaimed Point Stars hovering over a cup
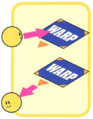
Keeby using a directional Warp Panel
Kirby using a free Warp Panel


Heads-up display elements[edit]
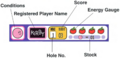
The heads-up display, with each part labeled
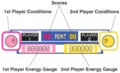
The 2P Game heads-up display, with each part labeled
The Shot Panel
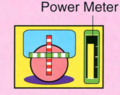
The Shot Panel, with the Power Meter labeled
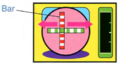
The Shot Panel, with the bar labeled
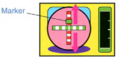
The Shot Panel, with the marker labeled

The Shot Panel at full power
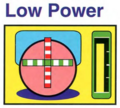
The Shot Panel at low power
The Spin Panel

The Spin Panel aiming a left spin

The Spin Panel aiming a slow left spin
The Spin Panel aiming a right spin
The Spin Panel aiming a slow right spin
The Spin Panel aiming a top spin
The Spin Panel aiming a slow top spin
The Spin Panel aiming a back spin
The Spin Panel aiming a slow back spin
The Spin Panel aiming a top left spin

The Spin Panel aiming a top right spin
The Spin Panel aiming a back left spin
The Spin Panel aiming a back right spin


Scenes[edit]
Kirby looking up at the stars, from the instruction booklet
Kirby looking at the starless sky, from the instruction booklet
King Dedede stealing the stars, as depicted in the instruction booklet
Kirby venturing out to get the stars back from Dedede, as depicted in the instruction booklet
American/European group artwork
Japanese group artwork


Sprites[edit]
Kirby and Keeby[edit]

Kirby in the 2P Game menu

Keeby, as he appears in his icon display

Keeby in the 2P Game menu


Copy Abilities[edit]


Icon displays[edit]

Kirby rolling


Enemies[edit]


Obstacles[edit]

Cup

Day and Night Switch (Day)

Day and Night Switch (Night)

Pond Drain Switch

Pond Fill Switch

Turntable Switch (On)

Turntable Switch (Off)

Warp Panel (purple)

Warp Panel (red)
1P Game icon stamps[edit]

Kirby's face

Star

Small oval

Large circle
2P Game course icons[edit]
Medals[edit]

Gold Medal

Silver Medal

Bronze Medal

Gold Medal (world map)

Silver Medal (world map)

Bronze Medal (world map)

Gold Medal (ranking screen)

Silver Medal (ranking screen)

Bronze Medal (ranking screen)
Placeholder scoreboard icons[edit]
Backgrounds[edit]


Demoplay icons[edit]

Basic Rule

Scroll and Guide

Fly and Grounder

Direction

Left/Right Spin

Top Spin and Back Spin

Shot on the Water

Go for it

Objects

Finally...
Other[edit]

Kirby riding a Warp Star

Kirby riding a Warp Star ship

Chibi Dedede

Unused[edit]

Icon for Mix

1P Game icon stamp of a solid square

1P Game icon stamp of Kirby

1P Game icon stamp of a solid star

1P Game icon stamp of a hollow star

1P Game icon stamp of a solid circle

1P Game icon stamp of a hollow circle

1P Game icon stamp of a hollow square
Screenshots[edit]
General[edit]
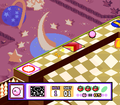
Title screen
New member name entry screen
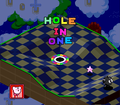
Scoring a hole-in-one on a course
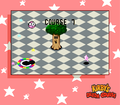
Completing a course
The starry transition effect seen after completing a course
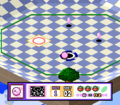
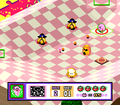
The course menu for 2P Game
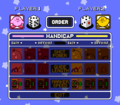
The handicap menu for 2P Game
Flapper returning Kirby to the board
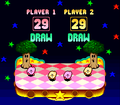
A draw in 2P Game


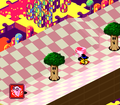
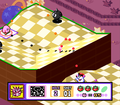
Course 1[edit]
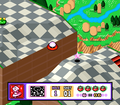
Course 1 on the map screen
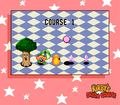
A still from the opening cutscene for Course 1
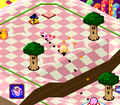
Just barely missing the hole-in-one (Hole 1)
Making the first move toward the Kick Panel (Hole 2)
Rolling around the Kabus in the back (Hole 2)
Following the Kick Panels to take out the Kabu (Hole 3)
Lining up the shot into the cup (Hole 3)
Heading toward the Warp Panel (Hole 4)
Emerging on the other side, not too quickly now (Hole 4)
Surveying the course to prepare the first shot (Hole 5)
Lining up the first shot across the upper walkway (Hole 6)
Using Parasol to drift down toward the cup (Hole 6)
Preparing a flying shot into the upper region (Hole 7)
Skipping across the pond to the other side (Hole 7)
Lining up the first shot toward the pond drain switch (Hole 8)
Using Parasol to just barely make it to the lower region (Hole 8)


Course 2[edit]
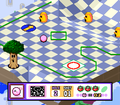
Course 2 on the map screen
A still from the opening cutscene for Course 2
Preparing a shot which will hit all of the flying foes (Hole 1)
Moving toward the last enemy, transforming into the cup (Hole 1)

Defeating Whispy Woods using Spark (Hole 2)
Lining up a shot to deal with the remaining foes (Hole 2)

Surveying the area (Hole 3)
Getting a little too dizzy during the shot (Hole 3)
Kirby Wheels through the remaining foes. (Hole 4)
Using Wheel to "walk on water" (Hole 5)
Using Wheel to power through the bunkers (Hole 5)
Preparing the first line-up past a bunker (Hole 6)
Using Parasol to drift into the lowland (Hole 6)
Preparing for a bounce after the first shot (Hole 7)
Getting deflected by the lawn (Hole 7)
Lining up the path up the slope (Hole 8)
Riding the Air Curtain to reach the left side (Hole 8)


Course 3[edit]
Course 3 on the map screen
A still from the opening cutscene for Course 3
Preparing to leap up to the cliffs region (Hole 1)
Preparing a shot onto the highest cliff (Hole 1)
Preparing the first shot carefully (Hole 2)
Navigating the maze of conveyor belts (Hole 2)
Surveying the surrounding board (Hole 3)
Planning a leap over Whispy Woods (Hole 3)
Surveying Kracko's hill (Hole 4)
Planning a shot from the left side (Hole 4)
Planning a water crossing (Hole 5)
A choice of paths to take at the beginning (Hole 6)

Riding the Air Curtain to certain victory (Hole 6)
A round of ice skating in a game of golf (Hole 7)
Planning a shot from the bottom of a pond (Hole 7)
Kirby takes in his surroundings on the board (Hole 8)
Kirby causes the pond to reappear behind him (Hole 8)


Course 4[edit]

Course 4 on the map screen
A still from the opening cutscene for Course 4
Lining up a curving shot (Hole 1)
Using Tornado to move swiftly by the Whispy Woods (Hole 1)
Taking note of the surrounding enemies (Hole 2)
Preparing a shot over the cliff face (Hole 3)
Slipping by the Gordos (Hole 4)
This shot must be planned carefully. (Hole 5)
Using the Dash Panel to launch over the Danger Zones (Hole 6)

Reaching the Kabu on the other side (Hole 6)
Preparing to ride down the slope (Hole 7)
Using Needle to stop from falling off the edge (Hole 7)
Skipping past the spiky hazard zone (Hole 8)
Freezing the pond to cross it (Hole 8)


Course 5[edit]
Course 5 on the map screen
A still from the opening cutscene for Course 5
Using a Dash Panel to boost across the upper walkway (Hole 1)
Using Needle to stop from bouncing into the ponds (Hole 1)
This shot requires some precision. (Hole 2)
Freezing another pond (Hole 2)

Moving across the bunker-laden path (Hole 3)
Making the last shot over some tricky terrain (Hole 3)
Surveying the nearby enemies (Hole 4)

Crossing the pond with Freeze (Hole 4)
Twisting on by the Whispys (Hole 5)
Leaping onto the high cliff (Hole 5)
Leaping over the chasm (Hole 6)
Reaching the far side of the right platform (Hole 6)
Kirby works his way down the Waddle Dee steps. (Hole 7)

Leaping toward the last Waddle Dee (Hole 7)
Blasting through the Whispys (Hole 8)
Riding the Air Curtain to the last cup (Hole 8)


Course 6[edit]
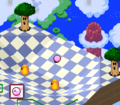
Course 6 on the map screen
A still from the opening cutscene for Course 6
Blasting through all the enemies (Hole 1)
Just barely missing the cup at the end (Hole 1)
Blasting through the lower portion of the course (Hole 2)

Using the panels to ride the higher walkway (Hole 2)
Hopping over the first spike pit (Hole 3)

Pondering the best move across the wide ramp (Hole 3)
Planning the perfect shot (Hole 4)
Executing the perfect shot (Hole 4)
Leaping over Whispy Woods using Hi-Jump (Hole 5)
Moving across the panels in the middle (Hole 6)
Making the loop at the top (Hole 6)
Making the bounce (Hole 7)
Scrolling to the Waddle Dee who will shortly be the cup (Hole 7)

Planning the first shot (Hole 8)
Rocketing off the hill using Fireball (Hole 8)


Course 7[edit]
Course 7 on the map screen
A still from the opening cutscene for Course 7
Using the UFO ability to cross a chasm (Hole 1)
Dashing along the upper walkway (Hole 2)
Spinning through the lower bowl (Hole 2)
Taking note of the surrounding hazards (Hole 3)
Warping from ear to ear (Hole 3)
Riding up the right conveyor belt (Hole 4)
Riding down the left conveyor belt (Hole 4)
Leaping over left Kracko (Hole 5)
Leaping over right Kracko (Hole 5)
Riding the lower belt (Hole 6)
Riding the upper belt (Hole 6)
Launching off the ramp with Spark activated (Hole 7)
Making the last shot against the Mr. P. Umpkins (Hole 7)
Approaching the left platform with UFO (Hole 8)
Leaving the left platform with UFO (better move quick!) (Hole 8)


Course 8[edit]
Course 8 on the map screen
A still from the opening cutscene for Course 8
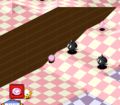
Rolling down the massive slope (Hole 1)
Reaching the Squishy area (Hole 1)
Rolling toward the Dash Panel (Hole 2)
Making use of the trampoline across the pond (Hole 2)
Using the bouncy slopes (Hole 3)
Rolling toward the lower lawn (Hole 3)
Admiring the Air Curtain rows (Hole 4)
Leaping to the top of the cliff (Hole 4)

Breaking out of the bumper fencing (Hole 5)
Using Tornado to rip through the enemies down the slope (Hole 5)
Kirby lines his sights on the UFO. (Hole 6)
Using UFO to scale this board (Hole 6)
Eyeballing the Dash Panel (Hole 7)
Using the various abilities to dispatch the enemies (Hole 7)
Defeating Whispy using Spark (Hole 8)
Catching Wheelie using Stone (Hole 8)
Crossing a pond using Wheel (Hole 8)
Using UFO to clear out the Gaspars (Hole 8)

Leaping over the last Whispy (Hole 8)


Dedede[edit]

Course Dedede on the map screen
Robo Dedede appears
Battle against Robo Dedede
Robo Dedede is defeated and vanishes, leaving its pilot exposed.

Castle Dedede is destroyed, freeing all the stars that were stolen.


Ending[edit]
A hammer-shaped constellation, returned to the night sky
A tomato-shaped constellation
A fish-shaped constellation
Stars in the shape of a star
A parasol-shaped constellation
Stars in the shape of the Star Rod

A Kirby-shaped constellation

The final constellation


Whispy Woods Course[edit]
Intro cutscene for Whispy Woods Course
Nearly making it into the cup (Hole 1)
Kirby pushes Keeby out of the way (Hole 1)
Kirby plans to launch himself onto a Squishy (Hole 2)
Dealing with the foe on the right (Hole 2)
Keeby barges in to take the middle enemy (Hole 2)
Kirby aims for two enemies (Hole 3)
Keeby hopping over a pond (Hole 3)

Mopping up the remaining foes (Hole 3)
Bouncing along the bumpy terrain (Hole 4)

Keeby lining up a shot (Hole 4)

Kirby using Tornado to try and snag the cup (Hole 4)
Kirby watches Keeby rolling (Hole 5)

A collision of puffballs sends both reeling. (Hole 5)

Keeby goes a bit off-course using Tornado. (Hole 5)
Kirby prepares to bounce along the course. (Hole 6)
Kirby rolls to the right. (Hole 6)
Keeby rolls to the left. (Hole 6)
Keeby, about to turn on the turntables (Hole 7)
Keeby tries not to get too dizzy. (Hole 7)
Attempting a shot from afar (Hole 7)
Kirby twists his way to a tomato. (Hole 8)

The game carries on into the night. (Hole 8)
Kirby tries to nab the cup using the Parasol. (Hole 8)


Mr. Shine & Mr. Bright Course[edit]
Intro cutscene for Mr. Shine & Mr. Bright Course
Kirby rolls toward the air curtain (Hole 1)
Keeby sneaks behind Parasol Waddle Doo to get at the Day and Night Switch. (Hole 1)
Kirby gets stuck in a bunker (Hole 1)
Keeby attempts to climb a short hill on the edge (Hole 2)
Keeby needs a nap. (Hole 2)
Keeby aims at the Broomhatter in front of him (Hole 3)
Kirby lands near the bottom of the board (Hole 3)
Kirby spins right into the bunker trench (Hole 3)
Kirby rollin' on the lawn (Hole 4)
Keeby flares up to tackle the foes on the right (Hole 4)
Kirby makes his way over to the lower-left (Hole 4)
Kirby about to make his shot (Hole 5)
Keeby twists through the lawn as Kirby watches. (Hole 5)
Kirby moves back up the hill. (Hole 5)
Kirby uses Needle to stop right after hitting an enemy. (Hole 6)
Keeby smolders as he races past. (Hole 6)
Keeby tries carefully to reach the cup around the Kick Panel. (Hole 6)
Kirby makes his way up a slope (Hole 7)
Keeby freezes Kirby solid as he passes by. (Hole 7)
Kirby spins over a very precarious position. (Hole 7)
Aiming into the cluster of air curtains (Hole 8)
Kirby and Keeby get mired in the central pit. (Hole 8)
Keeby goes for the last putt. (Hole 8)


Kracko Course[edit]
Intro cutscene for Kracko Course
Keeby looks at the deceptively plain board. (Hole 1)
Keeby tries to maneuver around the turntable-covered floor. (Hole 1)
Kirby makes a graceful jump over Keeby. (Hole 1)
Kirby plans his bounces carefully. (Hole 2)
Tornado Keeby gets stuck in a corner. (Hole 2)
Tornado Kirby moves along the board. (Hole 2)
Kirby rolls toward a Squishy. (Hole 3)
UFO Kirby slides on across the board. (Hole 3)
Freeze Keeby tries to close the distance. (Hole 3)
Kirby jumps over the lawn. (Hole 4)
Keeby leaps toward the central part of the board. (Hole 4)
Keeby makes use of the Dash Panel in the corner. (Hole 4)
Kirby is launched ahead by a Dash Panel. (Hole 5)
Keeby leaps, but may have overshot a bit... (Hole 5)
Kirby needs a break. (Hole 5)
Kirby aims at the three Squishys. (Hole 6)
Keeby sneaks on over to the top pocket. (Hole 6)
Kirby ricochets wildly off the bumper fence. (Hole 6)
Keeby burns his way at a Twister. (Hole 7)
Keeby leaps over Kracko. (Hole 7)
Keeby makes it into the hole after a fair amount of pain. (Hole 7)
Keeby rolls his way toward a big bump. (Hole 8)
Keeby brakes himself with a Parasol. (Hole 8)
Kirby spins around on a Conveyor Belt. (Hole 8)


Gordo Course[edit]

Intro cutscene for Gordo Course

Kirby plans his first move. (Hole 1)
Kirby descends the steps of the ziggurat. (Hole 1)
Tornado Keeby rushes by Kirby along the lowest floor. (Hole 1)
Keeby aims for the Broomhatter. (Hole 2)
Freeze Kirby slides by the edge. (Hole 2)

Keeby aims for the cup. (Hole 2)

Needle Keeby stops right before the Gordo. (Hole 3)
UFO Kirby cleans house. (Hole 3)
Keeby aims for the cup once more. (Hole 3)
Stone Kirby sits at the top of the slopes. (Hole 4)

Keeby twists it all around. (Hole 4)
Kirby may have overshot just a little bit... (Hole 4)
Keeby struggling in the massive spike pit (Hole 5)
Kirby tries his best to avoid getting poked for the 20th time by spikes. (Hole 5)
This is a very tiring stage. (Hole 5)
Kirby rolls along to reach a Broomhatter. (Hole 6)

Keeby makes the desperate leap across the gap, and hopefully he'll find a surface to land on. (Hole 6)
Kirby and Keeby relax a bit after the jump. (Hole 6)
Kirby rolls through the huge lawn. (Hole 7)
Keeby slips behind Kabu in the corner. (Hole 7)
Kirby will have a hard time making this shot. (Hole 7)
Kirby aims between the ability-providing enemies. (Hole 8)
Kirby skips off one of the ramps. (Hole 8)
Kirby makes one last attempt to take the cup from underwater. (Hole 8)


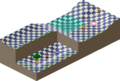
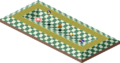
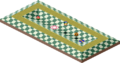
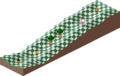
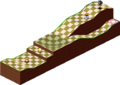
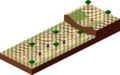
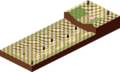
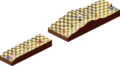
Course maps[edit]
Course 1[edit]
Hole 1 (Main Game)
Hole 1 (Extra Game)
Hole 2 (Main Game)
Hole 2 (Extra Game)
Hole 3 (Main Game)
Hole 3 (Extra Game)
Hole 4 (Main Game)
Hole 4 (Extra Game)
Hole 5 (Main Game)

Hole 5 (Extra Game)
Hole 6 (Main Game)

Hole 6 (Extra Game)

Hole 7 (Main Game)

Hole 7 (Extra Game)

Hole 8 (Main Game)
Hole 8 (Extra Game)


Course 2[edit]
Hole 1 (Main Game)
Hole 1 (Extra Game)

Hole 2 (Main Game)
Hole 2 (Extra Game)
Hole 3 (Main Game)

Hole 3 (Extra Game)
Hole 4 (Main Game)
Hole 4 (Extra Game)
Hole 5 (Main Game)
Hole 5 (Extra Game)
Hole 6 (Main Game)
Hole 6 (Extra Game)
Hole 7 (Main Game)
Hole 7 (Extra Game)
Hole 8 (Main Game)
Hole 8 (Extra Game)


Course 3[edit]
Hole 1 (Main Game)
Hole 1 (Extra Game)
Hole 2 (Main Game)
Hole 2 (Extra Game)
Hole 3 (Main Game)
Hole 3 (Extra Game)
Hole 4 (Main Game)
Hole 4 (Extra Game)
Hole 5 (Main Game)
Hole 5 (Extra Game)
Hole 6 (Main Game)

Hole 6 (Extra Game)
Hole 7 (Main Game)

Hole 7 (Extra Game)
Hole 8 (Main Game)

Hole 8 (Extra Game)


Course 4[edit]
Hole 1 (Main Game)
Hole 1 (Extra Game)
Hole 2 (Main Game)
Hole 2 (Extra Game)
Hole 3 (Main Game)
Hole 3 (Extra Game)
Hole 4 (Main Game)

Hole 4 (Extra Game)
Hole 5 (Main Game)
Hole 5 (Extra Game)

Hole 6 (Main Game)
Hole 6 (Extra Game)
Hole 7 (Main Game)
Hole 7 (Extra Game)
Hole 8 (Main Game)
Hole 8 (Extra Game)


Course 5[edit]
Hole 1 (Main Game)
Hole 1 (Extra Game)
Hole 2 (Main Game)
Hole 2 (Extra Game)
Hole 3 (Main Game)

Hole 3 (Extra Game)
Hole 4 (Main Game)
Hole 4 (Extra Game)
Hole 5 (Main Game)
Hole 5 (Extra Game)
Hole 6 (Main Game)

Hole 6 (Extra Game)
Hole 7 (Main Game)

Hole 7 (Extra Game)
Hole 8 (Main Game)
Hole 8 (Extra Game)


Course 6[edit]
Hole 1 (Main Game)
Hole 1 (Extra Game)
Hole 2 (Main Game)
Hole 2 (Extra Game)
Hole 3 (Main Game)
Hole 3 (Extra Game)
Hole 4 (Main Game)
Hole 4 (Extra Game)
Hole 5 (Main Game)
Hole 5 (Extra Game)

Hole 6 (Main Game)
Hole 6 (Extra Game)
Hole 7 (Main Game)

Hole 7 (Extra Game)
Hole 8 (Main Game)
Hole 8 (Extra Game)


Course 7[edit]
Hole 1 (Main Game)
Hole 1 (Extra Game)
Hole 2 (Main Game)
Hole 2 (Extra Game)
Hole 3 (Main Game)
Hole 3 (Extra Game)
Hole 4 (Main Game)
Hole 4 (Extra Game)
Hole 5 (Main Game)
Hole 5 (Extra Game)
Hole 6 (Main Game)
Hole 6 (Extra Game)
Hole 7 (Main Game)
Hole 7 (Extra Game)

Hole 8 (Main Game)
Hole 8 (Extra Game)


Course 8[edit]
Hole 1 (Main Game)
Hole 1 (Extra Game)
Hole 2 (Main Game)

Hole 2 (Extra Game)
Hole 3 (Main Game)
Hole 3 (Extra Game)
Hole 4 (Main Game)
Hole 4 (Extra Game)
Hole 5 (Main Game)
Hole 5 (Extra Game)
Hole 6 (Main Game)
Hole 6 (Extra Game)
Hole 7 (Main Game)
Hole 7 (Extra Game)
Hole 8 (Main Game)
Hole 8 (Extra Game)


[edit]
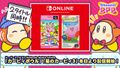
2019 Channel PPP post from the Kirby JP Twitter, informing that Kirby's Dream Land 3 and Kirby's Dream Course are now available on Nintendo Switch via Nintendo Switch Online.
Kirby #19 from the Kirby 30th Anniversary site, based on Kirby's Dream Course
"Hole in One" plushie of Kirby, based on the previous artwork
Gashapon Kirby figurines by Bandai, created for Kirby's 30th Anniversary
"Shooting Gallery" miniature set from the "Kirby Pupupu Japanese Festival" merchandise line, featuring a stand inspired by Kirby's Dream Course


Audio[edit]
Main themes[edit]
Special themes[edit]
| |||||||||||||||||||||||