|
This article or section is under construction. Therefore, please excuse its informal appearance while it's being worked on. We hope to have it completed as soon as possible.
Reason: This is gonna take a while longer than I thought. --Samwell (talk) 20:57, 18 September 2022 (UTC)
|
- This article is about collectible items found in treasure chests. For the chests themselves as objects, see Treasure Chest.
"Gold Medal" redirects here. For information about Gold Medal as a medal, see
Medal.
Treasure[1] refers to any collectible series of items which can be found inside Treasure Chests in stages. Depending on which game they appear in, treasures may or may not be required to complete the Story Mode, but collecting all of them is a requirement for 100% completion. Treasures made their first appearance in Kirby Super Star, specifically in The Great Cave Offensive, where collecting all 60 is required to fully complete the game mode. Since then, they have appeared in a handful of other games, the most recent one being Kirby's Extra Epic Yarn. For the sake of simplicity, this article will not discuss collectible sets of items that may or may not appear in treasure chests, such as keychains, stickers, or Picture Pieces. This article will also not cover collectible items that can be purchased using in-game currency, such as the furniture in Chaise Woole's store in Kirby's Epic Yarn or any of the items in Magolor's Shoppe.
Game appearances
Kirby Super Star / Kirby Super Star Ultra
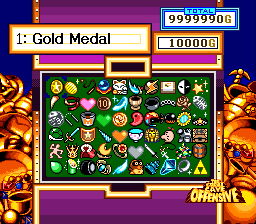
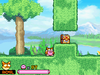
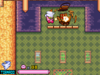
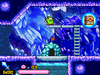
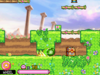
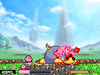
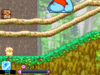
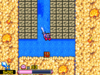
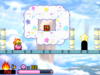
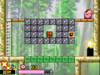
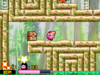
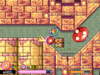
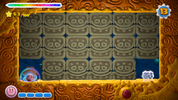
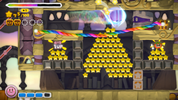
A completed Treasures collection, from
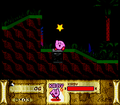
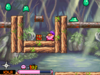
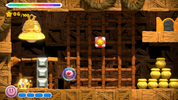
Kirby Super StarIn The Great Cave Offensive in Kirby Super Star and its remake, Kirby Super Star Ultra, Kirby's quest involves collecting treasure. As Kirby navigates the various areas of an underground chamber, he may find up to 60 treasure chests. The treasures are collectible items only and thus have no effect on Kirby's abilities; however, they are required to achieve 100% completion on the stage.
For details on how to collect these treasures, see the Sub-Tree, Crystal, Old Tower, and Garden pages.
Sub-Tree
| Sub-Tree Area Treasures
|
| Treasure
|
Image
|
Value
|
Notes
|
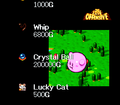
| Gold Medal
|
 
|
10,000 G
|
A common item awarded for merit in competitions.
|
| Gold Coin
|
 
|
1,000 G
|
A koban, an ancient Japanese gold coin.
|
| Whip
|
 
|
6,800 G
|
Referred to as the "Indy Whip" (インディウィップ) in Japanese, a reference to the famous weapon of the fictional treasure hunter Indiana Jones.
|
| Crystal Ball
|
 
|
200,000 G
|
A common item used by fortune tellers.
|
| Lucky Cat
|
 
|
500 G
|
A maneki-neko, a Japanese symbol of luck.
|
| Seiryu Sword
|
 
|
142,000 G
|
Seiryu means "Azure Dragon" and is one of the Four Symbols of the Chinese constellations.
This specific type of blade is a liuyedao or "willow-leaf blade", a common military blade throughout Chinese history.
|
| Screw Ball (Kirby Super Star)
|
 
|
80,000 G
|
A reference to the Screw Attack power-up of the Metroid series.
|
| Screw Attack (Kirby Super Star Ultra)
|
| Echigo Candy
|
 
|
8,000 G
|
Refers to a common scenario in historical samurai dramas where a scheming merchant, Echigoya (越後屋), offers a box of sweets to a corrupt governor.
He then reveals that the gift is actually a bribe for political power; the box is full of gold coins.
|
| Zebra Mask (Kirby Super Star)
|
 
|
278,000 G
|
A mask split into black and white halves.
While the Japanese name is simply "White/Black Mask" (しろくろマスク), its international name in Ultra references the Mario series' Phanto.
|
| Phanto Mask (Kirby Super Star Ultra)
|
| Star Stone
|
 
|
82,100 G
|
Referred to as a "Star Droplet" (ほしのしずく) in Japanese. Possibly a reference to the Warp Star.
|
| Beast's Fang
|
 
|
7,300 G
|
A fang belonging to an unknown creature. May be in reference to the real-world value of ivory.
|
| Bandanna
|
 
|
1,990 G
|
Referred to as the "Commando Bandanna" (コマンドバンダナ) in Japanese, likely in reference to bandannas worn by famous action movie heroes such as John Rambo.
|
| Springtime (Kirby Super Star)
|

|
250,000 G
|
One of the four Season Hearts. May possibly be a reference to the Zelda series' Heart Container.
|
| Seasons Heart (Kirby Super Star Ultra)
|

|
An amalgamation of four treasures from the original Kirby Super Star.
|
Crystal
| Crystal Area Treasures
|
| Treasure
|
Image
|
Value
|
Notes
|
| Dime
|
 
|
10 G
|
A reference to the common monetary piece. In Japanese, it's a ten yen coin, which is roughly equivalent to a dime, and is worth around 80% of one.
|
| Glass Slippers (Kirby Super Star)
|
 
|
120,000 G
|
A reference to the iconic item found in the fairy tale of Cinderella.
|
| Glass Slipper (Kirby Super Star Ultra)
|
| Goblet
|
 
|
800 G
|
Otherwise known as a chalice. A footed cup used as a vessel for beverages in medieval times.
|
| Saucepan
|
 
|
10 G
|
Referred to as a "Durable Pan" (じょうぶなおなべ) in Japanese.
|
| Brass Knuckle
|
 
|
20,000 G
|
A common weapon for martial artists dating back to ancient times.
|
| Amber Rose
|
 
|
22,100 G
|
Corresponding with the Glass Slipper, it may reference the fairy tale Beauty and the Beast.
It may also reference how ancient flora and fauna were trapped and crystallized within amber, preserving them in the present day.
|
| Fish Fossil
|
 
|
8,250 G
|
A fossilized fish.
|
| Beast Fossil
|
 
|
24,220 G
|
A fossil depicting an unknown lizard-like creature.
|
| Nunchuks (Kirby Super Star)
|

|
55,480 G
|
A weapon that originates from Okinawan martial arts.
|
| Machine Parts (Kirby Super Star Ultra)
|

|
121,300 G
|
The horns of the Hydra from Kirby Air Ride.
|
| Bucket
|
 
|
200 G
|
A reference to Mario & Wario.
|
| Summertime (Kirby Super Star)
|

|
250,000 G
|
One of the four Season Hearts.
|
| Power Paintbrush (Kirby Super Star Ultra)
|

|
222,000 G
|
A reference to Kirby: Canvas Curse.
|
| 100-Dollar Coin
|
 
|
10,000 G
|
A 10,000 yen coin, worth roughly 100 US dollars per the exchange rate.
|
| Ancient Gem
|
 
|
68,000 G
|
Referred to as a "Magatama of Flame" (ほのおのまがたま) in Japanese.
Could be a reference to the Yasakani no Magatama, one of the three Imperial Regalia of Japan.
|
| Falcon Helmet
|
 
|
41,000 G
|
A reference to the F-Zero series.
|
| Dud (Kirby Super Star)
|

|
30 G
|
A double meaning: it is both a "dud" as in a bomb that failed to detonate, and a "dud" in that its monetary value is quite low.
|
| Cell Phone (Kirby Super Star Ultra)
|

|
40,210 G
|
A reference to Kirby & The Amazing Mirror.
|
| Truth Mirror
|
 
|
500,000 G
|
A common item in Japanese folklore. Could be a reference to the mirror Yata no Kagami, one of the three Imperial Regalia of Japan.
|
Old Tower
| Old Tower Area Treasures
|
| Treasure
|
Image
|
Value
|
Notes
|
| Star Tiara
|
 
|
408,200 G
|
A tiara emblazoned with a golden star.
|
| Turtle Shell (Kirby Super Star)
|
 
|
800 G
|
Referred to as a generic "Turtle Shell" (かめこうら) in the Japanese version of both games. In Ultra, its international name is a reference to the Mario series.
|
| Koopa Shell (Kirby Super Star Ultra)
|
| Sword (Kirby Super Star)
|
 
|
325,000 G
|
A reference to Falchion, Marth's legendary sword in the Fire Emblem series.
It was simply called "Sword" in international versions of the original game, as it predated the international presence of Fire Emblem; it bears the proper name in Ultra.
|
| Falchion (Kirby Super Star Ultra)
|
| Warrior Shield
|
 
|
50,000 G
|
Likely meant to correspond to Falchion. A shield of similar design is used by the Sword Hero in Team Kirby Clash.
|
| Unicorn's Horn
|
 
|
80,300 G
|
A reference to the legendary creature, the unicorn.
|
| Autumntime (Kirby Super Star)
|

|
250,000 G
|
One of the four Season Hearts.
|
| Three-Star Cane (Kirby Super Star Ultra)
|

|
222,000 G
|
A reference to Kirby: Squeak Squad.
|
| Rice Bowl (Kirby Super Star)
|
 
|
50 G
|
A rice bowl with a cracked edge.
|
| Broken Bowl (Kirby Super Star Ultra)
|
| Tut's Mask
|
 
|
160,000 G
|
A reference to the ancient Egyptian Pharaoh Tutankhamun.
|
| Mr. Saturn
|
 
|
120,000 G
|
A reference to the Mr. Saturn race from the Mother series.
|
| Armor
|
 
|
212,000 G
|
A silver suit of armor.
|
| Treasure Box
|
 
|
100,000 G
|
A senryōbako, or box of 1,000 ryō, used for transporting coinage in the Tokugawa era.
|
| Mannequin
|
 
|
3,000 G
|
A mannequin depicted in a strange pose.
|
| Gold Crown
|
 
|
528,000 G
|
Referred to as the "Queen Crown" (クイーンクラウン) in Japanese.
|
| King's Cape
|
 
|
508,000 G
|
A red robe with fur trimming, similar to that of King Dedede. Corresponds to the Gold Crown.
|
| Model Ship
|
 
|
800,000 G
|
A model ship whose sail is shaped like a crescent moon, which is noted in the item's Japanese name (つきのうきふね, "Moon Model Ship").
|
| Sun Ring
|
 
|
800,000 G
|
A golden ring with an image of the sun on its front. Likely meant to correspond with the moon-shaped Model Ship.
|
Garden
| Garden Area Treasures
|
| Treasure
|
Image
|
Value
|
Notes
|
| Wintertime (Kirby Super Star)
|

|
250,000 G
|
One of the four Season Hearts.
|
| Gold Watering Can (Kirby Super Star Ultra)
|

|
200,000 G
|
A reference to the Animal Crossing series.
|
| Katana
|
 
|
990,000 G
|
A reference to the traditional Japanese long sword, the katana. It's the highest-valued treasure in both versions of the game.
|
| Charm
|
 
|
8,000 G
|
Referred to as an "amulet" (アミュレット) in Japanese. Bears an ankh-shaped design.
|
| Xmas Tree
|
 
|
40,000 G
|
A reference to the ubiquitous Christmas decoration.
|
| Kong's Barrel
|
 
|
1,500 G
|
A reference to the Donkey Kong series.
|
| Ramia's Scale
|
 
|
12,800 G
|
A mistranslation of "Lamia's Scale". A lamia is a creature from Greek mythology depicted as being part-human, part-snake.
|
| Shiny Bamboo
|
 
|
600,000 G
|
Named "Taketori's Daughter" (たけとりのむすめ) in Japanese, directly referencing the Japanese folk tale The Tale of the Bamboo Cutter.
|
| Tire
|
 
|
1,100 G
|
Referred to as the "Kart Tire" (カートのタイヤ) in Japanese, a possible reference to Super Mario Kart.
|
| Spirit Charm
|
 
|
78,500 G
|
A bracelet with a blue gem on its front.
|
| Pegasus Wing
|
 
|
42,800 G
|
A reference to the pegasus, a winged horse from Greek mythology. More specifically, a possible reference to the Wings of Pegasus item from the Kid Icarus series.
|
| Raccoon Doll
|
 
|
8,150 G
|
A reference to the tanuki statues that can be found in many places throughout Japan.
|
| Shell Whistle
|
 
|
82,000 G
|
Referred to as the "Ripple Whistle" (さざなみのふえ) in Japanese. An item of the same name is present in other RPGs, such as Shin Megami Tensei If....
|
| Orihalcon (Kirby Super Star)
|
 
|
512,000 G
|
Originally translated as "Orihalcon", it was given the proper name of Orichalcum in Ultra.
|
| Orichalcum (Kirby Super Star Ultra)
|
| Platinum Ring
|
 
|
40,000 G
|
A simple ring made out of platinum.
|
| Triforce
|
 
|
800,000 G
|
A reference to the Triforce, the iconic symbol of the Zelda series.
|

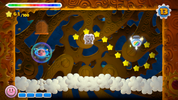
Also, on the map screen, a medal that looks like the Gold Medal treasure (seen to the right), signifies that all treasures have been found in the area.
Kirby & The Amazing Mirror
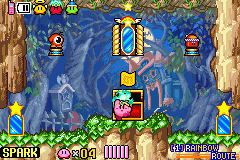
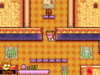
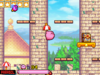
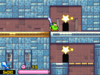
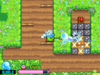
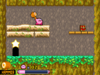
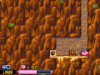
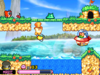
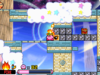
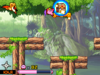
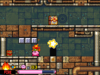
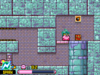
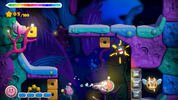
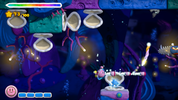
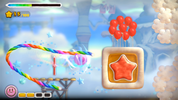
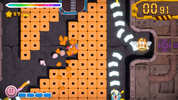
Kirby collecting an
Area Map from a treasure chest in
Kirby & The Amazing MirrorIn Kirby & The Amazing Mirror, there are treasure chests scattered around the many different worlds, and contain items such as area maps, Spray Paint, Vitalities, and other objects such as Notes, and a music player. Also contained within treasure chests are more standard consumable items, such as food, 1-Ups, or batteries. Treasure chests come in two different sizes, with the larger ones always containing a permanent collectible item. The game is not considered 100% complete until every treasure chest, large and small, is opened, even if the item inside is mundane.
Although every chest must be opened to fully complete the game, the following table lists the locations of every significant collectible item in Kirby & The Amazing Mirror, along with how to collect them:
| Collectible treasures in Kirby & The Amazing Mirror
|
| Treasure
|
Area
|
Room
|
How to obtain
|
| World Map
|
Intro area
|
N/A
|
This item is located inside the large treasure chest that must be opened to access the Central Circle for the first time.
|
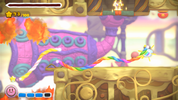
| Rainbow Route Area Map
|
Rainbow Route
|
Hub 1
|
This treasure chest can be found in the middle of the room, and is easy to access.
|
| Green Spray Paint
|
Rainbow Route
|
Room 28
|
This treasure chest can be accessed by hitting the lower of two adjacent Bomb Blocks along the path, then heading into the opened chamber to the right.
|
| Beginning Notes
|
Rainbow Route
|
Room 39
|
This treasure chest is located in a small chamber which can be reached by breaking the metal blocks that otherwise block access.
|
| Moonlight Mansion Area Map
|
Moonlight Mansion
|
Entry
|
This treasure chest can be found out in the open just to the right of Kirby's landing point from the Warp Star ride.
|
| Orange Spray Paint
|
Moonlight Mansion
|
Room 7
|
This treasure chest can be found by entering this room from Room 5.
|
| Enemy Sounds
|
Moonlight Mansion
|
Room 17
|
This treasure chest can be found in a small cave to the lower-right, accessible by swimming down and then to the right.
|
| Chalk Spray Paint
|
Moonlight Mansion
|
Goal 2
|
This treasure chest can be found in a small room accessible from the doorway from Room 18.
|
| Secret Sounds
|
Cabbage Cavern
|
Room 5
|
This treasure chest is locked behind a gate which closes quickly after opening it using a nearby switch. Kirby needs to be quick or resourceful to get in there.
|
| Chocolate Spray Paint
|
Cabbage Cavern
|
Room 6
|
This treasure chest is located in a small chamber blocked off using a Bomb Block which can only be hit using an ability that can attack through walls, such as Beam.
|
| Spunky Notes
|
Cabbage Cavern
|
Room 12
|
This treasure chest is located in the upper-left area, which can only be reached by entering from Room 11.
|
| Sapphire Spray Paint
|
Cabbage Cavern
|
Room 14
|
In order to get the treasure chest in this room, Kirby must quickly flip the switch right before where the doors on the right are, run quickly past the front gate, attack the Sword Knight and destroy the Bomb Block, and dash left until the treasure chest is reached. Kirby will likely need a stake-pounding ability to reach it.
|
| Cabbage Cavern Area Map
|
Cabbage Cavern
|
Goal
|
This large treasure chest is located in the upper-left corner, behind a Bomb Block barrier. Kirby needs to worm his way through the tunnels in a circuitous path to get there.
|
| Mustard Mountain Area Map
|
Mustard Mountain
|
Chest
|
This chest is tucked away at the right end of the room behind a gate with a tight switch timer. Kirby will need to be quick or resourceful to get inside.
|
| Cherry Spray Paint
|
Mustard Mountain
|
Goal 2
|
This chest can be found high atop a small platform along the path in the first enclosed room, next to a Sword Knight who is guarding it.
|
| Secret Notes
|
Carrot Castle
|
Room 13
|
This chest is located in the upper portion of this room, accessible by entering from Room 14.
|
| Yellow Spray Paint
|
Carrot Castle
|
Room 16
|
This chest is locked by a Bomb Block barrier that can only be broken by entering the room beneath, but doing that requires hitting another Bomb Block on the upper path, which Kirby cannot come back down from. The upper Bomb Block needs to be broken remotely to get access to the chest, which can be done with certain abilities or with the help of friends.
|
| Vitality
|
Carrot Castle
|
Chest 1
|
This chest is located in the center of this room, which can be accessed from Room 10.
|
| Carrot Castle Area Map
|
Carrot Castle
|
Chest 2
|
This chest is located in the upper portion of this room, and is out in the open. It can be reached from the Warp room.
|
| Ocean Spray Paint
|
Olive Ocean
|
Room 6
|
This chest can be found in a small chamber guarded by a Heave-Ho Block and a tight passage that only Mini Kirby can fit through. The intended strategy is to have the nearby Droppy hold on to Kirby's Mini ability so that he can inhale the block out of the way, and then get the ability back afterward to slip in.
|
| Vitality
|
Olive Ocean
|
Chest 1
|
This chest can be found in the middle of the room, guarded by several switch gates and Bomb Block barriers. Kirby can solve this puzzle with nothing more than his inhale and some good footwork, though abilities and/or friends can make the process easier.
|
| Olive Ocean Area Map
|
Olive Ocean
|
Chest 2
|
This chest can be found in a chamber under the main path, accessible by pounding a stake along the way. Bonkers is nearby to provide a suitable ability if needed.
|
| Sound Effects
|
Olive Ocean
|
Goal 2
|
This chest can be found in a small chamber blocked by a gate that can be opened by hitting the switch nestled in the floor underneath. The intended way to get in is to use Ice Kirby to freeze the nearby Waddle Dee and then kick its frozen body through the wall into the switch.
|
| Snow Spray Paint
|
Peppermint Palace
|
Room 5
|
This chest can be found in an isolated hallway on the right hand side, accessible only by coming in through the Chest room.
|
| Happy Notes
|
Peppermint Palace
|
Room 6
|
To get this chest, Kirby needs to enter from a secondary door in Room 12.
|
| Dream Notes
|
Peppermint Palace
|
Room 8
|
This chest can be found near the end of the three-pronged path leading to the right, along the middle path.
|
| Lavender Spray Paint
|
Peppermint Palace
|
Room 10
|
This chest can be found near the top of the rightmost path in this room, guarded by a Golem.
|
| Pink Spray Paint
|
Peppermint Palace
|
Room 22
|
This chest can be found at the end of a small tunnel choked with blocks that can be cleared by pounding a stake at the start of the path. The stake itself is behind a Bomb Block barrier, which is guarded by a Giant Rocky.
|
| Peppermint Palace Area Map
|
Peppermint Palace
|
Chest
|
This large chest can be found in the lower-right area of the room. To get there, Kirby will need to enter from Room 5, through the fight with Bonkers in that room. From there, he can zag past the Mirra guarding the door back to Room 5, then return from a different door to break a Bomb Block barrier that allows him to access the room holding the large chest.
|
| Battle Notes
|
Radish Ruins
|
Room 22
|
This treasure chest is located to the lower-left in a cave blocked off by a Heave-Ho Block, which Kirby can move by inhaling.
|
| Vitality
|
Radish Ruins
|
Chest 1
|
This treasure chest is out in the open, once Kirby reaches this room from Room 3.
|
| Radish Ruins Area Map
|
Radish Ruins
|
Chest 2
|
This treasure chest is located at the far right end of the room, past a long hall of spikes and a wind current pushing down on it. Kirby can bridge the gap by hitting a Bomb Block above, but should be careful to not then get stuck in the upper hallway.
|
| Emerald Spray Paint
|
Radish Ruins
|
Goal 1
|
This treasure chest can be found far below the goal door, by jumping down the pit just to the left (though not all the way down).
|
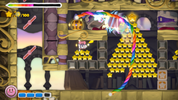
| Red Spray Paint
|
Candy Constellation
|
Room 2
|
This treasure chest is located behind a gate that is set to a timed switch in the middle of the room. Kirby can break the Star Blocks below the switch to bring it closer to the gate.
|
| Kirby's Sounds
|
Candy Constellation
|
Room 16
|
This chest can be accessed by breaking a Bomb Block to remove the wall in the way, but Kirby needs to be quick to get through or another wall will appear in its place shortly thereafter.
|
| Sound Player
|
Candy Constellation
|
Chest 1
|
This treasure chest is out in the open, once Kirby reaches this room from Room 6.
|
| Carbon Spray Paint
|
Candy Constellation
|
Chest 2
|
This treasure chest is out in the open, once Kirby reaches this room from Room 1.
|
| Vitality
|
Candy Constellation
|
Chest 2
|
This treasure chest can be accessed after defeating Phan Phan, once Kirby reaches this room from Room 9.
|
| Candy Constellation Area Map
|
Candy Constellation
|
Chest 3
|
This treasure chest is locked behind a series of times gates and switches. Kirby will need to be quick or resourceful to get in.
|
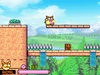
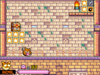
Kirby: Squeak Squad
In Kirby: Squeak Squad, Kirby can collect treasure chests in most stages, which he needs to carry using his Copy Palette. Most stages also feature a large treasure chest, which, when Kirby collects it, will typically make a high-ranking Squeak appear. If they manage to take the chest away from Kirby, he must then go to the base they entered to fight whoever brought the chest into the base along with a few Squeakers. If they are defeated, the treasure chest will appear. At the end of the stage, Kirby will open any treasure chests he has collected after his dance. In these treasure chests are all sorts of goods, including Spray Paint, Ability Scrolls, and Notes & Sounds. Some chests also contain Star Seals, which are required to reach Secret Sea and subsequently Gamble Galaxy. In addition to these treasure chests, another one appears whenever Kirby defeats a boss, which contains the corresponding Boss Battle Badge. If he collects every single one of these badges, the Boss Endurance sub-game will be unlocked.
The following tables list every treasure chest location in Kirby: Squeak Squad, along with notes on how to reach them:
Prism Plains
| Prism Plains Treasures
|
| Treasure
|
Stage
|
Location
|
How to obtain
|
| Beginning Notes
|
Stage 2
|
|
This chest can be found out in the open in the last room of the stage. It triggers the Squeaks to appear.
|
| Fire Scroll
|
Stage 3
|
|
This chest can be found buried in the dirt that Kirby can use the Animal ability to clear out.
|
| Sound Player
|
Stage 3
|
|
This chest must be collected in the last area to continue, and triggers the Squeaks to appear.
|
| Green Spray Paint
|
Stage 4
|
|
In the fourth room, Kirby can find this chest in a separate chamber through a hole in the ceiling of the main hallway.
|
| Graphic Piece - Yellow
|
Stage 4
|
|
This chest can be found in the fifth room, under a thin floor and surrounded by spikes.
|
| Hidden Door Key for Prism Plains
|
Stage 4
|
|
This chest is in the last room. Kirby has to fight Storo to keep it.
|
| Copy Palette - Check
|
Stage 5
|
|
This chest can be found in a barrel at the very top of the room.
|
| Boss Battle Badge - King Dedede
|
Boss
|
|
This treasure is obtained by defeating King Dedede.
|
| Graphic Piece - Red
|
Secret
|

|
In the fourth room, with two vertical paths, Kirby needs to find a doorway on the left path to reach this chest.
|
| Vitality
|
Secret
|
|
In the last room, this chest can be seen being carried away by a moving platform. Kirby needs to grab it and then get away from Doc and the Squeaks to safety.
|
Nature Notch
| Nature Notch Treasures
|
| Treasure
|
Stage
|
Location
|
How to obtain
|
| Animal Scroll
|
Stage 1
|
|
In the third room, Kirby needs to fire to the right when he can in the Cannon chain to reach this chest.
|
| Kirby's Sounds
|
Stage 1
|
|
In the fourth room, Kirby can use the Bubble ability to break some barriers to this chest, but should be careful not to trigger all of the Bomb Blocks.
|
| Star Seal
|
Stage 1
|
|
In the last room, Kirby can obtain this chest out in the open, but will need to run from the Squeaks in order to keep it. This item is required to complete the game.
|
| Citrus Spray Paint
|
Stage 2
|
|
In the third main area, Kirby needs to find a doorway in the upper-right corner to take him to a separate room where this chest can be picked up.
|
| Ghost Medal piece
|
Stage 2
|
|
Kirby needs to wrestle this chest away from Storo in the last area.
|
| Wheel Scroll
|
Stage 3
|
|
In the third room, Kirby can use the Wheel ability to nab this chest from a small grotto guarded by spikes. Grabbing the chest causes Doc and some Squeakers to appear.
|
| Pastel Copy Palette
|
Stage 3
|
|
In the fourth room, Kirby can access this chest by hitting a Bomb Block through a wall with an appropriate ability (such as Bubble).
|
| Graphic Piece - Red
|
Stage 3
|
|
In the sixth room, Kirby will need to dig through some soft dirt using the Animal ability to reach this chest.
|
| Cutter Scroll
|
Stage 4
|
|
In the last area, Kirby needs to outrun a boulder and enter the room where the chest is before it gets blocked off.
|
| Beam Scroll
|
Stage 5
|

|
In the third main area, Kirby can find a side door partially obstructed by flames and magma. Using Ice will let him pass through in the safest manner. Through the door is a small side room where the chest is.
|
| Graphic Piece - Green
|
Stage 5
|

|
In the fourth area, Kirby can get this chest after absorbing Big Metalun's power and using it to pound through some metal blocks.
|
| Hidden Door Key for Nature Notch
|
Stage 5
|
|
In the last area, Kirby will need to fight Spinni to obtain this chest.
|
| Boss Battle Badge - Mrs. Moley
|
Boss
|
|
This treasure is obtained by defeating Mrs. Moley.
|
| Graphic Piece - Red
|
Secret
|
|
In the second area, Kirby can use the Hammer ability from Bonkers to find a hidden door leading to this chest.
|
| Secret Map piece
|
Secret
|
|
From the third area, Kirby will need to take the lower door. In the following room, Kirby needs to catch a Gold Waddle Dee (with a switch in this area to aid in that task) before it jumps into the bottomless pit ahead. Defeating the Gold Waddle Dee will cause it to drop this chest.
|
| Vitality
|
Secret
|
|
In the last area, Kirby needs to fight Storo and the Squeakers for this chest.
|
Cushy Cloud
| Cushy Cloud Treasures
|
| Treasure
|
Stage
|
Location
|
How to obtain
|
| Graphic Piece - Blue
|
Stage 1
|
|
In the third area, Kirby can follow a path designed to be cleared away using the Laser ability, then find this chest at the end of it before proceeding.
|
| Grape Spray Paint
|
Stage 1
|
|
In the fourth main area, Kirby can find a side door leading to a room with an Acchi and the chest, buried in metal blocks.
|
| Spark Scroll
|
Stage 1
|
|
In the last area, Kirby needs to fight Spinni and the Squeakers for this chest.
|
| Familiar Notes
|
Stage 2
|
|
In the second main area, Kirby can find this chest by diving into the water and clearing a series of breakable blocks in a tunnel.
|
| Star Seal
|
Stage 2
|
|
In the last area, Kirby needs to wrestle this chest away from Doc and the Squeakers.
|
| Graphic Piece - Green
|
Stage 3
|
|
In the third main area, Kirby will want to tale the left path leading upward choked by Star Blocks to find a door leading to a side room where this chest is.
|
| Secret Map Piece
|
Stage 3
|
|
In the fourth main area, Kirby can find another optional doorway blocked by Star Blocks. In the room, Kirby needs to stop a Gold Waddle Dee from running off an edge, and can stop him by cutting some rope platforms. Defeating the Gold Waddle Dee yields this chest.
|
| Ghost Medal Piece
|
Stage 3
|
|
In the last area, Kirby needs to solve a timed switch puzzle to get this chest, then he needs to ferry it past Storo and his Squeakers to get to the exit.
|
| Lavender Spray Paint
|
Stage 4
|
|
In the second main area, Kirby needs to light a fuse and then enter the cannon to be launched to a side room where he can get this chest from inside some soft cloud platforms.
|
| Hi-Jump Scroll
|
Stage 4
|
|
In the fifth area, Kirby can find this chest by breaking the right set of Bomb Block barriers to drop it down, though breaking the wrong ones will cause it to be lost to a bottomless pit.
|
| Hidden Door Key for Cushy Cloud
|
Stage 4
|
|
In the last area, Kirby will need to race Spinni to get this chest, and then safely carry it to the exit.
|
| Tornado Scroll
|
Stage 5
|
|
In the last area, Kirby needs to chase this chest as it is being ferried away by a thundercloud. If he is too slow, the cloud will disintegrate and drop the chest into a bottomless pit.
|
| Boss Battle Badge - Mecha-Kracko
|
Boss
|
|
This treasure is obtained by defeating Mecha-Kracko.
|
| Orange Spray Paint
|
Secret
|
|
This chest can be ound in a side room accessible in the upper-right corner of the second main area. In this room, Kirby needs to free the chest from a Bomb Block container and then collect it without dropping it through the Breakable Block floor below.
|
| Graphic Piece - Blue
|
Secret
|
|
This chest is located in a small side room accessible by taking the cannon in the lower-right corner from the second main area.
|
| Vitality
|
Secret
|
|
This chest can be found in the lower-middle portion of the second area, right before the door leading into the next room. Collecting it causes the Squeaks to appear.
|
Jam Jungle
| Jam Jungle Treasures
|
| Treasure
|
Stage
|
Location
|
How to obtain
|
| Graphic Piece - Yellow
|
Stage 1
|
|
In the first area, Kirby can find this chest behind a switch gate that closes immediately after the switch is depressed. A Burn Switch can be found inside the area where the chest is, which will give Kirby an easier way in if hit. One way to do this is by aiming a Cutter blade.
|
| Shadow Spray Paint
|
Stage 1
|
|
In the fourth area, Kirby can access this chest by using the Laser ability to clear through a series of Bomb Block barriers and open the way.
|
| Bubble Scroll
|
Stage 1
|
|
In the last area, Kirby can find this chest by cutting a tall grass patch to reveal it. Grabbing the chest causes Doc and the Squeaks to appear.
|
| Yellow Spray Paint
|
Stage 2
|
|
In the third main area, Kirby can find this chest by hitting a certain Burn Switch on the path. After collecting the chest, a bunch of Maiga will appear to ambush him.
|
| Star Seal
|
Stage 2
|
|
In the last area, Kirby will need to nab the chest from a moving platform before Spinni gets it first.
|
| Metal Scroll
|
Stage 3
|
|
This chest can be found in the room following the split in the path in the third main area if Kirby takes the upper door. In the room, Kirby needs to make use of the Laser ability to clear a way to the chest.
|
| Industrial Copy Palette
|
Stage 3
|
|
This chest can be found in a room following the split in the fifth main area if Kirby takes the left cannon. In the room, Kirby needs to navigate a dark labyrinth to find the chest inside a barrel, but can light up the place using the Fire ability.
|
| Vitality
|
Stage 3
|
|
In the last area, Kirby needs to nab the treasure chest from Doc, who tries to get away with it. Using Wheel can help Kirby catch Doc faster.
|
| Graphic Piece - Blue
|
Stage 4
|
|
In the fourth main area, Kirby needs to ignore the door just to the left and instead go on a circuitous path that takes him through a fight against Buboo, then along a path that leads him to another door above some barrels. In this door, the chest can be found in an enclosed space blocked off by metal blocks that can be melted using the Fire ability. A bubble containing the Fire ability can be seen to the right.
|
| Secret Map piece
|
Stage 4
|
|
From the third area, Kirby needs to enter the right-most door on the split path leading downward. From there, he enters a deep cave where he needs to chase down a Gold Waddle Dee and get its treasure before it drops off into a pit.
|
| Hidden Door Key for Jam Jungle
|
Stage 4
|

|
At the end of the fifth area, Kirby needs to use the Fire ability to burn away some metal blocks blocking a side door rather than taking the main exit. This done, he can nab the large chest in the next room, but will then need to contend with Storo and his troops in the area after that.
|
| Laser Scroll
|
Stage 5
|
|
In the last room, Kirby needs to race down a long winding path to catch up with the falling chest and beat it to the bottom so he can pick it up without it falling into the pit below.
|
| Boss Battle Badge - Yadgaine
|
Boss
|
|
This treasure is obtained by defeating Yadgaine.
|
| Ice Scroll
|
Secret
|
|
In the fourth main area, Kirby can find this chest under a gate on the left side, which can be opened by breaking some floors above.
|
| Party Notes
|
Secret
|
|
In the fifth main area, Kirby can find this chest by taking a path choked with Star Blocks and then hitting a switch inside a wall to retract the spikes in the way.
|
| Ghost Medal Piece
|
Secret
|
|
In the last area before looping back to the start, Kirby can find this chest by hitting a switch in the middle of the hall. After picking up the chest, Kirby will need to contend with Spinni and his Squeakers.
|
- Main article: Furniture
In Kirby's Epic Yarn, treasures are referred to as Furniture. This can be found in stages, bought from vendors, and given as a reward for hanging on to Life Pieces in Devilish Mode. Once collected, the furniture can be used to decorate Kirby's Pad, aside from being necessary for 100% completion of the game.
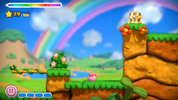
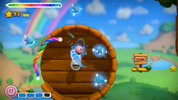
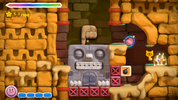
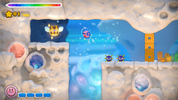
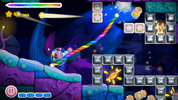
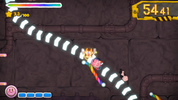
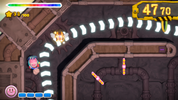
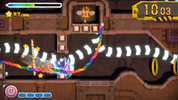
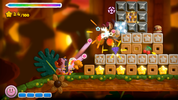
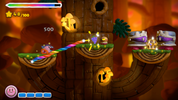
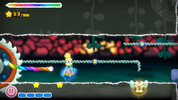
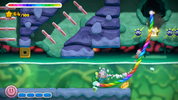
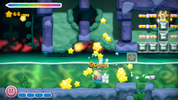
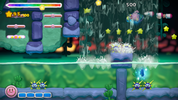
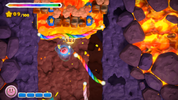
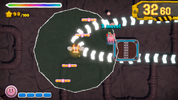
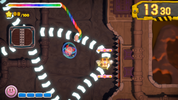
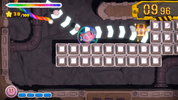
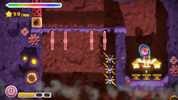
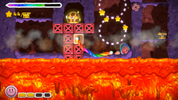
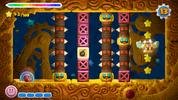
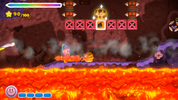
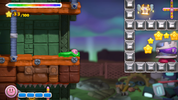
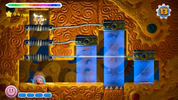
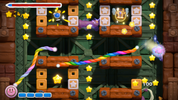
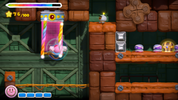
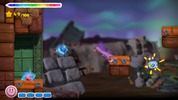
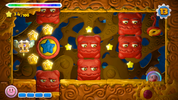
Kirby and the Rainbow Curse
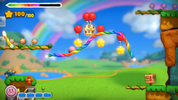
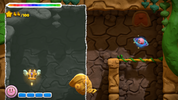
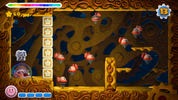
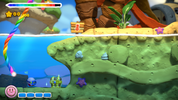
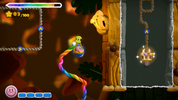
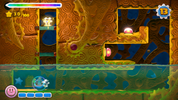
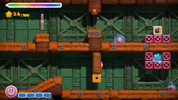
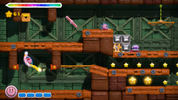
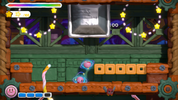
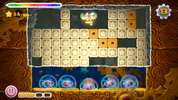
Each non-boss stage has five treasure chests to collect (excepting Deploy the Kirby Tank! and Kirby + Kirby, which both only have four). These may either be out in the open, hidden behind gates and side-chambers, or split into pieces, which must be reassembled within a short time limit. Some treasure chests can move on their own, which need to be collided with to collect. At the end of the stage, all collected chests are opened to reveal their contents, which contain Figurines or Music Tracks.
There are a total of 103 treasures to collect in the main stages of Story Mode. In addition to the items they contain, collecting these chests is also a requirement to unlock certain Challenge Mode stages.
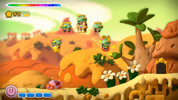
Green Valley
| Green Valley Treasures
|
| Treasure
|
Image
|
Stage
|
Location
|
How to obtain
|
| Kirby Figurine
|
|
The Adventure Begins (1-1)
|
|
The chest can be found in the second area, on the main path at the top of a ledge just before the first green Kirby-stopper pole.
|
| Elline Figurine
|
|
The Adventure Begins (1-1)
|
|
This chest can be found in an alcove in the third area just after Kirby obtains the Star Dash ability.
|
| Red Waddle Dee Figurine
|
|
The Adventure Begins (1-1)
|
|
This chest is located up high in the fourth area, above the Gray Zone within some gray blocks that require Kirby's Star Dash to break.
|
| Green Greens Track
|
|
The Adventure Begins (1-1)
|
|
In the fourth area, Kirby must roll through the multi-colored Pop Flowers along the lower path and then collect all the food to unlock a challenge door. Completing the challenge inside yields the treasure.
|
| Cotta Figurine
|
|
The Adventure Begins (1-1)
|
|
In the fourth area, Kirby must use a Launch Cannon to reach above the Gray Zone. He must then roll through all the flowers until a chain of point stars and a treasure chest appear attached to balloons.
|
| Cannon Cotta Figurine
|
|
Up the Big Ol' Tree (1-2)
|
|
In the second area near the top of the tree, Kirby should use a Star Dash to get past the Gray Zone.
|
| Cotta Knight Figurine
|
|
Up the Big Ol' Tree (1-2)
|
|
Kirby must Star Dash through the Cotta Knights and Cotta General in the third area and move upwards towards the treasure.
|
| The Adventure Begins (Arrangement) Track
|
|
Up the Big Ol' Tree (1-2)
|
|
In the third area, just before jumping into the Launch Cannon, Kirby should enter the time-challenge door. In the challenge, maneuvering around the bumpers will net Kirby the treasure.
|
| Bouncy Figurine
|
|
Up the Big Ol' Tree (1-2)
|

|
In the fourth area, Kirby should time the cannon fire just right to snag the treasure being tugged behind the Soarar.
|
| King Dedede's Theme Track
|
|
Up the Big Ol' Tree (1-2)
|
|
In the fifth area, Kirby must collect all the glowing puzzle pieces before time runs out to reveal the treasure.
|
| Gordo Figurine
|
|
Great Cave Escape (1-3)
|
|
At the leftmost side of area two, use Star Dash to break the metal blocks guarding this treasure.
|
| Bronto Burt Figurine
|
|
Great Cave Escape (1-3)
|
|
This is the treasure that the player sees upon entering area two, access to it is blocked by barrier blocks. Entering the cannon at the leftmost side of this area will blast Kirby all the way to the other side and expose this treasure.
|
| Through the Sky Track
|
|
Great Cave Escape (1-3)
|
|
In area three, break the metal blocks using Kirby's Star Dash to access the time-challenge door. Defeat the Cottas within the time limit to get the treasure.
|
| Carpa Figurine
|
|
Great Cave Escape (1-3)
|

|
Near the left side of area three, a Carpa carrying this treasure chest slowly climbs a waterfall. Use the Rainbow Rope to stop the flow and then grab the treasure.
|
| Vegetable Valley Track
|
|
Great Cave Escape (1-3)
|
|
Using Star Dash to get past the Gray Zone in area three will launch Kirby into a bell. Lead Kirby into the gray zone at a high angle to have him fall onto the treasure, or try and guide him while he's star dashing.
|
Yellow Dunes
| Yellow Dunes Treasures
|
| Treasure
|
Image
|
Stage
|
Location
|
How to obtain
|
| Mega Grindarr Figurine
|
|
Dig and Dash (2-1)
|
|
Just past the locked gate leading downward in the second area, there is a large room filled with sand, where several puzzle pieces must be quickly collected by Kirby to obtain the Treasure Chest.
|
| Top Ride Medley Track
|
|
Dig and Dash (2-1)
|
|
In the third area, a door to a challenge room can be found furthest to the right inside a block of sand. Kirby must complete the aforementioned time-challenge in this area to obtain the treasure chest.
|
| Grindarr Figurine
|
|
Dig and Dash (2-1)
|
|
Shortly after Mega Grindarr starts his descent, the path splits in two, with Gray Zones and food found on either side. Taking the path on the right here leads to a room with two Grindarrs poised over sand at differing height. The player will need to erase some of the sand holding the right Grindarr up, then move Kirby around past the key and then quickly slide him under the Grindarrs before they fall to get the chest.
|
| Drill Cotta Figurine
|
|
Dig and Dash (2-1)
|
|
This chest is locked away by three separate gates that require keys to open. To get all three, Kirby will need to have visited both of the paths mentioned in the previous treasure guide, likely needing to use a Star Dash to rocket back up after completing one side to get to the other. The third key is obtained in a hidden chamber nearer to the doors on the left side. Here, a small puzzle involving a marble needs to be solved to get the third key.
|
| Space Area Track
|
|
Dig and Dash (2-1)
|
|
Near the end of the fifth area, after disembarking from Mega Grindarr, a batch of sand in a ceiling alcove can be cleared away to reveal a hidden doorway. Entering this door leads to a puzzle room involving a marble, which the player needs to impart enough momentum to in order to hit the switch and open the way to this chest.
|
| Kirby Tank Figurine
|
|
Deploy the Kirby Tank! (2-2)
|
|
This treasure is sitting in a cache of metal blocks in the air on Kirby's path at the start of the tank section. A bunch of Point Stars are conjured in advance of this formation, and the game gives the player a hint to use the Mega Kirby Tank barrage to blast the metal blocks, so it is hard to miss.
|
| Waddle Dee Figurine (cannon)
|
|
Deploy the Kirby Tank! (2-2)
|
|
Shortly after Bouncy Sis, a spring appears on Kirby's path which he can use to bounce to a series of high decks. He'll have to maneuver past some Gordos on balloons to get to another spring that bounces him up to a star spinner. From here, the chest appears ahead of him attached to two balloons, and will slowly rise unless Kirby shoots it down. He should take care that it does not fall to the ground, however, if he wants to also collect the third treasure chest up ahead.
|
| Bombzway Figurine
|
|
Deploy the Kirby Tank! (2-2)
|
|
This chest is located inside a challenge room, which can be accessed shortly after obtaining the second chest if Kirby stayed high in the air to reach the platform the door is sitting on. This challenge tasks Kirby with shooting all the Bouncies within 15 seconds, though this can be easily accomplished using the Mega Kirby Tank barrage. After emerging from the door, Kirby should ignore the trail of point stars that appears in the sky to his right and drop straight down if he wants to get the fourth chest.
|
| Bouncy Sis Figurine
|
|
Deploy the Kirby Tank! (2-2)
|
|
Right before leaving the main Kirby Tank area, a giant Star Block appears on the path in front of the door. This needs to be destroyed with multiple tank shots. This done, five Bombzways will appear, with the uppermost one carrying the chest. Kirby will need to shoot it down before it flies away or he gets too far ahead.
|
| Blado Figurine
|
|
The Long-Lost Ruins (2-3)
|
|
Shortly into the ruins, Kirby will stumble across a Cotta and Cotta Knight guarding a treasure chest behind a metal block barrier. Kirby will need to use a Star Dash to get in there.
|
| Grinkey Figurine
|
|
The Long-Lost Ruins (2-3)
|
|
This treasure chest comes into view on the main path further into the ruins, nestled behind a shutter that will only open when four light panels have been activated. Two of these panels are guarded by lasers.
|
| Boss Theme Track
|
|
The Long-Lost Ruins (2-3)
|
|
A door to a challenge room can be found high up behind some soft clay in an alcove in the open space just prior to the Mecha Cotta fight. In this challenge room, Kirby has 15 seconds to light up a bunch of wall panels to make the chest appear and then collect it.
|
| Mecha Cotta Figurine
|
|
The Long-Lost Ruins (2-3)
|
|
This treasure chest is located inside a hidden room accessible to the left in the hall just after the Mecha Cotta fight. Kirby will need to use a Star Dash to break through the metal blocks guarding the chest.
|
| Reflected Laughter Track
|
|
The Long-Lost Ruins (2-3)
|
|
This last chest can be found in a secret area above the very last room in the stage containing the Goal Game. To reach it, Kirby needs to Star Dash upward, then aim for the chest.
|
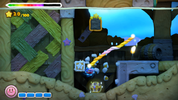
Indigo Ocean
| Indigo Ocean Treasures
|
| Treasure
|
Image
|
Stage
|
Location
|
How to obtain
|
| Underwater Kirby Figurine
|
|
Swept Out to Sea (3-1)
|
|
After ascending the first long vertical channel, this treasure chest can be found in a small nook on the left, guarded by metal blocks. Kirby will need to use a Star Dash to get in.
|
| Blipper Figurine
|
|
Swept Out to Sea (3-1)
|
|
After ascending the second long vertical tunnel, this chest can be found in another nook on the left, this time unguarded by blocks, but a water current will push Kirby away from it. Another Star Dash may be needed to fight the current and get the chest.
|
| Milky Way Wishes Track
|
|
Swept Out to Sea (3-1)
|
|
This chest is found inside a challenge room which is accessed at the start of the third vertical ascent. It tasks Kirby to travel across water currents in a winding tunnel in 15 seconds to grab the chest.
|
| Green Waddle Dee Figurine
|
|
Swept Out to Sea (3-1)
|
|
This chest is located out in the open between two lines of Gordos while ascending the third long vertical tunnel.
|
| Ripple Field track
|
|
Swept Out to Sea (3-1)
|
|
After exiting the water, this chest can be found nestled behind a metal block barrier in the cliff just before the end of the stage. A Star Dash is needed to get in.
|
| Kirby in the Cannon Figurine
|
|
The Haunted Ship (3-2)
|
|
This chest can be found in the very first part of the stage, just to the left of where Kirby starts. It is tucked in a small underwater alcove.
|
| Dethskullk Figurine
|
|
The Haunted Ship (3-2)
|
|
Underneath the door forward in the first part of the ship, this chest can be found in a small chamber blocked off by Star Blocks.
|
| Dethskullk King Figurine
|
|
The Haunted Ship (3-2)
|
|
This treasure chest is tucked away in the upper-left corner of the large area in the ship where the Dethskullk King can be found. It is partially hidden by foreground elements.
|
| Snowball Scuffle Track
|
|
The Haunted Ship (3-2)
|
|
In the large area of the ship where the Dethskullk King can be found, this chest can be obtained by collecting all the puzzle pieces that appear after collecting the first one in the lower-left corner, along with a key.
|
| Ice Cream Island Track
|
|
The Haunted Ship (3-2)
|
|
This chest is hidden in a room accessible in the last area of the stage through a door at the top of the waterfall. It can only be accessed using a Star Dash.
|
| Crabbo Figurine
|
|
Kirby Submarine's Torpedo Time (3-3)
|
|
Toward the bottom of the first auto-scrolling area, this chest can be found behind some metal blocks, which can be broken using a Star Torpedo.
|
| Sawgill Figurine
|
|
Kirby Submarine's Torpedo Time (3-3)
|
|
One of the Clam Shells in the second auto-scrolling area contains a puzzle piece. Collecting all the pieces quickly enough will award this chest.
|
| Mini Deepsee Figurine
|
|
Kirby Submarine's Torpedo Time (3-3)
|
|
Further along the second auto-scrolling area, this chest can be seen moving along with a Blipper school. Kirby will need to grab it before it slips away with the Blippers.
|
| Deepsee Figurine
|
|
Kirby Submarine's Torpedo Time (3-3)
|
|
During the third auto-scrolling area, this chest can be found behind some metal blocks, which can be broken using a Star Torpedo.
|
| Boss Battle Track
|
|
Kirby Submarine's Torpedo Time (3-3)
|
|
This chest is inside a challenge room, which can be accessed along the third auto-scrolling area. Kirby needs to guide his torpedoes toward the switch in the room to get the chest.
|
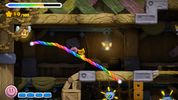
Blue Sky Palace
| Blue Sky Palace Treasures
|
| Treasure
|
Image
|
Stage
|
Location
|
How to obtain
|
| Bzztbulb Figurine
|
|
Rainbow Across the Skies (4-1)
|
|
This chest can be found encased in a metal block formation near the top of the second area. Kirby will need to Star Dash to get in.
|
| Trakker Figurine
|
|
Rainbow Across the Skies (4-1)
|

|
This treasure chest appears near the middle of the third area's auto-scrolling section just after the Candy on balloons passes by. It rises up quickly on two balloons on the right side, so Kirby will need to get it quick and not accidentally pop the balloons from above.
|
| Bronto Knight Figurine
|
|
Rainbow Across the Skies (4-1)
|
|
Shortly after the second chest flies by, a Launch Cannon will fly by on balloons on the left side, and shortly collide with a cloud and fall back down if not interacted with. This cannon takes Kirby to a separate area, where he has to launch through cannons with the right timing to grab the chest. Note that a Soarar comes in and pops the balloon attached to the chest, which may throw Kirby's timing off.
|
| Sky Tower Track
|
|
Rainbow Across the Skies (4-1)
|
|
At the beginning of the fourth area, the door to a challenge room can be found to the left. Kirby will need to be quick to get in before the screen scrolls away. Inside the room, Kirby needs to collect three formations of Point Stars in 15 seconds to make the chest appear.
|
| The Asteroid Track
|
|
Rainbow Across the Skies (4-1)
|
|
Near the end of the stage, a giant Star Block goes flying upward on several balloons. Kirby needs to break this block (easily done with a Star Dash) to get the chest inside.
|
| Bastron Figurine
|
|
The Wild Red Yonder (4-2)
|
|
While traversing the first area, this chest can be found in a ceiling cache blocked off by a shutter that can be opened by hitting a nearby switch.
|
| Yellow Waddle Dee Figurine
|
|
The Wild Red Yonder (4-2)
|
|
In the second area, this chest can be found in a small nook on the upper-left of a larger room, guarded by a Cotta General.
|
| Spear Cotta Figurine
|
|
The Wild Red Yonder (4-2)
|
|
In the second area, this chest can be found in a small nook on the upper-right of a larger room, guarded by a Cotta General.
|
| Spear Cotta Knight Figurine
|
|
The Wild Red Yonder (4-2)
|

|
In the third area, this chest is locked away in a metal block formation on the main path. Kirby can get in there using a Star Dash or with Bastron's help.
|
| Butter Building Track
|
|
The Wild Red Yonder (4-2)
|
|
In the third area, a door to a challenge room can be seen blocked off by a Bomb Block barrier, with the Bomb Blocks themselves tucked in the inside. Kirby needs Bastron to aim at these blocks and hit them to gain access. Once inside, Kirby has 15 seconds to defeat a Mecha Cotta to get the chest.
|
| Kirby Rocket Figurine
|
|
Kirby Rocket's Big Blastoff (4-3)
|
|
During the great escape sequence, this chest can be found tucked in the room to the furthest right, past a bunch of clay blocks.
|
| Shotzo Figurine
|
|
Kirby Rocket's Big Blastoff (4-3)
|
|
During the great escape sequence, this chest can be found near the middle of the main room in a small niche accessible from below.
|
| Kirby's Feast Figurine
|
|
Kirby Rocket's Big Blastoff (4-3)
|
|
During the great escape sequence, this chest can be found out in the open near the left side of the main room.
|
| Rainbow Resort Track
|
|
Kirby Rocket's Big Blastoff (4-3)
|
|
During the great escape sequence, this chest can be found up in the upper-left corner of the main room.
|
| The Beginner's Room Track
|
|
Kirby Rocket's Big Blastoff (4-3)
|
|
During the great escape sequence, this chest can be found just before the exit in a small ceiling cache blocked off by metal blocks. Kirby will need to use a Star Dash to get it.
|
Orange Woodland
| Orange Woodland Treasures
|
| Treasure
|
Image
|
Stage
|
Location
|
How to reach
|
| Mega Kirby Tank Figurine
|
|
Woodland Battle (5-1)
|
|
Near the end of the first Kirby Tank scrolling area, a big formation of blocks appears in Kirby's way. On top of this formation is a chest surrounded by metal blocks. The Mega Kirby Tank attack is needed to break these blocks.
|
| Sportle Figurine
|
|
Woodland Battle (5-1)
|
|
This chest can be found along the second scrolling area, guarded by two Cotta Generals.
|
| Forest Stage Track
|
|
Woodland Battle (5-1)
|
|
Shortly after getting the second chest, a door to a challenge room can be found blocked away by metal blocks. Kirby these need to be cleared out, then Kirby needs to drive up to the door using a Rainbow Rope. Inside the room, Kirby has 15 seconds to make a log roll up a hill to hit a switch, granting him access to the chest.
|
| Explortle Figurine
|
|
Woodland Battle (5-1)
|
|
Shortly into the third scrolling section, a Bombzway will fly in carrying this chest. Shooting it down will yield the chest to Kirby.
|
| Sportletini Figurine
|
|
Woodland Battle (5-1)
|
|
Further along in the third scrolling area, this chest can be seen underneath the main bridge, guarded by Cannon Cottas.
|
| Mountain Stage Track
|
|
Gondola Ride (5-2)
|
|
In the second area of the stage, this chest can be found near the door forward, attached to a gondola line. When Kirby approaches it, it will ride the line upward and stay in a high niche behind a Gray Zone. Kirby can reach the chest using a Star Dash.
|
| Treasure Found Figurine
|
|
Gondola Ride (5-2)
|
|
Just past the Gondola Bzztbulb, this chest can be found in a hidden chamber on the left behind some metal blocks. A Star Dash is needed to get in.
|
| Grab Hand Figurine
|
|
Gondola Ride (5-2)
|
|
Obtaining this chest is a fairly complicated process, performed while Kirby is riding a gondola. First, a marble needs to be moved to hit a switch, allowing the chest to fall down until it hits another set of shutters. From there, two more marbles need to be guided to switches to open these shutters. Lastly, some soft clay needs to be dug out underneath the chest to allow it to fall the rest of the way down, to an area where Kirby can pick it up.
|
| Coo's Theme Track
|
|
Gondola Ride (5-2)
|
|
Just after the third chest's pickup point, a door to a challenge room can be accessed by digging it out of some soft clay. In this room, Kirby has 15 seconds to launch himself up past a Gray Zone to get into a gondola, then ride it to the chest.
|
| Gondola Bzztbulb Figurine
|
|
Gondola Ride (5-2)
|
|
In the last area, this chest can be obtained at the termination point of a gondola line. Kirby will have to swoop near the abyss below to get it.
|
| Kirby Submarine Figurine
|
|
Deep-Divin' Kirby Submarine (5-3)
|
|
While traveling along the first auto-scrolling area, this chest can be found high up, supported by a long Star Block along with some Gordos. Breaking the block will cause these items to fall. The chest sinks more slowly than the Gordos, but it should still be collected quickly before it becomes unreachable.
|
| Bubbly Clouds Track
|
|
Deep-Divin' Kirby Submarine (5-3)
|
|
Further along the river, this chest can be found held up by some metal blocks. Kirby will need to fire a Star Torpedo to access it.
|
| Dangle Sloth Figurine
|
|
Deep-Divin' Kirby Submarine (5-3)
|
|
Even further along the river, a puzzle piece can be seen past a waterfall. Kirby will need to collect all the puzzle pieces that appear to get the chest.
|
| Big Forest Track
|
|
Deep-Divin' Kirby Submarine (5-3)
|
|
At the start of the vertical scrolling area, a door to a challenge room can be found to the right. In this room, Kirby needs to steer some torpedoes to hit some switches out of water to make the chest accessible.
|
| Waddle Dee (submarine) Figurine
|
|
Deep-Divin' Kirby Submarine (5-3)
|
|
This chest can be found in a separate room which can be reached through a doorway to the left near the top of the vertical scrolling area. Kirby will need a Star Torpedo to access this chest.
|
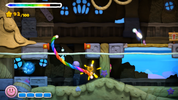
Red Volcano
| Red Volcano Treasures
|
| Treasure
|
Image
|
Stage
|
Location
|
How to reach
|
| Kirby Figurine (standing)
|
|
Burning Secrets (6-1)
|
|
Near the end of the first area, this chest can be found in a small niche in a cave blocked off by metal blocks. A Star Dash is needed to get inside.
|
| Revenge of the Enemy Track
|
|
Burning Secrets (6-1)
|
|
At the end of the third area, a lavafall can be blocked to reveal a hidden door to a challenge room. In this room, Kirby has 15 seconds to defeat 4 Bzztbulbs to make the chest appear.
|
| Hot Head Figurine
|
|
Burning Secrets (6-1)
|
|
This chest is hidden behind the lavafall in the fourth area, up near the top. It is easier to reach when the lavafall is briefly replaced with falling stars.
|
| Kirby Medley Track
|
|
Burning Secrets (6-1)
|
|
After avoiding the falling pieces of ceiling, Kirby can use a Star Dash to rocket up toward the open ceiling of the area past a Gray Zone. This will take him to another room where a treasure chest on balloons can be snagged, but it has to be retrieved quickly, or the balloons will pop and the chest will fall into the lava below.
|
| Cappy Figurine
|
|
Burning Secrets (6-1)
|
|
In the last gondola area, where Bastron appears, Kirby will need to collect a series of puzzle pieces to obtain the last chest. Getting these pieces requires deft gondola-jumping skills.
|
| Rest Area Track
|
|
Back to the Battleship (6-2)
|
|
This treasure is located in the lower-left room of the main timed area, inside a Gray Zone.
|
| Painting with Elline Figurine
|
|
Back to the Battleship (6-2)
|
|
This treasure can be found in the upper-left portion of the timed area, inside a circular Gray Zone.
|
| Waddle Doo Figurine
|
|
Back to the Battleship (6-2)
|
|
This treasure can be found in the upper-right portion of the timed area, up against the wall.
|
| Iceberg Ocean Track
|
|
Back to the Battleship (6-2)
|

|
This treasure can be found in the long corridor to the right in the timed area.
|
| Soarar Figurine
|
|
Back to the Battleship (6-2)
|
|
This treasure can be found in the lower-right of the timed area, nestled in a niche created by metal blocks. It can be grabbed without a Star Dash, but some time will be lost in the process in that case.
|
| Thornsby Figurine
|
|
Volcanic Panic (6-3)
|
|
While ascending the first rising lava area, this chest can be found over to the right off the main path above a bed of springs.
|
| Cotta General Figurine
|
|
Volcanic Panic (6-3)
|
|
Near the top of the first rising lava area, this chest can be collected after breaking a Bomb Block barrier on the main path, though Kirby will need to be quick to grab it before it falls into the lava below.
|
| Revenge of Meta Knight: Ending Track
|
|
Volcanic Panic (6-3)
|
|
In the intermission zone between the two rising lava areas, this chest can be found through a challenge room door blocked off by a Thornsby. In this challenge, Kirby has to quickly defeat the Thornsbys in the way of the chest.
|
| Broom Hatter Figurine
|
|
Volcanic Panic (6-3)
|
|
Near the start of the second rising lava area, this chest can be obtained by breaking a Bomb Block barrier below it. Doing this causes some Thornsbys to drop around Kirby though, so he will need to deal with them afterward.
|
| Heavy Lobster Track
|
|
Volcanic Panic (6-3)
|

|
Near the end of the second rising lava area, this chest can be obtained by using a Star Dash to power through some metal blocks.
|
Purple Fortress
| Purple Fortress Treasures
|
| Treasure
|
Image
|
Stage
|
Location
|
How to obtain
|
| Fearful Grab Hand Figurine
|
|
Infiltrate the Junk Factory! (7-1)
|
|
In the first area, this chest can be found in a big metal block formation in the middle of the large room. Kirby will need to Star Dash to get it.
|
| Gulpy Ghost Track
|
|
Infiltrate the Junk Factory! (7-1)
|
|
A door to a challenge room can be accessed in the second area, with some Shockcreepas opening the gate leading to it. In this room, Kirby needs to activate the shutters using the scanner fields to drop the chest down.
|
| Shockcreepa Figurine
|
|
Infiltrate the Junk Factory! (7-1)
|
|
In the room where many Shockcreepas crawl and the Candy can be found, this chest is situated inside one of the interior squares, blocked off by Star Blocks.
|
| Chef Kawasaki Figurine
|
|
Infiltrate the Junk Factory! (7-1)
|
|
In the second-to-last area, this chest can be seen guarded by Cotta Knights and a metal block barrier behind a movable wall. Kirby will need to Star Dash at the right moment as the wall comes down to get in.
|
| Studying the Factory Track
|
|
Infiltrate the Junk Factory! (7-1)
|
|
In the last open area, Kirby will need to collect several puzzle pieces to obtain this chest.
|
| Kirby and Kirby Figurine
|
|
Kirby + Kirby (7-2)
|
|
In the horizontal auto-scrolling hallway, a puzzle piece can be collected on the lower path. The remaining pieces will appear in both halls, and will need to be collected quickly to get the chest.
|
| Moonlight Capital Track
|
|
Kirby + Kirby (7-2)
|
|
In the horizontal auto-scrolling hallway, a chest can be seen encased in metal blocks on the upper path, guarded by a Cotta Knight. The upper Kirby will need to use a Star Dash to get the chest.
|
| Meta Knight Figurine
|
|
Kirby + Kirby (7-2)
|
|
During the elevator ride upward, a giant metal block appears on the path. A Star Dash can be used to bust it open and get the chest inside.
|
| The Legendary Halberd Track
|
|
Kirby + Kirby (7-2)
|
|
In the last area, a hidden door to a challenge room can be found in the cliffside on the left. In this room, there are five Kirbys to control, and they need to bound up through a gray zone to reach the chest up near the ceiling past several blocks.
|
| Milky Way Wishes: Shooting Track
|
|
Wonder Space (7-3)
|
|
A door to a challenge room can be accessed right after passing the Shieldster and Warpspace halls. In this room, Kirby has to navigate past several Warpspaces and a bumper to reach the chest on the left side.
|
| King Dedede Figurine
|
|
Wonder Space (7-3)
|
|
While being launched up to a room with three Warpspaces in it, the game will briefly pause to show the player where the chest is in relation to the other items. Up in the Warpspace room, Kirby should pick the one on the right to shoot down the middle and get the chest.
|
| Warpspace Figurine
|
|
Wonder Space (7-3)
|
|
While riding the gondola up the tall vertical passage, Kirby will need to switch tracks a few times to collect stars and avoid a Gordo. The chest can be found on the left after another track crossing, and Kirby should not switch tracks if he had been following the cues up to this point to get the chest.
|
| Shieldster Figurine
|
|
Wonder Space (7-3)
|
|
After riding the long fast gondola track to the end of the area, Kirby should Star Dash up the hole in the ceiling in the room at the end to reach a different area. In this area, Kirby has to steer up a chute full of Warpspaces in order to reach the top and hit a bell in the process. This done, a bunch of stars will rain down, along with the chest to the right.
|
| C-R-O-W-N-E-D Track
|
|
Wonder Space (7-3)
|

|
In the last area where Kirby is being swept by a wind current past big Warpspaces, the chest can be found nestled underneath a bunch of Warpspaces. Kirby will need to use a Star Dash to get the chest without being eaten.
|
Gallery
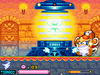
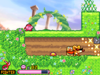
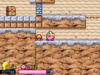
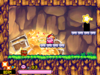
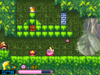
Kirby collecting the first treasure in The Great Cave Offensive in Kirby Super Star
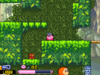
The end cutscene for The Great Cave Offensive lists all of the treasures that Kirby collected.
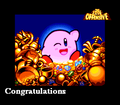
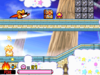
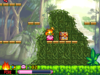
Perfect ending for The Great Cave Offensive in Kirby Super Star, showing Kirby with his treasure
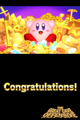
Equivalent perfect ending scene for Kirby Super Star Ultra
Names in other languages
| Language
|
Name
|
Meaning
|
| French
|
Trésor
|
Treasure
|
| German
|
Schatz
|
Treasure
|
| Italian
|
Tesoro
|
Treasure
|
| Spanish
|
Tesoro
|
Treasure
|
| Kirby Super Star Ultra treasures
|
| English |
French |
German |
Italian |
Spanish
|
| Sub-Tree
|
| Gold Medal |
Médaille d'Or |
Goldmedaille |
Medaglione d'oro |
Medalla de oro
|
| Gold Coin |
Pièce d'Or |
Goldmünze |
Moneta d'oro |
Moneda de oro
|
| Whip |
Fouet |
Peitsche |
Frusta |
Látigo
|
| Crystal Ball |
Boule de Cristal |
Kristallkugel |
Sfera di cristallo |
Bola de cristal
|
| Lucky Cat |
Chat Fétiche |
Glückskatze |
Gatto fortuna |
Gato de la suerte
|
| Seiryu Sword |
Epée Dragon |
Seiryu-Schwert |
Spada del drago |
Espada Seiryu
|
| Screw Attack |
Attaque en Vrille |
Kreisel-Mine |
Attacco a vite |
Ataque Espiral
|
| Echigo Candy |
Boîte de Bonbons |
Bonbon |
Caramella mou |
Caramelo Echigo
|
| Phanto Mask |
Masque du Phanto |
Phanto-Maske |
Maschera spettro |
Máscara fantasma
|
| Star Stone |
Pierre Etoile |
Sternenstein |
Pietra stella |
Piedra Estelar
|
| Beast's Fang |
Croc de Félin |
Reißzahn |
Zanna di belva |
Colmillo de bestia
|
| Bandanna |
Bandana |
Bandana |
Bandana |
Pañuelo
|
| Seasons Heart |
Cœur en Sucre |
Valentinsherz |
Cuorbaleno |
Carazón estaciones
|
| Crystal
|
| Dime |
Piécette |
Kupfermünze |
Monetina |
Calderilla
|
| Glass Slipper |
Soulier de Verre |
Glasschuh |
Vetroscarpe |
Zapato de cristal
|
| Goblet |
Coupe |
Kelch |
Calice |
Copa
|
| Saucepan |
Marmite |
Kochtopf |
Pentola |
Cacerola
|
| Brass Knuckle |
Poing |
Schlagring |
Tirapugni |
Puño americano
|
| Amber Rose |
Rose d'Ambre |
Bernsteinrose |
Rosa ambrata |
Rosa de ámbar
|
| Fish Fossil |
Fossile Marin |
Fischfossil |
Pesce fossile |
Pez fosilizado
|
| Beast Fossil |
Fossile Dino |
Tierfossil |
Belva fossile |
Bestia fosilizada
|
| Machine Parts |
Pièces de Hydra |
Machinenstück |
Parti di Hydra |
Piezas Hydra
|
| Bucket |
Seau |
Eimer |
Secchio |
Cubo
|
| Power Paintbrush |
Pinceau du Pouvoir |
Power-Malpinsel |
Oscuro disegno |
Pincel del Poder
|
| 100-Dollar Coin |
Pièce Ancienne |
Golddukaten |
Vecchia moneta |
Moneda antigua
|
| Ancient Gem |
Pierre Précieuse |
Uraltes Juwel |
Gemma antica |
Gema antigua
|
| Falcon Helmet |
Casque Falcon |
Falcons Helm |
Casco di Falcon |
Casco de Falcon
|
| Cell Phone |
Téléphone Mobile |
Walkie Talkie |
Cellulare |
Móvil
|
| Truth Mirror |
Miroir Magique |
Zauberspiegel |
Specchio della verità |
Espejo de la verdad
|
| Old Tower
|
| Star Tiara |
Tiare Etoilée |
Sternen-Diadem |
Diadema stella |
Diadema estelar
|
| Koopa Shell |
Carapace Koopa |
Koopa-Panzer |
Guscio Koopa |
Caparazón Koopa
|
| Falchion |
Falchion |
Falchion |
Falchion |
Falchion
|
| Warrior Shield |
Bouclier |
Schild |
Scudo del guerriero |
Escudo de guerrero
|
| Unicorn's Horn |
Corne de Licorne |
Horn des Einhorns |
Corno d'Unicorno |
Cuerno de unicornio
|
| Three-Star Cane |
Sceptre Etoile |
3-Sterne-Zepter |
Bacchetta stellare |
Vara de 3 estrellas
|
| Broken Bowl |
Bol Ebréché |
Porzellanschüssel |
Scodella rotta |
Tazón roto
|
| Tut's Mask |
Masque Pharaon |
Pharaomaske |
Maschera egizia |
Máscara egipcia
|
| Mr. Saturn |
Mr Saturn |
Mr. Saturn |
Mr. Saturn |
Mr. Saturn
|
| Armor |
Armure |
Rüstung |
Armatura |
Armadura
|
| Treasure Box |
Coffre au Trésor |
Schatzkiste |
Scrigno |
Cofre del tesoro
|
| Mannequin |
Mannequin |
Mannequin |
Statuina |
Maniquí
|
| Gold Crown |
Coronne Royale |
Goldkrone |
Corona d'oro |
Corona de oro
|
| King's Cape |
Cape Royale |
Königsmantel |
Mantello regale |
Capa del rey
|
| Model Ship |
Modèle Réduit |
Mondschiff |
Modellino di nave |
Maqueta de barco
|
| Sun Ring |
Anneau Solaire |
Sonnenring |
Anello solare |
Anillo solar
|
| Garden
|
| Gold Watering Can |
Arrosoir Doré |
Goldene Gießkanne |
Innaffiatoio d'oro |
Regadera dorada
|
| Katana |
Katana |
Katana |
Katana |
Katana
|
| Charm |
Amulette |
Amulett |
Ciondolo |
Amuleto
|
| Xmas Tree |
Sapin Décoré |
Tannenbaum |
Alberello |
Abeto
|
| Kong's Barrel |
Tonneau DK |
DK-Fass |
Barile di Donkey Kong |
Barril DK
|
| Ramia's Scale |
Ecaille de Dragon |
Lamias Schuppe |
Scaglia di Lamia |
Escama de Lamia
|
| Shiny Bamboo |
Bambou Luisant |
Märchen-Bambus |
Bambù lucente |
Bambú brillante
|
| Tire |
Roue de Kart |
Reifen |
Gomma Kart |
Rueda de kart
|
| Spirit Charm |
Porte-Bonheur |
Zauberschmuck |
Talismano |
Amuleto espiritual
|
| Pegasus Wing |
Aile de Pégase |
Pegasus' Flügel |
Ala di Pegaso |
Ala de pegaso
|
| Raccoon Doll |
Peluche Tanuki |
Tanuki-Puppe |
Procione di ceramica |
Mapache de peluche
|
| Shell Whistle |
Conque |
Scheckenhorn |
Corno dei mari |
Caracola
|
| Orichalcum |
Orichalque |
Orichalkum |
Orichalcum |
Orichalcum
|
| Platinum Ring |
Anneau de Platine |
Platin-Ring |
Anello di platino |
Anillo de platino
|
| Triforce |
Triforce |
Triforce |
Triforza |
Trifuerza
|
References
| Kirby: Squeak Squad |
|---|
| | Standard characters | | | | Squeaks | | | | Levels and stages | | | | Mid-Bosses | | | | Bosses | | | | Enemies | | | | Copy Abilities | | | | Items | | | | Collection | | | | Sub-Games | | | | Extra | |
|