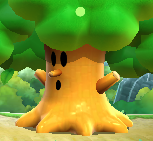
Boss: Difference between revisions
Pinkyoshifan (talk | contribs) m (→Kirby Super Star / Kirby Super Star Ultra: sticky headers) |
|||
| (207 intermediate revisions by 41 users not shown) | |||
| Line 1: | Line 1: | ||
{{ | {{ImCap | ||
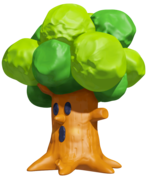
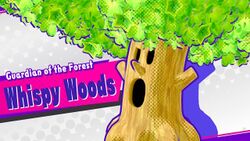
A '''boss''' is a distinguished enemy | |image=File:KSSU Whispy Woods artwork.png | ||
|size=300px | |||
|caption=[[Whispy Woods]], one of the most well-known '''bosses''' in the ''Kirby'' series. | |||
}} | |||
A '''boss''' is a distinguished enemy that is typically faced at the end of a level, and is usually very strong in comparison to others. Bosses come in many shapes and sizes, but they all have the following things in common: | |||
*They are fought in a distinctive area, which cannot be left until the boss is defeated or [[Kirby]] loses the fight (in some cases, even a life loss won't let Kirby escape). | *They are fought in a distinctive area, which cannot be left until the boss is defeated or [[Kirby]] loses the fight (in some cases, even a life loss won't let Kirby escape). | ||
*They take many hits to defeat, and their [[ | *They typically take many hits to defeat, and their [[health]] bar is usually displayed to the player during the fight. | ||
*They cannot be | *They cannot be [[inhale]]d by Kirby (with only [[Flowery Woods|one exception]]), but can be harmed in other ways. | ||
**In most cases, they have attacks which will either drop debris that Kirby can spit back at them, or cause [[ | **In most cases, they have attacks which will either drop debris that Kirby can spit back at them, or cause [[Dropped Star]]s to appear where they attack. | ||
* | *Generally, defeating them either completes the particular stage or level they are featured in, or completes the game if they are a final boss. There are exceptions where a boss is followed by another boss or does not complete the stage, most notably boss rush stages such as [[Gathering of the Beast Council]]. | ||
*Bosses typically have many different attacks they use in a random or not-so-random pattern. Some bosses enter different attack phases | *Bosses typically have many different attacks they use in a random or not-so-random pattern. Some bosses enter different attack phases after losing enough health. | ||
*With some bosses there are two or | *With some bosses, there are two or more phases to go through. These are completed in succession and are somewhat more difficult than most bosses. Final bosses such as [[Flowered Sectonia]], [[Star Dream]], and [[Void Termina]] are examples of this. | ||
*There is typically a special sound effect which plays when a boss is defeated. This sound is distinct from the [[Mid-Boss]] version. | *There is typically a special sound effect which plays when a boss is defeated. This sound is distinct from the [[Mid-Boss]] version. | ||
Enemies that possess some, but not all of these traits are usually considered [[Mid-Boss]]es, and are usually not as powerful. | Enemies that possess some, but not all of these traits are usually considered [[Mid-Boss]]es, and are usually not as powerful and often re-used multiple times throughout the games. | ||
==Game appearances== | ==Game appearances== | ||
Boss fights have been a staple of the [[Kirby (series)|''Kirby'' series]] since the very first game, and have appeared in nearly every subsequent entry. Below are | Boss fights have been a staple of the [[Kirby (series)|''Kirby'' series]] since the [[Kirby's Dream Land|very first game]], and have appeared in nearly every subsequent entry. Below are lists of every single major boss under their respective games, in order of appearance, as well as any other pertinent notes: | ||
===''Kirby's Dream Land''=== | ===''Kirby's Dream Land''=== | ||
{| class="wikitable sortable" border=1 cellpadding=2 | {| class="wikitable sortable" border=1 cellpadding=2 | ||
| Line 80: | Line 85: | ||
|- | |- | ||
|[[Whispy Woods]] | |[[Whispy Woods]] | ||
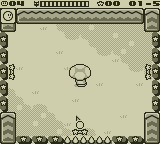
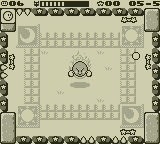
|align=center|[[File:KNiDL Whispy Woods battle.png]] | |align=center|[[File:KA Whispy Woods battle screenshot.png]]<br> '''''Kirby's Adventure''''' [[File:KNiDL Whispy Woods battle.png]]<br> '''''Kirby: Nightmare in Dream Land''''' | ||
|[[Vegetable Valley]] - Stage 5 | |[[Vegetable Valley]] - [[Vegetable Valley - Stage 5|Stage 5]] | ||
|None | |None | ||
|Whispy fights in a similar manner to his appearance in ''Kirby's Dream Land'', doing nothing but dropping [[Apple]]s and shooting [[Air Bullet]]s from his mouth. | |Whispy fights in a similar manner to his appearance in ''Kirby's Dream Land'', doing nothing but dropping [[Apple]]s and shooting [[Air Bullet]]s from his mouth. | ||
|- | |- | ||
|[[Paint Roller]] | |[[Paint Roller]] | ||
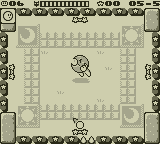
|align=center|[[File:KNiDL Paint Roller battle.png]] | |align=center|[[File:KA Paint Roller battle screenshot 01.png]]<br> '''''Kirby's Adventure''''' [[File:KNiDL Paint Roller battle.png]]<br> '''''Kirby: Nightmare in Dream Land''''' | ||
|[[Ice Cream Island]] - Stage 6 | |[[Ice Cream Island]] - [[Ice Cream Island - Stage 6|Stage 6]] | ||
|[[Ball]], [[Crash]], [[Mike]], [[Parasol]], [[Spark]], [[Wheel]] (various implements) | |[[Ball]], [[Crash]], [[Mike]], [[Parasol]], [[Spark]], [[Wheel]] (various implements) | ||
|A small ball-shaped creature with stick arms and legs, wearing a hat and roller blades, and carrying a crayon. He rolls around the arena, drawing things on one of four canvases which then come to life and attack Kirby. These can be swallowed for various [[Copy Ability|Copy Abilities]] or spat back. | |A small ball-shaped creature with stick arms and legs, wearing a hat and roller blades, and carrying a crayon. He rolls around the arena, drawing things on one of four canvases which then come to life and attack Kirby. These can be swallowed for various [[Copy Ability|Copy Abilities]] or spat back. | ||
|- | |- | ||
|[[Mr. Shine & Mr. Bright]] | |[[Mr. Shine & Mr. Bright]] | ||
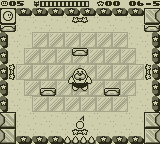
|align=center|[[File:KNiDL Mr Shine Mr Bright battle.png]] | |align=center|[[File:KA Mr Shine and Mr Bright.png]]<br> '''''Kirby's Adventure''''' [[File:KNiDL Mr Shine Mr Bright battle.png]]<br> '''''Kirby: Nightmare in Dream Land''''' | ||
|[[Butter Building]] - Stage 7 | |[[Butter Building]] - [[Butter Building - Stage 7|Stage 7]] | ||
| | |[[Cutter]], [[Fire]] ([[Dropped Star]]s) | ||
|Anthropomorphized versions of the sun and moon who attack in tag-team format. Kirby has to deal with one on the ground while the other hangs in the air, dodging and parrying both of their attacks. Defeating one of them will force that one to remain in the sky until the other is also defeated. | |Anthropomorphized versions of the sun and moon who attack in tag-team format. Kirby has to deal with one on the ground while the other hangs in the air, dodging and parrying both of their attacks. Defeating one of them will force that one to remain in the sky until the other is also defeated. | ||
|- | |- | ||
|[[Kracko]] | |[[Kracko]] | ||
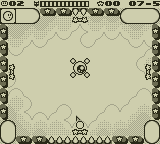
|align=center|[[File:KNiDL Kracko battle.png]] | |align=center|[[File:KA Grape Garden Stage 7 screenshot 03.png]]<br> '''''Kirby's Adventure''''' [[File:KNiDL Kracko battle.png]]<br> '''''Kirby: Nightmare in Dream Land''''' | ||
|[[Grape Garden]] - Stage 7 | |[[Grape Garden]] - [[Grape Garden - Stage 7|Stage 7]] | ||
|[[Hi-Jump]] (from [[Starman|Starmen]] summoned) | |[[Hi-Jump]] (from [[Starman|Starmen]] summoned) | ||
|This cloudy eyeball begins the fight by chasing Kirby in its [[Kracko Jr.|Junior]] form, then transforms into its regular form at the top of a series of cloud layers. It fights by shooting out beams from its eye, swooping around the stage, and shooting lighting below itself. It also sometimes drops [[Starman|Starmen]], which can be spat back at it or swallowed for the [[Hi-Jump]] ability. | |This cloudy eyeball begins the fight by chasing Kirby in its [[Kracko Jr.|Junior]] form, then transforms into its regular form at the top of a series of cloud layers. It fights by shooting out beams from its eye, swooping around the stage, and shooting lighting below itself. It also sometimes drops [[Starman|Starmen]], which can be spat back at it or swallowed for the [[Hi-Jump]] ability. | ||
|- | |- | ||
|[[Heavy Mole]] | |[[Heavy Mole]] | ||
|align=center|[[File:KNiDL Heavy Mole battle.png]] | |align=center|[[File:KA Yogurt Yard Stage 7 screenshot 02.png]]<br> '''''Kirby's Adventure''''' [[File:KNiDL Heavy Mole battle.png]]<br> '''''Kirby: Nightmare in Dream Land''''' | ||
|[[Yogurt Yard]] - Stage 7 | |[[Yogurt Yard]] - [[Yogurt Yard - Stage 7|Stage 7]] | ||
|[[Hammer]] (yellow | |[[Hammer]] (yellow missiles), [[Sleep]] (red missiles) | ||
|A large machine with two digging arms that continuously digs a tunnel to the right. Kirby has to chase it while the boss shoots out | |A large machine with two digging arms that continuously digs a tunnel to the right. Kirby has to chase it while the boss shoots out missiles of two varieties from behind. | ||
|- | |- | ||
|[[Meta Knight]] | |[[Meta Knight]] | ||
|align=center|[[File:KNiDL Meta Knight battle.png]] | |align=center|[[File:KA Orange Ocean Stage 7 screenshot 01.png]]<br> '''''Kirby's Adventure''''' [[File:KNiDL Meta Knight battle.png]]<br> '''''Kirby: Nightmare in Dream Land''''' | ||
|[[Orange Ocean]] - Stage 7 | |[[Orange Ocean]] - [[Orange Ocean - Stage 7|Stage 7]] | ||
|[[Sword]] (required) | |[[Sword]] (required) | ||
|The first appearance of the masked swordsman. He tosses Kirby a sword, and will not fight until Kirby picks it up. From there, the two engage in a sword duel, where Meta Knight reacts to Kirby's movements, and attacks using several different sword techniques. When defeated, his mask breaks, and he flees the scene. | |The first appearance of the masked swordsman. He [[GRAB IT!|tosses Kirby a sword]], and will not fight until Kirby picks it up. From there, the two engage in a sword duel, where Meta Knight reacts to Kirby's movements, and attacks using several different sword techniques. When defeated, his mask breaks, and he flees the scene. | ||
|- | |- | ||
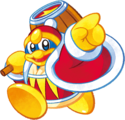
|[[King Dedede]] | |[[King Dedede]] | ||
|align=center|[[File:KNiDL King Dedede battle.png]] | |align=center|[[File:KA Rainbow Resort Stage 7 screenshot 03.png]]<br> '''''Kirby's Adventure''''' [[File:KNiDL King Dedede battle.png]]<br> '''''Kirby: Nightmare in Dream Land''''' | ||
|[[Rainbow Resort]] - Stage 7 | |[[Rainbow Resort]] - [[Rainbow Resort - Stage 7|Stage 7]] | ||
|None | |None | ||
|King Dedede fights in a similar manner to his appearance in ''Kirby's Dream Land'', though he has some new moves, including the ability to puff up and chase Kirby through the air. Older moves include his hammer swings, his Super Dedede Jump, and his [[Inhaling|inhale]] attack. | |King Dedede fights in a similar manner to his appearance in ''Kirby's Dream Land'', though he has some new moves, including the ability to puff up and chase Kirby through the air. Older moves include his hammer swings, his Super Dedede Jump, and his [[Inhaling|inhale]] attack. | ||
|- | |- | ||
|[[Nightmare]] | |[[Nightmare]] | ||
|align=center|[[File:KNiDL Nightmare battle.png]] | |align=center|[[File:KA Nightmare battle screenshot 02.png]]<br> '''''Kirby's Adventure''''' [[File:KNiDL Nightmare battle.png]]<br> '''''Kirby: Nightmare in Dream Land''''' | ||
|[[The Fountain of Dreams]] | |[[The Fountain of Dreams]] | ||
|[[Star Rod]] | |[[Star Rod]] | ||
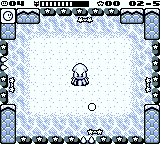
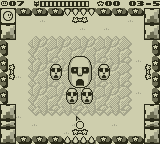
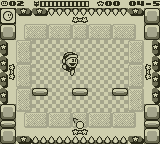
| Line 129: | Line 134: | ||
|} | |} | ||
This game was the first in the series to feature a [[Boss Endurance]] mode, which pitted Kirby against all the bosses in order on one [[ | This game was the first in the series to feature a [[Boss Endurance]] mode, which pitted Kirby against all the bosses in order on one [[Health]] bar and one life. | ||
===''Kirby's Pinball Land''=== | ===''Kirby's Pinball Land''=== | ||
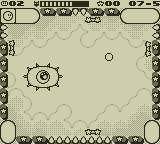
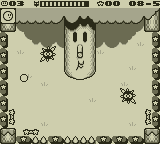
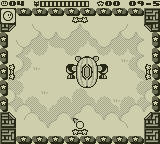
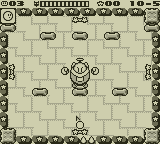
| Line 158: | Line 163: | ||
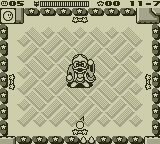
Once King Dedede is defeated, the game repeats. | Once King Dedede is defeated, the game repeats. | ||
=== ''Kirby's Dream Course'' === | |||
[[File:KDC Robo Dedede.png|thumb|200px|''Kirby's Dream Course'' features only one boss: [[Robo Dedede]].]] | |||
{{main|Robo Dedede}} | |||
In ''[[Kirby's Dream Course]]'', there is but a single boss fight which takes place in a special course dedicated to it at the very end of the game. This fight takes place against [[Robo Dedede]] - a large robot built to resemble King Dedede and who has him as its pilot - who battles Kirby by shooting out smaller clockwork Dedede robots and inching towards Kirby, defeating him if it gets to Kirby's starting point. Kirby can defeat Robo Dedede by launching into it, dealing additional damage when hitting the head using aerial shots. | |||
In the Extra Game, Robo Dedede has more HP, but otherwise acts the same. | |||
=== ''Kirby's Avalanche'' === | |||
Every opponent faced in ''[[Kirby's Avalanche]]'' is technically referred to as a "boss" in the game's manual, though since there are no other types of enemies to speak of, this term is not useful as a distinguisher. | |||
{{clear}} | |||
===''Kirby's Dream Land 2''=== | ===''Kirby's Dream Land 2''=== | ||
| Line 164: | Line 181: | ||
!class=unsortable|Appearance | !class=unsortable|Appearance | ||
!Level | !Level | ||
!Health | |||
!Points | !Points | ||
!Description | !Description | ||
| Line 170: | Line 188: | ||
|align=center|[[File:KDL2 Whispy Woods sprite.png]] | |align=center|[[File:KDL2 Whispy Woods sprite.png]] | ||
|[[Grass Land (Kirby's Dream Land 2)|Grass Land]] | |[[Grass Land (Kirby's Dream Land 2)|Grass Land]] | ||
|60 | |||
|10000 | |10000 | ||
|A staple boss of the [[Kirby (series)|''Kirby'' series]], this large tree is stationary and drops apples on Kirby, which are worth 100 points and can be inhaled and spat back, as well as attacking with his spiky roots. He initially wears a surgical mask and swirly glasses, but a few hits cause them to fall off, enabling him to blow air at Kirby in addition to his other abilities. | |A staple boss of the [[Kirby (series)|''Kirby'' series]], this large tree is stationary and drops apples on Kirby, which are worth 100 points and can be inhaled and spat back, as well as attacking with his spiky roots. He initially wears a surgical mask and swirly glasses, but a few hits cause them to fall off, enabling him to blow air at Kirby in addition to his other abilities. | ||
| Line 178: | Line 197: | ||
|align=center|[[File:KDL2 Nruff and Nelly sprite.png]] | |align=center|[[File:KDL2 Nruff and Nelly sprite.png]] | ||
|[[Big Forest]] | |[[Big Forest]] | ||
|60 | |||
|15000 | |15000 | ||
|Nruff, a large boar with spiky fur, and several Nellys, smaller boars worth 200 points each, continuously appear from both sides of the screen during the battle, running and jumping across the room's ledges. Kirby can only cause permanent damage to the boss by attacking Nruff, either by inhaling the Nellys for ammunition or using a [[Copy Ability]]. | |Nruff, a large boar with spiky fur, and several Nellys, smaller boars worth 200 points each, continuously appear from both sides of the screen during the battle, running and jumping across the room's ledges. Kirby can only cause permanent damage to the boss by attacking Nruff, either by inhaling the Nellys for ammunition or using a [[Copy Ability]]. | ||
| Line 186: | Line 206: | ||
|align=center|[[File:KDL2 Sweet Stuff sprite.png]] | |align=center|[[File:KDL2 Sweet Stuff sprite.png]] | ||
|[[Ripple Field (Kirby's Dream Land 2)|Ripple Field]] | |[[Ripple Field (Kirby's Dream Land 2)|Ripple Field]] | ||
|60 | |||
|20000 | |20000 | ||
|This large [[wikipedia:Anglerfish|anglerfish]] is fought in a scrolling underwater area and either charges at Kirby or fires lasers at him. To harm it, Kirby either has to blow bubbles at it or launch the starfish and [[Squishy]]s it can summon back at it, either by hitting them with his water gun or inhaling them and spitting them out using [[Kine]]. Every object knocked back at the fish awards Kirby with an additional 100 points. | |This large [[wikipedia:Anglerfish|anglerfish]] is fought in a scrolling underwater area and either charges at Kirby or fires lasers at him. To harm it, Kirby either has to blow bubbles at it or launch the starfish and [[Squishy]]s it can summon back at it, either by hitting them with his water gun or inhaling them and spitting them out using [[Kine]]. Every object knocked back at the fish awards Kirby with an additional 100 points. | ||
| Line 194: | Line 215: | ||
|align=center|[[File:KDL2 Ice Dragon sprite.png]] | |align=center|[[File:KDL2 Ice Dragon sprite.png]] | ||
|[[Iceberg (Kirby's Dream Land 2)|Iceberg]] | |[[Iceberg (Kirby's Dream Land 2)|Iceberg]] | ||
|60 | |||
|25000 | |25000 | ||
|A large dragon that uses its | |A large dragon that uses its tail to propel itself forward and into the air. Ice Dragon attempts to freeze Kirby with its breath, kicks icy spikes at him, or slams onto the ground to make [[Icicle]]s, which yield 100 points, fall down. | ||
Ice Dragon does not appear in its bonus chance, which requires Kirby to dodge the Icicles falling from above while catching small stars. | Ice Dragon does not appear in its bonus chance, which requires Kirby to dodge the Icicles falling from above while catching small stars. | ||
|- | |- | ||
|[[Mr. Shine & Mr. Bright]] | |[[Mr. Shine & Mr. Bright]] | ||
|align=center|[[File:KDL2 Mr Shine | |align=center|[[File:KDL2 Mr Shine sprite.png]] [[File:KDL2 Mr Bright sprite.png]] | ||
|[[Red Canyon]] | |[[Red Canyon]] | ||
|40 | |||
|30000 | |30000 | ||
|An anthropomorphic sun and moon that take turns fighting Kirby, with one of them being on the ground and vulnerable and the other floating in the sky, invincible. When Mr. Shine, the moon, is on the ground, he rolls around and throws cutter boomerangs while Mr. Bright sends down beams from above, which generate [[ | |An anthropomorphic sun and moon that take turns fighting Kirby, with one of them being on the ground and vulnerable and the other floating in the sky, invincible. When Mr. Shine, the moon, is on the ground, he rolls around and throws cutter boomerangs while Mr. Bright sends down beams from above, which generate [[Dropped Star]]s. When Mr. Bright is on the ground, he attacks Kirby with fire or by charging at Kirby while Mr. Bright causes stars to fall down, which can likewise be inhaled. Sometimes, the two combine to cause an eclipse, automatically harming Kirby unless he moves into a particular, dark area before the attack finishes. | ||
During their bonus chance, Mr. Shine bounces around while Mr. Bright, floating at the top, sends dangerous bullets as well as small stars downwards. | During their bonus chance, Mr. Shine bounces around while Mr. Bright, floating at the top, sends dangerous bullets as well as small stars downwards. | ||
| Line 210: | Line 233: | ||
|align=center|[[File:KDL2 Kracko sprite 1.png]]<br/><br/>[[File:KDL2 Kracko sprite 2.png]] | |align=center|[[File:KDL2 Kracko sprite 1.png]]<br/><br/>[[File:KDL2 Kracko sprite 2.png]] | ||
|[[Cloudy Park (Kirby's Dream Land 2)|Cloudy Park]] | |[[Cloudy Park (Kirby's Dream Land 2)|Cloudy Park]] | ||
|40 (1st form)<br/>80 (2nd form) | |||
|10000 (1st form)<br/>30000 (2nd form) | |10000 (1st form)<br/>30000 (2nd form) | ||
|Kracko begins the fight as not much more than an eyeball, resembling [[Kracko Jr.]]. During this phase, it alternates between moving inside the cloud platform at the bottom, from where it can fire beams, and flying through the air while four small orbs circle around it, trying to bump into Kirby and eventually sending its spheres at him. Every time it moves into or out of the cloud, a Co-Kracko emerges, which yields 100 points and can be inhaled and spat back. Once this form is defeated, Kracko refills its life meter and assumes its usual form of a one-eyed cloud surrounded by spikes. In this second phase of the battle, it flies through the air, firing beams in various directions as well as releasing more Co-Krackos. | |Kracko begins the fight as not much more than an eyeball, resembling [[Kracko Jr.]]. During this phase, it alternates between moving inside the cloud platform at the bottom, from where it can fire beams, and flying through the air while four small orbs circle around it, trying to bump into Kirby and eventually sending its spheres at him. Every time it moves into or out of the cloud, a Co-Kracko emerges, which yields 100 points and can be inhaled and spat back. Once this form is defeated, Kracko refills its life meter and assumes its usual form of a one-eyed cloud surrounded by spikes. In this second phase of the battle, it flies through the air, firing beams in various directions as well as releasing more Co-Krackos. | ||
| Line 218: | Line 242: | ||
|align=center|[[File:KDL2 King Dedede sprite.png]] | |align=center|[[File:KDL2 King Dedede sprite.png]] | ||
|[[Dark Castle]] | |[[Dark Castle]] | ||
|120 | |||
|100000 | |100000 | ||
|King Dedede the penguin is the last boss Kirby can fight without collecting the [[Rainbow Drop]]s. Like in other games, he attacks Kirby with his hammer, as well as by performing large jumps and trying to land on him. Both of these attacks generate stars that Kirby can inhale and spit back at him. He also attempts to inhale Kirby, spitting him out again and causing damage if he is successful. At some points during the battle, he briefly falls asleep. Multiple consecutive hits dealt to him cause him to get angry, making his attacks faster and more powerful, often causing harmful explosions. Defeating him without possessing the Rainbow Drops triggers the game's | |King Dedede the penguin is the last boss Kirby can fight without collecting the [[Rainbow Drop]]s. Like in other games, he attacks Kirby with his hammer, as well as by performing large jumps and trying to land on him. Both of these attacks generate stars that Kirby can inhale and spit back at him. He also attempts to inhale Kirby, spitting him out again and causing damage if he is successful. At some points during the battle, he briefly falls asleep. Multiple consecutive hits dealt to him cause him to get angry, making his attacks faster and more powerful, often causing harmful explosions. Defeating him without possessing the Rainbow Drops triggers the game's [[bad ending]]. | ||
King Dedede has no bonus chance; he can be refought at any time. | King Dedede has no bonus chance; he can be refought at any time. | ||
| Line 226: | Line 251: | ||
|align=center|[[File:KDL2 Dark Matter sprite 1.png]] | |align=center|[[File:KDL2 Dark Matter sprite 1.png]] | ||
|[[Dark Castle]] | |[[Dark Castle]] | ||
|120 | |||
|50000 | |50000 | ||
|When Kirby defeats King Dedede after collecting all of the Rainbow Drops, he receives the [[Rainbow Sword]] and has to face Dark Matter in the sky. In his first form, Dark Matter wears a cloak and mask and wields a sword. He floats up and down at one side of the screen, occasionally slashing with his sword or firing beams from it, as well as dashing towards the other side of the screen. He is also able to concentrate dark energy at the tip of his sword, firing it at Kirby in the form of a sphere. Kirby can knock this sphere back at him with the Rainbow Sword for 200 extra points, which causes a significantly higher amount of damage than simply slashing at the boss. At some points during the battle, Dark Matter switches from one side of the screen to the other. | |When Kirby defeats King Dedede after collecting all of the Rainbow Drops, he receives the [[Rainbow Sword]] and has to face Dark Matter in the sky. In his first form, Dark Matter wears a cloak and mask and wields a sword. He floats up and down at one side of the screen, occasionally slashing with his sword or firing beams from it, as well as dashing towards the other side of the screen. He is also able to concentrate dark energy at the tip of his sword, firing it at Kirby in the form of a sphere. Kirby can knock this sphere back at him with the Rainbow Sword for 200 extra points, which causes a significantly higher amount of damage than simply slashing at the boss. At some points during the battle, Dark Matter switches from one side of the screen to the other. | ||
| Line 232: | Line 258: | ||
|align=center|[[File:KDL2 Dark Matter sprite 2.png]] | |align=center|[[File:KDL2 Dark Matter sprite 2.png]] | ||
|[[Dark Castle]] | |[[Dark Castle]] | ||
|120 | |||
|200000 | |200000 | ||
|After his initial form is defeated, Dark Matter shows his true form, a black sphere with a singular eye surrounded by small orbs. He flies around very quickly, attacking mainly by launching the orbs surrounding him at Kirby, which can be knocked back at him for 400 points and a large amount of damage, as well as firing dark energy projectiles all around him. Furthermore, he is able to cause long bolts of black lightning to appear from his eye, which travel very fast, as well as charging at Kirby. Defeating him triggers the real ending of the game. But be warned, since Kirby fought Dark Matter's first phase in space, the second phase has both Kirby and Dark Matter falling from the sky, so the player doesn't have much time to defeat Dark Matter in this phase | |After his initial form is defeated, Dark Matter shows his true form, a black sphere with a singular eye surrounded by small orbs. He flies around very quickly, attacking mainly by launching the orbs surrounding him at Kirby, which can be knocked back at him for 400 points and a large amount of damage, as well as firing dark energy projectiles all around him. Furthermore, he is able to cause long bolts of black lightning to appear from his eye, which travel very fast, as well as charging at Kirby. Defeating him triggers the real ending of the game. But be warned, since Kirby fought Dark Matter's first phase in space, the second phase has both Kirby and Dark Matter falling from the sky, so the player doesn't have much time to defeat Dark Matter in this phase. Should Kirby take too long to defeat Dark Matter, Kirby will burn up in Popstar's atmosphere. | ||
|} | |} | ||
===''Kirby's Block Ball''=== | ===''Kirby's Block Ball''=== | ||
Each stage features a distinct boss at the end. They are as follows: | Each stage features a distinct boss at the end. They are as follows: | ||
{| class="wikitable mw-collapsible | {| class="wikitable mw-collapsible" border=1 cellpadding=2 | ||
!colspan=5|Bosses in ''Kirby's Block Ball'' | !colspan=5|Bosses in ''Kirby's Block Ball'' | ||
|- | |- | ||
| Line 247: | Line 274: | ||
!Notes | !Notes | ||
|- | |- | ||
|{{center|[[File:Big Cappy. | |{{center|[[File:KBBa Big Cappy.png]]<br>'''[[Big Cappy]]'''}} | ||
|[[Kirby's Block Ball - Stage 1|Stage 1]] | |[[Kirby's Block Ball - Stage 1|Stage 1]] | ||
|12 | |12 | ||
| Line 253: | Line 280: | ||
|The name of this boss is conjectural. | |The name of this boss is conjectural. | ||
|- | |- | ||
|{{center|[[File:KBBa Big Squishy battle.png | |{{center|[[File:KBBa Big Squishy battle.png]]<br>'''[[Big Squishy]]'''}} | ||
|[[Kirby's Block Ball - Stage 2|Stage 2]] | |[[Kirby's Block Ball - Stage 2|Stage 2]] | ||
|12 | |12 | ||
| Line 259: | Line 286: | ||
|The name of this boss is conjectural. | |The name of this boss is conjectural. | ||
|- | |- | ||
|{{center|[[File:Dekabu | |{{center|[[File:KBBa Dekabu.png]]<br>'''[[Big Kabu]]'''}} | ||
|[[Kirby's Block Ball - Stage 3|Stage 3]] | |[[Kirby's Block Ball - Stage 3|Stage 3]] | ||
|12 | |12 | ||
| Line 265: | Line 292: | ||
| | | | ||
|- | |- | ||
|{{center|[[File: | |{{center|[[File:KBBa Poppy Bros Sr.png]]<br>'''[[Poppy Bros. Sr.]]'''}} | ||
|[[Kirby's Block Ball - Stage 4|Stage 4]] | |[[Kirby's Block Ball - Stage 4|Stage 4]] | ||
|12 | |12 | ||
| Line 271: | Line 298: | ||
| | | | ||
|- | |- | ||
|{{center|[[File: | |{{center|[[File:KBBa MrBright.png]] [[File:KBBa MrShine.png]]<br>'''[[Mr. Shine & Mr. Bright]]'''}} | ||
|[[Kirby's Block Ball - Stage 5|Stage 5]] | |[[Kirby's Block Ball - Stage 5|Stage 5]] | ||
|6 each | |6 each | ||
| Line 277: | Line 304: | ||
| | | | ||
|- | |- | ||
|{{center|[[File: | |{{center|[[File:KBBa Mr Frosty.png]]<br>'''[[Mr. Frosty]]'''}} | ||
|[[Kirby's Block Ball - Stage 6|Stage 6]] | |[[Kirby's Block Ball - Stage 6|Stage 6]] | ||
|12 | |12 | ||
| Line 283: | Line 310: | ||
| | | | ||
|- | |- | ||
|{{center|[[File: | |{{center|[[File:KBBa Kracko Jr.png]] [[File:KBBa Kracko.png]]<br>'''[[Kracko Jr.]] & [[Kracko]]'''}} | ||
|[[Kirby's Block Ball - Stage 7|Stage 7]] | |[[Kirby's Block Ball - Stage 7|Stage 7]] | ||
|4 (Jr.)<br>8 (Kracko) | |4 (Jr.)<br>8 (Kracko) | ||
| Line 289: | Line 316: | ||
| | | | ||
|- | |- | ||
|{{center|[[File: | |{{center|[[File:KBBa Stage 8 Round 5 screenshot.png]]<br>'''[[Whispy Woods]]'''}} | ||
|[[Kirby's Block Ball - Stage 8|Stage 8]] | |[[Kirby's Block Ball - Stage 8|Stage 8]] | ||
|12 | |12 | ||
| Line 295: | Line 322: | ||
| | | | ||
|- | |- | ||
|{{center|[[File: | |{{center|[[File:KBBa Kabula.png]]<br>'''[[Kabula|Kaboola]]'''}} | ||
|[[Kirby's Block Ball - Stage 9|Stage 9]] | |[[Kirby's Block Ball - Stage 9|Stage 9]] | ||
|12 | |12 | ||
| Line 301: | Line 328: | ||
| | | | ||
|- | |- | ||
|{{center|[[File:Brobo. | |{{center|[[File:KBBa Brobo.png]]<br>'''[[Brobo]]'''}} | ||
|[[Kirby's Block Ball - Stage 10|Stage 10]] | |[[Kirby's Block Ball - Stage 10|Stage 10]] | ||
|12 | |12 | ||
| Line 307: | Line 334: | ||
|This is the last boss fight if the player has not met the Border Line Score on all the stages up to this point. | |This is the last boss fight if the player has not met the Border Line Score on all the stages up to this point. | ||
|- | |- | ||
|{{center|[[File: | |{{center|[[File:KBBa Stage 11 Round 7 screenshot.png]]<br>'''[[King Dedede]]'''}} | ||
|[[Kirby's Block Ball - Stage 11|Stage 11]] | |[[Kirby's Block Ball - Stage 11|Stage 11]] | ||
|24 | |24 | ||
| Line 314: | Line 341: | ||
|} | |} | ||
==='' | ===''Kirby Super Star'' / ''Kirby Super Star Ultra''=== | ||
<small>(Acronyms: SB=[[Spring Breeze]], DB=[[Dyna Blade (main game)|Dyna Blade]], TGCO=[[The Great Cave Offensive]], RoMK=[[Revenge of Meta Knight]], MWW=[[Milky Way Wishes]], TA=[[The Arena]], RotK=[[Revenge of the King]], HtH=[[Helper to Hero]], MNU=[[Meta Knightmare Ultra]], TTA=[[The True Arena]]. RotK, HtH, MNU, and TTA are only available in ''[[Kirby Super Star Ultra]]''.)</small> | <small>(Acronyms: SB=[[Spring Breeze]], DB=[[Dyna Blade (main game)|Dyna Blade]], TGCO=[[The Great Cave Offensive]], RoMK=[[Revenge of Meta Knight]], MWW=[[Milky Way Wishes]], TA=[[The Arena]], RotK=[[Revenge of the King]], HtH=[[Helper to Hero]], MNU=[[Meta Knightmare Ultra]], TTA=[[The True Arena]]. RotK, HtH, MNU, and TTA are only available in ''[[Kirby Super Star Ultra]]''.)</small> | ||
{| class="wikitable sortable" border=1 cellpadding=2 | {| class="wikitable sortable sticky" border=1 cellpadding=2 | ||
!Name | !Name | ||
!class=unsortable|Appearance | !class=unsortable|Appearance | ||
| Line 333: | Line 360: | ||
|- | |- | ||
|[[Whispy Woods]] | |[[Whispy Woods]] | ||
|align=center|[[File: | |align=center|[[File:KSSU Whispy Woods Arena Icon.png]] | ||
|None | |None | ||
|A true icon of the [[Kirby (series)|Kirby series]] that attacks simply by puffing small air pellets or dropping apples. | |A true icon of the [[Kirby (series)|''Kirby'' series]] that attacks simply by puffing small air pellets or dropping apples. | ||
|align=center|{{key|1}}{{y}} | |align=center|{{key|1}}{{y}} | ||
|align=center|{{key|3}}{{n}} | |align=center|{{key|3}}{{n}} | ||
| Line 348: | Line 375: | ||
|- | |- | ||
|[[Lololo & Lalala]] | |[[Lololo & Lalala]] | ||
|align=center|[[File: | |align=center|[[File:KSSU Lololo & Lalala Arena Icon.png]] | ||
|None | |None | ||
|The pink-and-blue duo from the [[wikipedia:Eggerland (series)|Eggerland]] series returns as a boss. They cannot attack themselves, and instead come out of one of six doors to push a box, which can be inhaled to be used as ammo. Sometimes [[Gordo]] comes out of a door. Each of them has separate health. | |The pink-and-blue duo from the [[wikipedia:Eggerland (series)|Eggerland]] series returns as a boss. They cannot attack themselves, and instead come out of one of six doors to push a box, which can be inhaled to be used as ammo. Sometimes [[Gordo]] comes out of a door. Each of them has separate health. | ||
| Line 363: | Line 390: | ||
|- | |- | ||
|[[Kracko]] | |[[Kracko]] | ||
|align=center|[[File: | |align=center|[[File:KSSU Kracko Arena Icon.png]] | ||
|[[Beam]] | |[[Beam]] | ||
|A cloud with one eye. He attacks by firing lightning towards the ground near Kirby, swinging two beams of lightning around him, swooping across the stage, and creating [[Waddle Doo]]s. He is the penultimate boss of [[Spring Breeze]]. | |A cloud with one eye. He attacks by firing lightning towards the ground near Kirby, swinging two beams of lightning around him, swooping across the stage, and creating [[Waddle Doo]]s. He is the penultimate boss of [[Spring Breeze]]. | ||
| Line 378: | Line 405: | ||
|- | |- | ||
|[[King Dedede]] | |[[King Dedede]] | ||
|align=center|[[File: | |align=center|[[File:KSSU King Dedede Arena Icon.png]] | ||
|None | |None | ||
|The king of [[Dream Land]] fights mainly with his hammer, but also will try to inhale, body-slam, or jump on Kirby. In [[Revenge of the King]], he is fought in his more powerful form [[Masked Dedede]]. | |The king of [[Dream Land]] fights mainly with his hammer, but also will try to inhale, body-slam, or jump on Kirby. In [[Revenge of the King]], he is fought in his more powerful form [[Masked Dedede]]. | ||
| Line 393: | Line 420: | ||
|- | |- | ||
|[[Dyna Blade]] | |[[Dyna Blade]] | ||
|align=center|[[File: | |align=center|[[File:KSSU Dyna Blade Arena Icon.png]] | ||
|None | |None | ||
|The giant bird known as Dyna Blade can grab Kirby or his helper in her talons, shoot fireballs, and fly around the stage. | |The giant bird known as Dyna Blade can grab Kirby or his helper in her talons, shoot fireballs, and fly around the stage. | ||
| Line 408: | Line 435: | ||
|- | |- | ||
|[[Fatty Whale]] | |[[Fatty Whale]] | ||
|align=center|[[File: | |align=center|[[File:KSSU Fatty Whale Arena Icon.png]] | ||
|[[Stone]] | |[[Stone]] | ||
|Fatty Whale jumps and floats across the stage in an attempt to hit Kirby, and can make a waterfall come out of his blowhole, making rocks (which give Stone ability) and [[Blipper]]s fall down. | |Fatty Whale jumps and floats across the stage in an attempt to hit Kirby, and can make a waterfall come out of his blowhole, making rocks (which give Stone ability) and [[Blipper]]s fall down. | ||
| Line 423: | Line 450: | ||
|- | |- | ||
|[[Computer Virus]] | |[[Computer Virus]] | ||
|align=center|[[File: | |align=center|[[File:KSSU Computer Virus Arena Icon.png]] | ||
|Various | |Various | ||
|This unique boss makes Kirby battle three enemies in an [[wikipedia:Role-Playing Game|RPG]]-like (turn-based) battle. When it is the enemy's turn to attack, it sits in a box invincible. When it is Kirby's turn, the enemy falls to the ground and is helpless against his attacks. In [[The Great Cave Offensive]], Kirby fights a Slime, Puppet, and Wizard. In later battles, he fights a Wizard, an Evil Knight, and a Great Dragon. During battle, [[Copy | |This unique boss makes Kirby battle three enemies in an [[wikipedia:Role-Playing Game|RPG]]-like (turn-based) battle. When it is the enemy's turn to attack, it sits in a box invincible. When it is Kirby's turn, the enemy falls to the ground and is helpless against his attacks. In [[The Great Cave Offensive]], Kirby fights a Slime, Puppet, and Wizard. In later battles, he fights a Wizard, an Evil Knight, and a Great Dragon. During battle, [[Copy Essence]]s can appear on the sides of the screen for Kirby to pick up. | ||
|align=center|{{key|3}}{{n}} | |align=center|{{key|3}}{{n}} | ||
|align=center|{{key|3}}{{n}} | |align=center|{{key|3}}{{n}} | ||
| Line 438: | Line 465: | ||
|- | |- | ||
|[[Chameleo Arm]] | |[[Chameleo Arm]] | ||
|align=center|[[File: | |align=center|[[File:KSSU Chameleo Arm Arena Icon.png]] | ||
|[[Paint]] | |[[Paint]] | ||
|A [[wikipedia:chameleon|chameleon]] who can eat Kirby, grab onto walls with its long arms, turn invisible, and shoot orbs from its mouth that can be eaten to get the Paint ability. It is one of the few bosses to give the paint ability, the others being [[Heavy Lobster]] and [[Marx Soul]]. He is also the only boss in [[The Great Cave Offensive]] that is optional. | |A [[wikipedia:chameleon|chameleon]] who can eat Kirby, grab onto walls with its long arms, turn invisible, and shoot orbs from its mouth that can be eaten to get the Paint ability. It is one of the few bosses to give the paint ability, the others being [[Heavy Lobster]] and [[Marx Soul]]. He is also the only boss in [[The Great Cave Offensive]] that is optional. | ||
| Line 453: | Line 480: | ||
|- | |- | ||
|[[Wham Bam Rock]] | |[[Wham Bam Rock]] | ||
|align=center|[[File: | |align=center|[[File:KSSU Wham Bam Rock Arena Icon.png]] | ||
|[[Stone]] | |[[Stone]] | ||
|Wham Bam Rock's appearance changed drastically from Kirby Super Star. He still has pounding, slapping, and grabbing attacks, but looks more like a rock and less cartoon-like. | |Wham Bam Rock's appearance changed drastically from Kirby Super Star. He still has pounding, slapping, and grabbing attacks, but looks more like a rock and less cartoon-like. In Helper to Hero, he is fought right before Wham Bam Jewel in the final round. | ||
|align=center|{{key|3}}{{n}} | |align=center|{{key|3}}{{n}} | ||
|align=center|{{key|3}}{{n}} | |align=center|{{key|3}}{{n}} | ||
| Line 463: | Line 490: | ||
|align=center|{{key|1}}{{y}} | |align=center|{{key|1}}{{y}} | ||
|align=center|{{key|3}}{{n}} | |align=center|{{key|3}}{{n}} | ||
|align=center|{{key|3}}{{ | |align=center|{{key|3}}{{y}} | ||
|align=center|{{key|1}}{{y}} | |align=center|{{key|1}}{{y}} | ||
|align=center|{{key|3}}{{n}} | |align=center|{{key|3}}{{n}} | ||
|- | |- | ||
|[[Twin Woods]] | |[[Twin Woods]] | ||
|align=center|[[File:Twin Woods | |align=center|[[File:KSSU Twin Woods Arena Icon.png]] | ||
|None | |None | ||
|Two [[Whispy Woods]] that face each other. They both blow air, and can drop | |Two [[Whispy Woods]] that face each other. They both [[Air Bullet|blow air]], and can drop [[Apple]]s, [[Capiller]]s, and [[Gordo]]s together. They can also, strangely, trade parts of themselves with each other. Each of them must be defeated separately. | ||
|align=center|{{key|3}}{{n}} | |align=center|{{key|3}}{{n}} | ||
|align=center|{{key|3}}{{n}} | |align=center|{{key|3}}{{n}} | ||
| Line 483: | Line 510: | ||
|- | |- | ||
|[[Combo Cannon|Main Cannon #2]] | |[[Combo Cannon|Main Cannon #2]] | ||
|align=center|[[File:KSSU Main Cannon 2 | |align=center|[[File:KSSU Main Cannon 2 Arena Icon.png]] | ||
|[[Bomb]] | |[[Bomb]] | ||
|A large cannon which can be found on the [[Halberd]]. It has three parts; a large cannon that aims and fires cannonballs, a robotic arm that can drop bombs or grab Kirby, and a laser gun near the bottom that can cover the whole floor with a dangerous beam of light. The robotic arm can be temporarily destroyed; the laser gun takes a while, but can be destroyed, and the only one that has actual health is the cannon itself. [[Helper]]s often attack the laser gun, which makes the battle easier once destroyed. | |A large cannon which can be found on the [[Halberd]]. It has three parts; a large cannon that aims and fires cannonballs, a robotic arm that can drop bombs or grab Kirby, and a laser gun near the bottom that can cover the whole floor with a dangerous beam of light. The robotic arm can be temporarily destroyed; the laser gun takes a while, but can be destroyed, and the only one that has actual health is the cannon itself. [[Helper]]s often attack the laser gun, which makes the battle easier once destroyed. | ||
| Line 498: | Line 525: | ||
|- | |- | ||
|[[Heavy Lobster]] | |[[Heavy Lobster]] | ||
|align=center|[[File: | |align=center|[[File:KSSU Heavy Lobster Arena Icon.png]] | ||
|[[Paint]] | |[[Paint]] | ||
|A metal crustacean that shoots flames, mini-lobsters, and paint blobs from its claws, as well as being able to walk, run and dash. | |A metal crustacean that shoots flames, mini-lobsters, and paint blobs from its claws, as well as being able to walk, run and dash. | ||
| Line 513: | Line 540: | ||
|- | |- | ||
|[[Reactor]] | |[[Reactor]] | ||
|align=center|[[File: | |align=center|[[File:KSSU Reactor Arena Icon.png]] | ||
|None | |None | ||
|The main reactor of the Halberd that is nearly invincible. The only thing that can hurt it is to make one of its lasers reflect back its main crystal, as Sailor Waddle Dee mentions before the fight. It attacks with flames from the ground and a small cannon that doesn't target Kirby. Like Main Cannon #2's laser gun, this cannon can be destroyed, but it doesn't hurt the reactor. | |The main reactor of the Halberd that is nearly invincible. The only thing that can hurt it is to make one of its lasers reflect back its main crystal, as Sailor Waddle Dee mentions before the fight. It attacks with flames from the ground and a small cannon that doesn't target Kirby. Like Main Cannon #2's laser gun, this cannon can be destroyed, but it doesn't hurt the reactor. | ||
| Line 528: | Line 555: | ||
|- | |- | ||
|[[Meta Knight]] | |[[Meta Knight]] | ||
|align=center|[[File: | |align=center|[[File:KSSU Meta Knight Arena Icon.png]] | ||
|[[Sword]] | |[[Sword]] | ||
|In the beginning of battle, Meta Knight sits on a platform with his cape over his face. After Kirby grabs the sword given to him, or takes too long to do so, Meta Knight jumps down and starts attacking with various sword and tornado attacks. After his defeat, his mask breaks and he escapes from the room. In [[Revenge of Meta Knight]], he chases Kirby off of the [[Halberd]]. In [[Meta Knightmare Ultra]], Meta Knight is a movable protagonist, and plays similar to a combination of [[Sword]] Kirby and [[Wing]] Kirby. | |In the beginning of battle, Meta Knight sits on a platform with his cape over his face. After Kirby [[GRAB IT!|grabs the sword]] given to him, or takes too long to do so, Meta Knight jumps down and starts attacking with various sword and tornado attacks. After his defeat, his mask breaks and he escapes from the room. In [[Revenge of Meta Knight]], he chases Kirby off of the [[Halberd]]. In [[Meta Knightmare Ultra]], Meta Knight is a movable protagonist, and plays similar to a combination of [[Sword]] Kirby and [[Wing]] Kirby. | ||
|align=center|{{key|3}}{{n}} | |align=center|{{key|3}}{{n}} | ||
|align=center|{{key|3}}{{n}} | |align=center|{{key|3}}{{n}} | ||
| Line 543: | Line 570: | ||
|- | |- | ||
|[[Galactic Nova Nucleus]] | |[[Galactic Nova Nucleus]] | ||
|align=center|[[File:KSSU Galactic Nova Nucleus.png]] | |align=center|[[File:KSSU Galactic Nova Nucleus Arena Icon.png]] | ||
|[[Starship]] | |[[Starship]] | ||
|The heart of [[Galactic Nova|Nova]], which Kirby must destroy to disable the giant comet. The fight consists of a flight through a looping circular arena, and Kirby must shoot down all the pieces inside the columns, while avoiding colliding with them. It is the penultimate boss of [[Milky Way Wishes]]. | |The heart of [[Galactic Nova|Nova]], which Kirby must destroy to disable the giant comet. The fight consists of a flight through a looping circular arena, and Kirby must shoot down all the pieces inside the columns, while avoiding colliding with them. It is the penultimate boss of [[Milky Way Wishes]]. | ||
| Line 558: | Line 585: | ||
|- | |- | ||
|[[Marx]] | |[[Marx]] | ||
|align=center|[[File: | |align=center|[[File:KSSU Marx Arena Icon.png]] | ||
|[[Cutter]], [[Ice]] | |[[Cutter]], [[Ice]] | ||
|The demon Marx is the final boss of the original, but now [[Marx Soul]] is fought at the end of the game. He attacks with many bizarre attacks, such as shooting a white laser out of his mouth, splitting in two to create a black hole, and teleporting to random spots on-screen. | |The demon Marx is the final boss of the original, but now [[Marx Soul]] is fought at the end of the game. He attacks with many bizarre attacks, such as shooting a white laser out of his mouth, splitting in two to create a black hole, and teleporting to random spots on-screen. | ||
| Line 573: | Line 600: | ||
|- | |- | ||
|[[Whispy Woods#Kirby Super Star Ultra|Whispy's Revenge]] | |[[Whispy Woods#Kirby Super Star Ultra|Whispy's Revenge]] | ||
|align=center|[[File: | |align=center|[[File:KSSU Whispy Revenge True Arena Icon.png]] | ||
|None | |None | ||
|Whispy Woods sporting purple leaves and dropping [[Gordo]]s and large bugs, as well as blowing tornadoes instead of just puffs of air. | |Whispy Woods sporting purple leaves and dropping [[Gordo]]s and large bugs, as well as blowing tornadoes instead of just puffs of air. | ||
| Line 588: | Line 615: | ||
|- | |- | ||
|[[Lololo & Lalala|Lololo & Lalala's Revenge]] | |[[Lololo & Lalala|Lololo & Lalala's Revenge]] | ||
|align=center|[[File: | |align=center|[[File:KSSU Lololo & Lalala Revenge True Arena Icon.png]] | ||
|None | |None | ||
|These two are now purple and orange, and their room has eight doors. Gordo appears more often, and the two move faster. | |These two are now purple and orange, and their room has eight doors. Gordo appears more often, and the two move faster. | ||
| Line 603: | Line 630: | ||
|- | |- | ||
|[[Kracko|Kracko's Revenge]] | |[[Kracko|Kracko's Revenge]] | ||
|align=center|[[File: | |align=center|[[File:KSSU Kracko Revenge True Arena Icon.png]] | ||
|[[Beam]] | |[[Beam]] | ||
|A stronger (and more intimidating) version of Kracko. He shares lightning and swooping attacks with his weaker cousin, and can also create [[Waddle Doo]]s, but his attacks have a wider range. He can also fly towards the center of the screen and shoot large bolts in all 8 directions. | |A stronger (and more intimidating) version of Kracko. He shares lightning and swooping attacks with his weaker cousin, and can also create [[Waddle Doo]]s, but his attacks have a wider range. He can also fly towards the center of the screen and shoot large bolts in all 8 directions. | ||
| Line 618: | Line 645: | ||
|- | |- | ||
|[[Kabula]] | |[[Kabula]] | ||
|align=center|[[File: | |align=center|[[File:KSSU Kabula True Arena Icon.png]] | ||
|[[Starship]] | |[[Starship]] | ||
|King Dedede's blimp that is fought while in Kirby's [[Starship]]. She fires [[Gordo]]s, cannonballs, and [[mariowiki:Bullet Bill|Bullet Bill]]-like projectiles, as well as barrel-rolling towards Kirby. | |King Dedede's blimp that is fought while in Kirby's [[Starship]]. She fires [[Gordo]]s, cannonballs, and [[mariowiki:Bullet Bill|Bullet Bill]]-like projectiles, as well as barrel-rolling towards Kirby. | ||
| Line 633: | Line 660: | ||
|- | |- | ||
|[[Masked Dedede]] | |[[Masked Dedede]] | ||
|align=center|[[File: | |align=center|[[File:KSSU Masked Dedede True Arena Icon.png]] | ||
|[[Hammer]] | |[[Hammer]] | ||
|[[King Dedede]] wearing a mask and using his "new Dedede Hammer", which is mechanical. His attacks have a larger range, and he has some new attacks regarding his powerful hammer, such as spinning around and targeting Kirby for a period of time or shooting missles and flames from the front of his hammer. He provides Kirby with a hammer of his own at the start of the fight. | |[[King Dedede]] wearing a mask and using his "new Dedede Hammer", which is mechanical. His attacks have a larger range, and he has some new attacks regarding his powerful hammer, such as spinning around and targeting Kirby for a period of time or shooting missles and flames from the front of his hammer. He provides Kirby with a hammer of his own at the start of the fight. | ||
| Line 648: | Line 675: | ||
|- | |- | ||
|[[Wham Bam Jewel]] | |[[Wham Bam Jewel]] | ||
|align=center|[[File: | |align=center|[[File:KSSU Wham Bam Jewel True Arena Icon.png]] | ||
|[[Stone]], [[Bomb]] | |[[Stone]], [[Bomb]] | ||
|The "Wham Bam King" with three eyes, a crown, and diamond hands. He attacks like Wham Bam Rock, punching and slapping with his hands, as well as shooting bullets from his hands and dropping bombs, which look like his face. | |The "Wham Bam King" with three eyes, a crown, and diamond hands. He attacks like Wham Bam Rock, punching and slapping with his hands, as well as shooting bullets from his hands and dropping bombs, which look like his face. | ||
| Line 663: | Line 690: | ||
|- | |- | ||
|[[Galacta Knight]] | |[[Galacta Knight]] | ||
|align=center|[[File: | |align=center|[[File:KSSU Galacta Knight True Arena Icon.png]] | ||
|[[Sword]] | |[[Sword]] | ||
|This legendary warrior attacks in a similar manner to [[Meta Knight]], creating tornadoes, beams, and more with the power of his lance and shield. He can also do unique moves, such as creating flames from the ground or calling in [[Meta-Knights]] of his very own. He is the final boss of the game [[Meta Knightmare Ultra]] and the penultimate boss of [[The True Arena]]. | |This legendary warrior attacks in a similar manner to [[Meta Knight]], creating tornadoes, beams, and more with the power of his lance and shield. He can also do unique moves, such as creating flames from the ground or calling in [[Meta-Knights]] of his very own. He is the final boss of the game [[Meta Knightmare Ultra]] and the penultimate boss of [[The True Arena]]. | ||
| Line 678: | Line 705: | ||
|- | |- | ||
|[[Marx Soul]] | |[[Marx Soul]] | ||
|align=center|[[File: | |align=center|[[File:KSSU Marx Soul True Arena Icon.png]] | ||
|[[Cutter]], [[Ice]], [[Paint]] | |[[Cutter]], [[Ice]], [[Paint]] | ||
|The final boss who appears only in [[the True Arena]]. He is Marx's soul after absorbing the power of [[Galactic Nova|Nova]]. He has a much | |The final boss who appears only in [[the True Arena]]. He is Marx's soul after absorbing the power of [[Galactic Nova|Nova]]. He has a much creepier demeanor, especially his laugh, and his attacks are even more strange, such as splitting into two large blobs of paint that move across the screen. Marx Soul provides the paint ability, although it has no special effect on him other than making him lose some health. After defeating him, he lets out a bloodcurdling screech. | ||
|align=center|{{key|3}}{{n}} | |align=center|{{key|3}}{{n}} | ||
|align=center|{{key|3}}{{n}} | |align=center|{{key|3}}{{n}} | ||
| Line 694: | Line 721: | ||
|} | |} | ||
''Kirby Super Star'' was the first game to introduce [[The Arena]], which pitted Kirby against all the bosses and mid-bosses of the game in a (mostly) random order with minimal supplies. | |||
Likewise, Super Star Ultra was the first game in the series to feature [[The True Arena]], which is like [[The Arena]], but | Likewise, ''Kirby Super Star Ultra'' was the first game in the series to feature [[The True Arena]], which is a lot like [[The Arena]], but with tougher bosses and less-potent healing items available. | ||
===''Kirby's Dream Land 3''=== | ===''Kirby's Dream Land 3''=== | ||
| Line 706: | Line 733: | ||
|colspan=2|[[Whispy Woods|Whispy]] | |colspan=2|[[Whispy Woods|Whispy]] | ||
![[File:KDL3 B Whispy.png]] | ![[File:KDL3 B Whispy.png]] | ||
|Whispy is a sentient tree and the possessed boss of [[Grass Land (Kirby's Dream Land 3)|Grass Land]].<br>He attacks by exhaling air pellets and spitting | |Whispy is a sentient tree and the possessed boss of [[Grass Land (Kirby's Dream Land 3)|Grass Land]].<br>He attacks by exhaling air pellets and spitting vegetables, and has a pointy nose that can damage Kirby. The vegetables he spits out can be inhaled and used as projectiles.<br>After having his life meter depleted, Whispy begins to move around angrily, spitting more food at Kirby. If Kirby moves too close to him, he will kick him away like a ball. | ||
|- | |- | ||
|colspan=2|[[Acro]] | |colspan=2|[[Acro]] | ||
| Line 712: | Line 739: | ||
|Acro is an orca that lives at [[Ripple Field (Kirby's Dream Land 3)|Ripple Field]] and was possessed by Dark Matter. Kirby fights this boss in two phases: A phase on dry land and an underwater phase.<br>On land, Acro tries to attack Kirby by ramming him. When it crashes into a wall, Kirby can use the debris to attack Acro.<br>In the second phase, Acro swims around while spitting various objects at Kirby. Kirby can throw these objects back at Acro with his water gun, or another ability. | |Acro is an orca that lives at [[Ripple Field (Kirby's Dream Land 3)|Ripple Field]] and was possessed by Dark Matter. Kirby fights this boss in two phases: A phase on dry land and an underwater phase.<br>On land, Acro tries to attack Kirby by ramming him. When it crashes into a wall, Kirby can use the debris to attack Acro.<br>In the second phase, Acro swims around while spitting various objects at Kirby. Kirby can throw these objects back at Acro with his water gun, or another ability. | ||
|- | |- | ||
|colspan=2|[[Pon Con]] | |colspan=2|[[Pon & Con|Pon Con]] | ||
![[File:KDL3 B PonCon.png]] | ![[File:KDL3 B PonCon.png]] | ||
|Pon the racoon and Con the fox are two animals of [[Sand Canyon]] that got corrupted by Dark Matter. They are later known as '''Pon & Con''' in ''[[Kirby Star Allies]]''.<br>They walk around the stage in colonies, accompanied by many smaller members of their species. Kirby can inhale the smaller animals and spit them back at the duo.<br>While the fight commences, bombs steadily drop from the top of the screen. The bombs need to be avoided, or they will cause Kirby damage.<br>Notably, the Blaster Bullet only deals 32 damage to Pon & Con. | |Pon the racoon and Con the fox are two animals of [[Sand Canyon]] that got corrupted by Dark Matter. They are later known as '''Pon & Con''' in ''[[Kirby Star Allies]]''.<br>They walk around the stage in colonies, accompanied by many smaller members of their species. Kirby can inhale the smaller animals and spit them back at the duo.<br>While the fight commences, bombs steadily drop from the top of the screen. The bombs need to be avoided, or they will cause Kirby damage.<br>Notably, the Blaster Bullet only deals 32 damage to Pon & Con. | ||
| Line 731: | Line 758: | ||
|[[Mr. Shine and Mr. Bright]] | |[[Mr. Shine and Mr. Bright]] | ||
![[File:KDL3 Mr Shine sprite.png]] [[File:KDL3 Mr Bright sprite.png]] | ![[File:KDL3 Mr Shine sprite.png]] [[File:KDL3 Mr Bright sprite.png]] | ||
|Mr. Shine the moon, and Mr. Bright the sun, two bosses painted by Ado. During the fight Mr. Bright constantly drops fireballs which can be used as projectiles to defeat the duo. | |Mr. Shine, the moon, and Mr. Bright, the sun, two bosses painted by Ado. During the fight, Mr. Bright constantly drops fireballs which can be used as projectiles to defeat the duo. | ||
|- | |- | ||
|[[Kracko]] | |[[Kracko]] | ||
| Line 739: | Line 766: | ||
|colspan=2|[[King Dedede]] | |colspan=2|[[King Dedede]] | ||
![[File:KDL3 B Dedede.png]] | ![[File:KDL3 B Dedede.png]] | ||
|Kirby's arch-rival who got possessed by Dark Matter. He is fought at the end of [[Iceberg (Kirby's Dream Land 3)|Iceberg]] and attacks in two phases: A battle on the ground and a battle in the air.<br>When on the ground he tries to smack Kirby with his hammer or flatten him by jumping on him. Some of his attacks leave stars behind that can be inhaled and spat out to damage Dedede.<br>During the air battle that follows, King Dedede hovers in the air and attacks by transforming his stomach into a maw or by shooting dark orbs from an eye in his belly. The dark orbs can be used to damage him. | |Kirby's arch-rival who got possessed by Dark Matter. He is fought at the end of [[Iceberg (Kirby's Dream Land 3)|Iceberg]] and attacks in two phases: A battle on the ground and a battle in the air.<br>When on the ground, he tries to smack Kirby with his hammer or flatten him by jumping on him. Some of his attacks leave stars behind that can be inhaled and spat out to damage Dedede.<br>During the air battle that follows, King Dedede hovers in the air and attacks by transforming his stomach into a maw or by shooting dark orbs from an eye in his belly. The dark orbs can be used to damage him. | ||
|- | |- | ||
|colspan=2|[[Dark Matter]] | |colspan=2|[[Dark Matter]] | ||
| Line 761: | Line 788: | ||
|align=center|[[File:K64 Whispy Woods Battle.png|150px]] | |align=center|[[File:K64 Whispy Woods Battle.png|150px]] | ||
|[[Pop Star (Kirby 64: The Crystal Shards)|Pop Star]] | |[[Pop Star (Kirby 64: The Crystal Shards)|Pop Star]] | ||
|None | |None | ||
|This fight with Whispy takes place on a looping circular stage, with the old tree occupying the middle. Kirby must first defeat his three children, called [[Whispy Woods Jr.]], by using the parent tree's [[Apple]]s to hit them with. Once all three are gone, Whispy becomes furious, and attacks Kirby by shooting out his roots, and tossing out a lot of apples. Kirby must hit the roots to defeat the tree. | |This fight with Whispy takes place on a looping circular stage, with the old tree occupying the middle. Kirby must first defeat his three children, called [[Whispy Woods Jr.]], by using the parent tree's [[Apple]]s to hit them with. Once all three are gone, Whispy becomes furious, and attacks Kirby by shooting out his roots, and tossing out a lot of apples. Kirby must hit the roots to defeat the tree. | ||
|- | |- | ||
| Line 767: | Line 794: | ||
|align=center|[[File:K64 Rock Star Stage 5 screenshot 04.png|150px]] | |align=center|[[File:K64 Rock Star Stage 5 screenshot 04.png|150px]] | ||
|[[Rock Star]] | |[[Rock Star]] | ||
|None | |None | ||
|The first phase of this fight has Kirby dodging the attacks of each Pix crystal as the platform rises into the sky. At the top, Kirby can attack Pix by spitting out constructs of similar | |The first phase of this fight has Kirby dodging the attacks of each Pix crystal as the platform rises into the sky. At the top, Kirby can attack Pix by spitting out constructs of similar color at the crystals to destroy them. | ||
|- | |- | ||
|[[Acro]] | |[[Acro]] | ||
| Line 774: | Line 801: | ||
|[[Aqua Star]] | |[[Aqua Star]] | ||
|[[Cutter]] (Fishbone), [[Bomb]] (Torpedoes) | |[[Cutter]] (Fishbone), [[Bomb]] (Torpedoes) | ||
|This fight takes place entirely underwater, as Kirby has to inhale and return objects that Acro spits at him, while avoiding the killer whale's gymnastics. The fight takes place in two separate phases, with a separate [[ | |This fight takes place entirely underwater, as Kirby has to inhale and return objects that Acro spits at him, while avoiding the killer whale's gymnastics. The fight takes place in two separate phases, with a separate [[Health]] bar for each one. | ||
|- | |- | ||
|[[Magman]] | |[[Magman]] | ||
| Line 804: | Line 831: | ||
===''Kirby Tilt 'n' Tumble''=== | ===''Kirby Tilt 'n' Tumble''=== | ||
In ''[[Kirby Tilt 'n' Tumble]]'', there are only three bosses, though the first two are faced numerous times with variations in each fight. Further variations in the boss fights are present when playing the [[Extra Game]]: | In ''[[Kirby Tilt 'n' Tumble]]'', there are only three bosses, though the first two are faced numerous times with variations in each fight. Further variations in the boss fights are present when playing the [[Extra Game]]: | ||
{| class="wikitable mw-collapsible | {| class="wikitable mw-collapsible" border=1 cellpadding=2 | ||
!colspan= | !colspan=4|Bosses in ''Kirby Tilt 'n' Tumble'' | ||
|- | |- | ||
!Boss | !Boss | ||
| Line 811: | Line 838: | ||
!HP | !HP | ||
!Description | !Description | ||
|- | |- | ||
|{{center|[[File:KTnT Orbservor.png]]<br>'''[[Orbservor]]'''}} | |{{center|[[File:KTnT Orbservor.png]]<br>'''[[Orbservor]]'''}} | ||
|[[Kirby Tilt 'n' Tumble - Level 1|Level 1]], [[Kirby Tilt 'n' Tumble - Level 2|Level 2]], [[Kirby Tilt 'n' Tumble - Level 4|Level 4]], [[Kirby Tilt 'n' Tumble - Level 5|Level 5]], [[Kirby Tilt 'n' Tumble - Level 7|Level 7]] | |[[Kirby Tilt 'n' Tumble - Level 1|Level 1]], [[Kirby Tilt 'n' Tumble - Level 2|Level 2]], [[Kirby Tilt 'n' Tumble - Level 4|Level 4]], [[Kirby Tilt 'n' Tumble - Level 5|Level 5]], [[Kirby Tilt 'n' Tumble - Level 7|Level 7]] | ||
|3 | |3 | ||
|A big spherical enemy with a single eye on top that serves as its weak point. There are four different varieties of Orbservor - distinguished by | |A big spherical enemy with a single eye on top that serves as its weak point. There are four different varieties of Orbservor - distinguished by color - which attack in different patterns. | ||
|- | |- | ||
|{{center|[[File:KTnT Kracko.png]]<br>'''[[Kracko]]'''}} | |{{center|[[File:KTnT Kracko.png]]<br>'''[[Kracko]]'''}} | ||
| Line 823: | Line 848: | ||
|6 | |6 | ||
|A cycloptic cloud enemy who attacks by filling the arena with [[Gordo]]s while shooting Co-Krackos and lightning at Kirby. He can be attacked using [[Air Bullet]]s after picking up the [[Balloon (item)|Balloon]]. | |A cycloptic cloud enemy who attacks by filling the arena with [[Gordo]]s while shooting Co-Krackos and lightning at Kirby. He can be attacked using [[Air Bullet]]s after picking up the [[Balloon (item)|Balloon]]. | ||
|- | |- | ||
|{{center|[[File:KTnT King Dedede.png]]<br>'''[[King Dedede]]'''}} | |{{center|[[File:KTnT King Dedede.png]]<br>'''[[King Dedede]]'''}} | ||
| Line 829: | Line 853: | ||
|10 | |10 | ||
|Kirby's arch-rival and the thief who stole Dream Land's stars. He attacks by swinging his hammer, throwing it like a boomerang, and trying to charge at Kirby. Kirby can attack him by blasting at him with a [[Cannon]] while his guard is down. | |Kirby's arch-rival and the thief who stole Dream Land's stars. He attacks by swinging his hammer, throwing it like a boomerang, and trying to charge at Kirby. Kirby can attack him by blasting at him with a [[Cannon]] while his guard is down. | ||
|} | |} | ||
| Line 839: | Line 862: | ||
!Appearance | !Appearance | ||
!Location | !Location | ||
!HP (1 player)<ref>[https://www5e.biglobe.ne.jp/~hosiza/data/112.html ''Kirby & The Amazing Mirror'': Enemy Data]</ref> | |||
!Description | !Description | ||
|- | |- | ||
| Line 844: | Line 868: | ||
|{{center|[[File:KatAMKingGolem.png]]}} | |{{center|[[File:KatAMKingGolem.png]]}} | ||
|[[Moonlight Mansion]] | |[[Moonlight Mansion]] | ||
|In a similar manner to [[Whispy Woods]], this giant stone column remains in one place while dropping rocks and [[Gordo]]s on Kirby, the former of which can be inhaled and spat back at it. It is also capable of releasing [[Golem]]s of different | |60 | ||
|In a similar manner to [[Whispy Woods]], this giant stone column remains in one place while dropping rocks and [[Gordo]]s on Kirby, the former of which can be inhaled and spat back at it. It is also capable of releasing [[Golem]]s of different colors from its mouth, which may be used for the same purpose. | |||
|- | |- | ||
|[[Moley]] | |[[Moley]] | ||
|{{center|[[File:KatAMMoley.png]]}} | |{{center|[[File:KatAMMoley.png]]}} | ||
|[[Cabbage Cavern]] | |[[Cabbage Cavern]] | ||
|A large, | |80 | ||
|A large, gray mole that randomly pops out of one of six holes in the cave it is fought in, tossing various objects at Kirby. Many of these can be inhaled and used to defeat the boss. | |||
|- | |- | ||
|[[Kracko]] | |[[Kracko]] | ||
|{{center|[[File: | |{{center|[[File:KNiDL Kracko sprite.png]]}} | ||
|[[Mustard Mountain]] | |[[Mustard Mountain]] | ||
|60 | |||
|One of the most fought bosses in the [[Kirby (series)|''Kirby'' series]], this one-eyed cloud creature employs similar tactics as in other games it appears in, flying across the arena and attacking with beams and rain. It also creates [[Waddle Doo]]s and [[Flamer]]s, which can be used as ammunition or swallowed for the [[Beam]] or [[Burning]] ability, respectively. | |One of the most fought bosses in the [[Kirby (series)|''Kirby'' series]], this one-eyed cloud creature employs similar tactics as in other games it appears in, flying across the arena and attacking with beams and rain. It also creates [[Waddle Doo]]s and [[Flamer]]s, which can be used as ammunition or swallowed for the [[Beam]] or [[Burning]] ability, respectively. | ||
|- | |- | ||
| Line 859: | Line 886: | ||
|{{center|[[File:Mega_Titan.png]]}} | |{{center|[[File:Mega_Titan.png]]}} | ||
|[[Carrot Castle]] | |[[Carrot Castle]] | ||
|40 (Mega Titan)<br>20 (Titan Head) | |||
|This large robot boss flies around, launching its four fists at Kirby. To defeat it, Kirby has to use the Beam or [[Spark]] ability or push it into the electricity at the sides of the room by using a Copy Ability or the stars generated by its attacks. Once its body is destroyed, its head remains, floating around while firing missiles, which can be inhaled and spat back. | |This large robot boss flies around, launching its four fists at Kirby. To defeat it, Kirby has to use the Beam or [[Spark]] ability or push it into the electricity at the sides of the room by using a Copy Ability or the stars generated by its attacks. Once its body is destroyed, its head remains, floating around while firing missiles, which can be inhaled and spat back. | ||
|- | |- | ||
| Line 864: | Line 892: | ||
|{{center|[[File:KatAMGobbler.png]]}} | |{{center|[[File:KatAMGobbler.png]]}} | ||
|[[Olive Ocean]] | |[[Olive Ocean]] | ||
|60 | |||
|A blue shark in a lifebuoy that resides in water, charging at Kirby or releasing smaller sharks, which may be inhaled and spat back. Alternatively, squirting at the boss while underwater likewise damages it. If Kirby leaves the water, Gobbler attacks him by leaping out of it. | |A blue shark in a lifebuoy that resides in water, charging at Kirby or releasing smaller sharks, which may be inhaled and spat back. Alternatively, squirting at the boss while underwater likewise damages it. If Kirby leaves the water, Gobbler attacks him by leaping out of it. | ||
|- | |- | ||
|[[Wiz]] | |[[Wiz]] | ||
|{{center|[[File: | |{{center|[[File:KaTAM Wiz.png]]}} | ||
|[[Peppermint Palace]] | |[[Peppermint Palace]] | ||
|80 | |||
|This cloaked magician is fought in a similar manner as [[Paint Roller]] in ''[[Kirby's Adventure]]''. It flies across the room, stopping in one of its corners, and conjures up different objects or enemies, which Kirby can inhale and spit back at the boss. | |This cloaked magician is fought in a similar manner as [[Paint Roller]] in ''[[Kirby's Adventure]]''. It flies across the room, stopping in one of its corners, and conjures up different objects or enemies, which Kirby can inhale and spit back at the boss. | ||
|- | |- | ||
|[[Dark Meta Knight|???]] | |[[Dark Meta Knight|???]] | ||
|{{center|[[File: | |{{center|[[File:KNiDL Meta Knight sprite.png]]}} | ||
|[[Radish Ruins]] | |[[Radish Ruins]] | ||
|60 | |||
|This masked swordsman appears to be [[Meta Knight]], but is actually Dark Meta Knight in disguise. He attacks by using various sword fighting techniques, a few of which create stars that may be spat back. Unlike Kirby's fights with Meta Knight in other games, the [[Sword]] ability is not provided in this battle. | |This masked swordsman appears to be [[Meta Knight]], but is actually Dark Meta Knight in disguise. He attacks by using various sword fighting techniques, a few of which create stars that may be spat back. Unlike Kirby's fights with Meta Knight in other games, the [[Sword]] ability is not provided in this battle. | ||
|- | |- | ||
|[[Master Hand | |[[Master Hand & Crazy Hand]] | ||
|{{center|[[File:KatAMMasterHand.png]][[File:KatAMCrazyHand.png]]}} | |{{center|[[File:KatAMMasterHand.png]][[File:KatAMCrazyHand.png]]}} | ||
|[[Candy Constellation]] | |[[Candy Constellation]] | ||
|60 (Master Hand)<br>40 (Crazy Hand) | |||
|For this boss battle, the Master Hand Mid-Boss teams up with Crazy Hand from the ''[[Super Smash Bros. (series)|Super Smash Bros.]]'' series, who looks identical to himself. In addition to each of them being able to use the Mid-Boss's abilities, the two gloves may cooperate to perform a clapping attack. Each of the bosses has to be defeated seperately, either by using a Copy Abilitiy or spitting the stars generated by some of their attacks back at them. | |For this boss battle, the Master Hand Mid-Boss teams up with Crazy Hand from the ''[[Super Smash Bros. (series)|Super Smash Bros.]]'' series, who looks identical to himself. In addition to each of them being able to use the Mid-Boss's abilities, the two gloves may cooperate to perform a clapping attack. Each of the bosses has to be defeated seperately, either by using a Copy Abilitiy or spitting the stars generated by some of their attacks back at them. | ||
|- | |- | ||
|[[Dark Meta Knight]] | |[[Dark Meta Knight]] | ||
|{{center|[[File:KatAMDarkMetaKnight.png]]}} | |{{center|[[File:KatAMDarkMetaKnight.png]]}} | ||
|[[ | |[[Dimension Mirror (level)|Dimension Mirror]] | ||
|48 | |||
|Dark Meta Knight returns for a rematch, now unmasked by the real Meta Knight. His attacks are similar to those he uses in the original battle with him, but he attacks more quickly and is able to use new, more powerful abilities, such as creating a tornado that throws Kirby into the air and damages him. He can be defeated by using either a Copy Ability or the stars generated by a few of his attacks. | |Dark Meta Knight returns for a rematch, now unmasked by the real Meta Knight. His attacks are similar to those he uses in the original battle with him, but he attacks more quickly and is able to use new, more powerful abilities, such as creating a tornado that throws Kirby into the air and damages him. He can be defeated by using either a Copy Ability or the stars generated by a few of his attacks. | ||
|- | |- | ||
|[[Dark Mind]] (phase 1) | |[[Dark Mind]] (phase 1) | ||
|{{center|[[File:KatAMDarkMind1.png]]}} | |{{center|[[File:KatAMDarkMind1.png]]}} | ||
|[[ | |[[Dimension Mirror (level)|Dimension Mirror]] | ||
|32 (first battle)<br>40 (second and third battles)<br>56 (fourth battle) | |||
|The first phase of Dark Mind, a large, cloaked figure with a helmet, has to be fought four times in consecution in slightly different arenas, with a short breather segment and the possiblity of acquiring a [[Maxim Tomato]] between each battle. He attacks by teleporting around the room and performing a wide repertoire of attacks, most of which involve launching stars at Kirby in different formations, exposing his weak core in the process. To harm him, Kirby has to use the [[Master]] ability, which is provided at the beginning of the battle, to attack his core, avoiding the two mirror circling around him. If Kirby loses the ability, he may alternatively inhale Dark Mind's star projectiles and fire them back at him. | |The first phase of Dark Mind, a large, cloaked figure with a helmet, has to be fought four times in consecution in slightly different arenas, with a short breather segment and the possiblity of acquiring a [[Maxim Tomato]] between each battle. He attacks by teleporting around the room and performing a wide repertoire of attacks, most of which involve launching stars at Kirby in different formations, exposing his weak core in the process. To harm him, Kirby has to use the [[Master]] ability, which is provided at the beginning of the battle, to attack his core, avoiding the two mirror circling around him. If Kirby loses the ability, he may alternatively inhale Dark Mind's star projectiles and fire them back at him. | ||
|- | |- | ||
|[[Dark Mind]] (phase 2) | |[[Dark Mind]] (phase 2) | ||
|{{center|[[File:KatAMDarkMind2.png]]}} | |{{center|[[File:KatAMDarkMind2.png]]}} | ||
|[[ | |[[Dimension Mirror (level)|Dimension Mirror]] | ||
|96 | |||
|Dark Mind's second form resembles a giant ball of fire with a singular eye. He normally floats at the top of the screen, though he occasionally charges across the ground. Many of his attacks involve mirrors, which he causes to fly around the screen, damaging Kirby if he touches them, or to reflect laser beams he shoots. He may also fire a large, powerful beam at Kirby, or flip the entire stage upside-down. In addition, Dark Mind continuously summons various kinds of enemies, including Waddle Doos, [[Boxin]]s, [[Sir Kibble]]s and [[Laser Ball]]s, which can be used as ammunition or swallowed for their ability, should Kirby lose the Master ability. | |Dark Mind's second form resembles a giant ball of fire with a singular eye. He normally floats at the top of the screen, though he occasionally charges across the ground. Many of his attacks involve mirrors, which he causes to fly around the screen, damaging Kirby if he touches them, or to reflect laser beams he shoots. He may also fire a large, powerful beam at Kirby, or flip the entire stage upside-down. In addition, Dark Mind continuously summons various kinds of enemies, including Waddle Doos, [[Boxin]]s, [[Sir Kibble]]s and [[Laser Ball]]s, which can be used as ammunition or swallowed for their ability, should Kirby lose the Master ability. | ||
|- | |- | ||
|[[Dark Mind]] (phase 3) | |[[Dark Mind]] (phase 3) | ||
|{{center|[[File:KatAMDarkMind3.png]]}} | |{{center|[[File:KatAMDarkMind3.png]]}} | ||
|[[ | |[[Dimension Mirror (level)|Dimension Mirror]] | ||
|250 | |||
|The final form of Dark Mind (and the final boss of the game) resembles its second form, but is considerably smaller. It is fought in a similar manner as [[Nightmare]]'s first form in ''[[Kirby's Adventure]]''. Kirby, riding on a [[Warp Star]], has to fire stars at Dark Mind, who flies left and right near the top of the screen and is likewise able to shoot stars in various patterns, as well as charge at Kirby. Even after the boss is defeated, Kirby may continue fighting him while the credits roll, though it is not possible to lose the battle any more at that point. A score is kept for every hit Dark Mind takes, and when the credits end, an extra 30 points is earned. | |The final form of Dark Mind (and the final boss of the game) resembles its second form, but is considerably smaller. It is fought in a similar manner as [[Nightmare]]'s first form in ''[[Kirby's Adventure]]''. Kirby, riding on a [[Warp Star]], has to fire stars at Dark Mind, who flies left and right near the top of the screen and is likewise able to shoot stars in various patterns, as well as charge at Kirby. Even after the boss is defeated, Kirby may continue fighting him while the credits roll, though it is not possible to lose the battle any more at that point. A score is kept for every hit Dark Mind takes, and when the credits end, an extra 30 points is earned. | ||
|} | |} | ||
==='' | ===''Kirby: Canvas Curse''=== | ||
''[[Kirby: Canvas Curse | ''[[Kirby: Canvas Curse]]'' only features two traditional bosses (those being [[Drawcia]] and [[Drawcia Soul]]), faced at the very end of the main game. There are technically four more bosses ([[Kracko Jr.]], [[Kracko]], [[Paint Roller]], and [[King Dedede]]) who are faced along the way in scenarios called Boss Games. These games ([[Block Attack]], [[Paint Panic]], and [[Cart Run]]) have different gameplay, so they are more akin to [[Sub-Game]]s. | ||
==='' | ===''Kirby: Squeak Squad''=== | ||
{|class=wikitable | {|class=wikitable | ||
!Name | !Name | ||
| Line 913: | Line 949: | ||
|- | |- | ||
|[[King Dedede]] | |[[King Dedede]] | ||
|align=center|[[File:King Dedede | |align=center|[[File:KSqS King Dedede Sprite.png]] | ||
|[[Prism Plains]] | |[[Prism Plains]] | ||
|King Dedede is the first boss Kirby has to fight. Unlike the next bosses, King Dedede flinches from each hit, stopping his actions. King Dedede can jump and fly, attempting to run into Kirby. He can also use his hammer to hit Kirby as well. Like in the previous games, King Dedede sports the ability to inhale and spit out Kirby. | |King Dedede is the first boss Kirby has to fight. Unlike the next bosses, King Dedede flinches from each hit, stopping his actions. King Dedede can jump and fly, attempting to run into Kirby. He can also use his hammer to hit Kirby as well. Like in the previous games, King Dedede sports the ability to inhale and spit out Kirby. | ||
|- | |- | ||
|[[Mrs. Moley]] | |[[Mrs. Moley]] | ||
|align=center|[[File:Mrs Moley | |align=center|[[File:KSqS Mrs Moley sprite.png]] | ||
|[[Nature Notch]] | |[[Nature Notch]] | ||
|Mrs. Moley is a large, | |Mrs. Moley is a large, gray mole, wife to [[Moley]], the other large gray mole. She sports similar attacks to Moley, such as throwing objects at Kirby. However, there are two holes where she emerges. She can also appear in the background. Once she is in the background, after some time, the glasses in her eyes may shine, and then she makes a big leap. A big shadow appears under Kirby, and Kirby has to dodge Mrs. Moley's body. If her body touches the hard ground, she is stunned for a while. If her body touches one of the two dirt patches, she digs in and resumes her attacks. | ||
|- | |- | ||
|[[Mecha-Kracko]] | |[[Mecha-Kracko]] | ||
|align=center|[[File:Mecha Kracko | |align=center|[[File:KSqS Mecha Kracko Sprite.png]] | ||
|[[Cushy Cloud]] | |[[Cushy Cloud]] | ||
|This boss fights very similarly to [[Kracko]]. Like Kracko, it can move around to hit Kirby or disperse enemies for Kirby to use as an ability or a projectile. However, after the first set of HP is depleted, [[Doc]] is revealed controlling the machine. Then, Mecha-Kracko removes the original stage while Kirby has to keep flying. Mecha-Kracko replaces the stage with a new one, but with gaps, or a smaller one. Then, it can use new attacks, which can let it surround in electricity or attack below it with electricity. | |This boss fights very similarly to [[Kracko]]. Like Kracko, it can move around to hit Kirby or disperse enemies for Kirby to use as an ability or a projectile. However, after the first set of HP is depleted, [[Doc]] is revealed controlling the machine. Then, Mecha-Kracko removes the original stage while Kirby has to keep flying. Mecha-Kracko replaces the stage with a new one, but with gaps, or a smaller one. Then, it can use new attacks, which can let it surround in electricity or attack below it with electricity. | ||
|- | |- | ||
|[[ | |[[Yadgaine]] | ||
|align=center|[[File: | |align=center|[[File:KSqS Yadgaine Sprite.png|120px]] | ||
|[[Jam Jungle]] | |[[Jam Jungle]] | ||
|This is the second boss that Doc pilots. Kirby is in a moving screen when fighting this boss. | |This is the second boss that Doc pilots. Kirby is in a moving screen when fighting this boss. Yadgaine can dig into the ground, throwing out rock fragments that Kirby should dodge. It can also shoot a laser from its mouth. Meanwhile, falling rocks can hurt Kirby, but Kirby can use these rocks to attack Yadgaine if he lacks a Copy Ability. After repeated hits, Yadgaine's claws can break, hindering its ability to dig. When both of its claws are broken, it cannot dig any more. The final part that breaks is its mouth before it gets destroyed. | ||
|- | |- | ||
|[[Bohboh]] | |[[Bohboh]] | ||
|align=center|[[File:Bohboh | |align=center|[[File:KSqS Bohboh Sprite.png]] | ||
|[[Vocal Volcano]] | |[[Vocal Volcano]] | ||
|Bohboh is a fiery owl-like creature with a tanooki tail. It first appears by flying in the background. One of its attacks include flying around and dropping fire balls which can be used as projectiles. It can also attempt to grab Kirby by charging at him. If it grabs Kirby, it throws Kirby to the lava, hurting Kirby and instantly removing his Copy Ability (due to the lava). If it misses and hits the ground, it is stunned while rocks fall. The rocks can be a hazard, but Kirby can also use these to attack Bohboh. After this, Bohboh flies slowly with its eyes closed, also vulnerable to attack, until its eyes open. | |Bohboh is a fiery owl-like creature with a tanooki tail. It first appears by flying in the background. One of its attacks include flying around and dropping fire balls which can be used as projectiles. It can also attempt to grab Kirby by charging at him. If it grabs Kirby, it throws Kirby to the lava, hurting Kirby and instantly removing his Copy Ability (due to the lava). If it misses and hits the ground, it is stunned while rocks fall. The rocks can be a hazard, but Kirby can also use these to attack Bohboh. After this, Bohboh flies slowly with its eyes closed, also vulnerable to attack, until its eyes open. | ||
|- | |- | ||
|[[Daroach]] | |[[Daroach]] | ||
|align=center|[[File:Daroach | |align=center|[[File:KSqS Daroach Sprite.png]] | ||
|[[Ice Island]] | |[[Ice Island]] | ||
|Daroach is the leader of the Squeaks. He sports multiple attacks. One of his attacks include using the [[Triple Star]] Cane to throw stars that can hurt Kirby, but Kirby can use. He can also throw bombs at Kirby, but it is also another projectile that Kirby can use to hurt Daroach. Daroach can also shoot a small ice beam that can freeze Kirby if it hits. During the boss fight, Daroach can teleport multiple times to avoid getting hit. | |Daroach is the leader of the Squeaks. He sports multiple attacks. One of his attacks include using the [[Triple Star]] Cane to throw stars that can hurt Kirby, but Kirby can use. He can also throw bombs at Kirby, but it is also another projectile that Kirby can use to hurt Daroach. Daroach can also shoot a small ice beam that can freeze Kirby if it hits. During the boss fight, Daroach can teleport multiple times to avoid getting hit. | ||
|- | |- | ||
|[[Meta Knight]] | |[[Meta Knight]] | ||
|align=center|[[File: | |align=center|[[File:KNiDL Meta Knight sprite.png]] | ||
|[[Secret Sea]] | |[[Secret Sea]] | ||
|Meta Knight fights like from his previous fights. He can jump from place to place and defend some of Kirby's attacks. His primary form of attacks involve using sword. His attacks produce stars that Kirby can use to hit Meta Knight. He can also create a whirlwind that spans almost throughout the screen that can sweep Kirby and damage him. Meta Knight also has new attacks involving the fire and electric elements | |Meta Knight fights like from his previous fights. He can jump from place to place and defend some of Kirby's attacks. His primary form of attacks involve using his sword. His attacks produce stars that Kirby can use to hit Meta Knight. He can also create a whirlwind that spans almost throughout the screen that can sweep Kirby and damage him. Meta Knight also has new attacks involving the fire and electric elements, allowing him to create an electric field or shoot fire blasts with his sword. | ||
|- | |- | ||
|[[Daroach|Dark Daroach]] | |[[Daroach|Dark Daroach]] | ||
|align=center|[[File:Dark Daroach | |align=center|[[File:KSqS Dark Daroach Sprite.png]] | ||
|[[Gamble Galaxy]] | |[[Gamble Galaxy]] | ||
|Dark Daroach is a similar boss fight to Daroach, but | |Dark Daroach is a similar boss fight to Daroach, but with more powerful attacks. His bombs, which are much larger, create fire pillars when they explode. His ice beam is also larger, and creates stars that Kirby can use to attack. The only attack that remains relatively unchanged is his Triple Star Cane. | ||
|- | |- | ||
|[[Dark Nebula]] | |[[Dark Nebula]] | ||
|align=center|[[File: | |align=center|[[File:KSqS Dark Nebula Sprite.png]]<br>[[File:KSqS Dark Nebula Fire Sprite.png]]<br>[[File:KSqS Dark Nebula Ice Sprite.png]]<br>[[File:KSqS Dark Nebula Spark Sprite.png]] | ||
|[[Gamble Galaxy]] | |[[Gamble Galaxy]] | ||
|Dark Nebula is the final boss in this game. Before fighting him, Kirby must follow a small black star in a level. At the end, the small black star grows and receives an eye. After that, Dark Nebula is formed. At the beginning of the boss fight, Dark Nebula changes into one of the three forms. All forms share attacks that involve shooting stars that inflict an effect of damage depending on Dark Nebula's current form. | |Dark Nebula is the final boss in this game. Before fighting him, Kirby must follow a small black star in a level. At the end, the small black star grows and receives an eye. After that, Dark Nebula is formed. At the beginning of the boss fight, Dark Nebula changes into one of the three forms. All forms share attacks that involve shooting stars that inflict an effect of damage depending on Dark Nebula's current form. | ||
| Line 963: | Line 999: | ||
===''Kirby's Epic Yarn'' / ''Kirby's Extra Epic Yarn''=== | ===''Kirby's Epic Yarn'' / ''Kirby's Extra Epic Yarn''=== | ||
Each land aside from [[Quilty Square]] has a stage dedicated to a boss encounter. The bosses of ''[[Kirby's Epic Yarn]]'' and ''[[Kirby's Extra Epic Yarn]]'' are as follows: | Each land aside from [[Quilty Square]] has a stage dedicated to a boss encounter. The bosses of ''[[Kirby's Epic Yarn]]'' and ''[[Kirby's Extra Epic Yarn]]'' are as follows: | ||
{| class="wikitable mw-collapsible | {| class="wikitable mw-collapsible" | ||
!colspan=4|Bosses in ''Kirby's Epic Yarn'' and ''Kirby's Extra Epic Yarn'' | !colspan=4|Bosses in ''Kirby's Epic Yarn'' and ''Kirby's Extra Epic Yarn'' | ||
|- | |- | ||
| Line 971: | Line 1,007: | ||
!World | !World | ||
|- | |- | ||
|{{Center|[[File: | |{{Center|[[File:KEY Fangora artwork.jpg|150px]]<br>'''[[Fangora]]'''}} | ||
|''This flaming guardian can breathe fire but will drop its guard when tired.'' | |''This flaming guardian can breathe fire but will drop its guard when tired.'' | ||
|A large green dragon that attacks using fire breath and its pointed tongue, but tires easily. | |A large green dragon that attacks using fire breath and its pointed tongue, but tires easily. | ||
| Line 981: | Line 1,017: | ||
|[[Hot Land]] | |[[Hot Land]] | ||
|- | |- | ||
|{{Center|[[File:Squashini.png|150px]]<br>'''[[Squashini]]'''}} | |{{Center|[[File:KEY Squashini Screenshot.png|150px]]<br>'''[[Squashini]]'''}} | ||
|''The villain of Treat Land has more than a few mean tricks up his sleeve!'' | |''The villain of Treat Land has more than a few mean tricks up his sleeve!'' | ||
|A wily gourd-headed magician that attacks using many magic tricks, but has a weak spot under his hat. | |A wily gourd-headed magician that attacks using many magic tricks, but has a weak spot under his hat. | ||
|[[Treat Land]] | |[[Treat Land]] | ||
|- | |- | ||
|{{Center|[[File:Capamari.jpg|150px]]<br>'''[[Capamari]]'''}} | |{{Center|[[File:KEY Capamari Phase 1 Screenshot.jpg|150px]]<br>'''[[Capamari]]'''}} | ||
|''This sea monster is rather vain. I wonder what the deal with that knit cap is...?'' | |''This sea monster is rather vain. I wonder what the deal with that knit cap is...?'' | ||
|A giant octopus that disguises itself as a squid using a knit cap. <br>Its weak point lies on its head between the eyes. | |A giant octopus that disguises itself as a squid using a knit cap. <br>Its weak point lies on its head between the eyes. | ||
|[[Water Land]] | |[[Water Land]] | ||
|- | |- | ||
|{{Center|[[File: | |{{Center|[[File:KEY King Dedede artwork.jpg|100px]]<br>'''[[King Dedede]]'''}} | ||
|''This selfish Dream Land king wields a big hammer that's almost as big as his mouth!'' | |''This selfish Dream Land king wields a big hammer that's almost as big as his mouth!'' | ||
|King Dedede is made to fight Kirby after being transformed into a yarn outline and tied to puppet strings. <br>Attacking King Dedede causes the strings to drop, which can then be pulled on to unravel them. | |King Dedede is made to fight Kirby after being transformed into a yarn outline and tied to puppet strings. <br>Attacking King Dedede causes the strings to drop, which can then be pulled on to unravel them. | ||
|[[Snow Land]] | |[[Snow Land]] | ||
|- | |- | ||
|{{Center|[[File:KEY Meta Knight | |{{Center|[[File:KEY Meta Knight artwork.jpg|150px]]<br>'''[[Meta Knight]]'''}} | ||
|''This space guardian fell under Yin-Yarn's spell! Luckily, it all worked out!'' | |''This space guardian fell under Yin-Yarn's spell! Luckily, it all worked out!'' | ||
|Meta Knight is made to fight Kirby after being transformed into a yarn outline and given flaming swords. <br>Each of these swords needs to be destroyed in turn in order to break the spell. | |Meta Knight is made to fight Kirby after being transformed into a yarn outline and given flaming swords. <br>Each of these swords needs to be destroyed in turn in order to break the spell. | ||
|[[Space Land]] | |[[Space Land]] | ||
|- | |- | ||
|{{Center|[[File: | |{{Center|[[File:KEY Yin Yarn artwork.png|150px]]<br>'''[[Yin-Yarn]]'''}} | ||
|''This sorcerer uses his knitting needles to weave his evil all across Dream Land!'' | |''This sorcerer uses his knitting needles to weave his evil all across Dream Land!'' | ||
|The main villain of ''Kirby's Epic Yarn''. <br>Yin-Yarn attacks by using his knitting needles and the power of the [[Magic Yarn]] to conjure enemies for Kirby to fight. | |The main villain of ''Kirby's Epic Yarn''. <br>Yin-Yarn attacks by using his knitting needles and the power of the [[Magic Yarn]] to conjure enemies for Kirby to fight. | ||
| Line 1,057: | Line 1,093: | ||
|} | |} | ||
==='' | ===''Kirby's Return to Dream Land'' / ''Kirby's Return to Dream Land Deluxe''=== | ||
Nearly all the bosses in | Nearly all the bosses in these games have an EX form, which is generally stronger and bears a different color palette (or other visual changes). Those that don't will be mentioned as such. The original Wii version also formally introduced the concept of having the boss change its tactics when its health reaches a certain threshold (usually when the boss loses 50-60% of its maximum health). | ||
{| class="wikitable mw-collapsible | {| class="wikitable mw-collapsible" border="1" cellpadding="2" | ||
!colspan=5|'''Bosses in '' | !colspan=5|'''Bosses in ''Kirby's Return to Dream Land''' | ||
|- | |- | ||
!Boss | !Boss | ||
!Main form | !Main form | ||
!HP (Main) | !HP (Main)<ref name=RtDL>Datamined from files\param\Archive.bin.cmp file</ref> | ||
!EX form | !EX form | ||
!HP (EX) | !HP (EX)<ref name=RtDL/> | ||
|- | |- | ||
|'''[[Whispy Woods#Kirby's Return to Dream Land|Whispy Woods]]''' | |'''[[Whispy Woods#Kirby's Return to Dream Land|Whispy Woods]]''' | ||
|[[ | |[[File:KRtDL Whispy Woods Arena Icon.png]] | ||
| | |330 | ||
||[[ | ||[[File:KRtDL Whispy Woods EX True Arena Icon.png]] | ||
|480 | |480 | ||
|- | |- | ||
|'''[[Mr. Dooter]]''' | |'''[[Mr. Dooter]]''' | ||
|[[ | |[[File:KRtDL Mr Dooter Arena Icon.png]] | ||
|420 | |420 | ||
|[[ | |[[File:KRtDL Mr Dooter EX True Arena Icon.png]] | ||
|580 | |580 | ||
|- | |- | ||
|'''[[Fatty Puffer]]''' | |'''[[Fatty Puffer]]''' | ||
|[[ | |[[File:KRtDL Fatty Puffer Arena Icon.png]] | ||
|560 | |560 | ||
|[[ | |[[File:KRtDL Fatty Puffer EX True Arena Icon.png]] | ||
|700 | |700 | ||
|- | |- | ||
|'''[[Goriath]]''' | |'''[[Goriath]]''' | ||
|[[ | |[[File:KRtDL Goriath Arena Icon.png]] | ||
|460 | |460 | ||
|[[ | |[[File:KRtDL Goriath EX True Arena Icon.png]] | ||
|540 | |540 | ||
|- | |- | ||
|'''[[Grand Doomer]]''' | |'''[[Grand Doomer]]''' | ||
|[[ | |[[File:KRtDL Grand Doomer Arena Icon.png]] | ||
|580 | |580 | ||
|[[ | |[[File:KRtDL Grand Doomer EX True Arena Icon.png]] | ||
|640 | |640 | ||
|- | |- | ||
|'''[[Metal General]]''' | |'''[[Metal General]]''' | ||
|[[ | |[[File:KRtDL Metal General Arena Icon.png]] | ||
|600 | |600 | ||
|[[ | |[[File:KRtDL Metal General EX True Arena Icon.png]] | ||
|640 | |640 | ||
|- | |- | ||
| Line 1,108: | Line 1,144: | ||
|{{N}} | |{{N}} | ||
|{{N}} | |{{N}} | ||
|[[ | |[[File:KRtDL HR-D3 True Arena Icon.png]] | ||
|720 | |720 | ||
*Phase 1: 288 (40%) | *Phase 1: 288 (40%) | ||
| Line 1,114: | Line 1,150: | ||
|- | |- | ||
|'''[[Landia]]''' | |'''[[Landia]]''' | ||
|[[ | |[[File:KRtDL Landia Arena Icon.png]] | ||
|640 | |640 | ||
|[[ | |[[File:KRtDL Landia EX True Arena Icon.png]] | ||
|720 | |720 | ||
|- | |- | ||
|'''[[ | |'''[[Lor & Magolor]]''' | ||
|[[ | |[[File:KRtDL Lor and Magolor Arena Icon.png]] | ||
|580 | |580 | ||
|[[ | |[[File:KRtDL Lor and Magolor EX True Arena Icon.png]] | ||
|680 | |680 | ||
|- | |- | ||
| Line 1,128: | Line 1,164: | ||
|{{N}} | |{{N}} | ||
|{{N}} | |{{N}} | ||
||[[ | ||[[File:KRtDL Galacta Knight True Arena Icon.png]] | ||
|540* | |540* | ||
|- | |- | ||
|'''[[Magolor]]''' | |'''[[Traitor Magolor|Magolor]]''' | ||
|[[ | |[[File:KRtDL Magolor Arena Icon.png]] | ||
|600 | |600 | ||
|[[ | |[[File:KRtDL Magolor EX True Arena Icon.png]] | ||
|800 | |800 | ||
|- | |||
|'''[[Magolor (second form)]]''' | |||
|[[File:KRtDL Magolor Second Form Arena Icon.png]] | |||
|750 | |||
|{{N}} | |||
|{{N}} | |||
|- | |- | ||
|'''[[Magolor Soul]]''' | |'''[[Magolor Soul]]''' | ||
| | |{{N}} | ||
| | |{{N}} | ||
|[[ | |[[File:KRtDL Magolor Soul True Arena Icon.png]] | ||
|999 | |999 | ||
|- | |- | ||
| Line 1,149: | Line 1,191: | ||
|} | |} | ||
{| class="wikitable mw-collapsible" border=1 cellpadding=2 | |||
!colspan=8|Bosses in ''Kirby's Return to Dream Land Deluxe'' | |||
|- | |||
!Boss | |||
!Image | |||
!New to this game? | |||
{| class="wikitable mw-collapsible | !Area | ||
!colspan= | !Description | ||
!HP | |||
!HP (EX) | |||
!Notes | |||
|- | |- | ||
! | !colspan=8|Story Mode | ||
|- | |- | ||
|[[ | |'''[[Whispy Woods]]''' | ||
|[[ | |align=center|[[File:KRtDLD Whispy Woods Arena Icon.png|225px]] | ||
[[File:KRtDLD Whispy Woods EX True Arena Icon.png|225px]] | |||
| | |{{N}} | ||
| | |[[Cookie Country - Stage 5]] | ||
| | |A sentient tree which can drop apples and breathe gale force winds to attack. Whispy Woods also gains the ability to inhale and chew on Kirby and friends. | ||
| | |420 | ||
|520 | |||
| | |||
|- | |- | ||
|[[ | |'''[[Mr. Dooter]]''' | ||
|[[ | |align=center|[[File:KRtDLD Mr Dooter Arena Icon.png|225px]] | ||
[[File:KRtDLD Mr Dooter EX True Arena Icon.png|225px]] | |||
| | |{{N}} | ||
| | |[[Raisin Ruins - Stage 5]] | ||
| | |An exotic magician which can produce skulls and snakes from his hat, and can spin rapidly to form a tornado. | ||
| | |460 | ||
|620 | |||
| | |||
|- | |- | ||
|[[ | |'''[[Fatty Puffer]]''' | ||
|[[ | |align=center|[[File:KRtDLD Fatty Puffer Arena Icon.png|225px]] | ||
[[File:KRtDLD Fatty Puffer EX True Arena Icon.png|225px]] | |||
| | |{{N}} | ||
| | |[[Onion Ocean - Stage 5]] | ||
| | |An obese pufferfish with the ability to perform a rolling charge, spit water projectiles, and inflate to an even more monstrous size when damaged enough. | ||
| | |610 | ||
|750 | |||
| | |||
|- | |- | ||
|[[ | |'''[[Goriath]]''' | ||
|[[ | |align=center|[[File:KRtDLD Goriath Arena Icon.png|225px]] | ||
[[File:KRtDLD Goriath EX True Arena Icon.png|225px]] | |||
| | |{{N}} | ||
| | |[[White Wafers - Stage 6]] | ||
| | |A large white primate with the ability to control ice and deliver powerful punches. In his second phase, Goriath's hair turns golden and he gains additional attacks, such as the ability to fire energy waves. | ||
| | |500 | ||
|580 | |||
| | |||
|- | |- | ||
|[[ | |'''[[Grand Doomer]]''' | ||
|[[ | |align=center|[[File:KRtDLD Grand Doomer Arena Icon.png|225px]] | ||
[[File:KRtDLD Grand Doomer EX True Arena Icon.png|225px]] | |||
| | |{{N}} | ||
|[[ | |[[Nutty Noon - Stage 6]] | ||
| | |The final boss fought on [[Popstar]], Grand Doomer is the leader of the fierce Sphere Doomers. It can fire energy spheres and disappear into a dimensional hole to ambush Kirby. During Grand Doomer's second phase within the main mode, it gains stony armor which can only be damaged by the [[Ultra Sword]] ability. | ||
| | |630 | ||
|690 | |||
| | |||
|- | |- | ||
|[[ | |'''[[Metal General]]''' | ||
|[[ | |align=center|[[File:KRtDLD Metal General Arena Icon.png|225px]] | ||
[[File:KRtDLD Metal General EX True Arena Icon.png|225px]] | |||
|{{N}} | |{{N}} | ||
|[[Egg Engines - Stage 6]] | |||
|The mechanical guardian of Egg Engines, Metal General possesses impressive swordsmanship and can shoot bombs and giant missiles at Kirby. | |||
|660 | |||
|700 | |||
|In Extra Mode, Metal General EX is fought before HR-D3. | |||
|- | |||
|'''[[Landia]]''' | |||
|align=center|[[File:KRtDLD Landia Arena Icon.png|225px]] | |||
[[File:KRtDLD Landia EX True Arena Icon.png|225px]] | |||
|{{N}} | |{{N}} | ||
|[[Dangerous Dinner - Stage 4]] | |||
|The draconian keeper of the Master Crown, Landia consists of four smaller dragons which can combine into a single, four-headed beast. Landia's attacks consist of launching fireballs, creating windstorms, and wielding electrical currents. | |||
|700 | |||
|780 | |||
| | |||
|- | |- | ||
|[[ | |'''[[Lor & Magolor]]''' | ||
|[[ | |align=center|[[File:KRtDLD Lor and Magolor Arena Icon.png|225px]] | ||
[[File:KRtDLD Lor and Magolor EX True Arena Icon.png|225px]] | |||
| | |{{N}} | ||
|[[ | |[[Another Dimension (level)|Another Dimension]] | ||
|Magolor manipulates the corrupted Lor Starcutter to assault Kirby. It can launch star projectiles and energy orbs, throw its wings akin to boomerangs, and even control a massive hurricane. | |||
| | |630 | ||
|730 | |||
| | |||
|- | |- | ||
|[[ | |'''[[Traitor Magolor|Magolor]]''' | ||
|[[ | |align=center|[[File:KRtDLD Magolor Arena Icon.png|225px]] | ||
[[File:KRtDLD Magolor EX True Arena Icon.png|225px]] | |||
|{{N}} | |{{N}} | ||
|Another Dimension | |||
|The deceitful wizard possesses an impressive array of magical abilities, including the ability to launch magical spheres, summon Doomers to glide across the screen, and generate black holes. In his second phase, Magolor creates a star-like shield which can only be broken using [[Super Ability|Super Abilities]]. | |||
|660 | |||
|860 | |||
|When Kirby deals the final blow using Ultra Sword, Magolor appears to initially resist the blade strike. | |||
|- | |||
|'''[[Magolor (second form)|Magolor's second form]]''' | |||
|align=center|[[File:KRtDLD Magolor Second Form Arena Icon.png|225px]] | |||
|{{N}} | |{{N}} | ||
|Another Dimension | |||
|After his initial defeat, Magolor transforms into an ethereal, more powerful reincarnated form. In his second phase, Magolor's second form can wield his own, twisted renditions of Kirby's Super Abilities. | |||
|900 | |||
|{{N}} | |{{N}} | ||
|Replaced by Magolor Soul in Extra Mode and The True Arena. | |||
|- | |- | ||
|[[ | !colspan=8|Extra Mode''' | ||
|- | |||
|'''[[HR-D3]]''' | |||
|align=center|[[File:KRtDLD HR-D3 True Arena Icon.png|225px]] | |||
|{{N}} | |{{N}} | ||
|[[Egg Engines - Stage 6|Stage 6]] (Extra Mode only) | |||
|A titanic robot piloted by Metal General. It has two separate health bars for each of its attack phases. HR-D3 can fire homing rockets, shoot lasers from its eyes, and spin its giant arms around. | |||
|{{N}} | |{{N}} | ||
| | |800 | ||
(320+480) | |||
| | |||
| | |||
|- | |- | ||
|[[ | |'''[[Magolor Soul]]''' | ||
|align=center|[[File:KRtDLD Magolor Soul True Arena Icon.png|225px]] | |||
|{{N}} | |{{N}} | ||
|[[Another Dimension (level)|Another Dimension]] (Extra Mode only) | |||
|Said to be the form of Magolor after being consumed completely by the Master Crown, Magolor Soul is an even more powerful version of Magolor's second form from the main Story Mode. | |||
|{{N}} | |{{N}} | ||
|1200 | |||
| | |||
|- | |||
!colspan=8|Magolor Epilogue: The Interdimensional Traveler | |||
|- | |||
|'''[[Electricky Dooter]]''' | |||
|align=center|[[File:KRtDLD Electricky Dooter True Arena Icon.png|225px]] | |||
|{{Y}} | |||
|[[Aerogree Dimension]] | |||
|A green wizard similar to Mr. Dooter, but possesses the power to control lightning. | |||
|{{N}} | |{{N}} | ||
| | |500 | ||
| | | | ||
|- | |- | ||
|[[ | |'''[[Fiery Puffer]]''' | ||
|align=center|[[File:KRtDLD Fiery Puffer True Arena Icon.png|225px]] | |||
|{{Y}} | |||
|[[Pyred Dimension]] | |||
|A horned, magma-covered pufferfish who possesses similar attacks to Fatty Puffer, but with added pyrotechnic capabilities. | |||
|{{N}} | |{{N}} | ||
|500 | |||
| | |||
|- | |||
|'''[[Hydriath]]''' | |||
|align=center|[[File:KRtDLD Hydriath True Arena Icon.png|225px]] | |||
|{{Y}} | |||
|[[Poseiblu Dimension]] | |||
|A merman-like entity which can throw globs of water. He has a similar appearance and fighting style to Goriath. | |||
|{{N}} | |{{N}} | ||
|580 | |||
| | |||
|- | |||
|'''[[Rampaging Doomers]]''' | |||
|align=center|[[File:KRtDLD Rampaging Doomers True Arena Icon.png|225px]] | |||
|{{Y}} | |||
|[[Locandra Dimension]] | |||
|A quartet of Sphere Doomers which fly across the screen while attempting to tackle Magolor. They can also create damaging energy clouds and summon black holes. | |||
|{{N}} | |{{N}} | ||
| | |750 | ||
| | | | ||
|- | |- | ||
| | |'''[[Crowned Doomer]]''' | ||
|align=center|[[File:KRtDLD Crowned Doomer True Arena Icon.png|225px]] | |||
|{{Y}} | |||
|[[Ethereal Altar]] | |||
|Grand Doomer after taking on a powerful and shady new form due to being imbued with shards of the Master Crown and consuming Magolor's [[Fruit Fragment|red fruit]]. | |||
|{{N}} | |||
|620 | |||
| | |||
|- | |- | ||
| | |'''[[Master Crown (boss)|Master Crown]]''' | ||
| | |align=center|[[File:KRtDLD Master Crown True Arena Icon.png|225px]] | ||
|A | |{{Y}} | ||
|Ethereal Altar | |||
|A giant tree assimilated by the Master Crown. The Master Crown's attacks consist of launching thick tree roots through portals, and dropping crystalline apples on Magolor. | |||
|{{N}} | |||
|650 | |||
| | | | ||
|- | |- | ||
| | !colspan=8|The True Arena | ||
|- | |- | ||
| | |'''[[Galacta Knight]]''' | ||
|[[The | |align=center|[[File:KRtDLD Galacta Knight True Arena Icon.png|225px]] | ||
|{{N}} | |||
|[[The True Arena]] | |||
|A legendary swordsman akin to [[Meta Knight]], said to be the most powerful warrior in the galaxy. He possesses a wide range of attacks with his lance and shield, as well as the ability to summon and launch energy swords. | |||
|{{N}} | |||
|600* | |||
| | | | ||
|- | |- | ||
| | |[[Magolor Soul|'''Magolor Soul''' (True Arena)]] | ||
|[[The | |align=center|[[File:KRtDLD Magolor Soul True Arena Icon.png|225px]] | ||
| | |{{Y}} | ||
| | |[[The True Arena]] | ||
|By far the most difficult rendition of Magolor, this version of Magolor Soul is even less restrained than his Extra Mode fight. Namely, he can launch two Magolor Cannons at once, and now possesses attacks based on the [[Sand]] and [[Mecha]] abilities. | |||
|{{N}} | |||
||1500 | |||
(600+900)* | |||
|In Magolor Soul's second phase, his eyes disappear except for the one in his mouth, suggesting that the Master Crown has fully assimilated Magolor's body. | |||
|- | |- | ||
| | |colspan=8|Notes: | ||
*For reference, the basic [[Star Bullet]] does 52 [[damage]]. | |||
*Multiplayer damage multiplier: 0.8 for 2 players, 0.75 for 3 players, 0.7 for 4 players. | |||
*Existing bosses have increased HP compared to their counterparts in the original ''[[Kirby's Return to Dream Land]]''. | |||
*Bosses have 75% maximum HP in [[The Arena]] and [[The True Arena]] (rounded down to zero decimal places). | |||
*The table lists the actual HP of Galacta Knight* and Magolor Soul* in The True Arena instead of their internal base HP of 800 and 2000 (800+1200), respectively. | |||
|} | |} | ||
===''Kirby | ===''Kirby's Dream Collection Special Edition''=== | ||
Aside from the games contained in this collection, there is a separate boss fight in the [[New Challenge Stages]] Sub-Game. At the end of the [[Smash Combat Chamber EX]], Kirby has to contend with Whispy Woods, appearing as he did in ''Kirby's Return to Dream Land'', but fighting like his EX form from that same game. Unlike in other cases, Whispy's health bar is not shown during the fight. | |||
===''Kirby: Triple Deluxe''=== | |||
Like in ''Kirby's Return to Dream Land'', most bosses have more powerful alternate forms (known as DX here), but not all do. Most bosses also incorporate the foreground and background when fighting. | |||
{| class="wikitable mw-collapsible | {| class="wikitable mw-collapsible" border="1" cellpadding="2" | ||
!colspan= | !colspan=7|'''Bosses in ''Kirby: Triple Deluxe''' | ||
|- | |- | ||
!Boss | ! Boss | ||
! | ! Main Form | ||
! | ! HP | ||
! | ! Defense Modifier | ||
! | ! DX Form | ||
! HP | |||
! Defense Modifier | |||
|- | |- | ||
|[[Flowery Woods]] | |||
|[[File:KTD Flowery Woods Arena icon.png]] | |||
|440 ([[Fine Fields]])<br>330 ([[Royal Road - Stage 4]] / [[The Arena]]) | |||
|×0.75 | |||
|[[File:KTD Flowery Woods DX Arena icon.png]] | |||
|620 ([[Fine Fields]])<br>465 ([[Royal Road - Stage 4]] / [[The True Arena]]) | |||
|×0.75 | |||
|- | |- | ||
| | |[[Paintra]] | ||
|[[File:KTD Paintra Arena icon.png]] | |||
|[[ | |460 ([[Lollipop Land]])<br>345 ([[Royal Road - Stage 4]] / [[The Arena]]) | ||
| | |×0.75 | ||
|[[File:KTD Paintra DX Arena icon.png]] | |||
|640 ([[Lollipop Land]])<br>480 ([[Royal Road - Stage 4]] / [[The True Arena]]) | |||
|×0.75 | |||
|- | |- | ||
| | |[[Kracko#Kirby: Triple Deluxe|Kracko]] | ||
|[[File:KTD Kracko Arena icon.png]] | |||
|[[ | |520 ([[Old Odyssey]])<br>390 ([[Royal Road - Stage 2]] / [[The Arena]]) | ||
| | |×0.75 (body)<br>×0.7 (2nd phase spikes) | ||
| | |[[File:KTD Kracko DX Arena icon.png]] | ||
|700 ([[Old Odyssey]])<br>525 ([[Royal Road - Stage 2]] / [[The True Arena]]) | |||
|×0.75 (body)<br>×0.7 (2nd phase spikes) | |||
|- | |- | ||
| | |[[Coily Rattler]] | ||
|[[File:KTD Coily Rattler Arena icon.png]] | |||
|[[ | |520 ([[Wild World]])<br>390 ([[Royal Road - Stage 2]] / [[The Arena]]) | ||
|×0.75 | |||
| | |[[File:KTD Coily Rattler DX Arena icon.png]] | ||
|680 ([[Wild World]])<br>510 ([[Royal Road - Stage 2]] / [[The True Arena]]) | |||
|×0.75 | |||
|- | |- | ||
| | |[[Pyribbit]] | ||
|[[File: | |[[File:KTD Pyribbit Arena icon.png]] | ||
|[[ | |600 ([[Endless Explosions]])<br>450 ([[Royal Road - Stage 4]] / [[The Arena]]) | ||
| | |×0.9 | ||
| | |[[File:KTD Pyribbit DX Arena icon.png]] | ||
|760 ([[Endless Explosions]])<br>570 ([[Royal Road - Stage 4]] / [[The True Arena]]) | |||
|×0.9 | |||
|- | |- | ||
| | |[[Masked Dedede#Kirby: Triple Deluxe|Masked Dedede]] | ||
|[[File: | |[[File:KTD Masked Dedede Arena icon.png]] | ||
| | |620 (Story Mode)<br>465 ([[The Arena]]) | ||
| | |×0.75 | ||
| | |{{N}} | ||
|{{N}} | |||
|{{N}} | |||
|- | |- | ||
| | |[[Queen Sectonia]] | ||
|[[File: | |[[File:KTD Queen Sectonia Arena icon.png]] | ||
| | |640 (Story Mode)<br>480 ([[The Arena]]) | ||
| | |×0.9 | ||
|[[File:KTD Queen Sectonia DX Arena icon.png]] | |||
|790 ([[Dededetour!]])<br>592 ([[The True Arena]]) | |||
|×0.9 | |||
|- | |- | ||
| | |[[Flowered Sectonia]] | ||
|[[File: | |[[File:KTD Flowered Sectonia Arena icon.png]] | ||
| | |700 (Story Mode)<br>525 ([[The Arena]]) | ||
| | |×0.9 | ||
| | |{{N}} | ||
|{{N}} | |||
|{{N}} | |||
|- | |- | ||
| | |[[Shadow Dedede]] | ||
|[[File: | |{{N}} | ||
|[[ | |{{N}} | ||
| | |{{N}} | ||
|[[File:KTD Shadow Dedede Arena icon.png]] | |||
|800 ([[Dededetour!]])<br>600 ([[The True Arena]]) | |||
|×0.75 | |||
|- | |- | ||
| | |[[Dark Meta Knight's Revenge]] | ||
|[[File: | |{{N}} | ||
|[[ | |{{N}} | ||
| | |{{N}} | ||
|[[File:KTD Dark Meta Knight Arena icon.png]] | |||
|820 ([[Dededetour!]])<br>570 ([[The True Arena]]) | |||
|×1 | |||
|- | |- | ||
| | |[[Soul of Sectonia]] | ||
|[[File: | |{{N}} | ||
| | |{{N}} | ||
| | |{{N}} | ||
|[[File:KTD Soul of Sectonia Arena icon.png]] | |||
|999* (1st)<br>450* (2nd) | |||
|×0.9 (1st flowers)<br>×1 (1st vines)<br>×1 (2nd) | |||
|- | |- | ||
|' | |colspan=7|Notes: | ||
*The basic [[Star Bullet]] has 52 Base Power. Star Bullet's actual damage = Base Power × (0.5 + 0.5 × Boss Defense Modifier) | |||
*[[Copy Ability]]'s actual damage = Base Power × Boss Defense Modifier | |||
*'''Masked Dedede''' becomes '''Masked Dedede's Revenge''' when his HP is 55% or lower. | |||
*Against [[Flowered Sectonia]], [[Dark Meta Knight's Revenge]] and [[Soul of Sectonia]], [[Crash]] and [[Mike]]'s actual damage = Base Power × 0.33 | |||
*Most bosses have 75% maximum HP when fought in [[The Arena]] and [[The True Arena]] (rounded down to zero decimal places). | |||
*[[Soul of Sectonia]] has 1,332 base HP for phase 1 and 600 base HP for phase 2, but because she is only fought in The True Arena, her actual HP for both phases is effectively 999 and 450, respectively. | |||
|} | |||
Some bosses in this game are fought throughout regular stages later. In addition, the third time [[Flowery Woods]] is encountered, Kirby has the Hypernova ability, and swallows him whole without a fight. | |||
===''Kirby Fighters Deluxe''=== | |||
Only two bosses are present in ''[[Kirby Fighters Deluxe]]'', both appearing in the game's Single Player Mode. The first is [[Kracko]], who appears in Round 5. He is fought on the [[Bubbly Clouds (Battle Stage)|Bubbly Clouds]] [[Battle Stage]], who behaves much like his ''Kirby: Triple Deluxe'' counterpart, but also has a new attack where he scatters [[Keychain]]s across the screen. | |||
The final boss of the mode is [[Team DDD]], appearing in the Final Round on the [[Fountain of Dreams (Battle Stage)|Fountain of Dreams]] Battle Stage. Depending on the difficulty, Kirby will have to fight either 24, 32, 47, or 64 Dededes, with the last one always being a much larger variant, who, like Kracko, also has an attack involving blocking the player's view with Keychains. | |||
===''Kirby and the Rainbow Curse''=== | |||
{| class="wikitable" | |||
!Boss | |||
!Location | |||
!Description | |||
|- | |- | ||
|{{center|[[File:KatRC Whispy Woods art 1.png|150px]]<br>'''[[Whispy Woods]]'''}} | |||
|[[The Forest of Whispy Woods]] & [[Sky-High Whispy Woods]] | |||
|A sentient tree rooted in place, who has the power to grow spiky flowers and drop bombs, in addition to blowing gusts of wind and calling in friends to defend him. In his second encounter, he gains a metal coating, making him immune to regular [[Touch Dash]]es. | |||
|- | |- | ||
| | |{{center|[[File:KatRC Hooplagoon art 1.png|150px]]<br>'''[[Hooplagoon]]'''}} | ||
|[[File: | |[[Hooplagoon, Relic of the Ruins]] & [[Hooplagoon of the Lake]] | ||
|A circular robotic creature who spins through the air and can fire lasers and conjure an electric field around himself. He grows in size and speed when his shields are damaged. In the second encounter, Hooplagoon is faced underwater. | |||
| | |||
| | |||
|- | |- | ||
| | |{{center|[[File:KatRC The Claykken Figurine.png|125px]]<br>'''[[The Claykken]]'''}} | ||
|[[The Claykken's Lair]] & [[The Claykken's Sea of Fire]] | |||
|[[ | |A giant squid who somewhat resembles a pirate captain. The Claykken attacks by trying to swipe at Kirby with his spiked tentacles, and when that fails, he enters the fray fully and launches himself at Kirby like a torpedo, leaving behind clouds of ink as he moves. In the second encounter, The Claykken is faced on land in a volcanic region. | ||
|A | |||
|- | |- | ||
| | |{{center|[[File:KatRC Claycia boss art.png|150px]]<br>'''[[Claycia]]'''}} | ||
|[[The Final Battle]] | |||
|[[ | |A talented magical clay sculptor who has been possessed by an evil force. She attacks by conjuring enemies and objects to toss Kirby's direction, and can manipulate [[Gray Zone]]s. She is weak to her own [[Clay Ball]]s. | ||
|A | |||
|- | |- | ||
|{{center|[[File:KatRC Dark Crafter Figurine.png|175px]]<br>'''[[Dark Crafter]]'''}} | |||
|{{center|[[File: | |[[The Final Battle]] | ||
| | |The evil entity responsible for possessing Claycia. He tries to flee from the [[Kirby Rocket]] after being ousted and tosses continuous waves of bombs at Kirby to try and keep him away, but Kirby can retaliate by launching himself at Dark Crafter with a [[Star Dash]]. | ||
| | |||
|} | |} | ||
==='' | ===''Kirby: Planet Robobot''=== | ||
There are twelve unique bosses in Story Mode with the addition of three new bosses in [[Meta Knightmare Returns]], and one new boss in [[The True Arena]]. Like in the previous two main series games, most bosses have stronger versions, denoted by '''2.0''', and are fought in the aforementioned two modes. Some bosses are fought in circular arenas in certain phases, much like in ''Kirby 64: The Crystal Shards''. | |||
{| class="wikitable mw-collapsible | |||
!colspan=5| | The following table lists all the bosses fought in Story Mode, Meta Knightmare Returns, and The True Arena. This does not count [[Sub-Game]] bosses like the [[Team Kirby Clash]] bosses and the [[Masher]]s (classified as [[Mid-Boss]] instead) from [[Kirby 3D Rumble]]. | ||
{| class="wikitable mw-collapsible" border=1 cellpadding=2 | |||
!colspan=5|Bosses in ''Kirby: Planet Robobot'' | |||
|- | |- | ||
! | !Boss | ||
!Image | !Image | ||
! | !Area | ||
!Description | !Description | ||
!Notes | !Notes | ||
|- | |- | ||
| | !colspan=5|Story Mode | ||
|- | |- | ||
|[[ | |'''[[Gigavolt]]''' / '''Gigavolt II''' | ||
| | |align=center|[[File:KPR Gigavolt.png|200px]]<br>[[File:KPR Gigavolt II.png|200px]] | ||
| | |[[Patched Plains]] ([[Patched_Plains - Stage 3|Stage 3]]) & [[Access Ark]] ([[Access Ark - Stage 5|Stage 5]]) | ||
|A | |A towering green robot with long arms that must be unscrewed by the [[Robobot Armor]]. | ||
| | |In Access Ark, a more difficult, purple-colored variant named Gigavolt II is encountered, but is defeated in the same manner.<br>This boss cannot be fought directly in [[Meta Knightmare Returns]], as there is no Robobot Armor in the sub-game. | ||
|- | |- | ||
|[[ | |'''[[Clanky Woods]]''' | ||
| | |align=center|[[File:KPR Clanky Woods battle 1.png|200px]] | ||
| | |[[Patched Plains]] ([[Patched Plains - Stage 5|Stage 5]]) | ||
|A | |A mechanized [[Whispy Woods]] that can move freely about, drill into the ground, and shoot missiles. | ||
| | |Chase sequences with Clanky Woods also appears in the [[Patched Plains - Stage 1|first level]] and in [[Access Ark - Stage 8 EX|Stage 8 of Access Ark]], but are not directly counted as boss battles. | ||
|- | |- | ||
|[[ | |'''[[C.O.G.S.]]''' | ||
| | |align=center|[[File:KPR COGS battle 1.png|200px]] | ||
| | |[[Resolution Road]] ([[Resolution Road - Stage 2|Stage 2]]) & [[Gigabyte Grounds]] ([[Gigabyte Grounds - Stage 4|Stage 4]]) | ||
|A | |A giant wall of gears, cogs, and turrets that must be defeated by the [[Robobot Armor]] in [[Jet Mode]]. | ||
| | |After C.O.G.S. is defeated in Gigabyte Grounds, Core Kabula is fought immediately afterwards. | ||
|- | |- | ||
|[[ | |'''[[Holo Defense API]]''' | ||
|[[File:KPR Holo Defense API.png|200px]] | |||
| | |[[Resolution Road]] ([[Resolution Road - Stage 5|Stage 5]]) | ||
|A | |A holographic security system that resembles [[Pix]]. It projects green holographic versions of bosses and Mid-Bosses from past ''Kirby'' games to slow the pink puffball down. | ||
|Bosses summoned by the Holo Defense API (in order) are [[Kracko|Holo-Kracko]], [[Sphere Doomer|Holo-Doomers]], [[Ice Dragon|Holo-Ice Dragon]], and [[Coily Rattler|Holo-Coily Rattler]]. | |||
|- | |- | ||
|[[ | |'''[[Susie]]''' | ||
|[[File:KPR Susie battle 1.png|200px]] | |||
| | |[[Overload Ocean]] ([[Overload Ocean - Stage 6|Stage 6]]) | ||
| | |The executive assistant to the [[Haltmann Works Company]], who uses her mech to attack with spins, drill attacks, and even summon drones. | ||
| | | | ||
|- | |- | ||
|[[ | |'''[[Core Kabula]]''' | ||
|[[File:KPR Core Kabula.png|200px]] | |||
| | |[[Gigabyte Grounds]] ([[Gigabyte Grounds - Stage 4|Stage 4]]) | ||
| | |After [[C.O.G.S.]] is defeated once more in Gigabyte Grounds, [[Core Kabula]] emerges from its remains in a surprise attack against [[Kirby]] in the [[Robobot Armor]], still in [[Jet Mode]]. | ||
| | |While it is the second boss encountered in Gigabyte Grounds (after C.O.G.S.), she is not considered as the main boss of this area.<br>This boss cannot be fought directly in [[Meta Knightmare Returns]], as there is no Robobot Armor in the Sub-Game. | ||
|- | |- | ||
|[[ | |'''[[Mecha Knight]]''' | ||
|[[File:KPR Mecha Knight.png|200px]] | |||
| | |[[Gigabyte Grounds]] ([[Gigabyte Grounds - Stage_6|Stage 6]]) | ||
|A | |A subdued and mechanized [[Meta Knight]] who is forced to do the company's bidding. He attacks with a laser [[Galaxia]] sword, missiles, and laser beams. | ||
| | |This boss battle is completely skipped in [[Meta Knightmare Returns]]. It is replaced with [[Stock Mecha Knight]]. | ||
|- | |- | ||
|[[ | |'''[[Dedede Clone]]''' | ||
|[[File:KPR Dedede Clone Battle 2.png|200px]] | |||
| | |[[Rhythm Route]] ([[Rhythm Route - Stage 6|Stage 6]]) | ||
|A | |A cloned, purple [[King Dedede]] that can split into three during the second half of the fight. | ||
| | | | ||
|- | |- | ||
|[[ | |'''[[Dedede Clones & D3]]''' | ||
|[[File:KPR Dedede Clones and D3 Battle 1.png|200px]] | |||
| | |[[Rhythm Route]] ([[Rhythm Route - Stage 6|Stage 6]]) | ||
| | |The Dedede Clones hop onto the D3 Cannon, a tridimensional cannon resembling the king in color, and use its barrage of lasers, flames, and explosives to take on the pink puffball. | ||
| | |This boss battle is directly fought after Dedede Clone is defeated. | ||
|- | |- | ||
|[[ | |'''[[Mecha Knight+]]''' | ||
|[[File:KPR Mecha Knight+ battle 2.png|200px]] | |||
| | |[[Access Ark]] ([[Access Ark - Stage 6|Stage 6]]) | ||
|After his defeat in [[Gigabyte Grounds]], an upgraded Mecha Knight is sent out by Susie to deal with Kirby again within the Haltmann Works executive office. This variant notably sports a red appearance and a giant clawed tail. | |||
| | |This boss battle is completely skipped in [[Meta Knightmare Returns]]. | ||
|- | |- | ||
|[[ | |'''[[President Haltmann]]''' | ||
|[[File:KPR President Haltmann battle 2.png|200px]] | |||
| | |[[Access Ark]] ([[Access Ark - Stage 6|Stage 6]]) | ||
| | |The primary antagonist and president of the [[Haltmann Works Company]]. He engages Kirby in battle with a large, golden mech. | ||
| | | | ||
|- | |- | ||
|[[ | |'''[[Star Dream]]''' | ||
|[[File:KPR Star Dream Fight Intro.png|200px]] | |||
| | |[[Mind in the Program]] | ||
| | |The final boss of Story Mode, which is a sentient computer that was fused with President Haltmann's mind, throwing it into a path of destruction. | ||
| | |The [[Last Battle Ability]] used to battle Star Dream is the Robobot Armor's [[Halberd Mode]].<br>This boss battle is omitted from [[Meta Knightmare Returns]].<br>The fourth phase is completely omitted in [[The Arena]]. | ||
|- | |- | ||
| | !colspan=5|Meta Knightmare Returns''' | ||
|- | |- | ||
|[[ | |'''[[Stock Mecha Knight]]''' | ||
|[[File:KPR Stock Mecha Knight.png|200px]] | |||
| | |[[Gigabyte Grounds]] ([[Gigabyte Grounds - Stage 6|Stage 6]]) | ||
|A | |A mass-produced replica of [[Mecha Knight]] which also is fitted with a clawed tail that is used by [[Mecha Knight+]]. | ||
| | |This boss can also be fought in [[The True Arena]]. | ||
|- | |- | ||
|[[ | |'''[[Dark Matter Clone]]''' | ||
|[[File:KPR Dark Matter Clone.png|200px]] | |||
| | |[[Access Ark]] ([[Access Ark - Stage_6|Stage 6]]) | ||
|A | |A clone of [[Dark Matter]] in his swordsman form, fighting in almost the same way as his appearance in ''[[Kirby's Dream Land 2]]'' in addition to new attacks. | ||
| | |This boss can also be fought in [[The True Arena]]. | ||
|- | |- | ||
|[[ | |'''[[Sectonia Clone]]''' | ||
|[[File:KPR Sectonia Clone.png|200px]] | |||
| | |[[Access Ark]] ([[Access Ark - Stage 6|Stage 6]]) | ||
|A clone of [[Queen Sectonia]], fighting in almost the same way as her appearance in ''[[Kirby: Triple Deluxe]]''. | |||
|The | |This boss can also be fought in [[The True Arena]]. | ||
|- | |- | ||
|[[ | |'''[[Galacta Knight|Galacta Knight Returns]]''' | ||
|{{center|[[File: | |{{center|[[File:KPR Galacta Knight.png]]}} | ||
| | |[[Access Ark]] ([[Access Ark - Stage 6|Stage 6]]) | ||
| | |The greatest warrior in the galaxy, serving as the final boss of [[Meta Knightmare Returns]]. He fights almost identically to his appearance in ''[[Kirby's Return to Dream Land]]'', with this incarnation bringing in new attacks like the ability to open up a dimensional rift to [[Another Dimension]]. | ||
|This | |This boss can also be fought in [[The True Arena]]. | ||
|- | |- | ||
| | !colspan=5|The True Arena | ||
|- | |- | ||
|[[ | |'''[[Star Dream Soul OS]]''' | ||
|[[File:KPR Star Dream Soul OS Phase 1.jpg|200px]] | |||
| | |[[The True Arena]] | ||
|The final boss of the True Arena and the ultimate challenge in the entirety of the game, essentially acting as the Soul Boss for [[Star Dream]] itself. | |||
| | |This boss has an all-new fourth-phase where [[Kirby]] must fight against the heart of the computer itself. | ||
| | |||
|} | |} | ||
===''Kirby | ===''Team Kirby Clash Deluxe''=== | ||
Many enemies encountered in this free-to-start spin-off title are beefed up considerably in subsequent encounters, given more [[health]] and more attack options. Almost all enemies are faced at least twice this way, except a handful in the last area. The enemies are as follows: | |||
{| class="wikitable mw-collapsible" border=1 cellpadding=2 | |||
{| class="wikitable mw-collapsible | !colspan=5|Enemies in ''Team Kirby Clash Deluxe'' | ||
!colspan= | |||
|- | |- | ||
!Enemy | !Enemy | ||
! | !Image | ||
! | !# of encounters | ||
!Description | !Description | ||
!Notes | !Notes | ||
|- | |- | ||
|{{center|[[File: | |[[Colossal Waddle Dee]] | ||
| | |{{center|[[File:TKCD Colossal Waddle Dee screenshot.png]]}} | ||
|3 | |||
|A | |A very big and red-furred Waddle Dee who is rather sluggish and not much of a threat. | ||
| | |Only faced by itself once. The other two encounters are paired with other enemies. | ||
|- | |- | ||
|{{center|[[File: | |[[Colossal Kabu]] | ||
| | |{{center|[[File:TKCD Colossal Kabu screenshot.png]]}} | ||
| | |2 | ||
|A very big Kabu who spins around and can vanish and reappear in the air. | |||
| | |Only faced in tag-teams with other enemies. | ||
|- | |||
|[[Colossal Hot Head]] | |||
|{{center|[[File:TKCD Colossal Hot Head screenshot.png]]}} | |||
|1 | |||
|A very big Hot Head who attacks using a long flamethrower from its mouth. | |||
|Only faced in tag-teams with other enemies. | |||
|- | |- | ||
|[[Mr. Frosty]] | |||
| | |{{center|[[File:TKCD Mr Frosty screenshot.png]]}} | ||
|3 | |||
|A | |A big overalls-wearing walrus man who attacks using ice blocks, charges, and body slams. | ||
| | | | ||
|- | |- | ||
|{{center|[[File: | |[[King Doo]] | ||
|[[ | |{{center|[[File:TKCD King Doo screenshot.png]]}} | ||
|3 | |||
|A very large yellow [[Waddle Doo]] who can use various [[Beam]]-related attacks. | |||
| | | | ||
|- | |- | ||
|{{center|[[File: | |[[Gigant Edge]] | ||
| | |{{center|[[File:TKCD Gigant Edge screenshot.png]]}} | ||
| | |3 | ||
| | |A bulky green-armored swordsman who carries a shield and can toss his sword like a boomerang. | ||
| | | | ||
| | |- | ||
|[[Kracko]] | |||
|{{center|[[File:TKCD Kracko screenshot.png]]}} | |||
|2 | |||
|A floating one-eyed storm cloud who attacks using beams, lightning, and rain. | |||
|The first battle against him in the Dunes serves as the first Ordeal. | |||
|- | |- | ||
|{{center|[[File: | |[[Kibble Blade]] | ||
|[[ | |{{center|[[File:TKCD Kibble Blade screenshot.png]]}} | ||
|3 | |||
|A larger silver version of [[Sir Kibble]] who attacks using its boomerang cutter and charge moves. | |||
| | | | ||
|- | |- | ||
|{{center|[[File: | |[[Bonkers]] | ||
|[[ | |{{center|[[File:TKCD Bonkers screenshot.png]]}} | ||
| | |3 | ||
| | |A mallet-wielding ape man who can use many different hammer techniques and can toss coconuts. | ||
| | |||
|- | |||
|[[Blocky]] | |||
|{{center|[[File:TKCD Blocky screenshot.png]]}} | |||
|3 | |||
|A big rectangular stone creature with feet that attacks using body slams and can harden to defend itself. | |||
| | | | ||
|- | |- | ||
|[[Whispy Woods]] | |||
|{{center|[[File:TKCD Whispy Woods screenshot.png]]}} | |||
|2 | |||
|The familiar faced arbor who attacks using [[Air Bullet]]s, [[apple]]s, and by leaping around. | |||
|Only faced in the Ruins area, where his first encounter serves as the game's second Ordeal. | |||
|- | |- | ||
|{{center|[[File: | |[[Miasmoros]] | ||
| | |{{center|[[File:TKCD Miasmoros screenshot.png]]}} | ||
| | |2 | ||
| | |A toxic [[Galbo]]-like creature that attacks with poisonous vomit and leaves dangerous puddles on the ground as it slithers. | ||
| | |||
|- | |- | ||
|{{center|[[File: | |[[Ice Dragon]] | ||
| | |{{center|[[File:TKCD Ice Dragon screenshot.png]]}} | ||
| | |2 | ||
| | |A cuddly-looking but dangerous reptile that breathes ice and can cause icicles to drop when it stomps the ground. | ||
| | |||
|- | |- | ||
|{{center|[[File: | |[[Greater Doomer]] | ||
|[[ | |{{center|[[File:TKCD Greater Doomer screenshot.png]]}} | ||
|2 | |||
| | |A large purple [[Sphere Doomer]] who attacks with swoops, charges, and dark energy orbs. | ||
| | |||
|- | |- | ||
|{{center|[[File: | |[[Pyribbit]] | ||
| | |{{center|[[File:TKCD Pyribbit screenshot.png]]}} | ||
| | |2 | ||
| | |A bulbous red horned toad who swims in lava and can breathe fire and conjure lava waves. | ||
|Only faced in the Volcano area, where his first encounter serves as the game's third Ordeal. | |||
|- | |- | ||
|{{center|[[File: | |[[Telepathos]] | ||
| | |{{center|[[File:TKCD Telepathos screenshot.png]]}} | ||
| | |2 | ||
| | |A strange-shaped pale flying creature who attacks using swoops and psychic projectiles. | ||
| | |||
|- | |- | ||
|{{center|[[File: | |[[Landia]] | ||
| | |{{center|[[File:TKCD Landia screenshot.png|150px]]<br>[[File:TKCD Landia EX screenshot.png|150px]]}} | ||
|The second | |2 | ||
|The four-headed dragon and Guardian Angel who attacks using fire, lightning, and wind. Can split into four smaller dragons and recombine at will. | |||
|The second encounter with Landia serves as the fifth Ordeal, and is against Landia EX. | |||
|- | |- | ||
|{{center|[[File: | |[[Taranza]] | ||
| | |{{center|[[File:TKCD Taranza screenshot.png]]}} | ||
|1 | |||
| | |A powerful but easily-manipulated arachnid mage who can teleport, launch various magic projectiles, and catch the Kirbys in a magic web. | ||
|This encounter serves as the fourth Ordeal in the game. It also marks the first time that Taranza has ever been fought directly in the ''Kirby'' series. | |||
|- | |- | ||
|{{center|[[File: | |[[Parallel Susie]] | ||
|[[ | |{{center|[[File:TKCD Parallel Susie screenshot.png]]}} | ||
| | |1 | ||
|An alternate-universe version of [[Susie]] who attacks much the same using her own Business Suit. | |||
|This encounter serves as the sixth Ordeal. | |||
|- | |- | ||
|{{center|[[File: | |[[Parallel Landia]] | ||
|[[ | |{{center|[[File:TKCD Parallel Landia screenshot.png|150px]]}} | ||
|1 | |||
| | |An alternate-universe version of [[Landia]] who attacks much the same, but is more powerful. | ||
|This encounter serves as the seventh Ordeal. | |||
|- | |- | ||
|{{center|[[File: | |[[Dark Taranza]] | ||
|[[ | |{{center|[[File:TKCD Dark Taranza screenshot.png]]}} | ||
|1 | |||
| | |An alternate-universe version of [[Taranza]] who attacks much the same, but is more powerful. | ||
|This encounter serves as the eighth Ordeal, and is paired with King D-Mind's first appearance. | |||
|- | |- | ||
|{{center|[[File: | |[[King D-Mind]] | ||
|[[ | |{{center|[[File:TKCD King D-Mind screenshot.png]]<br>[[File:TKCD King D-Mind Revenge screenshot.png]]}} | ||
| | |2 | ||
| | |The king of darkness from [[Another Dimension|another dimension]], who resembles both [[King Dedede]] and [[Dark Mind]]. As such, he has the powers of both, and is a very dangerous foe. | ||
|Initially paired with the battle with Dark Taranza. He is later faced on his own as the ninth and final Ordeal of the game. | |||
|} | |||
===''Kirby's Blowout Blast''=== | |||
Unlike Kirby 3D Rumble, this game features boss encounters at the end of each level. These bosses fight in a more elaborate manner than common enemies, and have specific arenas devoted to them. Each boss (excepting Giant Masked Dedede) also has an EX form which is faced in the extra stages. The bosses of ''Kirby's Blowout Blast'' are as follows: | |||
{| class="wikitable mw-collapsible" border=1 cellpadding=2 | |||
!colspan=6|Bosses in ''Kirby's Blowout Blast'' | |||
|- | |- | ||
!Boss | |||
!Location(s) | |||
!Points | |||
!Description | |||
!EX differences | |||
!Notes | |||
|- | |- | ||
|{{center|[[File: | |{{center|[[File:KBBl Lololo.png]][[File:KBBl Lololo EX.png]]<br>'''[[Lololo & Lalala|Lololo]]'''}} | ||
|[[ | |[[Kirby's Blowout Blast - Level 1-4|1-4 & 1-4EX]] | ||
| | |5000 points (6000 EX) | ||
|A blue raindrop-shaped creature that attacks by pushing emerald boxes and [[Gordo]]s through doorways. In the latter half of his fight, he may toss these instead of just pushing them. | |||
|Lololo's Revenge bears a purple body hue and can move more quickly. In his second phase, he uses ruby boxes that leave fire trails as they slide. | |||
| | | | ||
|- | |- | ||
|{{center|[[File: | |{{center|[[File:KBBl Kracko Jr.png]][[File:KBBl Kracko Jr EX.png]]<br>'''[[Kracko Jr.]]'''}} | ||
|[[Kirby | |[[Kirby's Blowout Blast - Level 2-4|2-4 & 2-4EX]] | ||
| | |8000 points (10000 EX) | ||
| | |This juvenile form of Kracko attacks by charging at Kirby and trying to strike him with lighting. In his second phase, Kracko Jr. can unleash a spinning wave beam attack outward from his center. | ||
|Kracko Jr.'s Revenge moves more quickly than his main game counterpart. His beam attack also has more bars. | |||
|This marks Kracko Jr.'s first appearance in a 3D ''Kirby'' game. | |||
|- | |- | ||
|{{center|[[File: | |{{center|[[File:KBBl Lololo.png]][[File:KBBl Lalala.png]]<br>[[File:KBBl Lololo EX.png]][[File:KBBl Lalala EX.png]]<br>'''[[Lololo & Lalala]]'''}} | ||
|[[ | |[[Kirby's Blowout Blast - Level 3-5|3-5 & 3-5EX]]<br>[[Kirby's Blowout Blast - Secret Path|Secret Path]] | ||
|5000 points each (6000 EX) | |||
|A duo boss that attacks by pushing emerald boxes and [[Gordo]]s through doorways. In the latter half of their fight, they may toss these instead of just pushing them. | |||
|Lololo and Lalala's Revenge bear purple and orange body hues and can move more quickly. In their second phase, they use ruby boxes that leave fire trails as they slide. | |||
| | | | ||
|- | |- | ||
|{{center|[[File: | |{{center|[[File:KBBl Kracko.png]][[File:KBBl Kracko EX.png]]<br>'''[[Kracko]]'''}} | ||
|[[ | |[[Kirby's Blowout Blast - Level 4-5|4-5 & 4-5EX]]<br>[[Kirby's Blowout Blast - Secret Path|Secret Path]] | ||
| | |10000 points (12000 EX) | ||
|Kracko strikes again in his fully mature form, sporting stronger versions of Kracko Jr.'s attacks, along with a few new ones, including firing volleys of beam blasts and causing a big electric storm. | |||
|Kracko's Revenge has more complex and difficult-to-dodge attacks overall and moves more quickly. | |||
| | | | ||
|- | |- | ||
|{{center|[[File: | |{{center|[[File:KBBl Dedede intro.png|150px]][[File:KBBl Dededes Revenge intro.png|150px]]<br>'''[[King Dedede]]'''}} | ||
|[[ | |[[Kirby's Blowout Blast - Level 5-5|5-5 & 5-5EX]]<br>[[Kirby's Blowout Blast - Secret Path|Secret Path]] | ||
|A | |N/A | ||
| | |King Dedede attacks using his familiar moveset, now transferred to a 3D space. This includes his [[Super Dedede Jump]], [[Head Slide]], hammer swings, and [[inhale]]. He is also able to shoot out homing spark attacks from his hammer. He notably does not [[hover]], as he did not have that move in ''[[Kirby's Dream Land]]''. | ||
|King Dedede's Revenge attacks more quickly, often chaining his attacks together or performing them multiple times in succession. | |||
|King Dedede's Revenge is depicted without his kimono, hearkening back to his older design. | |||
|- | |- | ||
|{{center|[[File: | |{{center|[[File:KBBl Stage 5-5 3.png|250px]][[File:KBBl Stage 5-5 EX 3.png|250px]]<br>'''[[King Dedede|Giant King Dedede]]'''}} | ||
|[[ | |[[Kirby's Blowout Blast - Level 5-5|5-5 & 5-5EX]] | ||
| | |12000 points (14000 EX) | ||
| | |This giant form of King Dedede attacks by trying to slam Kirby from above with his hammer and using his inhale. His hammer strikes leaves a lot of drop stars behind. | ||
|Giant King Dedede's Revenge can create homing sparks that chase after Kirby with his hammer strikes. | |||
| | |||
|- | |- | ||
|{{center|[[File: | |{{center|[[File:KBBl Giant Masked Dedede fight 1.png|250px]]<br>'''[[Masked Dedede|Giant Masked Dedede]]'''}} | ||
|[[ | |[[Kirby's Blowout Blast - Secret Path|Secret Path]] | ||
|15000 points | |||
|Giant Masked Dedede has several changes compared to his regular giant counterparts. His mask protects him from regular star bullets, only taking damage from blaster bullets. His mechanical hammer allows him to fire missiles and lasers at Kirby. His inhale also sucks up waves of Gordos that need to be dodged. | |||
|N/A | |||
| | |||
|} | |||
===''Kirby Battle Royale''=== | |||
In this title, there is only one instance where a proper "boss" is faced; at the end of [[Dedede's Cake Royale]] against [[Dededestroyer Z]]. [[Robo Bonkers]] can also be considered a boss of sorts, but the way he is battled de-emphasizes the idea of a showdown against the enemy itself in favor of competing with other contestants to see who can do the most damage to a slow-moving target. | |||
===''Kirby Star Allies''=== | |||
There are 26 distinct bosses in ''[[Kirby Star Allies]]'' (not counting [[Galacta Knight]]), the most amount of bosses in any main series ''Kirby'' game. Some bosses may change their behavior based on how many allies are in the team. | |||
The following table lists every distinct boss in ''Kirby Star Allies'' in the intended order of encounter: | |||
{| class="wikitable mw-collapsible" border=1 cellpadding=2 | |||
!colspan=6|Bosses in ''Kirby Star Allies'' | |||
|- | |- | ||
!'''Name''' | |||
!Location(s) | |||
!Health (Base)<br>Star Bullet = 52 | |||
!Health (Ultimate Choice) | |||
!Description | |||
!Notes | |||
|- | |- | ||
|{{center|[[File:KSA | |{{center|[[File:KSA Whispy Woods splash.jpg|250px]]<br>'''[[Whispy Woods]]'''}} | ||
|[[ | |[[Fruity Forest]]<br>[[Falluna Moon]]<br>[[Guest Star ???? Star Allies Go!]]<br>[[The Ultimate Choice]] (Sizzling Threat and lower) | ||
| | |700<br>490 (Falluna Moon) | ||
| | |525 | ||
|This sentient arbor returns as the first boss encounter. Powered up by a [[Jamba Heart|Dark Heart fragment]], he can grow larger and conjure waves and waves of [[Apple]]s, along with other new tricks. Despite this, he is still not particularly formidable. | |||
|Whispy Woods is weak to fire attacks, and may catch fire when hit by them enough. <br>Whispy Woods can be befriended after his defeat using a Friend Heart. | |||
|- | |- | ||
|{{center|[[File:KSA | |{{center|[[File:KSA King Dedede splash.jpg|250px]]<br>'''[[King Dedede]]'''}} | ||
|[[ | |[[Clash at Castle Dedede]]<br>[[Guest Star ???? Star Allies Go!]]<br>[[The Ultimate Choice]] (all except Soul Melter EX) | ||
| | |680 | ||
| | |510 | ||
|Kirby's eternal rival attacks when Kirby and his friends storm the castle. Engorging himself on rotten food and the power of a Dark Heart fragment, he becomes considerably beefier during his fight, and gains new attack patterns using his giant arms. | |||
|King Dedede can be befriended after his defeat using a Friend Heart. | |||
|- | |- | ||
|{{center|[[File:KSA | |{{center|[[File:KSA Meta Knight splash.jpg|250px]]<br>'''[[Meta Knight]]'''}} | ||
|[[ | |[[Sacred Square]]<br>[[Guest Star ???? Star Allies Go!]]<br>[[The Ultimate Choice]] (all except Soul Melter EX) | ||
| | |600 | ||
| | |450 | ||
|The Masked Swordsman returns for another honorable duel (should Kirby accept it). Using the power of the Dark Heart fragment, he splits into many copies of himself and can throw giant boulders using magical force. | |||
|Meta Knight can be befriended after his defeat using a Friend Heart. | |||
|- | |- | ||
|{{center|[[File:KSA | |{{center|[[File:KSA Pon and Con splash.jpg|250px]]<br>'''[[Pon & Con]]'''}} | ||
|[[ | |[[Gatehouse Road]]<br>[[Guest Star ???? Star Allies Go!]]<br>[[The Ultimate Choice]] (Mild Stroll through Sizzling Threat) | ||
| | |245 each | ||
| | |183 each | ||
|These two woodland guardians are dressed in armor and recruited by the Jambastion to defend the front gate. They attack by charging along with their children, some of whom drop elemental bombs. | |||
|Pon & Con are befriended after their defeat using a Friend Heart. | |||
|- | |- | ||
|{{center|[[File:KSA | |{{center|[[File:KSA Francisca splash 1.jpg|250px]]<br>'''[[Francisca]]'''}} | ||
|[[Guest Star ???? Star Allies Go! | |[[Longview Corridor]]<br>[[Blizzno Moon]]<br>[[Guest Star ???? Star Allies Go!]]<br>[[The Ultimate Choice]] (Zesty Expedition, Fiery Showdown through Soul Melter, Soul Melter EX (EX form)) | ||
| | |630<br>742 (rematch) | ||
| | |472<br>519 (rematch)<br>779 (Soul Melter EX) | ||
|The first of [[Jambandra]]'s three Generals of Magic. She wields a frosty battle axe and attacks with a variety of ice and water-based moves. | |||
|Francisca has an EX form which is faced in Soul Melter EX of [[The Ultimate Choice]]. <br>She is also faced as part of [[The Three Mage-Sisters]] boss battle. | |||
|- | |- | ||
|{{center|[[File:KSA | |{{center|[[File:KSA Flamberge splash 1.jpg|250px]]<br>'''[[Flamberge]]'''}} | ||
|[[The Ultimate Choice]] (Soul Melter EX) | |[[Inner Sanctum]]<br>[[Sizzlai Moon]]<br>[[Guest Star ???? Star Allies Go!]]<br>[[The Ultimate Choice]] (Spicy Adventure, Infernal Crisis, Soul Melter, Soul Melter EX (EX form)) | ||
|The | |650<br>715 (rematch) | ||
|487<br>536 (rematch)<br>804 (Soul Melter EX) | |||
|The second of Jambandra's three Generals of Magic. She wields a flaming sword and leaves lingering pillars of flame in her wake when she attacks. | |||
|Flamberge has an EX form which is faced in Soul Melter EX of [[The Ultimate Choice]]. <br>She is also faced as part of [[The Three Mage-Sisters]] boss battle. | |||
|- | |- | ||
|{{center|[[File:KSA | |{{center|[[File:KSA Zan Partizanne splash 1.jpg|250px]]<br>'''[[Zan Partizanne]]'''}} | ||
|[[The Ultimate Choice]] (Soul Melter EX) | |[[Heavenly Hall]]<br>[[The Divine Terminus]]<br>[[Guest Star ???? Star Allies Go!]]<br>[[The Ultimate Choice]] (Sizzling Threat, Infernal Crisis, Soul Melter, Soul Melter EX (EX form)) | ||
|The | |680<br>748 (rematch) | ||
|510<br>561 (rematch)<br>841 (Soul Melter EX) | |||
|The third and most senior of Jambandra's three Generals of Magic. She wields an electric lance and rains shocking destruction down from above. | |||
|Zan Partizanne has an EX form which is faced in Soul Melter EX of [[The Ultimate Choice]]. <br>She is also faced as part of [[The Three Mage-Sisters]] boss battle. | |||
|- | |- | ||
! | |{{center|[[File:KSA Yggy Woods splash.jpg|250px]]<br>'''[[Yggy Woods]]'''}} | ||
|[[Falluna Moon]]<br>[[Extra Planet δ]]<br>[[Guest Star ???? Star Allies Go!]]<br>[[The Ultimate Choice]] (Fiery Showdown through Soul Melter) | |||
|910 | |||
|682 | |||
|An old cherry tree who serves as a more powerful analogue to Whispy Woods. | |||
|Yggy Woods shares Whispy's weakness to fire. | |||
|- | |- | ||
|[[ | |{{center|[[File:KSA Goldon and Silvox splash.jpg|250px]]<br>'''[[Goldon & Silvox]]'''}} | ||
|[[Mareen Moon]]<br>[[Guest Star ???? Star Allies Go!]]<br>[[The Ultimate Choice]] (Fiery Showdown through Soul Melter EX) | |||
|245 each | |||
|183 each (275 each in Soul Melter EX only) | |||
| | |Two large mammals made of metal that serve as a more powerful analogue to Pon & Con. | ||
|Goldon & Silvox have greater stamina when faced in Soul Melter EX. | |||
|- | |- | ||
|[[ | |{{center|[[File:KSA Grand Mam splash.jpg|250px]]<br>'''[[Grand Mam]]'''}} | ||
|[[Grott Moon]] | |||
|{{ | |800 | ||
| | |{{center|{{N}}}} | ||
|The | |A giant egg-shaped creature who wears a nearly impenetrable suit of armor and wields bombs attached to ropes. | ||
|Grand Mam is the only boss who does not appear in The Ultimate Choice. | |||
|- | |- | ||
|[[ | |{{center|[[File:KSA Kracko splash.jpg|250px]]<br>'''[[Kracko]]'''}} | ||
|[[Gabbel Moon]]<br>[[Guest Star ???? Star Allies Go!]]<br>[[The Ultimate Choice]] (Mild Stroll through Soul Melter) | |||
|400 | |||
|300 | |||
| | |This familiar cloud-enshrouded eyeball returns to harass Kirby and his team as they hop from planet to planet. His attacks are largely the same as they've ever been. | ||
|Transforms into [[Twin Kracko]] after being defeated. | |||
|- | |- | ||
|[[ | |{{center|[[File:KSA Twin Kracko splash.jpg|250px]]<br>'''[[Twin Kracko]]'''}} | ||
|[[Gabbel Moon]]<br>[[Guest Star ???? Star Allies Go!]]<br>[[The Ultimate Choice]] (Mild Stroll through Soul Melter) | |||
|720 | |||
| | |540 | ||
| | |After Kracko is defeated, he splits in two and continues fighting. When split, Twin Kracko gain a number of new attacks, including torrential rains and big thunderstorms. | ||
| | |||
|- | |- | ||
|[[ | |{{center|[[File:KSA Hyness splash.jpg|250px]]<br>'''[[Hyness]]'''}} | ||
|[[The Divine Terminus]]<br>[[Guest Star ???? Star Allies Go!]]<br>[[The Ultimate Choice]] (Sizzling Threat through Soul Melter) | |||
|480 (hooded)<br>720 (unhooded) | |||
| | |360 (hooded)<br>540 (unhooded) | ||
|Mage- | |The mad wizard and head of Jambandra who commands The Three Mage-Sisters and tends to the [[Jamba Heart]]. He attacks using powerful elemental magic and can siphon the life energy from his generals when he runs low. | ||
| | |||
|- | |- | ||
|[[ | |{{center|[[File:KSA Void Termina splash.jpg|250px]]<br>'''[[Void Termina]]'''}} | ||
|[[Kirby Star Allies (level)|Kirby Star Allies]]<br>[[The Ultimate Choice]] (Infernal Crisis, Soul Melter) | |||
|500 (Phase 2)<br>700 (Phase 4) | |||
| | |375 (Phase 2)<br>525 (Phase 4) | ||
| | |An ancient incarnation of chaos and destruction and relative of [[Dark Matter]] who is revived from the Jamba Heart after Hyness sacrifices himself and his generals to him. He takes on several forms during his battle, and is fought using the [[Star Allies Sparkler]]. He serves as the final boss of Story Mode. | ||
|Void Termina's Soul Melter form is more powerful and has a different color palette. <br>The last phase of Void Termina's battle is only used in Story Mode. | |||
|- | |- | ||
|[[ | |{{center|[[File:KSA Galacta Knight splash.jpg|250px]]<br>'''[[Galacta Knight]]'''}} | ||
|[[Guest Star ???? Star Allies Go!]] | |||
|{{ | |{{center|{{N}}}} | ||
| | |{{center|{{N}}}} | ||
| | |Often called "The Greatest Warrior in the Galaxy", this swordsman is brought from another dimension to battle the Guest Stars, but does not actually get to fight them this time, as a [[butterfly]] immediately casts judgment on him who turns into [[Morpho Knight]] as a result. | ||
| | |||
|- | |- | ||
|[[ | |{{center|[[File:KSA Morpho Knight splash.jpg|250px]]<br>'''[[Morpho Knight]]'''}} | ||
|[[Guest Star ???? Star Allies Go!]]<br>[[The Ultimate Choice]] (Fiery Showdown through Soul Melter) | |||
|1380 | |||
|' | |920 | ||
| | |This [[Butterfly|enigmatic creature]] takes on the form of a swordsman after absorbing Galacta Knight's power and does battle with the Guest Stars. He wields incredibly powerful fiery magic. He serves as the final opponent of [[Guest Star ???? Star Allies Go!]] | ||
| | |||
|- | |- | ||
|[[ | |{{center|[[File:KSA Void Soul splash.jpg|250px]]<br>'''[[Void Soul]]'''}} | ||
|[[The Ultimate Choice]] (Soul Melter) | |||
|{{ | |{{center|{{N}}}} | ||
| | |1350 | ||
|[[ | |A powered-up version of Void Termina's final form. Described as the "Essence of Chaos", this creature is encountered only in Soul Melter difficulty of [[The Ultimate Choice]]. | ||
|Can be considered to be the ultimate final boss of the base game of ''Kirby Star Allies''. | |||
|- | |- | ||
|[[ | |{{center|[[File:KSA Parallel Woods splash.jpg|250px]]<br>'''[[Parallel Woods]]'''}} | ||
|[[Heroes in Another Dimension - Dimension I]]<br>[[Guest Star ???? Star Allies Go!|Guest Star The Three Mage-Sisters]]<br>[[The Ultimate Choice]] (Soul Melter EX) | |||
|1400 | |||
| | |1050 | ||
| | |An extremely powerful version of Whispy Woods who hails from [[Another Dimension]]. | ||
|Only available in Version 4.0.0+. | |||
|- | |- | ||
|[[ | |{{center|[[File:KSA Parallel Twin Kracko splash screen.png|250px]]<br>'''[[Parallel Twin Kracko]]'''}} | ||
|[[Heroes in Another Dimension - Dimension II]]<br>[[Guest Star ???? Star Allies Go!|Guest Star The Three Mage-Sisters]]<br>[[The Ultimate Choice]] (Soul Melter EX) | |||
|800 | |||
| | |600 | ||
|A more powerful version of Twin Kracko which hails from Another Dimension. | |||
|Transforms into [[Parallel Big Kracko]] after their defeat. <br>Only available in Version 4.0.0+. | |||
|- | |- | ||
|[[Kracko]] | |{{center|[[File:KSA Parallel Big Kracko splash.jpg|250px]]<br>'''[[Parallel Big Kracko]]'''}} | ||
|[[Heroes in Another Dimension - Dimension II]]<br>[[Guest Star ???? Star Allies Go!|Guest Star The Three Mage-Sisters]]<br>[[The Ultimate Choice]] (Soul Melter EX) | |||
|1440 | |||
|' | |1080 | ||
| | |After Parallel Twin Kracko is defeated, they recombine into this singular giant black cloud. Parallel Big Kracko's attacks are massive, often taking up the entire battlefield. | ||
|Only available in Version 4.0.0+. | |||
|- | |- | ||
|[[ | |{{center|[[File:KSA Parallel Meta Knight splash screen.png|250px]]<br>'''[[Parallel Meta Knight]]'''}} | ||
|[[Heroes in Another Dimension - Dimension III]]<br>[[Guest Star ???? Star Allies Go!|Guest Star The Three Mage-Sisters]]<br>[[The Ultimate Choice]] (Soul Melter EX) | |||
|1200 | |||
| | |900 | ||
| | |A more powerful version of Meta Knight who uses more potent dark magics. | ||
|Only available in Version 4.0.0+. | |||
|- | |- | ||
|[[ | |{{center|[[File:KSA Parallel Dedede splash screen.png|250px]]<br>'''[[Parallel Dedede]]'''}} | ||
|[[Heroes in Another Dimension - Dimension IV]]<br>[[Guest Star ???? Star Allies Go!|Guest Star The Three Mage-Sisters]]<br>[[The Ultimate Choice]] (Soul Melter EX) | |||
|1360 | |||
| | |1020 | ||
| | |A more powerful version of King Dedede who unleashes big shockwaves with nearly every attack. | ||
|Only available in Version 4.0.0+. | |||
|- | |- | ||
|[[ | |{{center|[[File:KSA Corrupt Hyness splash screen.png|250px]]<br>'''[[Hyness|Corrupt Hyness]]'''}} | ||
|[[Heroes in Another Dimension - Final Dimension]]<br>[[The Ultimate Choice]] (Soul Melter EX) | |||
|1500 | |||
| | |1125 | ||
| | |Hyness is infused with the power of the Jamba Heart and driven utterly mad, becoming more powerful and using wooden stumps in place of his missing mage generals. | ||
|Only available in Version 4.0.0+. | |||
|- | |- | ||
|[[ | |{{center|[[File:KSA The Three Mage-Sisters splash.jpg|250px]]<br>'''[[The Three Mage-Sisters]]'''}} | ||
|[[Heroes in Another Dimension - Final Dimension]]<br>[[The Ultimate Choice]] (Soul Melter EX) | |||
| | |3234 | ||
| | |2425 | ||
| | |In order to exact retribution on Kirby and his team, Francisca, Flamberge, and Zan Partizanne fight as one, combining their attacks. This encounter serves as the last fight in [[Heroes in Another Dimension]]. | ||
|Only available in Version 4.0.0+. | |||
|- | |- | ||
|[[ | |{{center|[[File:KSA Morpho Knight EX splash screen.png|250px]]<br>'''[[Morpho Knight|Morpho Knight EX]]'''}} | ||
|[[Guest Star ???? Star Allies Go!|Guest Star The Three Mage-Sisters]]<br>[[The Ultimate Choice]] (Soul Melter EX) | |||
|2070 | |||
| | |1380 | ||
| | |A more powerful variant of Morpho Knight who uses vortexes to trap his foes in his attacks. | ||
|Only available in Version 4.0.0+. | |||
|- | |- | ||
|[[ | |{{center|[[File:KSA True Void Termina splash screen.png|250px]]<br>'''[[Void Termina|Void Termina - The True Destroyer of Worlds]]'''}} | ||
|[[The Ultimate Choice]] (Soul Melter EX) | |||
|{{ | |{{center|{{N}}}} | ||
| | |562 (Phase 2) | ||
| | |The penultimate version of Void Termina who is battled exclusively in Soul Melter EX of [[The Ultimate Choice]]. | ||
|Only available in Version 4.0.0+. | |||
|- | |- | ||
|[[Void | |{{center|[[File:KSA Void splash screen.png|250px]]<br>'''[[Void]]'''}} | ||
|[[The Ultimate Choice]] (Soul Melter EX) | |||
|{{ | |{{center|{{N}}}} | ||
|'' | |2000 | ||
|The final form of Void Termina, serving as the very last battle in Soul Melter EX of [[The Ultimate Choice]]. | |||
|Only available in Version 4.0.0+. | |||
|} | |||
====Boss Caption==== | |||
In addition, every boss in ''Star Allies'' has their own caption on the boss splash screen. | |||
{| class="wikitable mw-collapsible mw-collapsed" border=1 cellpadding=2 | |||
!colspan=6| ''Kirby Star Allies'' Boss Caption | |||
|- | |- | ||
!Boss | |||
!English Caption | |||
!Japanese Caption | |||
!Chinese Caption | |||
!Korean Caption | |||
!Meaning of Japanese/Chinese/Korean Caption | |||
|- | |- | ||
|[[ | |[[Whispy Woods]] | ||
|''' | |'''Guardian of the Forest''' | ||
|{{furi| | |{{furi|森|もり}}の{{furi|番人|ばんにん}}<br>(Romaji: ''mori no ban'nin'') | ||
|''' | |'''森林的守卫''' (Simplified)<br>'''森林的守衛''' (Traditional)<br>(Pinyin: ''sēn lín de shǒu wèi'') | ||
| | |'''숲의 파수꾼'''<br>(Romaja: ''sup-ui pasukkun'') | ||
|Guardian of the Forest | |||
|- | |- | ||
|[[ | |[[King Dedede]] | ||
|''' | |'''His Royal Nemesis''' | ||
|{{furi| | |{{furi|宿敵|しゅくてき}}の{{furi|暴君|ぼうくん}}<br>(Romaji: ''shukuteki no bōkun'') | ||
| | |'''宿敌之暴君''' (Simplified)<br>'''宿敵之暴君''' (Traditional)<br>(Pinyin: ''sù dí zhī bào jūn'') | ||
| | |'''천적 폭군'''<br>(Romaja: ''cheonjeog poggun'') | ||
|The Nemesis Tyrant | |||
|- | |- | ||
|[[ | |[[Meta Knight]] | ||
|''' | |'''The Lone Swordsman''' | ||
|{{furi| | |{{furi|孤高|ここう}}の{{furi|騎士|きし}}<br>(Romaji: ''kokō no kishi'') | ||
|''' | |'''孤高的骑士''' (Simplified)<br>'''孤高的騎士''' (Traditional)<br>(Pinyin: ''gū gāo de qí shì'') | ||
| | |'''고고한 기사'''<br>(Romaja: ''gogohan gisa'') | ||
|The Lone Knight | |||
|- | |- | ||
|[[ | |[[Pon & Con]] | ||
|''' | |'''Dual Defenders''' | ||
|{{furi| | |{{furi|阿吽|あうん}}の{{furi|護獣|ごじゅう}}<br>(Romaji: ''aun no gojū'') | ||
| | |'''守门兽''' (Simplified)<br>'''守門獸''' (Traditional)<br>(Pinyin: ''shǒu mén shòu'') | ||
| | |'''수비 복식조''' (Romaja: ''subi bogsigjo'') | ||
* | |Japanese: A-un Guardian Beasts | ||
*[[wikipedia:A-un|A-un]], derived from Sanskrit, is often used in Shinto and Buddhist architecture to describe the paired statues common in Japanese religious settings. | |||
Chinese: Gate Guardian Beasts<br>Korean: Defensive Doubles | |||
|- | |- | ||
|[[ | |[[Francisca]]<br>(first battle in [[Longview Corridor]]) | ||
|''' | |'''Frozen General''' | ||
|{{furi| | |{{furi|氷華|ひょうか}}の{{furi|三魔官|さんまかん}}<br>(Romaji: ''hyōka no sanmakan'') | ||
| | |'''冰晶三魔官'''<br>(Pinyin: ''bīng jīng sān mó guān'') | ||
| | |'''빙화의 사신'''<br>(Romaja: ''binghwaui sasin'') | ||
|Japanese/Chinese: Magic General of Ice Crystal<br>Korean: Glacial Envoy | |||
|- | |- | ||
|[[ | |[[Flamberge]]<br>(first battle in [[Inner Sanctum]]) | ||
|''' | |'''Blazing General''' | ||
|{{furi| | |{{furi|業火|ごうか}}の{{furi|三魔官|さんまかん}}<br>(Romaji: ''gōka no sanmakan'') | ||
| | |'''业火三魔官''' (Simplified)<br>'''業火三魔官''' (Traditional)<br>(Pinyin: ''yè huǒ sān mó guān'') | ||
| | |'''업화의 사자'''<br>(Romaja: ''eobhwaui sasin'') | ||
|Japanese/Chinese: Magic General of Inferno/Hellfire<br>Korean: Inferno/Hellfire Envoy | |||
|- | |- | ||
|[[ | |[[Zan Partizanne]]<br>(first battle in [[Heavenly Hall]]) | ||
|''' | |'''Lightning General''' | ||
|{{furi| | |{{furi|雷牙|らいが}}の{{furi|三魔官|さんまかん}}<br>(Romaji: ''raiga no sanmakan'') | ||
|''' | |'''雷牙三魔官'''<br>(Pinyin: ''léi yá sān mó guān'') | ||
| | |'''번개의 사신'''<br>(Romaja: ''beongaeui sasin'') | ||
|Japanese/Chinese: Magic General of Thunder Fang<br>Korean: Lightning Envoy | |||
|- | |- | ||
|[[ | |[[Yggy Woods]] | ||
|''' | |'''Old-Growth Elder''' | ||
|{{furi| | |{{furi|残桜|ざんおう}}の{{furi|古樹|こじゅ}}<br>(Romaji: ''zanō no koju'') | ||
| | |'''残樱的古树''' (Simplified)<br>'''殘櫻的古樹''' (Traditional)<br>(Pinyin: ''cán yīng de gǔ shù'') | ||
| | |'''전설의 고목'''<br>(Romaja: ''jeonseol-ui gomog'') | ||
|Japanese/Chinese: Ancient Woods of Fallen Cherry Blossoms<br>Korean: Legendary Old Tree | |||
|- | |- | ||
|[[ | |[[Goldon & Silvox]] | ||
|'''The | |'''The Metal Heavies''' | ||
|{{furi| | |{{furi|金閣|きんかく}}{{furi|銀閣|ぎんかく}}<br>(Romaji: ''kinkaku ginkaku'') | ||
| | |'''金角银角''' (Simplified)<br>'''金角銀角''' (Traditional)<br>(Pinyin: ''jīn jiǎo yín jiǎo'') | ||
| | |'''금은의 병사'''<br>(Romaja: ''geum-eun-ui byeongsa'') | ||
|Japanese/Chinese: [[wikipedia:List_of_Journey_to_the_West_characters#Golden_and_Silver_Horned_Kings_and_associates|Golden and Silver Horned Kings]] | |||
*They are the two fox demon kings from the Chinese novel ''[[wikipedia:Journey to the West|Journey to the West]]''. | |||
Korean: Soldiers of Gold and Silver | |||
|- | |- | ||
|[[ | |[[Grand Mam]] | ||
|''' | |'''Big Bad Mama''' | ||
|{{furi| | |{{furi|頑強|がんきょう}}なる{{furi|大母|だいぼ}}<br>(Romaji: ''gankyōnaru daibo'') | ||
| | |'''顽强的大母''' (Simplified)<br>'''頑強的大母''' (Traditional)<br>(Pinyin: ''wán qiáng de dà mǔ'') | ||
|'''완강한 대모'''<br>(Romaja: ''wanganghan daemo'') | |||
|Strong-willed Big Mama | |||
|- | |- | ||
|[[Francisca]]<br>(revenge battle in [[Blizzno Moon]]) | |||
|'''Bringer of Icy Doom''' | |||
|{{furi|災来|さいらい}}する{{furi|氷華|ひょうか}}<br>(Romaji: ''sairaisuru hyōka'') | |||
|'''灾厄再来的冰晶''' (Simplified)<br>'''災厄再來的冰晶''' (Traditional)<br>(Pinyin: ''zāi è zài lái de bīng jīng'') | |||
|'''다가오는 빙화'''<br>(Romaja: ''dagaoneun binghwa'') | |||
|Japanese/Chinese: Disaster Bringer of Ice Crystal Returns<br>Korean: Oncoming Glacier | |||
|- | |- | ||
|[[ | |[[Kracko]] | ||
| | |'''Cycloptic Stormcloud''' | ||
| | |{{furi|隻眼|せきがん}}の{{furi|雷雲|らいうん}}<br>(Romaji: ''sekigan no raiun'') | ||
| | |'''单眼的雷云'''<br>(Pinyin: ''dān yǎn de léi yún'') | ||
| | |'''외눈의 번개구름'''<br>(Romaja: ''oenun-ui beongaeguleum'') | ||
|Cycloptic Thundercloud | |||
|- | |- | ||
|[[ | |[[Twin Kracko]] | ||
| | |'''Dual Thunderheads''' | ||
| | |{{furi|乱舞|らんぶ}}する{{furi|双雲|そううん}}<br>(Romaji: ''ranbusuru sōun'') | ||
| | |'''乱舞双云''' (Simplified)<br>'''亂舞雙雲''' (Traditional)<br>(Pinyin: ''luàn wǔ shuāng yún'') | ||
| | |'''폭주하는 쌍둥이 구름'''<br>(Romaja: ''pogjuhaneun ssangdung-i guleum'') | ||
|Wildly Dancing Dual Clouds | |||
|- | |- | ||
|[[ | |[[Flamberge]]<br>(revenge battle in [[Sizzlai Moon]]) | ||
|'''Bringer of Flame''' | |||
| | |{{furi|災来|さいらい}}する{{furi|業火|ごうか}}<br>(Romaji: ''sairaisuru gōka'') | ||
| | |'''灾厄再来的业火''' (Simplified)<br>'''災厄再來的業火''' (Traditional)<br>(Pinyin: ''zāi è zài lái de yè huǒ'') | ||
| | |'''다가오는 엄화'''<br>(Romaja: ''dagaoneun eomhwa'') | ||
|Japanese/Chinese: Disaster Bringer of Inferno/Hellfire Returns<br>Korean: Oncoming Inferno/Hellfire | |||
|- | |- | ||
|[[ | |[[Zan Partizanne]]<br>(revenge battle in [[The Divine Terminus]]) | ||
|'''Bringer of Shock''' | |||
| | |{{furi|災来|さいらい}}する{{furi|雷牙|らいが}}<br>(Romaji: ''sairaisuru raiga'') | ||
| | |'''灾厄再来的雷牙''' (Simplified)<br>'''災厄再來的雷牙''' (Traditional)<br>(Pinyin: ''zāi è zài lái de léi yá'') | ||
| | |'''다가오는 번개'''<br>(Romaja: ''dagaoneun beongae'') | ||
|Japanese/Chinese: Disaster Bringer of Thunder Fang Returns<br>Korean: Oncoming Lightning | |||
|- | |- | ||
|[[ | |[[Hyness]] | ||
| | |'''Officiant of Doom''' | ||
| | |{{furi|魔神官|ましんかん}}<br>(Romaji: ''mashinkan'') | ||
| | |'''魔神官'''<br>(Pinyin: ''mó shén guān'') | ||
| | |'''파멸의 사제'''<br>(Romaja: ''pamyeol-ui saje'') | ||
|Japanese/Chinese: Officiant of Demon<br>Korean: Priest of Doom | |||
|- | |- | ||
|[[ | |[[Galacta Knight]] | ||
| | |'''Temporal Warrior''' | ||
| | |{{furi|時|とき}}{{furi|巡|めぐ}}る{{furi|戦士|せんし}}<br>(Romaji: ''toki meguru senshi'') | ||
| | |'''时空巡逻战士''' (Simplified)<br>'''時空巡邏戰士''' (Traditional)<br>(Pinyin: ''shí kōng xún luó zhàn shì'') | ||
|'''시간의 전사'''<br>(Romaa: ''sigan-ui jeonsa'') | |||
|Japanese: Time-Crossing Warrior<br>Chinese: Time-Space Patrol Warrior<br>Korean: Warrior of Time | |||
*The Japanese caption is taken from '''<u>時巡る</u>銀河最強の<u>戦士</u>''', the Japanese title of "[[The Greatest Warrior in the Galaxy]]" ''[[Kirby: Planet Robobot]]'' remix. | |||
|- | |- | ||
|[[ | |[[Morpho Knight]] | ||
| | |'''Reborn Butterfly''' | ||
| | |{{furi|黄泉返|よみがえ}}る{{furi|極蝶|ごくちょう}}<br>(Romaji: ''yomigaeru gokuchō'') | ||
| | |'''复活的极蝶''' (Simplified)<br>'''復活的極蝶''' (Traditional)<br>(Pinyin: ''fù huó de jí dié'') | ||
|'''환생한 나비'''<br>(Romaja: ''hwansaenghan nabi'') | |||
|Japanese/Chinese: Reborn Sukhavati Butterfly<br>Korean: Reincarnated Butterfly | |||
*黄泉返る is a Japanese idiom for 'reborn', with the literal meaning of 'returning from the underworld'. | |||
*[[wikipedia:Sukhavati|极乐/極樂 (Sukhavati, or the Western Paradise)]] refers to the western pure land of Amitābha in Mahayana Buddhism. | |||
|- | |- | ||
|[[ | |[[Void Termina]] | ||
| | |'''Destroyer of Worlds''' | ||
| | |{{furi|破神|はじん}}<br>(Romaji: ''hajin'') | ||
| | |'''破神'''<br>(Pinyin: ''pò shén'') | ||
| | |'''파괴의 신'''<br>(Romaja: ''pagoeui sin'') | ||
|God of Destruction | |||
|- | |- | ||
|[[ | |[[Void Soul]] | ||
| | |'''Essence of Chaos''' | ||
| | |{{furi|魂沌|こんとん}}<br>(Romaji: ''konton'') | ||
| | |'''魂沌'''<br>(Pinyin: ''hún dùn'') | ||
|'''혼돈의 영혼'''<br>(Romaja: ''hondon-ui yeonghon'') | |||
|Japanese/Chinese: Soul Chaos | |||
*a pun on 混沌/渾沌 (chaos) | |||
Korean: Soul of Chaos | |||
|- | |- | ||
|[[ | |[[Parallel Woods]] | ||
|[[ | |'''Otherworldly Arbor''' | ||
| | |{{furi|異界|いかい}}の{{furi|面樹|めんじゅ}}<br>(Romaji: ''ikai no menju'') | ||
| | |'''异界的人面树''' (Simplified)<br>'''異界的人面樹''' (Traditional)<br>(Pinyin: yì jiè de rén miàn shù) | ||
|'''이공간의 거목'''<br>(Romaja: ''igong-gan-ui geomog'') | |||
|Japanese/Chinese: Otherworldly Human-Face Tree | |||
*[[wikipedia:Jinmenju|Jinmenju]] (人面樹 human-face tree) is a strange tree in East Asian folklore. | |||
Korean: Other-Space Giant Tree | |||
|- | |||
|[[Parallel Twin Kracko]] | |||
|'''Unearthly Storm Front''' | |||
|{{furi|異空|いくう}}の{{furi|叢雲|そううん}}<br>(Romaji: ''ikū no sōun'') | |||
| | | | ||
|'''이공간의 재앙 구름'''<br>(Romaja: ''igong-gan-ui jaeang guleum'') | |||
|Japanese: Other-Sky Gathering Clouds<br>Korean: Other-Space Diastrous Clouds | |||
|- | |- | ||
|[[ | |[[Parallel Big Kracko]] | ||
| | |'''Unearthly Thunderhead''' | ||
| | |{{furi|異空|いくう}}の{{furi|大乱雲|だいらんうん}}<br>(Romaji: ''ikū no dainanun'') | ||
| | |'''异空间的大乱云''' (Simplified)<br>'''異空間的大亂雲''' (Traditional)<br>(Pinyin: yì kōng jiān de dà luàn yún) | ||
|'''이공간의 공포 구름'''<br>(Romaja: ''igong-gan-ui gongpo guleum'') | |||
|Japanese/Chinese: Other-Sky Great Wild Cloud | |||
*大乱雲 is similar to 大乱闘スマッシュブラザーズ ("Great Fray Smash Bros."), the Japanese name of the [[Super Smash Bros. (series)|''Super Smash Bros.'' series]]. | |||
Korean: Other-Space Horror Cloud | |||
|- | |- | ||
|[[ | |[[Parallel Meta Knight]] | ||
| | |'''Otherworldly Frost Blade''' | ||
| | |{{furi|異界|いかい}}の{{furi|霜刃|そうじん}}<br>(Romaji: ''ikai no soujin'') | ||
| | |||
| | | | ||
|'''이공간의 예리한 칼날'''<br>(Romaja: ''igong-gan-ui yelihan kalnal'') | |||
|Japanese: Otherworldly Sharp Blade<br>Korean: Other-Space Sharp Blade | |||
*In Chinese literature, 霜刃 (lit. "frost blade") refers to a sharp blade. | |||
|- | |- | ||
|[[ | |[[Parallel Dedede]] | ||
| | |'''Otherworldly Dark Liege''' | ||
| | |{{furi|異界|いかい}}の{{furi|暗君|あんくん}}<br>(Romaji: ''ikai no ankun'') | ||
| | |||
| | | | ||
|'''이공간의 혼군'''<br>(Romaja: ''igong-gan-ui hongun'') | |||
|Japanese: Otherworldly Dark Liege | |||
*暗君 has two meanings: dark ruler (lit.); foolish/incapable ruler. | |||
Korean: Other-Space Liege | |||
|- | |- | ||
|[[ | |[[Hyness|Corrupt Hyness]] | ||
| | |'''Fell Officiant''' | ||
| | |{{furi|堕神官|だしんかん}}<br>(Romaji: ''Da shinkan'') | ||
| | |||
| | | | ||
|'''타락한 사제'''<br>(Romaja: ''talaghan saje'') | |||
|Japanese: Fell Officiant<br>Korean: Fallen Priest | |||
*The reading for 堕 used (だ) is also used in 堕落 (corruption). | |||
|- | |- | ||
|[[ | |[[The Three Mage-Sisters]] | ||
|[[ | |'''Repentant Retaliators''' | ||
| | |{{furi|復仇|ふっきゅう}}する{{furi|懺党|ざんとう}}<br>(Romaji: ''fukkūsuru zantō'') | ||
| | |'''复仇的忏党''' (Simplified)<br>'''復仇的懺黨''' (Traditional)<br>(Pinyin: ''fù chóu de chán dǎng'') | ||
|'''참회한 보복자'''<br>(Romaja: ''chamhoehan bobogja'') | |||
|Japanese: Repentant Retaliators | |||
*{{furi|懺党|ざんとう}} could be a pun on {{furi|残党|ざんとう}} (the vanquished). | |||
Korean: Pentient Avengers | |||
|- | |||
|[[Morpho Knight|Morpho Knight EX]] | |||
|'''Dark-Winged Disaster''' | |||
|{{furi|災来|さいらい}}する{{furi|黒|くろ}}き{{furi|極蝶|こくちょう}}<br>(Romaji: ''sairaisuru kurokikyokuchō'') | |||
| | | | ||
|'''다가오는 검은 나비'''<br>(Romaja: ''dagaoneun geom-eun nabi'') | |||
|Japanese: Disaster Bringer Black Butterfly Returns<br>Korean: Oncoming Black Butterfly | |||
|- | |- | ||
|[[ | |[[Void Termina]] (battle in Soul Melter EX) | ||
|'''The True Destroyer of Worlds''' | |||
|{{furi|真|しん}}{{furi|破神|はじん}}<br>(Romaji: ''shin hajin'') | |||
| | |||
| | |||
| | |||
| | |||
| | |||
| | | | ||
|'''진정한 파괴의 신'''<br>(Romaja: ''jinjeonghan pagoeui sin'') | |||
|True God of Destruction | |||
|- | |- | ||
|[[ | |[[Void]] | ||
| | |'''Astral Birth''' | ||
| | |{{furi|星誕|せいたん}}<br>(Romaji: ''seitan'') | ||
| | |||
| | | | ||
|'''별의 탄생'''<br>(Romaja: ''byeol-ui tansaeng'') | |||
|Star Birth | |||
|} | |||
===''Super Kirby Clash''=== | |||
The following table lists every unique enemy in ''Super Kirby Clash''. Note that the number of encounters includes those where the boss is partnered with others and also include battles with a powered-up version ("EX" and "Revenge") of the same boss. | |||
{| class="wikitable mw-collapsible" border=1 cellpadding=2 | |||
!colspan=5|Bosses in ''Super Kirby Clash'' | |||
|- | |- | ||
!Boss | |||
!Image | |||
!#number of encounters | |||
!Description | |||
!Notes | |||
|- | |- | ||
|[[ | |[[Blocky]] | ||
|[[File:SKC | |[[File:SKC Blocky.jpg|150px]] | ||
| | |6 | ||
|A | |A squared-off rock monster who attacks by rolling, using body slams, and otherwise trying to crush Team Kirby using its girth. | ||
| | | | ||
|- | |- | ||
|[[ | |[[Bonkers]] | ||
|[[File:SKC | |[[File:SKC Bonkers.jpg|150px]] | ||
| | |3 | ||
| | |A mallet-wielding simian warrior who can perform flying hammer spins and toss [[Coconut]]s. | ||
| | | | ||
|- | |- | ||
|[[ | |[[Colossal Driblee]] | ||
|[[File:SKC | |[[File:SKC Colossal Driblee.jpg|150px]] | ||
| | |2 | ||
|A | |A massive [[Driblee]] who can spit globs of water and ride a big surf wave. | ||
| | | | ||
|- | |- | ||
|[[ | |[[Colossal Hot Head]] | ||
|[[File:SKC | |[[File:SKC Colossal Hot Head.jpg|150px]] | ||
| | |4 | ||
|A | |A massive [[Hot Head]] who can spew huge cones of flame and shoot fireballs. | ||
| | | | ||
|- | |- | ||
|[[ | |[[Colossal Kabu]] | ||
|[[File:SKC | |[[File:SKC Colossal Kabu.jpg|150px]] | ||
|6 | |6 | ||
|A | |A massive [[Kabu]] who spins around to attack and can phase in-and-out of sight to reappear elsewhere. | ||
| | |||
|- | |- | ||
|[[ | |[[Colossal Spear Waddle Dee]] | ||
|[[File:SKC | |[[File:SKC Colossal Spear Waddle Dee.jpg|150px]] | ||
| | |7 | ||
|A | |A huge [[Waddle Dee]] who carries a big spear. It can attack by leaping and thrusting or tossing its spear. | ||
| | |Replaces [[Colossal Waddle Dee]] from ''Team Kirby Clash Deluxe''. | ||
|- | |- | ||
|[[ | |[[Electric Dragon]] | ||
|[[File:SKC | |[[File:SKC Electric Dragon.jpg|150px]] | ||
| | |5 | ||
|A [[ | |A yellow variant of [[Ice Dragon]] who attacks using electricity. | ||
| | | | ||
|- | |- | ||
|[[ | |[[Flame Galboros]] | ||
|[[File:SKC | |[[File:SKC Flame Galboros.jpg|150px]] | ||
|5 | |5 | ||
| | |A big red limbless dragon which can breathe flames and spew magma. It can also charge with a burning tackle and make big leaps. | ||
| | | | ||
|- | |- | ||
|[[ | |[[Frost Kibble Blade]] | ||
|[[File:SKC | |[[File:SKC Frost Kibble Blade.jpg|150px]] | ||
|5 | |||
|An icy variant on [[Kibble Blade]] who creates lingering ice spikes wherever its blades strike the ground. | |||
| | |||
|- | |||
|[[Gigant Edge]] | |||
|[[File:SKC Gigant Edge.jpg|150px]] | |||
|3 | |3 | ||
|A | |A big soldier in green armor who wields a sword and shield. Gigant Edge uses varying sword swipes, can leap, and can create shockwaves at higher levels. | ||
| | | | ||
|- | |- | ||
|[[ | |[[Greater Doomer]] | ||
|[[File:SKC | |[[File:SKC Greater Doomer.jpg|150px]] | ||
| | |7 | ||
| | |An otherworldly purple specter with bird-like features. It attacks by charging, shooting purple orbs, and using a burning tackle. | ||
| | | | ||
|- | |- | ||
|[[ | |[[Hornhead]] | ||
|[[File:SKC | |[[File:SKC Hornhead screenshot.jpg|150px]] | ||
| | |7 | ||
|A | |A giant rhinoceros beetle-like foe who attacks by charging and using its horn. It can fly, grab a Kirby to toss him, and shoot projectiles from its horn at higher levels. | ||
| | | | ||
|- | |- | ||
|[[ | |[[Ice Dragon]] | ||
|[[File:SKC | |[[File:SKC Ice Dragon.jpg|150px]] | ||
| | |5 | ||
|A | |A deceptively-cuddly blue dragon who can breathe a cone of frost and cause icebergs to rain from the sky. It can flutter in the air using its tail. | ||
| | | | ||
|- | |- | ||
|[[ | |[[Ignite Edge]] | ||
|[[File:SKC | |[[File:SKC Ignite Edge.jpg|150px]] | ||
| | |5 | ||
|A fiery version of [[Gigant Edge]] who can cause burning conflagrations with his sword strikes. | |||
| | | | ||
|- | |- | ||
|[[Kibble Blade]] | |||
|[[File:SKC Kibble Blade.jpg|150px]] | |||
|3 | |||
|A large gleaming suit of silver armor which attacks by throwing giant boomerangs and charging. | |||
| | |||
|- | |- | ||
| | |[[King D-Mind]] | ||
| | |[[File:SKC King D-Mind.jpg|150px]] | ||
| | |3 | ||
|Referred to as the "King of Darkness", this powerful foe from another dimension resembles both [[Dark Mind]] and [[King Dedede]]. He attacks using a mechanical hammer (and later a big poleaxe), body slams, and leaps. He is also capable of creating energy waves and opening his belly to shoot nasty projectiles, fly around with a massive biting jaw, and shoot a huge laser. | |||
|Also includes King D-Mind's Revenge.<br>King D-Mind is fought only at the Decisive Battlefield. | |||
|- | |- | ||
| | |[[King Doo]] | ||
| | |[[File:SKC King Doo.jpg|150px]] | ||
| | |3 | ||
|A large variant of [[Waddle Doo]] who can fire varying types of big [[Beam]] attacks. | |||
| | |||
|- | |- | ||
| | |[[Kracko]] | ||
|[[File:SKC Kracko.jpg|150px]] | |||
|3 | |3 | ||
| | |A big spiky cycloptic cloud monster which can attack using swoops, beams, and lightning. | ||
| | |||
|- | |- | ||
|[[Landia]] | |||
| | |[[File:SKC Landia.jpg|150px]] | ||
| | |4 | ||
|A massive four-headed flying dragon referred to as the "Guardian Angel". He can charge, conjure wind, breathe fire, conduct electricity, and split into four smaller dragons. | |||
|Also includes Landia EX.<br>Landia is fought only at the Empyrean, while Landia EX is fought only at the Decisive Battlefield. | |||
|- | |- | ||
| | |[[Miasmoros]] | ||
| | |[[File:SKC Miasmoros.jpg|150px]] | ||
| | |5 | ||
| | |A toxic sludge creature who belches poison and leaves toxic trails in its wake. It is capable of charging and leaping as well. | ||
| | |||
|- | |||
|[[Mr. Frosty]] | |||
|[[File:SKC Mr Frosty screenshot.jpg|150px]] | |||
|4 | |||
|An overalls-wearing walrus man who can breathe frost, throw ice cubes, and gobble up a Kirby. He is also capable of deft acrobatics. | |||
| | |||
|- | |||
|[[Mr. Floaty]] | |||
|[[File:SKC Mr Floaty screenshot.jpg|150px]] | |||
|3 | |||
|A summer variant of [[Mr. Frosty]] who attacks using water. | |||
| | |||
|- | |||
|[[Parallel Landia]] | |||
|[[File:SKC Parallel Landia.jpg|150px]] | |||
|1 | |||
|A stronger black variant of [[Landia]] who hails from another dimension. | |||
| | |||
|- | |||
|[[Parallel Nightmare]] | |||
|[[File:SKC Parallel Nightmare.jpg|150px]] | |||
|6 | |||
|A mischievous robed wizard made of darkness. He attacks by swooping, firing starry projectiles, and conjuring vortexes. | |||
|Also includes Parallel Nightmare's Revenge. Parallel Nightmare is also seen (but not fought) in the Story Quest "Tougher: [[King D-Mind]]". | |||
|- | |||
|[[Parallel Susie]] | |||
|[[File:SKC Parallel Susie.jpg|150px]] | |||
|2 | |||
|A petite secretary from another dimension who pilots a giant robotic suit. She attacks using various explosive projectiles, can perform spinning dashes and jumps, and launches her suit to create big shockwaves. | |||
|Parallel Susie is fought only at the Decisive Battlefield. | |||
|- | |||
|[[Pres. Parallel Susie]] | |||
|[[File:SKC Pres Parallel Susie screenshot.jpg|150px]] | |||
|2 | |||
|A [[Susie]] from a yet different parallel dimension who is a more powerful version of Parallel Susie. | |||
|Pres. is short for "President". | |||
|- | |||
|[[Pyribbit]] | |||
|[[File:SKC Pyribbit.jpg|150px]] | |||
|4 | |||
|A giant king toad who can swim in lava. He attacks by breathing fire, spewing magma and rock, leaping about frantically, and calling lava waves. He may also try to eat a Kirby using his tongue. | |||
|Also includes Pyribbit EX. This enemy is only fought in the Volcano. | |||
|- | |||
|[[Spark Bonkers]] | |||
|[[File:SKC Spark Bonkers.jpg|150px]] | |||
|5 | |||
|An electric-blue variant of [[Bonkers]] who can create lingering electric discharges whenever he strikes with his hammer. | |||
| | |||
|- | |||
|[[Taranza]] | |||
|[[File:SKC Taranza.jpg|150px]] | |||
|3 | |||
|A caped hovering spider man referred to as the "puppeteer mage". He can teleport, conjure energy orbs, throw crystals, and catch Kirbys in a net. | |||
|Taranza is fought only in the Empyrean. | |||
|- | |||
|[[Telepathos]] | |||
|[[File:SKC Telepathos.jpg|150px]] | |||
|4 | |||
|A hovering psychic enigma who attacks using psionic blasts and by dive-bombing Team Kirby. | |||
| | |||
|- | |||
|[[Venom Kracko]] | |||
|[[File:SKC Venom Kracko.jpg|150px]] | |||
|4 | |||
|A noxious variant of [[Kracko]] who can leave putrid clouds of gas behind when he swoops around. | |||
| | |||
|- | |||
|[[Whispy Woods]] | |||
|[[File:SKC Whispy Woods.jpg|150px]] | |||
|3 | |||
|A big tree enemy who attacks by throwing [[apple]]s, [[Gordo]]s, and [[Caterpillar]]s at Team Kirby. Later on, he can also leap about, and potentially crush Kirbys under his roots. | |||
|Appears only in the Ruins. | |||
|- | |||
|[[Galacta Knight#Super Kirby Clash|Aeon Hero]] | |||
|[[File:SKC Aeon Hero.jpg|150px]] | |||
|4 | |||
|An ancient angelic swordsman who is also known as [[Galacta Knight]]. He has three different forms, and attacks using his lance and various powerful magical moves, many of which are capable of ripping open the fabric of space. | |||
|Also includes Aeon Hero (Light) and Aeon Hero (Dark). This is the final boss of the game. Aeon Hero is fought only at the Dreamscape. | |||
|} | |||
===''Kirby Fighters 2''=== | |||
There are a total of four distinct bosses in ''[[Kirby Fighters 2]]'''s [[Story Mode: The Destined Rivals]] (five if Waning Masked Dedede & Waxing Masked Meta Knight are counted as a distinct boss), and they are re-fought multiple times with each subsequent fight being tougher and featuring new moves. The bosses are as follows: | |||
{| class="wikitable mw-collapsible" border=1 cellpadding=2 | |||
!colspan=3|Bosses in '''Story Mode: The Destined Rivals''' | |||
|- | |||
!Boss(es) | |||
!Times fought | |||
!Notes | |||
|- | |||
|{{center|[[File:KF2_TwinWoods_SplashScreen.jpg|300px]]<br>[[Twin Woods]]}} | |||
|4 | |||
|They are the first boss of Story Mode (fought as the final boss of Chapter 1), and are fought a few times in subsequent chapters. They share some of [[Whispy Woods]]' attacks from ''[[Kirby Star Allies]]'', and are able to move around independently from each other. | |||
|- | |||
|{{center|[[File:KF2 Duo Edge splash screen.jpg|300px]]<br>[[Duo Edge]]}} | |||
|4 | |||
|Consists of [[Gigant Edge]] and [[Ignite Edge]], who fight together on [[The Empyrean]]. Their moves are retained from ''[[Super Kirby Clash]]''. | |||
|- | |||
|{{center|[[File:KF2_ShadowKirby_StorySplash.jpg|300px]]<br>[[Shadow Kirby]]}} | |||
|3 | |||
|In the second Story Mode battle, Shadow Kirby uses a [[Copy Ability]] that corresponds to the selected buddy, and both the first and third battle has him mimicking the same selected ability as the player. His battle music changes on Very Hard of [[Single-Handed Mode]] and both battles in the Final Chapter of [[Story Mode: The Destined Rivals]]. | |||
|- | |||
|{{center|[[File:KF2_DDDMK_Ch3_SplashScreen.jpg|300px]]<br>[[File:KF2_DDDMK_Ch4_SplashScreen.jpg|300px]]<br>[[King Dedede & Meta Knight]]}} | |||
|3 (technically 4) | |||
|This dual boss battle features [[King Dedede]] & [[Meta Knight]], using combinations of their attacks to try and defeat [[Kirby]] and his buddy. They are fought as the final bosses of Chapter 2 (who are actually disguised Waddle Dees) and subsequent chapters. | |||
|- | |||
|{{center|[[File:KF2_MoonWarriors_SplashScreen.jpg|300px]]<br>[[Waning Crescent Masked Dedede & Waxing Crescent Masked Meta Knight|Waning Crescent Masked Dedede <br>& Waxing Crescent Masked Meta Knight]]}} | |||
|1 | |||
|In their eagerness to finally defeat Kirby and his buddy, King Dedede & Meta Knight don the Mask of Dark Bonds to become a more powerful duo and finally overwhelm their rivals. This boss fight can be considered the true final boss of the game, if not counted as a second phase of the final fight. | |||
|} | |||
===''Kirby and the Forgotten Land''=== | |||
{| class="wikitable mw-collapsible" border=1 cellpadding=2 | |||
!colspan=5|Bosses in ''Kirby and the Forgotten Land'' | |||
|- | |||
!'''Boss''' | |||
!Location(s) | |||
!Description | |||
!HP values | |||
!Notes | |||
|- | |||
!colspan=5|Main game | |||
|- | |||
|{{center|[[File:KatFL Gorimondo boss title screenshot.jpg|250px]]<br>'''<small>Strong-Armed Beast</small><br>[[Gorimondo]]'''}} | |||
|[[The Brawl at the Mall]]<br>[[Gathering of the Beast Council]]<br>Meta Knight Cup<br>The Ultimate Cup | |||
|A giant gorilla-like entity part of the [[Beast Pack]]'s high council who first appears as the boss of [[Natural Plains]], making him the first boss Kirby faces in the game. He primarily uses physical attacks, such as swinging his large hands and stomping, and sometimes pulls large rocks out of the ground to throw. | |||
|1,000 (The Brawl at the Mall)<br>600 (Gathering of the Beast Council)<br>700 ([[Colosseum]]) | |||
| | |||
|- | |||
|{{center|[[File:KatFL Tropic Woods splash screen.png|250px]]<br>'''<small>Unfriendly Fronds</small><br>[[Tropic Woods]]'''}} | |||
|[[The Tropical Terror]]<br>Meta Knight Cup<br>The Ultimate Cup | |||
|A large tropical spin-off of the Whispy Woods family, resembling both a palm tree and a pineapple who first appears as the boss of [[Everbay Coast]]. It primarily uses its large roots and explosive coconuts to attack. | |||
|1,350 (The Tropical Terror)<br>945 (Colosseum) | |||
|Tropic Woods is the only main game boss to not be refought in [[Redgar Forbidden Lands]]. | |||
|- | |||
|{{center|[[File:KatFL Clawroline Boss Title Screenshot.jpg|250px]]<br>'''<small>Lethal Leopard</small><br>[[Clawroline]]'''}} | |||
|[[Danger under the Big Top]]<br>[[Gathering of the Beast Council]]<br>Meta Knight Cup<br>The Ultimate Cup | |||
|An agile anthropomorphic leopard entity who is a part of the Beast Pack's high council and is of a relatively normal size compared to other bosses in the series. She first appears as the boss of [[Wondaria Remains]], and primarily attacks with her greatly extending claws, throwing knives, and pounces/dashes. | |||
|1,000 (Danger under the Big Top)<br>600 (Gathering of the Beast Council)<br>700 (Colosseum) | |||
| | |||
|- | |||
|{{center|[[File:KatFL King Dedede Splash Screen.jpg|250px]]<br>'''<small>His Royal Nemesis</small><br>[[King Dedede]]'''}} | |||
|[[An Unexpected Beast King]]<br>The Ultimate Cup | |||
|The royal rival of Kirby who joins the Beast Pack and first appears as the boss of [[Winter Horns]] after being possessed, now with disheveled clothing and war paint. He primarily attacks with his hammer, large pillars, and attempts to slam/dash. | |||
|1,600 (An Unexpected Beast King)<br>1,120 (The Ultimate Cup) | |||
| | |||
|- | |||
|{{center|[[File:KatFL Sillydillo Boss Title Screenshot.jpg|250px]]<br>'''<small>Armor-Plated Prancer</small><br>[[Sillydillo]]'''}} | |||
|[[Collector in the Sleepless Valley]]<br>[[Gathering of the Beast Council]]<br>The Ultimate Cup | |||
|A large armadillo with cartoonish features who is a part of the Beast Pack's high council and first appears as the boss of [[Originull Wasteland]]. It primarily attacks by rolling, shaking Kirby up in a cage if it catches him, and spinning around with a puppet partner. | |||
|1,800 (Collector of the Sleepless Valley)<br>684 (Gathering of the Beast Council)<br>1,260 (The Ultimate Cup) | |||
| | |||
|- | |||
|{{center|[[File:KatFL Forgo Dedede Splash Screen.jpg|250px]]<br>'''<small>His Primal Nemesis</small><br>[[Forgo Dedede]]'''}} | |||
|[[In the Presence of the King]]<br>The Ultimate Cup | |||
|The return of King Dedede who first appears as the boss of [[Redgar Forbidden Lands]], now more strongly possessed, making him more versatile and powerful with a large hog mask and two hammers. He primarily uses more dangerous versions of several of his attacks from his original battle, in addition to throwing his hammers and pounding the ground to cause bouts of small flames. | |||
|1,700 (800+900) (In the Presence of the King)<br>1,190 (560+630) (The Ultimate Cup) | |||
| | |||
|- | |||
|{{center|[[File:KatFL Leongar Splash Screen.jpg|250px]]<br>'''<small>King of the Beasts</small><br>[[Leongar]]'''}} | |||
|[[Lab Discovera]]<br>The Ultimate Cup | |||
|A large possessed lion entity who is the leader over the Beast Pack and first appears as the first boss faced in [[Lab Discovera]]. He attacks primarily with claw strikes and pounces similar to that of Clawroline's, in addition to chomping, spewing a large beam out of his mouth, striking the air to send out crisscrossed beams, and slamming the ground to create shockwaves with his fists. | |||
|1,800 (Lab Discovera)<br>1,260 (The Ultimate Cup) | |||
| | |||
|- | |||
|{{center|[[File:KatFL Fecto Forgo Splash Screen.jpg|250px]]<br>'''<small>Invasive Species</small><br>[[Fecto Forgo]]'''}} | |||
|[[Lab Discovera]]<br>The Ultimate Cup | |||
|An amalgamation of Leongar and many other members of the Beast Pack faced as the second boss in [[Lab Discovera]], brought together after the "ID-F86" specimen is released from its confinement. It chases Kirby down a long pathway, attacking by reaching out its head of Leongar to chomp and throwing out globs of itself. | |||
|1,600 (Lab Discovera)<br>1,120 (The Ultimate Cup) | |||
|Fecto Forgo is unique compared to the rest of the bosses in the game, as it is fought in a long chase sequence instead of an open arena. | |||
|- | |||
|{{center|[[File:KatFL Fecto Elfilis Splash Screen.jpg|250px]]<br>'''<small>Ultimate Life-Form</small><br>[[Fecto Elfilis]]'''}} | |||
|[[Lab Discovera]]<br>The Ultimate Cup | |||
|The angelic complete form of "ID-F86", first faced as the final boss of the main game in [[Lab Discovera]] after having absorbed [[Elfilin]]. It attacks primarily with its mystically imbued polearm, making many aerial strikes with its ability to fly, in addition to creating homing projectiles, and tearing into other dimensions to bring in more dangerous hazards. It can also heal itself. | |||
|2,500 (Lab Discovera)<br>1,750 (The Ultimate Cup) | |||
| | |||
|- | |||
!colspan=5|Isolated Isles: Forgo Dreams (Extra Mode) | |||
|- | |||
|{{center|[[File:KatFL Phantom Gorimondo Splash Screen.jpg|250px]]<br>'''<small>Strong-Armed Illusion</small><br>[[Phantom Gorimondo]]'''}} | |||
|[[Forgo Plains]]<br>The Ultimate Cup Z | |||
|A neon doppelgänger of Gorimondo who first appears as the boss of [[Forgo Plains]]. It is much stronger and harder to avoid, having every attack from the original battle fleshed out, such as throwing rocks which now home in, and swinging its hands in quicker succession. | |||
|1,800 (Forgo Plains)<br>1,260 (The Ultimate Cup Z) | |||
| | |||
|- | |||
|{{center|[[File:KatFL Phantom Tropic Woods Splash Screen.jpg|250px]]<br>'''<small>Illusory Fronds</small><br>[[Phantom Tropic Woods]]'''}} | |||
|[[Forgo Bay]]<br>The Ultimate Cup Z | |||
|A neon doppelgänger of Tropic Woods who first appears as the boss of [[Forgo Bay]]. It is much stronger and harder to avoid, having every attack from the original battle fleshed out, such as dropping down much larger coconuts and [[Gordo]]s, and forcing a maze out of the ground which Kirby has to navigate through in order to deal damage. | |||
|2,000 (Forgo Bay)<br>1,400 (The Ultimate Cup Z) | |||
| | |||
|- | |||
|{{center|[[File:KatFL Phantom Clawroline Splash Screen.jpg|250px]]<br>'''<small>Illusory Leopard</small><br>[[Phantom Clawroline]]'''}} | |||
|[[Forgo Park]]<br>The Ultimate Cup Z | |||
|A neon doppelgänger of Clawroline who first appears as the boss of [[Forgo Park]]. She is much stronger and harder to avoid, having every attack from the original battle fleshed out, such as throwing knives more frequently, and creating three duplicates of herself who attempt to pounce on Kirby with her. | |||
|1,600 (Forgo Park)<br>1,120 (The Ultimate Cup Z) | |||
| | |||
|- | |||
|{{center|[[File:KatFL Phantom King Dedede Splash Screen.jpg|250px]]<br>'''<small>His Illusory Nemesis</small><br>[[Phantom King Dedede]]'''}} | |||
|[[Forgo Horns]]<br>The Ultimate Cup Z | |||
|A neon doppelgänger of King Dedede who first appears as the boss of [[Forgo Horns]]. It is much stronger and harder to avoid, having every attack from the original battle fleshed out, such as attacking with its hammer and a pillar much quicker, and rolling [[Gordo Bar]]s across the arena while attacking with an aforementioned pillar. | |||
|1,700 (Forgo Horns)<br>1,190 (The Ultimate Cup Z) | |||
| | |||
|- | |||
|{{center|[[File:KatFL Phantom Sillydillo Splash Screen.jpg|250px]]<br>'''<small>Armor-Plated Illusion</small><br>[[Phantom Sillydillo]]'''}} | |||
|[[Forgo Wasteland]]<br>The Ultimate Cup Z | |||
|A neon doppelgänger of Sillydillo who first appears as the boss of [[Forgo Wasteland]]. It is much stronger and harder to avoid, having every attack from the original battle fleshed out, such as sometimes throwing out a set of bombs instead of swinging a cage, and making a sandstorm appear. | |||
|1,900 (Forgo Wasteland)<br>1,330 (The Ultimate Cup Z) | |||
| | |||
|- | |||
|{{center|[[File:KatFL Phantom Forgo Dedede Splash Screen.jpg|250px]]<br>'''<small>Illusory Primal Nemesis</small><br>[[Phantom Forgo Dedede]]'''}} | |||
|[[Forgo Zone]]<br>The Ultimate Cup Z | |||
|A neon doppelgänger of Forgo Dedede who first appears as the boss of [[Forgo Zone]]. It is much stronger and harder to avoid, having every attack from the original battle fleshed out, such as rocking the arena around to sink it into the surrounding lava, sometimes especially by raining down large meteors. | |||
|2,040 (960+1,080) (Forgo Zone)<br>1,360 (640+720) (The Ultimate Cup Z) | |||
| | |||
|- | |||
|{{center|[[File:KatFL Forgo Leon Splash Screen.jpg|250px]]<br>'''<small>Possessed Beast</small><br>[[Leongar|Forgo Leon]]'''}} | |||
|[[Forgo Land]]<br>The Ultimate Cup Z | |||
|The return of Leongar who first appears as the first boss of [[Forgo Land]], now fully possessed after having his soul fragments returned to him, making him more versatile and powerful by having every attack from the original battle fleshed out, such as raining meteors when spewing a beam, and striking beams out much faster and in new variants. In addition, he is now assisted with attacking by [[Fecto Forgo#Psychic Beast: Soul Forgo|Soul Forgo]]. | |||
|3,400 (1,400+2,000) (Forgo Land)<br>2,380 (980+1,400) (The Ultimate Cup Z) | |||
| | |||
|- | |||
|{{center|[[File:KatFL Morpho Knight Splash Screen.jpg|250px]]<br>'''<small>Fluttering Dream Eater</small><br>[[Morpho Knight]]'''}} | |||
|[[Forgo Land]]<br>The Ultimate Cup Z | |||
|The sword-wielding caster of judgment who first appears as the final boss of [[Forgo Land]] and Forgo Dreams overall after absorbing [[Fecto Forgo|Soul Forgo]]. It primarily attacks similarly to that of [[Meta Knight]], but is much quicker and can teleport. In addition, it can send variants of flames across the arena, cast out homing soul forms of "ID-F86", use soundwaves to distort Kirby's perspective, and use two much larger forms of its sword. | |||
|2,000 (Forgo Land)<br>1,500 (The Ultimate Cup Z) | |||
| | |||
|- | |||
!colspan=5|Colosseum | |||
|- | |||
|{{center|[[File:KatFL Meta Knight splash screen.png|250px]]<br>'''<small>The Lone Swordsman</small><br>[[Meta Knight]]'''}} | |||
|Meta Knight Cup<br>The Ultimate Cup | |||
|The caped swordsman who solely appears as a boss in the [[Colosseum]]. He primarily attacks by using [[Galaxia]] and the variety of sword beams and small fire bouts created by it, in addition to raising large rocks out of the ground to rain onto Kirby, and attempting to catch the puffball in his [[Upper Calibur]]. | |||
|1,000 | |||
| | |||
|- | |||
|{{center|[[File:KatFL Phantom Meta Knight Splash Screen.jpg|250px]]<br>'''<small>The Lone Illusion</small><br>[[Phantom Meta Knight]]'''}} | |||
|The Ultimate Cup Z | |||
|A neon doppelgänger of Meta Knight who solely appears as a boss in the [[Colosseum]]. It is much stronger and harder to avoid, having every attack from the original battle fleshed out, such as striking out sword beams much more often, and making a duplicate of itself when attempting to catch Kirby in its [[Upper Calibur]]. | |||
|1,000 | |||
| | |||
|- | |||
|{{center|[[File:KatFL Chaos Elfilis splash screen.png|250px]]<br>'''<small>Species Born of Chaos</small><br>[[Chaos Elfilis]]'''}} | |||
|The Ultimate Cup Z | |||
|The ultimate divine entity of chaos, who absorbed the souls of the native beasts and the "ethereal butterfly" for one last shot at revenge. In addition to being much stronger than Fecto Elfilis and harder to avoid, having every attack from the original battle fleshed out, it has several new attacks, such as surrounding Kirby with angelic blades, creating large tornadoes and beams, making use of more dimensional rifts, and forming a colossal version of itself which swings at Kirby with its polearm. | |||
Once this entity is defeated, the true spherical entity is removed from the physical body and faced. It attacks primarily by creating a black hole, quickly firing beams and globs of itself, and increasing its size to slam down and create shockwaves, in addition to using [[Deadly Sun|Deadly Sun Grazer]], [[Bound Pound|Impact Pound]], and [[Shooter Cutter|Blazar Cutter]]. | |||
|3,400 (phase 1)<br>3,000 (phase 2) | |||
| | |||
|} | |||
==Profiles== | |||
===''Kirby's Dream Land 2''=== | |||
*'''3DS Virtual Console manual bio (shared with mid-bosses):''' "''Minibosses appear midway through certain stages. Main bosses appear in the last stage of each island. When a miniboss or boss appears, its life meter is displayed in place of your score. To defeat a boss, reduce its life meter to zero.''" | |||
==Trivia== | |||
*[[Kracko]] and [[Whispy Woods]] are tied as the most frequently appearing bosses in the series, with both having made numerous appearances as Bosses proper, or simply as cameos. | |||
**Despite this, the first main-series title to feature neither of them is ''[[Kirby and the Forgotten Land]]'', though a [[Tropic Woods|relative]] of Whispy Woods does appear in that game. | |||
*In ''[[Kirby Super Star]]'' and its remake, ''[[Kirby Super Star Ultra]]'', if two players are in play before the boss [[stamina|health]] bar appears, the boss will have their health increased by 30%. This can be prevented by summoning the [[Helper]] after the boss health bar appears. | |||
*A Miiverse post regarding ''[[Kirby: Triple Deluxe]]'' revealed that bosses fought repeatedly gradually lose their maximum health and become slower and weaker. As such, each time Kirby fails to defeat the boss and tries again, the boss becomes slightly easier. This is meant to give relief to players struggling with the fights.<ref>[https://kirbydevpostarchive.tumblr.com/post/164948734591/hal-laboratory-%E3%82%A4%E3%82%B7%E3%83%80-hallaboratory-07252014-919 Miiverse post about bosses (archive)]</ref> This mechanic has been present in all subsequent main-series ''Kirby'' games, as well as the spin-offs ''[[Kirby Fighters Deluxe]]'' and ''[[Kirby Fighters 2]]''. It does not apply to battles in [[Boss Endurance]] modes, however. | |||
*From ''[[Kirby's Return to Dream Land]]'' onward, main series bosses (and [[mid-boss]]es) have a variable defense multipler. The defense of bosses usually increases in the following scenarios: | |||
**At the beginning of the battle when their health bar is filling up. | |||
**When their phase is shifting. | |||
**When they are performing certain attacks. | |||
**When there is more than one player in the battle (in ''Kirby's Return to Dream Land'' and ''Kirby Star Allies''), the players receive a decreased attack multiplier rather than bosses having an increased health or defense multiplier. | |||
==Names in other languages== | |||
{{names | |||
|ja=ボス | |||
|jaR=bosu | |||
|jaM=Boss | |||
|pt=Chefão | |||
|ptM=Big boss | |||
|fr=Boss | |||
|frM=- | |||
|zhTrad=魔王 | |||
|zhTradR=Mówáng | |||
|zhSimp=魔王<br>''Mówáng''<br>魔头 | |||
|zhSimpR=Mótóu | |||
|zhM=Boss (lit. "Demon King")<br>Monster | |||
|ko=보스 | |||
|koR=boseu | |||
|koM=Boss | |||
|nl=Eindbaas | |||
|nlM=Endboss | |||
|it=Boss | |||
|itM=- | |||
|de=Boss | |||
|deM=- | |||
|es=Jefe | |||
|esM=Boss | |||
}} | |||
{{ref}} | {{ref}} | ||
{{clear}} | |||
{{Navbox-Game Design}} | |||
[[Category:Bosses|*]] | [[Category:Bosses|*]] | ||
[[Category:Lists]] | [[Category:Lists]] | ||
Revision as of 01:50, 2 May 2024
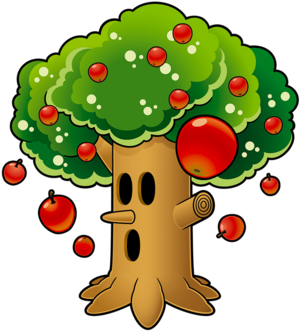
A boss is a distinguished enemy that is typically faced at the end of a level, and is usually very strong in comparison to others. Bosses come in many shapes and sizes, but they all have the following things in common:
- They are fought in a distinctive area, which cannot be left until the boss is defeated or Kirby loses the fight (in some cases, even a life loss won't let Kirby escape).
- They typically take many hits to defeat, and their health bar is usually displayed to the player during the fight.
- They cannot be inhaled by Kirby (with only one exception), but can be harmed in other ways.
- In most cases, they have attacks which will either drop debris that Kirby can spit back at them, or cause Dropped Stars to appear where they attack.
- Generally, defeating them either completes the particular stage or level they are featured in, or completes the game if they are a final boss. There are exceptions where a boss is followed by another boss or does not complete the stage, most notably boss rush stages such as Gathering of the Beast Council.
- Bosses typically have many different attacks they use in a random or not-so-random pattern. Some bosses enter different attack phases after losing enough health.
- With some bosses, there are two or more phases to go through. These are completed in succession and are somewhat more difficult than most bosses. Final bosses such as Flowered Sectonia, Star Dream, and Void Termina are examples of this.
- There is typically a special sound effect which plays when a boss is defeated. This sound is distinct from the Mid-Boss version.
Enemies that possess some, but not all of these traits are usually considered Mid-Bosses, and are usually not as powerful and often re-used multiple times throughout the games.
Game appearances
Boss fights have been a staple of the Kirby series since the very first game, and have appeared in nearly every subsequent entry. Below are lists of every single major boss under their respective games, in order of appearance, as well as any other pertinent notes:
Kirby's Dream Land
| Name | Appearance | Location | Points | Health | Description |
|---|---|---|---|---|---|
| Whispy Woods | Green Greens | 10000 | 6 | This large tree does not move, but blows Air Bullets at Kirby as well as dropping Apples from his canopy, which are worth 400 points and can be spat back at him. Unlike in most later games featuring the boss, getting close to Whispy does not harm Kirby.
In the Extra Game, Whispy Woods drops Gordos in addition to apples, which bounce along the ground until moving off the screen. | |
| Lololo & Lalala | Castle Lololo | 16500 | 3 each | Lololo & Lalala appear from one of the four doors at each side of the boss room, pushing boxes, which are worth 400 points, across one of the four ledges and disappearing into the door at the opposite side. To defeat them, Kirby must inhale their boxes and spit them back. Each of the two can be defeated separately. If one is defeated while pushing a box, the box will still move as if the boss was still there.
The duo walks faster in the Extra Game, and may push Gordos. | |
| Kaboola | Float Islands | 20000 | 40 (displayed as 8) | Using the Mint Leaf, Kirby has to fight this blimp while flying through the sky. She attacks Kirby from the right side of the screen by launching cannonballs from the cannon attached to her, alternating between firing a single one, three consecutively or three at the same time, two of which fly diagonally. She may also charge forward in an attempt to ram Kirby.
She moves faster and shoots more rapidly in the Extra Game. | |
| Kracko | Bubbly Clouds | 25000 | 6 | An adult form of Kracko Jr., this spiky cloud floats through the room or swoops at Kirby, stopping at the sides of the area to fire beams all around itself and create Waddle Doos. The latter have to be inhaled and spat back at it to beat it.
Its attack pattern changes drastically in the Extra Game; here, it can either charge along the ground, fire beams from the center of the screen or move along the top, dropping bombs that are worth 20 points and can be spat back. | |
| King Dedede | Mt. Dedede | 100000 | 10 | As the game's final boss, King Dedede possesses a wider range of attacks than the bosses fought prior to him. He may attempt to pounce on Kirby, hit him with his hammer or inhale him, spitting him out again to cause damage. He is also able to jump into the air, harming Kirby if he lands on him. Both his jumping and hammer attacks generate stars, which Kirby has to use as ammunition to defeat him. When Kirby is above him, Dedede is furthermore able to jump straight into the air and swing his hammer; this attack does not make any stars appear.
In the Extra Game, he moves faster, as well as jumping further and more often. |
Kirby's Dream Land was also the first game to introduce the idea of an Extra Game, wherein the bosses were made harder in certain respects, among other changes.
Kirby's Adventure / Kirby: Nightmare in Dream Land
| Name | Appearance | Location | Copy Abilities | Description |
|---|---|---|---|---|
| Whispy Woods | 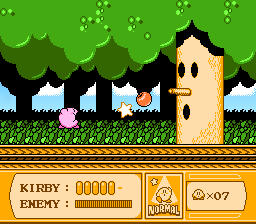 Kirby's Adventure 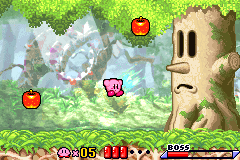 Kirby: Nightmare in Dream Land |
Vegetable Valley - Stage 5 | None | Whispy fights in a similar manner to his appearance in Kirby's Dream Land, doing nothing but dropping Apples and shooting Air Bullets from his mouth. |
| Paint Roller | 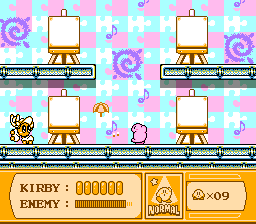 Kirby's Adventure 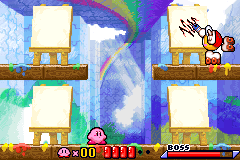 Kirby: Nightmare in Dream Land |
Ice Cream Island - Stage 6 | Ball, Crash, Mike, Parasol, Spark, Wheel (various implements) | A small ball-shaped creature with stick arms and legs, wearing a hat and roller blades, and carrying a crayon. He rolls around the arena, drawing things on one of four canvases which then come to life and attack Kirby. These can be swallowed for various Copy Abilities or spat back. |
| Mr. Shine & Mr. Bright | 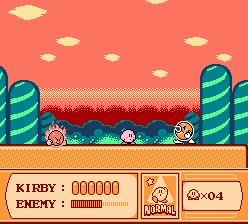 Kirby's Adventure 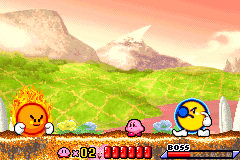 Kirby: Nightmare in Dream Land |
Butter Building - Stage 7 | Cutter, Fire (Dropped Stars) | Anthropomorphized versions of the sun and moon who attack in tag-team format. Kirby has to deal with one on the ground while the other hangs in the air, dodging and parrying both of their attacks. Defeating one of them will force that one to remain in the sky until the other is also defeated. |
| Kracko | 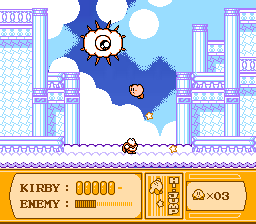 Kirby's Adventure 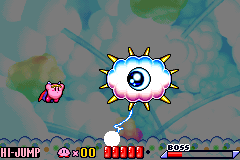 Kirby: Nightmare in Dream Land |
Grape Garden - Stage 7 | Hi-Jump (from Starmen summoned) | This cloudy eyeball begins the fight by chasing Kirby in its Junior form, then transforms into its regular form at the top of a series of cloud layers. It fights by shooting out beams from its eye, swooping around the stage, and shooting lighting below itself. It also sometimes drops Starmen, which can be spat back at it or swallowed for the Hi-Jump ability. |
| Heavy Mole | 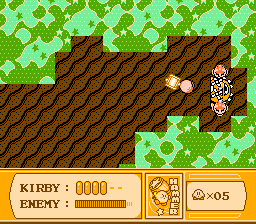 Kirby's Adventure 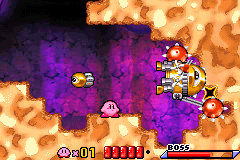 Kirby: Nightmare in Dream Land |
Yogurt Yard - Stage 7 | Hammer (yellow missiles), Sleep (red missiles) | A large machine with two digging arms that continuously digs a tunnel to the right. Kirby has to chase it while the boss shoots out missiles of two varieties from behind. |
| Meta Knight | 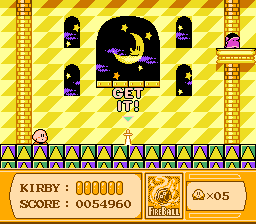 Kirby's Adventure 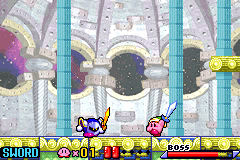 Kirby: Nightmare in Dream Land |
Orange Ocean - Stage 7 | Sword (required) | The first appearance of the masked swordsman. He tosses Kirby a sword, and will not fight until Kirby picks it up. From there, the two engage in a sword duel, where Meta Knight reacts to Kirby's movements, and attacks using several different sword techniques. When defeated, his mask breaks, and he flees the scene. |
| King Dedede | 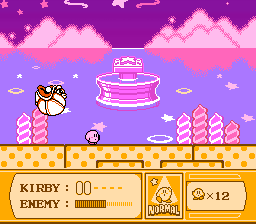 Kirby's Adventure 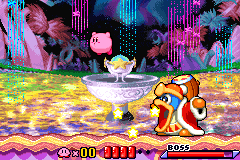 Kirby: Nightmare in Dream Land |
Rainbow Resort - Stage 7 | None | King Dedede fights in a similar manner to his appearance in Kirby's Dream Land, though he has some new moves, including the ability to puff up and chase Kirby through the air. Older moves include his hammer swings, his Super Dedede Jump, and his inhale attack. |
| Nightmare | 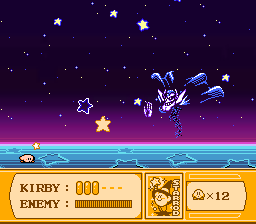 Kirby's Adventure 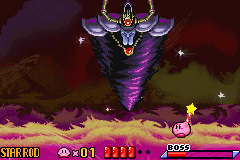 Kirby: Nightmare in Dream Land |
The Fountain of Dreams | Star Rod | Kirby fights this menace in two phases using the Star Rod. The first is a chase through the sky as Kirby fires at the Nightmare Power Orb. However, both Kirby and the Nightmare Power Orb are falling from the sky in this phase, so the player doesn't have much time to defeat the Nightmare Power Orb. If Kirby takes too long, The Nightmare Power Orb will fly away and Kirby will hit the ground hard and lose a life. After that, the battle changes location to a large moon, where Kirby battles Nightmare in his wizard form. To damage Nightmare in this form, Kirby must hit his torso underneath the cloak. Defeating this boss completes the game. |
This game was the first in the series to feature a Boss Endurance mode, which pitted Kirby against all the bosses in order on one Health bar and one life.
Kirby's Pinball Land
Kirby's Pinball Land contains four bosses. The first three are found at the end of their respective 'lands', and the final boss is faced after the first three are defeated:
| Boss | Location | KP |
|---|---|---|
 Whispy Woods |
Wispy-Woods Land | 8 |
 Kracko |
Kracko Land | 8 (4 for each phase) |
 Poppy Bros. Sr. |
Poppy Brothers' Land | 6 (3 for each phase) |
 King Dedede |
King Dedede's board | 23 (5 for the first phase; 18 for the second phase) |
Once King Dedede is defeated, the game repeats.
Kirby's Dream Course
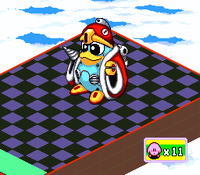
- Main article: Robo Dedede
In Kirby's Dream Course, there is but a single boss fight which takes place in a special course dedicated to it at the very end of the game. This fight takes place against Robo Dedede - a large robot built to resemble King Dedede and who has him as its pilot - who battles Kirby by shooting out smaller clockwork Dedede robots and inching towards Kirby, defeating him if it gets to Kirby's starting point. Kirby can defeat Robo Dedede by launching into it, dealing additional damage when hitting the head using aerial shots.
In the Extra Game, Robo Dedede has more HP, but otherwise acts the same.
Kirby's Avalanche
Every opponent faced in Kirby's Avalanche is technically referred to as a "boss" in the game's manual, though since there are no other types of enemies to speak of, this term is not useful as a distinguisher.
Kirby's Dream Land 2
| Name | Appearance | Level | Health | Points | Description |
|---|---|---|---|---|---|
| Whispy Woods | Grass Land | 60 | 10000 | A staple boss of the Kirby series, this large tree is stationary and drops apples on Kirby, which are worth 100 points and can be inhaled and spat back, as well as attacking with his spiky roots. He initially wears a surgical mask and swirly glasses, but a few hits cause them to fall off, enabling him to blow air at Kirby in addition to his other abilities.
His Bonus Chance has him spitting small stars and apples at Kirby. | |
| Nruff and Nelly | Big Forest | 60 | 15000 | Nruff, a large boar with spiky fur, and several Nellys, smaller boars worth 200 points each, continuously appear from both sides of the screen during the battle, running and jumping across the room's ledges. Kirby can only cause permanent damage to the boss by attacking Nruff, either by inhaling the Nellys for ammunition or using a Copy Ability.
This boss's bonus chance consists of Nellys and small stars appearing from the sides of the screen and moving along the ledges; Nruff does not appear during it. | |
| Sweet Stuff | Ripple Field | 60 | 20000 | This large anglerfish is fought in a scrolling underwater area and either charges at Kirby or fires lasers at him. To harm it, Kirby either has to blow bubbles at it or launch the starfish and Squishys it can summon back at it, either by hitting them with his water gun or inhaling them and spitting them out using Kine. Every object knocked back at the fish awards Kirby with an additional 100 points.
Sweet Stuff is absent from its bonus chance, which instead requires Kirby to dodge Gordos in the water while collecting small stars. | |
| Ice Dragon | Iceberg | 60 | 25000 | A large dragon that uses its tail to propel itself forward and into the air. Ice Dragon attempts to freeze Kirby with its breath, kicks icy spikes at him, or slams onto the ground to make Icicles, which yield 100 points, fall down.
Ice Dragon does not appear in its bonus chance, which requires Kirby to dodge the Icicles falling from above while catching small stars. | |
| Mr. Shine & Mr. Bright | Red Canyon | 40 | 30000 | An anthropomorphic sun and moon that take turns fighting Kirby, with one of them being on the ground and vulnerable and the other floating in the sky, invincible. When Mr. Shine, the moon, is on the ground, he rolls around and throws cutter boomerangs while Mr. Bright sends down beams from above, which generate Dropped Stars. When Mr. Bright is on the ground, he attacks Kirby with fire or by charging at Kirby while Mr. Bright causes stars to fall down, which can likewise be inhaled. Sometimes, the two combine to cause an eclipse, automatically harming Kirby unless he moves into a particular, dark area before the attack finishes.
During their bonus chance, Mr. Shine bounces around while Mr. Bright, floating at the top, sends dangerous bullets as well as small stars downwards. | |
| Kracko | Cloudy Park | 40 (1st form) 80 (2nd form) |
10000 (1st form) 30000 (2nd form) |
Kracko begins the fight as not much more than an eyeball, resembling Kracko Jr.. During this phase, it alternates between moving inside the cloud platform at the bottom, from where it can fire beams, and flying through the air while four small orbs circle around it, trying to bump into Kirby and eventually sending its spheres at him. Every time it moves into or out of the cloud, a Co-Kracko emerges, which yields 100 points and can be inhaled and spat back. Once this form is defeated, Kracko refills its life meter and assumes its usual form of a one-eyed cloud surrounded by spikes. In this second phase of the battle, it flies through the air, firing beams in various directions as well as releasing more Co-Krackos.
Its bonus chance involves Co-Krackos and small stars popping out of the cloud at the bottom. | |
| King Dedede | Dark Castle | 120 | 100000 | King Dedede the penguin is the last boss Kirby can fight without collecting the Rainbow Drops. Like in other games, he attacks Kirby with his hammer, as well as by performing large jumps and trying to land on him. Both of these attacks generate stars that Kirby can inhale and spit back at him. He also attempts to inhale Kirby, spitting him out again and causing damage if he is successful. At some points during the battle, he briefly falls asleep. Multiple consecutive hits dealt to him cause him to get angry, making his attacks faster and more powerful, often causing harmful explosions. Defeating him without possessing the Rainbow Drops triggers the game's bad ending.
King Dedede has no bonus chance; he can be refought at any time. | |
| Dark Matter (1st phase) | Dark Castle | 120 | 50000 | When Kirby defeats King Dedede after collecting all of the Rainbow Drops, he receives the Rainbow Sword and has to face Dark Matter in the sky. In his first form, Dark Matter wears a cloak and mask and wields a sword. He floats up and down at one side of the screen, occasionally slashing with his sword or firing beams from it, as well as dashing towards the other side of the screen. He is also able to concentrate dark energy at the tip of his sword, firing it at Kirby in the form of a sphere. Kirby can knock this sphere back at him with the Rainbow Sword for 200 extra points, which causes a significantly higher amount of damage than simply slashing at the boss. At some points during the battle, Dark Matter switches from one side of the screen to the other. | |
| Dark Matter (2nd phase) | Dark Castle | 120 | 200000 | After his initial form is defeated, Dark Matter shows his true form, a black sphere with a singular eye surrounded by small orbs. He flies around very quickly, attacking mainly by launching the orbs surrounding him at Kirby, which can be knocked back at him for 400 points and a large amount of damage, as well as firing dark energy projectiles all around him. Furthermore, he is able to cause long bolts of black lightning to appear from his eye, which travel very fast, as well as charging at Kirby. Defeating him triggers the real ending of the game. But be warned, since Kirby fought Dark Matter's first phase in space, the second phase has both Kirby and Dark Matter falling from the sky, so the player doesn't have much time to defeat Dark Matter in this phase. Should Kirby take too long to defeat Dark Matter, Kirby will burn up in Popstar's atmosphere. |
Kirby's Block Ball
Each stage features a distinct boss at the end. They are as follows:
| Bosses in Kirby's Block Ball | ||||
|---|---|---|---|---|
| Boss | Stage | HP | Description | Notes |
| Stage 1 | 12 | A simple opponent who hops back and forth horizontally. When down to half health, it loses its cap and conjures four smaller Cappies to defend itself. | The name of this boss is conjectural. | |
| Stage 2 | 12 | A larger version of Squishy that can catch Kirby and toss him away on occasion. | The name of this boss is conjectural. | |
| Stage 3 | 12 | A larger version of Kabu that sits still and shoots out smaller Kabus at Kirby and the paddles. | ||
| Stage 4 | 12 | A bomb-throwing foe who hops between three different positions. | ||
| Stage 5 | 6 each | Projectile-tossing celestial objects that must be defeated one after the other. | ||
| Stage 6 | 12 | An overalls-wearing walrus who takes cover behind icy barriers and rolls around horizontally. He can also catch Kirby and toss him away on occasion. | ||
| Stage 7 | 4 (Jr.) 8 (Kracko) |
A cycloptic storm cloud that can shoot lightning and swoop in figure-8 patterns. He transforms into his mature form after four hits and only takes damage when hit in the eye. | ||
| Stage 8 | 12 | A big stationary tree who shoots Air Bullets and drops Gordos from his canopy. His large size makes him an easy target for Kirby. | ||
| Stage 9 | 12 | A blimp enemy who fires at the paddles using her cannons while moving around the arena in a figure-8 pattern. | ||
| Stage 10 | 12 | A small circular creature with disembodied hands who occupies a robot suit. It jumps between three platforms and shoots its hands out as bombs toward the paddles. | This is the last boss fight if the player has not met the Border Line Score on all the stages up to this point. | |
| Stage 11 | 24 | Kirby's arch-frenemy who attacks using bombs, flying around the arena and occasionally eating Kirby to spit him back out again, and later on with a rocket launcher. | Completing this fight triggers the end credits. | |
Kirby Super Star / Kirby Super Star Ultra
(Acronyms: SB=Spring Breeze, DB=Dyna Blade, TGCO=The Great Cave Offensive, RoMK=Revenge of Meta Knight, MWW=Milky Way Wishes, TA=The Arena, RotK=Revenge of the King, HtH=Helper to Hero, MNU=Meta Knightmare Ultra, TTA=The True Arena. RotK, HtH, MNU, and TTA are only available in Kirby Super Star Ultra.)
| Name | Appearance | Copy Abilities | Description | SB | DB | TGCO | RoMK | MWW | TA | RotK | HtH | MNU | TTA |
|---|---|---|---|---|---|---|---|---|---|---|---|---|---|
| Whispy Woods | None | A true icon of the Kirby series that attacks simply by puffing small air pellets or dropping apples. | |||||||||||
| Lololo & Lalala | None | The pink-and-blue duo from the Eggerland series returns as a boss. They cannot attack themselves, and instead come out of one of six doors to push a box, which can be inhaled to be used as ammo. Sometimes Gordo comes out of a door. Each of them has separate health. | |||||||||||
| Kracko | Beam | A cloud with one eye. He attacks by firing lightning towards the ground near Kirby, swinging two beams of lightning around him, swooping across the stage, and creating Waddle Doos. He is the penultimate boss of Spring Breeze. | |||||||||||
| King Dedede | None | The king of Dream Land fights mainly with his hammer, but also will try to inhale, body-slam, or jump on Kirby. In Revenge of the King, he is fought in his more powerful form Masked Dedede. | |||||||||||
| Dyna Blade | None | The giant bird known as Dyna Blade can grab Kirby or his helper in her talons, shoot fireballs, and fly around the stage. | |||||||||||
| Fatty Whale | Stone | Fatty Whale jumps and floats across the stage in an attempt to hit Kirby, and can make a waterfall come out of his blowhole, making rocks (which give Stone ability) and Blippers fall down. | |||||||||||
| Computer Virus | Various | This unique boss makes Kirby battle three enemies in an RPG-like (turn-based) battle. When it is the enemy's turn to attack, it sits in a box invincible. When it is Kirby's turn, the enemy falls to the ground and is helpless against his attacks. In The Great Cave Offensive, Kirby fights a Slime, Puppet, and Wizard. In later battles, he fights a Wizard, an Evil Knight, and a Great Dragon. During battle, Copy Essences can appear on the sides of the screen for Kirby to pick up. | |||||||||||
| Chameleo Arm | Paint | A chameleon who can eat Kirby, grab onto walls with its long arms, turn invisible, and shoot orbs from its mouth that can be eaten to get the Paint ability. It is one of the few bosses to give the paint ability, the others being Heavy Lobster and Marx Soul. He is also the only boss in The Great Cave Offensive that is optional. | |||||||||||
| Wham Bam Rock | Stone | Wham Bam Rock's appearance changed drastically from Kirby Super Star. He still has pounding, slapping, and grabbing attacks, but looks more like a rock and less cartoon-like. In Helper to Hero, he is fought right before Wham Bam Jewel in the final round. | |||||||||||
| Twin Woods | None | Two Whispy Woods that face each other. They both blow air, and can drop Apples, Capillers, and Gordos together. They can also, strangely, trade parts of themselves with each other. Each of them must be defeated separately. | |||||||||||
| Main Cannon #2 | Bomb | A large cannon which can be found on the Halberd. It has three parts; a large cannon that aims and fires cannonballs, a robotic arm that can drop bombs or grab Kirby, and a laser gun near the bottom that can cover the whole floor with a dangerous beam of light. The robotic arm can be temporarily destroyed; the laser gun takes a while, but can be destroyed, and the only one that has actual health is the cannon itself. Helpers often attack the laser gun, which makes the battle easier once destroyed. | |||||||||||
| Heavy Lobster | Paint | A metal crustacean that shoots flames, mini-lobsters, and paint blobs from its claws, as well as being able to walk, run and dash. | |||||||||||
| Reactor | None | The main reactor of the Halberd that is nearly invincible. The only thing that can hurt it is to make one of its lasers reflect back its main crystal, as Sailor Waddle Dee mentions before the fight. It attacks with flames from the ground and a small cannon that doesn't target Kirby. Like Main Cannon #2's laser gun, this cannon can be destroyed, but it doesn't hurt the reactor. | |||||||||||
| Meta Knight | Sword | In the beginning of battle, Meta Knight sits on a platform with his cape over his face. After Kirby grabs the sword given to him, or takes too long to do so, Meta Knight jumps down and starts attacking with various sword and tornado attacks. After his defeat, his mask breaks and he escapes from the room. In Revenge of Meta Knight, he chases Kirby off of the Halberd. In Meta Knightmare Ultra, Meta Knight is a movable protagonist, and plays similar to a combination of Sword Kirby and Wing Kirby. | |||||||||||
| Galactic Nova Nucleus | Starship | The heart of Nova, which Kirby must destroy to disable the giant comet. The fight consists of a flight through a looping circular arena, and Kirby must shoot down all the pieces inside the columns, while avoiding colliding with them. It is the penultimate boss of Milky Way Wishes. | |||||||||||
| Marx | Cutter, Ice | The demon Marx is the final boss of the original, but now Marx Soul is fought at the end of the game. He attacks with many bizarre attacks, such as shooting a white laser out of his mouth, splitting in two to create a black hole, and teleporting to random spots on-screen. | |||||||||||
| Whispy's Revenge | None | Whispy Woods sporting purple leaves and dropping Gordos and large bugs, as well as blowing tornadoes instead of just puffs of air. | |||||||||||
| Lololo & Lalala's Revenge | None | These two are now purple and orange, and their room has eight doors. Gordo appears more often, and the two move faster. | |||||||||||
| Kracko's Revenge | Beam | A stronger (and more intimidating) version of Kracko. He shares lightning and swooping attacks with his weaker cousin, and can also create Waddle Doos, but his attacks have a wider range. He can also fly towards the center of the screen and shoot large bolts in all 8 directions. | |||||||||||
| Kabula | Starship | King Dedede's blimp that is fought while in Kirby's Starship. She fires Gordos, cannonballs, and Bullet Bill-like projectiles, as well as barrel-rolling towards Kirby. | |||||||||||
| Masked Dedede | Hammer | King Dedede wearing a mask and using his "new Dedede Hammer", which is mechanical. His attacks have a larger range, and he has some new attacks regarding his powerful hammer, such as spinning around and targeting Kirby for a period of time or shooting missles and flames from the front of his hammer. He provides Kirby with a hammer of his own at the start of the fight. | |||||||||||
| Wham Bam Jewel | Stone, Bomb | The "Wham Bam King" with three eyes, a crown, and diamond hands. He attacks like Wham Bam Rock, punching and slapping with his hands, as well as shooting bullets from his hands and dropping bombs, which look like his face. | |||||||||||
| Galacta Knight | Sword | This legendary warrior attacks in a similar manner to Meta Knight, creating tornadoes, beams, and more with the power of his lance and shield. He can also do unique moves, such as creating flames from the ground or calling in Meta-Knights of his very own. He is the final boss of the game Meta Knightmare Ultra and the penultimate boss of The True Arena. | |||||||||||
| Marx Soul | Cutter, Ice, Paint | The final boss who appears only in the True Arena. He is Marx's soul after absorbing the power of Nova. He has a much creepier demeanor, especially his laugh, and his attacks are even more strange, such as splitting into two large blobs of paint that move across the screen. Marx Soul provides the paint ability, although it has no special effect on him other than making him lose some health. After defeating him, he lets out a bloodcurdling screech. |
Kirby Super Star was the first game to introduce The Arena, which pitted Kirby against all the bosses and mid-bosses of the game in a (mostly) random order with minimal supplies.
Likewise, Kirby Super Star Ultra was the first game in the series to feature The True Arena, which is a lot like The Arena, but with tougher bosses and less-potent healing items available.
Kirby's Dream Land 3
| Name | Appearance | Description | |
|---|---|---|---|
| Whispy | 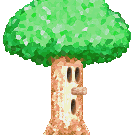
|
Whispy is a sentient tree and the possessed boss of Grass Land. He attacks by exhaling air pellets and spitting vegetables, and has a pointy nose that can damage Kirby. The vegetables he spits out can be inhaled and used as projectiles. After having his life meter depleted, Whispy begins to move around angrily, spitting more food at Kirby. If Kirby moves too close to him, he will kick him away like a ball. | |
| Acro | Acro is an orca that lives at Ripple Field and was possessed by Dark Matter. Kirby fights this boss in two phases: A phase on dry land and an underwater phase. On land, Acro tries to attack Kirby by ramming him. When it crashes into a wall, Kirby can use the debris to attack Acro. In the second phase, Acro swims around while spitting various objects at Kirby. Kirby can throw these objects back at Acro with his water gun, or another ability. | ||
| Pon Con | Pon the racoon and Con the fox are two animals of Sand Canyon that got corrupted by Dark Matter. They are later known as Pon & Con in Kirby Star Allies. They walk around the stage in colonies, accompanied by many smaller members of their species. Kirby can inhale the smaller animals and spit them back at the duo. While the fight commences, bombs steadily drop from the top of the screen. The bombs need to be avoided, or they will cause Kirby damage. Notably, the Blaster Bullet only deals 32 damage to Pon & Con. | ||
| Ado | Ado is a young artist who was in Cloudy Park when Dark Matter attacked. The artist attacks by painting enemies on a great easel and making them come to life. Kirby then needs to defeat the paintings before he can take on Ado. Four of these paintings need to be defeated, all of which are bosses from Kirby's Dream Land 2. | ||
| Ice Dragon | A painted version of Ice Dragon. It attacks by using its breath to move around rapidly and by spitting out ice cubes. The ice cubes can be inhaled and launched back at the beast to defeat it. | ||
| Sweet Stuff | A painting of Sweet Stuff. It attacks by firing lightning orbs at Kirby. Sometimes it releases a star-shaped object that can be inhaled and spat back at the boss, which will damage it. | ||
| Mr. Shine and Mr. Bright | Mr. Shine, the moon, and Mr. Bright, the sun, two bosses painted by Ado. During the fight, Mr. Bright constantly drops fireballs which can be used as projectiles to defeat the duo. | ||
| Kracko | A painting of a cloud creature, drawn by Ado. It attacks by shooting lightning bolts at Kirby. Sometimes it drops a smaller version of itself, called Co-Kracko. The Co-Krackos can be used to defeat this boss. | ||
| King Dedede | Kirby's arch-rival who got possessed by Dark Matter. He is fought at the end of Iceberg and attacks in two phases: A battle on the ground and a battle in the air. When on the ground, he tries to smack Kirby with his hammer or flatten him by jumping on him. Some of his attacks leave stars behind that can be inhaled and spat out to damage Dedede. During the air battle that follows, King Dedede hovers in the air and attacks by transforming his stomach into a maw or by shooting dark orbs from an eye in his belly. The dark orbs can be used to damage him. | ||
| Dark Matter | A manifestation of Dark Matter and the penultimate boss of the game that must be defeated before Kirby can take on the final boss. It appears like a black orb of dark energy with several orange spheres encircling its back. It attacks by sending out the orange spheres located at its back and by shooting energy beams at Kirby, similar to its second phase in Kirby's Dream Land 2. | ||
| Zero | 
|
The master of Dark Matter and final boss of the game. Zero looks like a giant white sphere with a single glaring red eye. Its eye can be seen before the boss fight on several occasions, for example during the introduction cutscene. It attacks by tackling Kirby, creating small manifestations of Dark Matter as projectiles and by squirting blood. If Kirby manages to deplete its life points, its eye will burst out of the body and try to attack Kirby on its own. To defeat Zero, Kirby must destroy the eye. | |
Kirby 64: The Crystal Shards
| Name | Appearance | Level | Copy Abilities | Description |
|---|---|---|---|---|
| Whispy Woods | 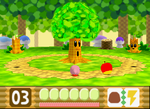
|
Pop Star | None | This fight with Whispy takes place on a looping circular stage, with the old tree occupying the middle. Kirby must first defeat his three children, called Whispy Woods Jr., by using the parent tree's Apples to hit them with. Once all three are gone, Whispy becomes furious, and attacks Kirby by shooting out his roots, and tossing out a lot of apples. Kirby must hit the roots to defeat the tree. |
| Pix | 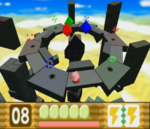
|
Rock Star | None | The first phase of this fight has Kirby dodging the attacks of each Pix crystal as the platform rises into the sky. At the top, Kirby can attack Pix by spitting out constructs of similar color at the crystals to destroy them. |
| Acro | 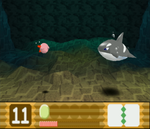
|
Aqua Star | Cutter (Fishbone), Bomb (Torpedoes) | This fight takes place entirely underwater, as Kirby has to inhale and return objects that Acro spits at him, while avoiding the killer whale's gymnastics. The fight takes place in two separate phases, with a separate Health bar for each one. |
| Magman | 
|
Neo Star | Burning (Magoo, Burnis) | Magman is a giant Sandman, though made of magma. It fights in two phases, first with extending tendrils, then with its full body. It can cause tremors, breathe fire, and spit out smaller foes for Kirby to contend with. |
| HR-H and HR-E | 
|
Shiver Star | Bomb (missiles) | A giant robot that can shift form between a humanoid and a lobster shape. It attacks by shooting missiles and attacking with its arms. |
| Miracle Matter | 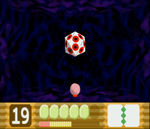
|
Ripple Star | All base abilities | A polygonal foe with eyes on all of its facets. It continually shifts forms, based on each of the base Copy Abilities that Kirby can use in the game. To defeat it, Kirby has to attack it with the matching ability or spit out an element that appears during the attack to disable that form. Unless all the Crystal Shards were collected, this is the last boss. |
| 0² | 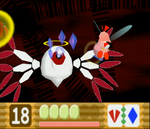
|
Dark Star | Ribbon's Crystal | A reincarnated version of Zero that Kirby and Ribbon must team up to defeat. They have to continually shoot crystals into its eye to stun it, then hit the halo to flip it, and attack the green underside to defeat it. Defeating this boss completes the game. |
Kirby Tilt 'n' Tumble
In Kirby Tilt 'n' Tumble, there are only three bosses, though the first two are faced numerous times with variations in each fight. Further variations in the boss fights are present when playing the Extra Game:
| Bosses in Kirby Tilt 'n' Tumble | |||
|---|---|---|---|
| Boss | Level(s) | HP | Description |
| Level 1, Level 2, Level 4, Level 5, Level 7 | 3 | A big spherical enemy with a single eye on top that serves as its weak point. There are four different varieties of Orbservor - distinguished by color - which attack in different patterns. | |
| Level 3, Level 6 | 6 | A cycloptic cloud enemy who attacks by filling the arena with Gordos while shooting Co-Krackos and lightning at Kirby. He can be attacked using Air Bullets after picking up the Balloon. | |
| Level 8 | 10 | Kirby's arch-rival and the thief who stole Dream Land's stars. He attacks by swinging his hammer, throwing it like a boomerang, and trying to charge at Kirby. Kirby can attack him by blasting at him with a Cannon while his guard is down. | |
Kirby & The Amazing Mirror
| Name | Appearance | Location | HP (1 player)[1] | Description |
|---|---|---|---|---|
| King Golem | Moonlight Mansion | 60 | In a similar manner to Whispy Woods, this giant stone column remains in one place while dropping rocks and Gordos on Kirby, the former of which can be inhaled and spat back at it. It is also capable of releasing Golems of different colors from its mouth, which may be used for the same purpose. | |
| Moley | Cabbage Cavern | 80 | A large, gray mole that randomly pops out of one of six holes in the cave it is fought in, tossing various objects at Kirby. Many of these can be inhaled and used to defeat the boss. | |
| Kracko | Mustard Mountain | 60 | One of the most fought bosses in the Kirby series, this one-eyed cloud creature employs similar tactics as in other games it appears in, flying across the arena and attacking with beams and rain. It also creates Waddle Doos and Flamers, which can be used as ammunition or swallowed for the Beam or Burning ability, respectively. | |
| Mega Titan | Carrot Castle | 40 (Mega Titan) 20 (Titan Head) |
This large robot boss flies around, launching its four fists at Kirby. To defeat it, Kirby has to use the Beam or Spark ability or push it into the electricity at the sides of the room by using a Copy Ability or the stars generated by its attacks. Once its body is destroyed, its head remains, floating around while firing missiles, which can be inhaled and spat back. | |
| Gobbler | Olive Ocean | 60 | A blue shark in a lifebuoy that resides in water, charging at Kirby or releasing smaller sharks, which may be inhaled and spat back. Alternatively, squirting at the boss while underwater likewise damages it. If Kirby leaves the water, Gobbler attacks him by leaping out of it. | |
| Wiz | Peppermint Palace | 80 | This cloaked magician is fought in a similar manner as Paint Roller in Kirby's Adventure. It flies across the room, stopping in one of its corners, and conjures up different objects or enemies, which Kirby can inhale and spit back at the boss. | |
| ??? | Radish Ruins | 60 | This masked swordsman appears to be Meta Knight, but is actually Dark Meta Knight in disguise. He attacks by using various sword fighting techniques, a few of which create stars that may be spat back. Unlike Kirby's fights with Meta Knight in other games, the Sword ability is not provided in this battle. | |
| Master Hand & Crazy Hand | Candy Constellation | 60 (Master Hand) 40 (Crazy Hand) |
For this boss battle, the Master Hand Mid-Boss teams up with Crazy Hand from the Super Smash Bros. series, who looks identical to himself. In addition to each of them being able to use the Mid-Boss's abilities, the two gloves may cooperate to perform a clapping attack. Each of the bosses has to be defeated seperately, either by using a Copy Abilitiy or spitting the stars generated by some of their attacks back at them. | |
| Dark Meta Knight | Dimension Mirror | 48 | Dark Meta Knight returns for a rematch, now unmasked by the real Meta Knight. His attacks are similar to those he uses in the original battle with him, but he attacks more quickly and is able to use new, more powerful abilities, such as creating a tornado that throws Kirby into the air and damages him. He can be defeated by using either a Copy Ability or the stars generated by a few of his attacks. | |
| Dark Mind (phase 1) | Dimension Mirror | 32 (first battle) 40 (second and third battles) 56 (fourth battle) |
The first phase of Dark Mind, a large, cloaked figure with a helmet, has to be fought four times in consecution in slightly different arenas, with a short breather segment and the possiblity of acquiring a Maxim Tomato between each battle. He attacks by teleporting around the room and performing a wide repertoire of attacks, most of which involve launching stars at Kirby in different formations, exposing his weak core in the process. To harm him, Kirby has to use the Master ability, which is provided at the beginning of the battle, to attack his core, avoiding the two mirror circling around him. If Kirby loses the ability, he may alternatively inhale Dark Mind's star projectiles and fire them back at him. | |
| Dark Mind (phase 2) | Dimension Mirror | 96 | Dark Mind's second form resembles a giant ball of fire with a singular eye. He normally floats at the top of the screen, though he occasionally charges across the ground. Many of his attacks involve mirrors, which he causes to fly around the screen, damaging Kirby if he touches them, or to reflect laser beams he shoots. He may also fire a large, powerful beam at Kirby, or flip the entire stage upside-down. In addition, Dark Mind continuously summons various kinds of enemies, including Waddle Doos, Boxins, Sir Kibbles and Laser Balls, which can be used as ammunition or swallowed for their ability, should Kirby lose the Master ability. | |
| Dark Mind (phase 3) | Dimension Mirror | 250 | The final form of Dark Mind (and the final boss of the game) resembles its second form, but is considerably smaller. It is fought in a similar manner as Nightmare's first form in Kirby's Adventure. Kirby, riding on a Warp Star, has to fire stars at Dark Mind, who flies left and right near the top of the screen and is likewise able to shoot stars in various patterns, as well as charge at Kirby. Even after the boss is defeated, Kirby may continue fighting him while the credits roll, though it is not possible to lose the battle any more at that point. A score is kept for every hit Dark Mind takes, and when the credits end, an extra 30 points is earned. |
Kirby: Canvas Curse
Kirby: Canvas Curse only features two traditional bosses (those being Drawcia and Drawcia Soul), faced at the very end of the main game. There are technically four more bosses (Kracko Jr., Kracko, Paint Roller, and King Dedede) who are faced along the way in scenarios called Boss Games. These games (Block Attack, Paint Panic, and Cart Run) have different gameplay, so they are more akin to Sub-Games.
Kirby: Squeak Squad
| Name | Appearance | Location | Description |
|---|---|---|---|
| King Dedede | Prism Plains | King Dedede is the first boss Kirby has to fight. Unlike the next bosses, King Dedede flinches from each hit, stopping his actions. King Dedede can jump and fly, attempting to run into Kirby. He can also use his hammer to hit Kirby as well. Like in the previous games, King Dedede sports the ability to inhale and spit out Kirby. | |
| Mrs. Moley | Nature Notch | Mrs. Moley is a large, gray mole, wife to Moley, the other large gray mole. She sports similar attacks to Moley, such as throwing objects at Kirby. However, there are two holes where she emerges. She can also appear in the background. Once she is in the background, after some time, the glasses in her eyes may shine, and then she makes a big leap. A big shadow appears under Kirby, and Kirby has to dodge Mrs. Moley's body. If her body touches the hard ground, she is stunned for a while. If her body touches one of the two dirt patches, she digs in and resumes her attacks. | |
| Mecha-Kracko | Cushy Cloud | This boss fights very similarly to Kracko. Like Kracko, it can move around to hit Kirby or disperse enemies for Kirby to use as an ability or a projectile. However, after the first set of HP is depleted, Doc is revealed controlling the machine. Then, Mecha-Kracko removes the original stage while Kirby has to keep flying. Mecha-Kracko replaces the stage with a new one, but with gaps, or a smaller one. Then, it can use new attacks, which can let it surround in electricity or attack below it with electricity. | |
| Yadgaine | Jam Jungle | This is the second boss that Doc pilots. Kirby is in a moving screen when fighting this boss. Yadgaine can dig into the ground, throwing out rock fragments that Kirby should dodge. It can also shoot a laser from its mouth. Meanwhile, falling rocks can hurt Kirby, but Kirby can use these rocks to attack Yadgaine if he lacks a Copy Ability. After repeated hits, Yadgaine's claws can break, hindering its ability to dig. When both of its claws are broken, it cannot dig any more. The final part that breaks is its mouth before it gets destroyed. | |
| Bohboh | Vocal Volcano | Bohboh is a fiery owl-like creature with a tanooki tail. It first appears by flying in the background. One of its attacks include flying around and dropping fire balls which can be used as projectiles. It can also attempt to grab Kirby by charging at him. If it grabs Kirby, it throws Kirby to the lava, hurting Kirby and instantly removing his Copy Ability (due to the lava). If it misses and hits the ground, it is stunned while rocks fall. The rocks can be a hazard, but Kirby can also use these to attack Bohboh. After this, Bohboh flies slowly with its eyes closed, also vulnerable to attack, until its eyes open. | |
| Daroach | Ice Island | Daroach is the leader of the Squeaks. He sports multiple attacks. One of his attacks include using the Triple Star Cane to throw stars that can hurt Kirby, but Kirby can use. He can also throw bombs at Kirby, but it is also another projectile that Kirby can use to hurt Daroach. Daroach can also shoot a small ice beam that can freeze Kirby if it hits. During the boss fight, Daroach can teleport multiple times to avoid getting hit. | |
| Meta Knight | Secret Sea | Meta Knight fights like from his previous fights. He can jump from place to place and defend some of Kirby's attacks. His primary form of attacks involve using his sword. His attacks produce stars that Kirby can use to hit Meta Knight. He can also create a whirlwind that spans almost throughout the screen that can sweep Kirby and damage him. Meta Knight also has new attacks involving the fire and electric elements, allowing him to create an electric field or shoot fire blasts with his sword. | |
| Dark Daroach | Gamble Galaxy | Dark Daroach is a similar boss fight to Daroach, but with more powerful attacks. His bombs, which are much larger, create fire pillars when they explode. His ice beam is also larger, and creates stars that Kirby can use to attack. The only attack that remains relatively unchanged is his Triple Star Cane. | |
| Dark Nebula | Gamble Galaxy | Dark Nebula is the final boss in this game. Before fighting him, Kirby must follow a small black star in a level. At the end, the small black star grows and receives an eye. After that, Dark Nebula is formed. At the beginning of the boss fight, Dark Nebula changes into one of the three forms. All forms share attacks that involve shooting stars that inflict an effect of damage depending on Dark Nebula's current form.
|
Kirby's Epic Yarn / Kirby's Extra Epic Yarn
Each land aside from Quilty Square has a stage dedicated to a boss encounter. The bosses of Kirby's Epic Yarn and Kirby's Extra Epic Yarn are as follows:
| Bosses in Kirby's Epic Yarn and Kirby's Extra Epic Yarn | |||
|---|---|---|---|
| Boss | Patch Plaza caption | Description | World |
| This flaming guardian can breathe fire but will drop its guard when tired. | A large green dragon that attacks using fire breath and its pointed tongue, but tires easily. | Grass Land | |
| This guardian of the volcano shoots fire from her wings! Avoid getting burned! | A large phoenix that attacks using its fiery wings and by sending Embirds after Kirby, but is weak to Yarn Balls. | Hot Land | |
| The villain of Treat Land has more than a few mean tricks up his sleeve! | A wily gourd-headed magician that attacks using many magic tricks, but has a weak spot under his hat. | Treat Land | |
| This sea monster is rather vain. I wonder what the deal with that knit cap is...? | A giant octopus that disguises itself as a squid using a knit cap. Its weak point lies on its head between the eyes. |
Water Land | |
| This selfish Dream Land king wields a big hammer that's almost as big as his mouth! | King Dedede is made to fight Kirby after being transformed into a yarn outline and tied to puppet strings. Attacking King Dedede causes the strings to drop, which can then be pulled on to unravel them. |
Snow Land | |
| This space guardian fell under Yin-Yarn's spell! Luckily, it all worked out! | Meta Knight is made to fight Kirby after being transformed into a yarn outline and given flaming swords. Each of these swords needs to be destroyed in turn in order to break the spell. |
Space Land | |
| This sorcerer uses his knitting needles to weave his evil all across Dream Land! | The main villain of Kirby's Epic Yarn. Yin-Yarn attacks by using his knitting needles and the power of the Magic Yarn to conjure enemies for Kirby to fight. |
Dream Land | |
| Yin-Yarn used the power of the Metamato to transform into a mighty robot tank! | Yin-Yarn takes a form similar to a Tankbot in a last-ditch effort to defeat Kirby and Prince Fluff. The heroes in turn become a Tankbot to retaliate against him, and a battle of flying missiles ensues for the fate of Dream Land and Patch land both. |
Dream Land | |
Kirby Mass Attack
There are five bosses in Kirby Mass Attack, each serving as the final obstacle of each level. The first four are fought for a second time in Necro Nebula.
| Boss | Image | Home level | Description | Notes |
|---|---|---|---|---|
| Whispy Woods | 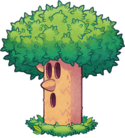
|
Green Grounds | A totem pole-like sentient tree whose segments can be destroyed by slamming into them repeatedly. | Unlike in other iterations, Whispy Woods fights by dropping spiky nuts instead of apples. |
| Lady Ivy | 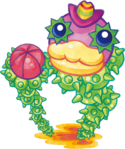
|
Sandy Canyon | A spiky Snoozroot-like creature that attacks by knocking the platform the Kirbys are standing on around like a see-saw. | |
| King Dedede | Dedede Resort | King Dedede fights the Kirbys by tossing bombs encased in bubbles from a hot air balloon. | This is the only fight that can be entered with less than 10 Kirbys. | |
| Skullord | Volcano Valley | A giant skull-wearing pig enemy that attacks from afar using meteors shot from its snout. | ||
| Necrodeus | 
|
Necro Nebula | An undead wizard who hates bright light and who was responsible for splitting Kirby into 10. He attacks using his hands to swipe and using a laser inside his mouth. | Defeating Necrodeus completes the game. |
Kirby's Return to Dream Land / Kirby's Return to Dream Land Deluxe
Nearly all the bosses in these games have an EX form, which is generally stronger and bears a different color palette (or other visual changes). Those that don't will be mentioned as such. The original Wii version also formally introduced the concept of having the boss change its tactics when its health reaches a certain threshold (usually when the boss loses 50-60% of its maximum health).
| Bosses in Kirby's Return to Dream Land | ||||
|---|---|---|---|---|
| Boss | Main form | HP (Main)[2] | EX form | HP (EX)[2] |
| Whispy Woods | 330 | 480 | ||
| Mr. Dooter | 420 | 580 | ||
| Fatty Puffer | 560 | 700 | ||
| Goriath | 460 | 540 | ||
| Grand Doomer | 580 | 640 | ||
| Metal General | 600 | 640 | ||
| HR-D3 | 720
| |||
| Landia | 640 | 720 | ||
| Lor & Magolor | 580 | 680 | ||
| Galacta Knight | 540* | |||
| Magolor | 600 | 800 | ||
| Magolor (second form) | 750 | |||
| Magolor Soul | 999 | |||
Notes:
| ||||
| Bosses in Kirby's Return to Dream Land Deluxe | |||||||
|---|---|---|---|---|---|---|---|
| Boss | Image | New to this game? | Area | Description | HP | HP (EX) | Notes |
| Story Mode | |||||||
| Whispy Woods | Cookie Country - Stage 5 | A sentient tree which can drop apples and breathe gale force winds to attack. Whispy Woods also gains the ability to inhale and chew on Kirby and friends. | 420 | 520 | |||
| Mr. Dooter | Raisin Ruins - Stage 5 | An exotic magician which can produce skulls and snakes from his hat, and can spin rapidly to form a tornado. | 460 | 620 | |||
| Fatty Puffer | Onion Ocean - Stage 5 | An obese pufferfish with the ability to perform a rolling charge, spit water projectiles, and inflate to an even more monstrous size when damaged enough. | 610 | 750 | |||
| Goriath | White Wafers - Stage 6 | A large white primate with the ability to control ice and deliver powerful punches. In his second phase, Goriath's hair turns golden and he gains additional attacks, such as the ability to fire energy waves. | 500 | 580 | |||
| Grand Doomer | Nutty Noon - Stage 6 | The final boss fought on Popstar, Grand Doomer is the leader of the fierce Sphere Doomers. It can fire energy spheres and disappear into a dimensional hole to ambush Kirby. During Grand Doomer's second phase within the main mode, it gains stony armor which can only be damaged by the Ultra Sword ability. | 630 | 690 | |||
| Metal General | Egg Engines - Stage 6 | The mechanical guardian of Egg Engines, Metal General possesses impressive swordsmanship and can shoot bombs and giant missiles at Kirby. | 660 | 700 | In Extra Mode, Metal General EX is fought before HR-D3. | ||
| Landia | Dangerous Dinner - Stage 4 | The draconian keeper of the Master Crown, Landia consists of four smaller dragons which can combine into a single, four-headed beast. Landia's attacks consist of launching fireballs, creating windstorms, and wielding electrical currents. | 700 | 780 | |||
| Lor & Magolor | Another Dimension | Magolor manipulates the corrupted Lor Starcutter to assault Kirby. It can launch star projectiles and energy orbs, throw its wings akin to boomerangs, and even control a massive hurricane. | 630 | 730 | |||
| Magolor | Another Dimension | The deceitful wizard possesses an impressive array of magical abilities, including the ability to launch magical spheres, summon Doomers to glide across the screen, and generate black holes. In his second phase, Magolor creates a star-like shield which can only be broken using Super Abilities. | 660 | 860 | When Kirby deals the final blow using Ultra Sword, Magolor appears to initially resist the blade strike. | ||
| Magolor's second form | Another Dimension | After his initial defeat, Magolor transforms into an ethereal, more powerful reincarnated form. In his second phase, Magolor's second form can wield his own, twisted renditions of Kirby's Super Abilities. | 900 | Replaced by Magolor Soul in Extra Mode and The True Arena. | |||
| Extra Mode | |||||||
| HR-D3 | Stage 6 (Extra Mode only) | A titanic robot piloted by Metal General. It has two separate health bars for each of its attack phases. HR-D3 can fire homing rockets, shoot lasers from its eyes, and spin its giant arms around. | 800
(320+480) |
||||
| Magolor Soul | Another Dimension (Extra Mode only) | Said to be the form of Magolor after being consumed completely by the Master Crown, Magolor Soul is an even more powerful version of Magolor's second form from the main Story Mode. | 1200 | ||||
| Magolor Epilogue: The Interdimensional Traveler | |||||||
| Electricky Dooter | Aerogree Dimension | A green wizard similar to Mr. Dooter, but possesses the power to control lightning. | 500 | ||||
| Fiery Puffer | Pyred Dimension | A horned, magma-covered pufferfish who possesses similar attacks to Fatty Puffer, but with added pyrotechnic capabilities. | 500 | ||||
| Hydriath | Poseiblu Dimension | A merman-like entity which can throw globs of water. He has a similar appearance and fighting style to Goriath. | 580 | ||||
| Rampaging Doomers | Locandra Dimension | A quartet of Sphere Doomers which fly across the screen while attempting to tackle Magolor. They can also create damaging energy clouds and summon black holes. | 750 | ||||
| Crowned Doomer | Ethereal Altar | Grand Doomer after taking on a powerful and shady new form due to being imbued with shards of the Master Crown and consuming Magolor's red fruit. | 620 | ||||
| Master Crown | Ethereal Altar | A giant tree assimilated by the Master Crown. The Master Crown's attacks consist of launching thick tree roots through portals, and dropping crystalline apples on Magolor. | 650 | ||||
| The True Arena | |||||||
| Galacta Knight | The True Arena | A legendary swordsman akin to Meta Knight, said to be the most powerful warrior in the galaxy. He possesses a wide range of attacks with his lance and shield, as well as the ability to summon and launch energy swords. | 600* | ||||
| Magolor Soul (True Arena) | The True Arena | By far the most difficult rendition of Magolor, this version of Magolor Soul is even less restrained than his Extra Mode fight. Namely, he can launch two Magolor Cannons at once, and now possesses attacks based on the Sand and Mecha abilities. | 1500
(600+900)* |
In Magolor Soul's second phase, his eyes disappear except for the one in his mouth, suggesting that the Master Crown has fully assimilated Magolor's body. | |||
Notes:
| |||||||
Kirby's Dream Collection Special Edition
Aside from the games contained in this collection, there is a separate boss fight in the New Challenge Stages Sub-Game. At the end of the Smash Combat Chamber EX, Kirby has to contend with Whispy Woods, appearing as he did in Kirby's Return to Dream Land, but fighting like his EX form from that same game. Unlike in other cases, Whispy's health bar is not shown during the fight.
Kirby: Triple Deluxe
Like in Kirby's Return to Dream Land, most bosses have more powerful alternate forms (known as DX here), but not all do. Most bosses also incorporate the foreground and background when fighting.
| Bosses in Kirby: Triple Deluxe | ||||||
|---|---|---|---|---|---|---|
| Boss | Main Form | HP | Defense Modifier | DX Form | HP | Defense Modifier |
| Flowery Woods | 440 (Fine Fields) 330 (Royal Road - Stage 4 / The Arena) |
×0.75 | 620 (Fine Fields) 465 (Royal Road - Stage 4 / The True Arena) |
×0.75 | ||
| Paintra | 460 (Lollipop Land) 345 (Royal Road - Stage 4 / The Arena) |
×0.75 | 640 (Lollipop Land) 480 (Royal Road - Stage 4 / The True Arena) |
×0.75 | ||
| Kracko | 520 (Old Odyssey) 390 (Royal Road - Stage 2 / The Arena) |
×0.75 (body) ×0.7 (2nd phase spikes) |
700 (Old Odyssey) 525 (Royal Road - Stage 2 / The True Arena) |
×0.75 (body) ×0.7 (2nd phase spikes) | ||
| Coily Rattler | 520 (Wild World) 390 (Royal Road - Stage 2 / The Arena) |
×0.75 | 680 (Wild World) 510 (Royal Road - Stage 2 / The True Arena) |
×0.75 | ||
| Pyribbit | 600 (Endless Explosions) 450 (Royal Road - Stage 4 / The Arena) |
×0.9 | 760 (Endless Explosions) 570 (Royal Road - Stage 4 / The True Arena) |
×0.9 | ||
| Masked Dedede | 620 (Story Mode) 465 (The Arena) |
×0.75 | ||||
| Queen Sectonia | 640 (Story Mode) 480 (The Arena) |
×0.9 | 790 (Dededetour!) 592 (The True Arena) |
×0.9 | ||
| Flowered Sectonia | 700 (Story Mode) 525 (The Arena) |
×0.9 | ||||
| Shadow Dedede | 800 (Dededetour!) 600 (The True Arena) |
×0.75 | ||||
| Dark Meta Knight's Revenge | 820 (Dededetour!) 570 (The True Arena) |
×1 | ||||
| Soul of Sectonia | 999* (1st) 450* (2nd) |
×0.9 (1st flowers) ×1 (1st vines) ×1 (2nd) | ||||
Notes:
| ||||||
Some bosses in this game are fought throughout regular stages later. In addition, the third time Flowery Woods is encountered, Kirby has the Hypernova ability, and swallows him whole without a fight.
Kirby Fighters Deluxe
Only two bosses are present in Kirby Fighters Deluxe, both appearing in the game's Single Player Mode. The first is Kracko, who appears in Round 5. He is fought on the Bubbly Clouds Battle Stage, who behaves much like his Kirby: Triple Deluxe counterpart, but also has a new attack where he scatters Keychains across the screen.
The final boss of the mode is Team DDD, appearing in the Final Round on the Fountain of Dreams Battle Stage. Depending on the difficulty, Kirby will have to fight either 24, 32, 47, or 64 Dededes, with the last one always being a much larger variant, who, like Kracko, also has an attack involving blocking the player's view with Keychains.
Kirby and the Rainbow Curse
| Boss | Location | Description |
|---|---|---|
| The Forest of Whispy Woods & Sky-High Whispy Woods | A sentient tree rooted in place, who has the power to grow spiky flowers and drop bombs, in addition to blowing gusts of wind and calling in friends to defend him. In his second encounter, he gains a metal coating, making him immune to regular Touch Dashes. | |
| Hooplagoon, Relic of the Ruins & Hooplagoon of the Lake | A circular robotic creature who spins through the air and can fire lasers and conjure an electric field around himself. He grows in size and speed when his shields are damaged. In the second encounter, Hooplagoon is faced underwater. | |
| The Claykken's Lair & The Claykken's Sea of Fire | A giant squid who somewhat resembles a pirate captain. The Claykken attacks by trying to swipe at Kirby with his spiked tentacles, and when that fails, he enters the fray fully and launches himself at Kirby like a torpedo, leaving behind clouds of ink as he moves. In the second encounter, The Claykken is faced on land in a volcanic region. | |
| The Final Battle | A talented magical clay sculptor who has been possessed by an evil force. She attacks by conjuring enemies and objects to toss Kirby's direction, and can manipulate Gray Zones. She is weak to her own Clay Balls. | |
| The Final Battle | The evil entity responsible for possessing Claycia. He tries to flee from the Kirby Rocket after being ousted and tosses continuous waves of bombs at Kirby to try and keep him away, but Kirby can retaliate by launching himself at Dark Crafter with a Star Dash. |
Kirby: Planet Robobot
There are twelve unique bosses in Story Mode with the addition of three new bosses in Meta Knightmare Returns, and one new boss in The True Arena. Like in the previous two main series games, most bosses have stronger versions, denoted by 2.0, and are fought in the aforementioned two modes. Some bosses are fought in circular arenas in certain phases, much like in Kirby 64: The Crystal Shards.
The following table lists all the bosses fought in Story Mode, Meta Knightmare Returns, and The True Arena. This does not count Sub-Game bosses like the Team Kirby Clash bosses and the Mashers (classified as Mid-Boss instead) from Kirby 3D Rumble.
| Bosses in Kirby: Planet Robobot | ||||
|---|---|---|---|---|
| Boss | Image | Area | Description | Notes |
| Story Mode | ||||
| Gigavolt / Gigavolt II | 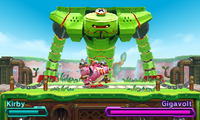 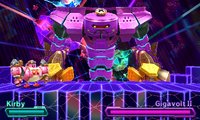
|
Patched Plains (Stage 3) & Access Ark (Stage 5) | A towering green robot with long arms that must be unscrewed by the Robobot Armor. | In Access Ark, a more difficult, purple-colored variant named Gigavolt II is encountered, but is defeated in the same manner. This boss cannot be fought directly in Meta Knightmare Returns, as there is no Robobot Armor in the sub-game. |
| Clanky Woods | 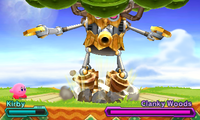
|
Patched Plains (Stage 5) | A mechanized Whispy Woods that can move freely about, drill into the ground, and shoot missiles. | Chase sequences with Clanky Woods also appears in the first level and in Stage 8 of Access Ark, but are not directly counted as boss battles. |
| C.O.G.S. | 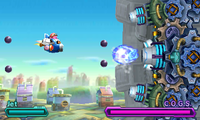
|
Resolution Road (Stage 2) & Gigabyte Grounds (Stage 4) | A giant wall of gears, cogs, and turrets that must be defeated by the Robobot Armor in Jet Mode. | After C.O.G.S. is defeated in Gigabyte Grounds, Core Kabula is fought immediately afterwards. |
| Holo Defense API | 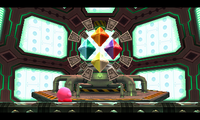
|
Resolution Road (Stage 5) | A holographic security system that resembles Pix. It projects green holographic versions of bosses and Mid-Bosses from past Kirby games to slow the pink puffball down. | Bosses summoned by the Holo Defense API (in order) are Holo-Kracko, Holo-Doomers, Holo-Ice Dragon, and Holo-Coily Rattler. |
| Susie | 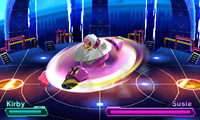
|
Overload Ocean (Stage 6) | The executive assistant to the Haltmann Works Company, who uses her mech to attack with spins, drill attacks, and even summon drones. | |
| Core Kabula | 
|
Gigabyte Grounds (Stage 4) | After C.O.G.S. is defeated once more in Gigabyte Grounds, Core Kabula emerges from its remains in a surprise attack against Kirby in the Robobot Armor, still in Jet Mode. | While it is the second boss encountered in Gigabyte Grounds (after C.O.G.S.), she is not considered as the main boss of this area. This boss cannot be fought directly in Meta Knightmare Returns, as there is no Robobot Armor in the Sub-Game. |
| Mecha Knight | 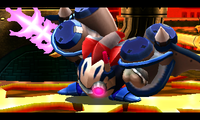
|
Gigabyte Grounds (Stage 6) | A subdued and mechanized Meta Knight who is forced to do the company's bidding. He attacks with a laser Galaxia sword, missiles, and laser beams. | This boss battle is completely skipped in Meta Knightmare Returns. It is replaced with Stock Mecha Knight. |
| Dedede Clone | 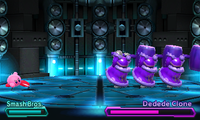
|
Rhythm Route (Stage 6) | A cloned, purple King Dedede that can split into three during the second half of the fight. | |
| Dedede Clones & D3 | 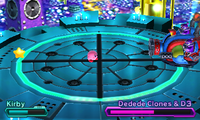
|
Rhythm Route (Stage 6) | The Dedede Clones hop onto the D3 Cannon, a tridimensional cannon resembling the king in color, and use its barrage of lasers, flames, and explosives to take on the pink puffball. | This boss battle is directly fought after Dedede Clone is defeated. |
| Mecha Knight+ | 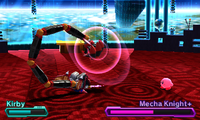
|
Access Ark (Stage 6) | After his defeat in Gigabyte Grounds, an upgraded Mecha Knight is sent out by Susie to deal with Kirby again within the Haltmann Works executive office. This variant notably sports a red appearance and a giant clawed tail. | This boss battle is completely skipped in Meta Knightmare Returns. |
| President Haltmann | 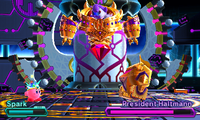
|
Access Ark (Stage 6) | The primary antagonist and president of the Haltmann Works Company. He engages Kirby in battle with a large, golden mech. | |
| Star Dream | 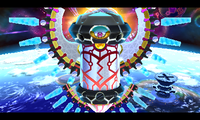
|
Mind in the Program | The final boss of Story Mode, which is a sentient computer that was fused with President Haltmann's mind, throwing it into a path of destruction. | The Last Battle Ability used to battle Star Dream is the Robobot Armor's Halberd Mode. This boss battle is omitted from Meta Knightmare Returns. The fourth phase is completely omitted in The Arena. |
| Meta Knightmare Returns | ||||
| Stock Mecha Knight | 
|
Gigabyte Grounds (Stage 6) | A mass-produced replica of Mecha Knight which also is fitted with a clawed tail that is used by Mecha Knight+. | This boss can also be fought in The True Arena. |
| Dark Matter Clone | 
|
Access Ark (Stage 6) | A clone of Dark Matter in his swordsman form, fighting in almost the same way as his appearance in Kirby's Dream Land 2 in addition to new attacks. | This boss can also be fought in The True Arena. |
| Sectonia Clone | 
|
Access Ark (Stage 6) | A clone of Queen Sectonia, fighting in almost the same way as her appearance in Kirby: Triple Deluxe. | This boss can also be fought in The True Arena. |
| Galacta Knight Returns | Access Ark (Stage 6) | The greatest warrior in the galaxy, serving as the final boss of Meta Knightmare Returns. He fights almost identically to his appearance in Kirby's Return to Dream Land, with this incarnation bringing in new attacks like the ability to open up a dimensional rift to Another Dimension. | This boss can also be fought in The True Arena. | |
| The True Arena | ||||
| Star Dream Soul OS | 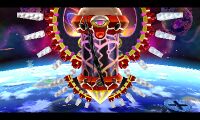
|
The True Arena | The final boss of the True Arena and the ultimate challenge in the entirety of the game, essentially acting as the Soul Boss for Star Dream itself. | This boss has an all-new fourth-phase where Kirby must fight against the heart of the computer itself. |
Team Kirby Clash Deluxe
Many enemies encountered in this free-to-start spin-off title are beefed up considerably in subsequent encounters, given more health and more attack options. Almost all enemies are faced at least twice this way, except a handful in the last area. The enemies are as follows:
| Enemies in Team Kirby Clash Deluxe | ||||
|---|---|---|---|---|
| Enemy | Image | # of encounters | Description | Notes |
| Colossal Waddle Dee | 3 | A very big and red-furred Waddle Dee who is rather sluggish and not much of a threat. | Only faced by itself once. The other two encounters are paired with other enemies. | |
| Colossal Kabu | 2 | A very big Kabu who spins around and can vanish and reappear in the air. | Only faced in tag-teams with other enemies. | |
| Colossal Hot Head | 1 | A very big Hot Head who attacks using a long flamethrower from its mouth. | Only faced in tag-teams with other enemies. | |
| Mr. Frosty | 3 | A big overalls-wearing walrus man who attacks using ice blocks, charges, and body slams. | ||
| King Doo | 3 | A very large yellow Waddle Doo who can use various Beam-related attacks. | ||
| Gigant Edge | 3 | A bulky green-armored swordsman who carries a shield and can toss his sword like a boomerang. | ||
| Kracko | 2 | A floating one-eyed storm cloud who attacks using beams, lightning, and rain. | The first battle against him in the Dunes serves as the first Ordeal. | |
| Kibble Blade | 3 | A larger silver version of Sir Kibble who attacks using its boomerang cutter and charge moves. | ||
| Bonkers | 3 | A mallet-wielding ape man who can use many different hammer techniques and can toss coconuts. | ||
| Blocky | 3 | A big rectangular stone creature with feet that attacks using body slams and can harden to defend itself. | ||
| Whispy Woods | 2 | The familiar faced arbor who attacks using Air Bullets, apples, and by leaping around. | Only faced in the Ruins area, where his first encounter serves as the game's second Ordeal. | |
| Miasmoros | 2 | A toxic Galbo-like creature that attacks with poisonous vomit and leaves dangerous puddles on the ground as it slithers. | ||
| Ice Dragon | 2 | A cuddly-looking but dangerous reptile that breathes ice and can cause icicles to drop when it stomps the ground. | ||
| Greater Doomer | 2 | A large purple Sphere Doomer who attacks with swoops, charges, and dark energy orbs. | ||
| Pyribbit | 2 | A bulbous red horned toad who swims in lava and can breathe fire and conjure lava waves. | Only faced in the Volcano area, where his first encounter serves as the game's third Ordeal. | |
| Telepathos | 2 | A strange-shaped pale flying creature who attacks using swoops and psychic projectiles. | ||
| Landia | 2 | The four-headed dragon and Guardian Angel who attacks using fire, lightning, and wind. Can split into four smaller dragons and recombine at will. | The second encounter with Landia serves as the fifth Ordeal, and is against Landia EX. | |
| Taranza | 1 | A powerful but easily-manipulated arachnid mage who can teleport, launch various magic projectiles, and catch the Kirbys in a magic web. | This encounter serves as the fourth Ordeal in the game. It also marks the first time that Taranza has ever been fought directly in the Kirby series. | |
| Parallel Susie | 1 | An alternate-universe version of Susie who attacks much the same using her own Business Suit. | This encounter serves as the sixth Ordeal. | |
| Parallel Landia | 1 | An alternate-universe version of Landia who attacks much the same, but is more powerful. | This encounter serves as the seventh Ordeal. | |
| Dark Taranza | 1 | An alternate-universe version of Taranza who attacks much the same, but is more powerful. | This encounter serves as the eighth Ordeal, and is paired with King D-Mind's first appearance. | |
| King D-Mind | 2 | The king of darkness from another dimension, who resembles both King Dedede and Dark Mind. As such, he has the powers of both, and is a very dangerous foe. | Initially paired with the battle with Dark Taranza. He is later faced on his own as the ninth and final Ordeal of the game. | |
Kirby's Blowout Blast
Unlike Kirby 3D Rumble, this game features boss encounters at the end of each level. These bosses fight in a more elaborate manner than common enemies, and have specific arenas devoted to them. Each boss (excepting Giant Masked Dedede) also has an EX form which is faced in the extra stages. The bosses of Kirby's Blowout Blast are as follows:
| Bosses in Kirby's Blowout Blast | |||||
|---|---|---|---|---|---|
| Boss | Location(s) | Points | Description | EX differences | Notes |
| 1-4 & 1-4EX | 5000 points (6000 EX) | A blue raindrop-shaped creature that attacks by pushing emerald boxes and Gordos through doorways. In the latter half of his fight, he may toss these instead of just pushing them. | Lololo's Revenge bears a purple body hue and can move more quickly. In his second phase, he uses ruby boxes that leave fire trails as they slide. | ||
| 2-4 & 2-4EX | 8000 points (10000 EX) | This juvenile form of Kracko attacks by charging at Kirby and trying to strike him with lighting. In his second phase, Kracko Jr. can unleash a spinning wave beam attack outward from his center. | Kracko Jr.'s Revenge moves more quickly than his main game counterpart. His beam attack also has more bars. | This marks Kracko Jr.'s first appearance in a 3D Kirby game. | |
| 3-5 & 3-5EX Secret Path |
5000 points each (6000 EX) | A duo boss that attacks by pushing emerald boxes and Gordos through doorways. In the latter half of their fight, they may toss these instead of just pushing them. | Lololo and Lalala's Revenge bear purple and orange body hues and can move more quickly. In their second phase, they use ruby boxes that leave fire trails as they slide. | ||
| 4-5 & 4-5EX Secret Path |
10000 points (12000 EX) | Kracko strikes again in his fully mature form, sporting stronger versions of Kracko Jr.'s attacks, along with a few new ones, including firing volleys of beam blasts and causing a big electric storm. | Kracko's Revenge has more complex and difficult-to-dodge attacks overall and moves more quickly. | ||
| 5-5 & 5-5EX Secret Path |
N/A | King Dedede attacks using his familiar moveset, now transferred to a 3D space. This includes his Super Dedede Jump, Head Slide, hammer swings, and inhale. He is also able to shoot out homing spark attacks from his hammer. He notably does not hover, as he did not have that move in Kirby's Dream Land. | King Dedede's Revenge attacks more quickly, often chaining his attacks together or performing them multiple times in succession. | King Dedede's Revenge is depicted without his kimono, hearkening back to his older design. | |
| 5-5 & 5-5EX | 12000 points (14000 EX) | This giant form of King Dedede attacks by trying to slam Kirby from above with his hammer and using his inhale. His hammer strikes leaves a lot of drop stars behind. | Giant King Dedede's Revenge can create homing sparks that chase after Kirby with his hammer strikes. | ||
| Secret Path | 15000 points | Giant Masked Dedede has several changes compared to his regular giant counterparts. His mask protects him from regular star bullets, only taking damage from blaster bullets. His mechanical hammer allows him to fire missiles and lasers at Kirby. His inhale also sucks up waves of Gordos that need to be dodged. | N/A | ||
Kirby Battle Royale
In this title, there is only one instance where a proper "boss" is faced; at the end of Dedede's Cake Royale against Dededestroyer Z. Robo Bonkers can also be considered a boss of sorts, but the way he is battled de-emphasizes the idea of a showdown against the enemy itself in favor of competing with other contestants to see who can do the most damage to a slow-moving target.
Kirby Star Allies
There are 26 distinct bosses in Kirby Star Allies (not counting Galacta Knight), the most amount of bosses in any main series Kirby game. Some bosses may change their behavior based on how many allies are in the team.
The following table lists every distinct boss in Kirby Star Allies in the intended order of encounter:
| Bosses in Kirby Star Allies | |||||
|---|---|---|---|---|---|
| Name | Location(s) | Health (Base) Star Bullet = 52 |
Health (Ultimate Choice) | Description | Notes |
| Fruity Forest Falluna Moon Guest Star ???? Star Allies Go! The Ultimate Choice (Sizzling Threat and lower) |
700 490 (Falluna Moon) |
525 | This sentient arbor returns as the first boss encounter. Powered up by a Dark Heart fragment, he can grow larger and conjure waves and waves of Apples, along with other new tricks. Despite this, he is still not particularly formidable. | Whispy Woods is weak to fire attacks, and may catch fire when hit by them enough. Whispy Woods can be befriended after his defeat using a Friend Heart. | |
| Clash at Castle Dedede Guest Star ???? Star Allies Go! The Ultimate Choice (all except Soul Melter EX) |
680 | 510 | Kirby's eternal rival attacks when Kirby and his friends storm the castle. Engorging himself on rotten food and the power of a Dark Heart fragment, he becomes considerably beefier during his fight, and gains new attack patterns using his giant arms. | King Dedede can be befriended after his defeat using a Friend Heart. | |
| Sacred Square Guest Star ???? Star Allies Go! The Ultimate Choice (all except Soul Melter EX) |
600 | 450 | The Masked Swordsman returns for another honorable duel (should Kirby accept it). Using the power of the Dark Heart fragment, he splits into many copies of himself and can throw giant boulders using magical force. | Meta Knight can be befriended after his defeat using a Friend Heart. | |
| Gatehouse Road Guest Star ???? Star Allies Go! The Ultimate Choice (Mild Stroll through Sizzling Threat) |
245 each | 183 each | These two woodland guardians are dressed in armor and recruited by the Jambastion to defend the front gate. They attack by charging along with their children, some of whom drop elemental bombs. | Pon & Con are befriended after their defeat using a Friend Heart. | |
| Longview Corridor Blizzno Moon Guest Star ???? Star Allies Go! The Ultimate Choice (Zesty Expedition, Fiery Showdown through Soul Melter, Soul Melter EX (EX form)) |
630 742 (rematch) |
472 519 (rematch) 779 (Soul Melter EX) |
The first of Jambandra's three Generals of Magic. She wields a frosty battle axe and attacks with a variety of ice and water-based moves. | Francisca has an EX form which is faced in Soul Melter EX of The Ultimate Choice. She is also faced as part of The Three Mage-Sisters boss battle. | |
| Inner Sanctum Sizzlai Moon Guest Star ???? Star Allies Go! The Ultimate Choice (Spicy Adventure, Infernal Crisis, Soul Melter, Soul Melter EX (EX form)) |
650 715 (rematch) |
487 536 (rematch) 804 (Soul Melter EX) |
The second of Jambandra's three Generals of Magic. She wields a flaming sword and leaves lingering pillars of flame in her wake when she attacks. | Flamberge has an EX form which is faced in Soul Melter EX of The Ultimate Choice. She is also faced as part of The Three Mage-Sisters boss battle. | |
| Heavenly Hall The Divine Terminus Guest Star ???? Star Allies Go! The Ultimate Choice (Sizzling Threat, Infernal Crisis, Soul Melter, Soul Melter EX (EX form)) |
680 748 (rematch) |
510 561 (rematch) 841 (Soul Melter EX) |
The third and most senior of Jambandra's three Generals of Magic. She wields an electric lance and rains shocking destruction down from above. | Zan Partizanne has an EX form which is faced in Soul Melter EX of The Ultimate Choice. She is also faced as part of The Three Mage-Sisters boss battle. | |
| Falluna Moon Extra Planet δ Guest Star ???? Star Allies Go! The Ultimate Choice (Fiery Showdown through Soul Melter) |
910 | 682 | An old cherry tree who serves as a more powerful analogue to Whispy Woods. | Yggy Woods shares Whispy's weakness to fire. | |
| Mareen Moon Guest Star ???? Star Allies Go! The Ultimate Choice (Fiery Showdown through Soul Melter EX) |
245 each | 183 each (275 each in Soul Melter EX only) | Two large mammals made of metal that serve as a more powerful analogue to Pon & Con. | Goldon & Silvox have greater stamina when faced in Soul Melter EX. | |
| Grott Moon | 800 | A giant egg-shaped creature who wears a nearly impenetrable suit of armor and wields bombs attached to ropes. | Grand Mam is the only boss who does not appear in The Ultimate Choice. | ||
| Gabbel Moon Guest Star ???? Star Allies Go! The Ultimate Choice (Mild Stroll through Soul Melter) |
400 | 300 | This familiar cloud-enshrouded eyeball returns to harass Kirby and his team as they hop from planet to planet. His attacks are largely the same as they've ever been. | Transforms into Twin Kracko after being defeated. | |
| Gabbel Moon Guest Star ???? Star Allies Go! The Ultimate Choice (Mild Stroll through Soul Melter) |
720 | 540 | After Kracko is defeated, he splits in two and continues fighting. When split, Twin Kracko gain a number of new attacks, including torrential rains and big thunderstorms. | ||
| The Divine Terminus Guest Star ???? Star Allies Go! The Ultimate Choice (Sizzling Threat through Soul Melter) |
480 (hooded) 720 (unhooded) |
360 (hooded) 540 (unhooded) |
The mad wizard and head of Jambandra who commands The Three Mage-Sisters and tends to the Jamba Heart. He attacks using powerful elemental magic and can siphon the life energy from his generals when he runs low. | ||
| Kirby Star Allies The Ultimate Choice (Infernal Crisis, Soul Melter) |
500 (Phase 2) 700 (Phase 4) |
375 (Phase 2) 525 (Phase 4) |
An ancient incarnation of chaos and destruction and relative of Dark Matter who is revived from the Jamba Heart after Hyness sacrifices himself and his generals to him. He takes on several forms during his battle, and is fought using the Star Allies Sparkler. He serves as the final boss of Story Mode. | Void Termina's Soul Melter form is more powerful and has a different color palette. The last phase of Void Termina's battle is only used in Story Mode. | |
| Guest Star ???? Star Allies Go! | Often called "The Greatest Warrior in the Galaxy", this swordsman is brought from another dimension to battle the Guest Stars, but does not actually get to fight them this time, as a butterfly immediately casts judgment on him who turns into Morpho Knight as a result. | ||||
| Guest Star ???? Star Allies Go! The Ultimate Choice (Fiery Showdown through Soul Melter) |
1380 | 920 | This enigmatic creature takes on the form of a swordsman after absorbing Galacta Knight's power and does battle with the Guest Stars. He wields incredibly powerful fiery magic. He serves as the final opponent of Guest Star ???? Star Allies Go! | ||
| The Ultimate Choice (Soul Melter) | 1350 | A powered-up version of Void Termina's final form. Described as the "Essence of Chaos", this creature is encountered only in Soul Melter difficulty of The Ultimate Choice. | Can be considered to be the ultimate final boss of the base game of Kirby Star Allies. | ||
| Heroes in Another Dimension - Dimension I Guest Star The Three Mage-Sisters The Ultimate Choice (Soul Melter EX) |
1400 | 1050 | An extremely powerful version of Whispy Woods who hails from Another Dimension. | Only available in Version 4.0.0+. | |
| Heroes in Another Dimension - Dimension II Guest Star The Three Mage-Sisters The Ultimate Choice (Soul Melter EX) |
800 | 600 | A more powerful version of Twin Kracko which hails from Another Dimension. | Transforms into Parallel Big Kracko after their defeat. Only available in Version 4.0.0+. | |
| Heroes in Another Dimension - Dimension II Guest Star The Three Mage-Sisters The Ultimate Choice (Soul Melter EX) |
1440 | 1080 | After Parallel Twin Kracko is defeated, they recombine into this singular giant black cloud. Parallel Big Kracko's attacks are massive, often taking up the entire battlefield. | Only available in Version 4.0.0+. | |
| Heroes in Another Dimension - Dimension III Guest Star The Three Mage-Sisters The Ultimate Choice (Soul Melter EX) |
1200 | 900 | A more powerful version of Meta Knight who uses more potent dark magics. | Only available in Version 4.0.0+. | |
| Heroes in Another Dimension - Dimension IV Guest Star The Three Mage-Sisters The Ultimate Choice (Soul Melter EX) |
1360 | 1020 | A more powerful version of King Dedede who unleashes big shockwaves with nearly every attack. | Only available in Version 4.0.0+. | |
| Heroes in Another Dimension - Final Dimension The Ultimate Choice (Soul Melter EX) |
1500 | 1125 | Hyness is infused with the power of the Jamba Heart and driven utterly mad, becoming more powerful and using wooden stumps in place of his missing mage generals. | Only available in Version 4.0.0+. | |
| Heroes in Another Dimension - Final Dimension The Ultimate Choice (Soul Melter EX) |
3234 | 2425 | In order to exact retribution on Kirby and his team, Francisca, Flamberge, and Zan Partizanne fight as one, combining their attacks. This encounter serves as the last fight in Heroes in Another Dimension. | Only available in Version 4.0.0+. | |
| Guest Star The Three Mage-Sisters The Ultimate Choice (Soul Melter EX) |
2070 | 1380 | A more powerful variant of Morpho Knight who uses vortexes to trap his foes in his attacks. | Only available in Version 4.0.0+. | |
| The Ultimate Choice (Soul Melter EX) | 562 (Phase 2) | The penultimate version of Void Termina who is battled exclusively in Soul Melter EX of The Ultimate Choice. | Only available in Version 4.0.0+. | ||
| The Ultimate Choice (Soul Melter EX) | 2000 | The final form of Void Termina, serving as the very last battle in Soul Melter EX of The Ultimate Choice. | Only available in Version 4.0.0+. | ||
Boss Caption
In addition, every boss in Star Allies has their own caption on the boss splash screen.
| Kirby Star Allies Boss Caption | |||||
|---|---|---|---|---|---|
| Boss | English Caption | Japanese Caption | Chinese Caption | Korean Caption | Meaning of Japanese/Chinese/Korean Caption |
| Whispy Woods | Guardian of the Forest | 森の番人 (Romaji: mori no ban'nin) |
森林的守卫 (Simplified) 森林的守衛 (Traditional) (Pinyin: sēn lín de shǒu wèi) |
숲의 파수꾼 (Romaja: sup-ui pasukkun) |
Guardian of the Forest |
| King Dedede | His Royal Nemesis | 宿敵の暴君 (Romaji: shukuteki no bōkun) |
宿敌之暴君 (Simplified) 宿敵之暴君 (Traditional) (Pinyin: sù dí zhī bào jūn) |
천적 폭군 (Romaja: cheonjeog poggun) |
The Nemesis Tyrant |
| Meta Knight | The Lone Swordsman | 孤高の騎士 (Romaji: kokō no kishi) |
孤高的骑士 (Simplified) 孤高的騎士 (Traditional) (Pinyin: gū gāo de qí shì) |
고고한 기사 (Romaja: gogohan gisa) |
The Lone Knight |
| Pon & Con | Dual Defenders | 阿吽の護獣 (Romaji: aun no gojū) |
守门兽 (Simplified) 守門獸 (Traditional) (Pinyin: shǒu mén shòu) |
수비 복식조 (Romaja: subi bogsigjo) | Japanese: A-un Guardian Beasts
Chinese: Gate Guardian Beasts |
| Francisca (first battle in Longview Corridor) |
Frozen General | 氷華の三魔官 (Romaji: hyōka no sanmakan) |
冰晶三魔官 (Pinyin: bīng jīng sān mó guān) |
빙화의 사신 (Romaja: binghwaui sasin) |
Japanese/Chinese: Magic General of Ice Crystal Korean: Glacial Envoy |
| Flamberge (first battle in Inner Sanctum) |
Blazing General | 業火の三魔官 (Romaji: gōka no sanmakan) |
业火三魔官 (Simplified) 業火三魔官 (Traditional) (Pinyin: yè huǒ sān mó guān) |
업화의 사자 (Romaja: eobhwaui sasin) |
Japanese/Chinese: Magic General of Inferno/Hellfire Korean: Inferno/Hellfire Envoy |
| Zan Partizanne (first battle in Heavenly Hall) |
Lightning General | 雷牙の三魔官 (Romaji: raiga no sanmakan) |
雷牙三魔官 (Pinyin: léi yá sān mó guān) |
번개의 사신 (Romaja: beongaeui sasin) |
Japanese/Chinese: Magic General of Thunder Fang Korean: Lightning Envoy |
| Yggy Woods | Old-Growth Elder | 残桜の古樹 (Romaji: zanō no koju) |
残樱的古树 (Simplified) 殘櫻的古樹 (Traditional) (Pinyin: cán yīng de gǔ shù) |
전설의 고목 (Romaja: jeonseol-ui gomog) |
Japanese/Chinese: Ancient Woods of Fallen Cherry Blossoms Korean: Legendary Old Tree |
| Goldon & Silvox | The Metal Heavies | 金閣銀閣 (Romaji: kinkaku ginkaku) |
金角银角 (Simplified) 金角銀角 (Traditional) (Pinyin: jīn jiǎo yín jiǎo) |
금은의 병사 (Romaja: geum-eun-ui byeongsa) |
Japanese/Chinese: Golden and Silver Horned Kings
Korean: Soldiers of Gold and Silver |
| Grand Mam | Big Bad Mama | 頑強なる大母 (Romaji: gankyōnaru daibo) |
顽强的大母 (Simplified) 頑強的大母 (Traditional) (Pinyin: wán qiáng de dà mǔ) |
완강한 대모 (Romaja: wanganghan daemo) |
Strong-willed Big Mama |
| Francisca (revenge battle in Blizzno Moon) |
Bringer of Icy Doom | 災来する氷華 (Romaji: sairaisuru hyōka) |
灾厄再来的冰晶 (Simplified) 災厄再來的冰晶 (Traditional) (Pinyin: zāi è zài lái de bīng jīng) |
다가오는 빙화 (Romaja: dagaoneun binghwa) |
Japanese/Chinese: Disaster Bringer of Ice Crystal Returns Korean: Oncoming Glacier |
| Kracko | Cycloptic Stormcloud | 隻眼の雷雲 (Romaji: sekigan no raiun) |
单眼的雷云 (Pinyin: dān yǎn de léi yún) |
외눈의 번개구름 (Romaja: oenun-ui beongaeguleum) |
Cycloptic Thundercloud |
| Twin Kracko | Dual Thunderheads | 乱舞する双雲 (Romaji: ranbusuru sōun) |
乱舞双云 (Simplified) 亂舞雙雲 (Traditional) (Pinyin: luàn wǔ shuāng yún) |
폭주하는 쌍둥이 구름 (Romaja: pogjuhaneun ssangdung-i guleum) |
Wildly Dancing Dual Clouds |
| Flamberge (revenge battle in Sizzlai Moon) |
Bringer of Flame | 災来する業火 (Romaji: sairaisuru gōka) |
灾厄再来的业火 (Simplified) 災厄再來的業火 (Traditional) (Pinyin: zāi è zài lái de yè huǒ) |
다가오는 엄화 (Romaja: dagaoneun eomhwa) |
Japanese/Chinese: Disaster Bringer of Inferno/Hellfire Returns Korean: Oncoming Inferno/Hellfire |
| Zan Partizanne (revenge battle in The Divine Terminus) |
Bringer of Shock | 災来する雷牙 (Romaji: sairaisuru raiga) |
灾厄再来的雷牙 (Simplified) 災厄再來的雷牙 (Traditional) (Pinyin: zāi è zài lái de léi yá) |
다가오는 번개 (Romaja: dagaoneun beongae) |
Japanese/Chinese: Disaster Bringer of Thunder Fang Returns Korean: Oncoming Lightning |
| Hyness | Officiant of Doom | 魔神官 (Romaji: mashinkan) |
魔神官 (Pinyin: mó shén guān) |
파멸의 사제 (Romaja: pamyeol-ui saje) |
Japanese/Chinese: Officiant of Demon Korean: Priest of Doom |
| Galacta Knight | Temporal Warrior | 時巡る戦士 (Romaji: toki meguru senshi) |
时空巡逻战士 (Simplified) 時空巡邏戰士 (Traditional) (Pinyin: shí kōng xún luó zhàn shì) |
시간의 전사 (Romaa: sigan-ui jeonsa) |
Japanese: Time-Crossing Warrior Chinese: Time-Space Patrol Warrior Korean: Warrior of Time
|
| Morpho Knight | Reborn Butterfly | 黄泉返る極蝶 (Romaji: yomigaeru gokuchō) |
复活的极蝶 (Simplified) 復活的極蝶 (Traditional) (Pinyin: fù huó de jí dié) |
환생한 나비 (Romaja: hwansaenghan nabi) |
Japanese/Chinese: Reborn Sukhavati Butterfly Korean: Reincarnated Butterfly
|
| Void Termina | Destroyer of Worlds | 破神 (Romaji: hajin) |
破神 (Pinyin: pò shén) |
파괴의 신 (Romaja: pagoeui sin) |
God of Destruction |
| Void Soul | Essence of Chaos | 魂沌 (Romaji: konton) |
魂沌 (Pinyin: hún dùn) |
혼돈의 영혼 (Romaja: hondon-ui yeonghon) |
Japanese/Chinese: Soul Chaos
Korean: Soul of Chaos |
| Parallel Woods | Otherworldly Arbor | 異界の面樹 (Romaji: ikai no menju) |
异界的人面树 (Simplified) 異界的人面樹 (Traditional) (Pinyin: yì jiè de rén miàn shù) |
이공간의 거목 (Romaja: igong-gan-ui geomog) |
Japanese/Chinese: Otherworldly Human-Face Tree
Korean: Other-Space Giant Tree |
| Parallel Twin Kracko | Unearthly Storm Front | 異空の叢雲 (Romaji: ikū no sōun) |
이공간의 재앙 구름 (Romaja: igong-gan-ui jaeang guleum) |
Japanese: Other-Sky Gathering Clouds Korean: Other-Space Diastrous Clouds | |
| Parallel Big Kracko | Unearthly Thunderhead | 異空の大乱雲 (Romaji: ikū no dainanun) |
异空间的大乱云 (Simplified) 異空間的大亂雲 (Traditional) (Pinyin: yì kōng jiān de dà luàn yún) |
이공간의 공포 구름 (Romaja: igong-gan-ui gongpo guleum) |
Japanese/Chinese: Other-Sky Great Wild Cloud
Korean: Other-Space Horror Cloud |
| Parallel Meta Knight | Otherworldly Frost Blade | 異界の霜刃 (Romaji: ikai no soujin) |
이공간의 예리한 칼날 (Romaja: igong-gan-ui yelihan kalnal) |
Japanese: Otherworldly Sharp Blade Korean: Other-Space Sharp Blade
| |
| Parallel Dedede | Otherworldly Dark Liege | 異界の暗君 (Romaji: ikai no ankun) |
이공간의 혼군 (Romaja: igong-gan-ui hongun) |
Japanese: Otherworldly Dark Liege
Korean: Other-Space Liege | |
| Corrupt Hyness | Fell Officiant | 堕神官 (Romaji: Da shinkan) |
타락한 사제 (Romaja: talaghan saje) |
Japanese: Fell Officiant Korean: Fallen Priest
| |
| The Three Mage-Sisters | Repentant Retaliators | 復仇する懺党 (Romaji: fukkūsuru zantō) |
复仇的忏党 (Simplified) 復仇的懺黨 (Traditional) (Pinyin: fù chóu de chán dǎng) |
참회한 보복자 (Romaja: chamhoehan bobogja) |
Japanese: Repentant Retaliators
Korean: Pentient Avengers |
| Morpho Knight EX | Dark-Winged Disaster | 災来する黒き極蝶 (Romaji: sairaisuru kurokikyokuchō) |
다가오는 검은 나비 (Romaja: dagaoneun geom-eun nabi) |
Japanese: Disaster Bringer Black Butterfly Returns Korean: Oncoming Black Butterfly | |
| Void Termina (battle in Soul Melter EX) | The True Destroyer of Worlds | 真破神 (Romaji: shin hajin) |
진정한 파괴의 신 (Romaja: jinjeonghan pagoeui sin) |
True God of Destruction | |
| Void | Astral Birth | 星誕 (Romaji: seitan) |
별의 탄생 (Romaja: byeol-ui tansaeng) |
Star Birth | |
Super Kirby Clash
The following table lists every unique enemy in Super Kirby Clash. Note that the number of encounters includes those where the boss is partnered with others and also include battles with a powered-up version ("EX" and "Revenge") of the same boss.
| Bosses in Super Kirby Clash | ||||
|---|---|---|---|---|
| Boss | Image | #number of encounters | Description | Notes |
| Blocky | 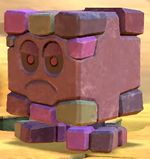
|
6 | A squared-off rock monster who attacks by rolling, using body slams, and otherwise trying to crush Team Kirby using its girth. | |
| Bonkers | 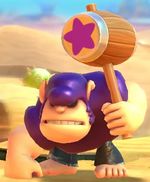
|
3 | A mallet-wielding simian warrior who can perform flying hammer spins and toss Coconuts. | |
| Colossal Driblee | 
|
2 | A massive Driblee who can spit globs of water and ride a big surf wave. | |
| Colossal Hot Head | 
|
4 | A massive Hot Head who can spew huge cones of flame and shoot fireballs. | |
| Colossal Kabu | 
|
6 | A massive Kabu who spins around to attack and can phase in-and-out of sight to reappear elsewhere. | |
| Colossal Spear Waddle Dee | 
|
7 | A huge Waddle Dee who carries a big spear. It can attack by leaping and thrusting or tossing its spear. | Replaces Colossal Waddle Dee from Team Kirby Clash Deluxe. |
| Electric Dragon | 
|
5 | A yellow variant of Ice Dragon who attacks using electricity. | |
| Flame Galboros | 
|
5 | A big red limbless dragon which can breathe flames and spew magma. It can also charge with a burning tackle and make big leaps. | |
| Frost Kibble Blade | 
|
5 | An icy variant on Kibble Blade who creates lingering ice spikes wherever its blades strike the ground. | |
| Gigant Edge | 
|
3 | A big soldier in green armor who wields a sword and shield. Gigant Edge uses varying sword swipes, can leap, and can create shockwaves at higher levels. | |
| Greater Doomer | 
|
7 | An otherworldly purple specter with bird-like features. It attacks by charging, shooting purple orbs, and using a burning tackle. | |
| Hornhead | 
|
7 | A giant rhinoceros beetle-like foe who attacks by charging and using its horn. It can fly, grab a Kirby to toss him, and shoot projectiles from its horn at higher levels. | |
| Ice Dragon | 
|
5 | A deceptively-cuddly blue dragon who can breathe a cone of frost and cause icebergs to rain from the sky. It can flutter in the air using its tail. | |
| Ignite Edge | 
|
5 | A fiery version of Gigant Edge who can cause burning conflagrations with his sword strikes. | |
| Kibble Blade | 
|
3 | A large gleaming suit of silver armor which attacks by throwing giant boomerangs and charging. | |
| King D-Mind | 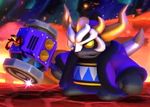
|
3 | Referred to as the "King of Darkness", this powerful foe from another dimension resembles both Dark Mind and King Dedede. He attacks using a mechanical hammer (and later a big poleaxe), body slams, and leaps. He is also capable of creating energy waves and opening his belly to shoot nasty projectiles, fly around with a massive biting jaw, and shoot a huge laser. | Also includes King D-Mind's Revenge. King D-Mind is fought only at the Decisive Battlefield. |
| King Doo | 
|
3 | A large variant of Waddle Doo who can fire varying types of big Beam attacks. | |
| Kracko | 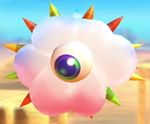
|
3 | A big spiky cycloptic cloud monster which can attack using swoops, beams, and lightning. | |
| Landia | 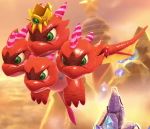
|
4 | A massive four-headed flying dragon referred to as the "Guardian Angel". He can charge, conjure wind, breathe fire, conduct electricity, and split into four smaller dragons. | Also includes Landia EX. Landia is fought only at the Empyrean, while Landia EX is fought only at the Decisive Battlefield. |
| Miasmoros | 
|
5 | A toxic sludge creature who belches poison and leaves toxic trails in its wake. It is capable of charging and leaping as well. | |
| Mr. Frosty | 
|
4 | An overalls-wearing walrus man who can breathe frost, throw ice cubes, and gobble up a Kirby. He is also capable of deft acrobatics. | |
| Mr. Floaty | 
|
3 | A summer variant of Mr. Frosty who attacks using water. | |
| Parallel Landia | 
|
1 | A stronger black variant of Landia who hails from another dimension. | |
| Parallel Nightmare | 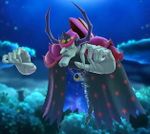
|
6 | A mischievous robed wizard made of darkness. He attacks by swooping, firing starry projectiles, and conjuring vortexes. | Also includes Parallel Nightmare's Revenge. Parallel Nightmare is also seen (but not fought) in the Story Quest "Tougher: King D-Mind". |
| Parallel Susie | 
|
2 | A petite secretary from another dimension who pilots a giant robotic suit. She attacks using various explosive projectiles, can perform spinning dashes and jumps, and launches her suit to create big shockwaves. | Parallel Susie is fought only at the Decisive Battlefield. |
| Pres. Parallel Susie | 
|
2 | A Susie from a yet different parallel dimension who is a more powerful version of Parallel Susie. | Pres. is short for "President". |
| Pyribbit | 
|
4 | A giant king toad who can swim in lava. He attacks by breathing fire, spewing magma and rock, leaping about frantically, and calling lava waves. He may also try to eat a Kirby using his tongue. | Also includes Pyribbit EX. This enemy is only fought in the Volcano. |
| Spark Bonkers | 
|
5 | An electric-blue variant of Bonkers who can create lingering electric discharges whenever he strikes with his hammer. | |
| Taranza | 
|
3 | A caped hovering spider man referred to as the "puppeteer mage". He can teleport, conjure energy orbs, throw crystals, and catch Kirbys in a net. | Taranza is fought only in the Empyrean. |
| Telepathos | 
|
4 | A hovering psychic enigma who attacks using psionic blasts and by dive-bombing Team Kirby. | |
| Venom Kracko | 
|
4 | A noxious variant of Kracko who can leave putrid clouds of gas behind when he swoops around. | |
| Whispy Woods | 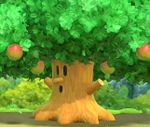
|
3 | A big tree enemy who attacks by throwing apples, Gordos, and Caterpillars at Team Kirby. Later on, he can also leap about, and potentially crush Kirbys under his roots. | Appears only in the Ruins. |
| Aeon Hero | 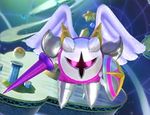
|
4 | An ancient angelic swordsman who is also known as Galacta Knight. He has three different forms, and attacks using his lance and various powerful magical moves, many of which are capable of ripping open the fabric of space. | Also includes Aeon Hero (Light) and Aeon Hero (Dark). This is the final boss of the game. Aeon Hero is fought only at the Dreamscape. |
Kirby Fighters 2
There are a total of four distinct bosses in Kirby Fighters 2's Story Mode: The Destined Rivals (five if Waning Masked Dedede & Waxing Masked Meta Knight are counted as a distinct boss), and they are re-fought multiple times with each subsequent fight being tougher and featuring new moves. The bosses are as follows:
| Bosses in Story Mode: The Destined Rivals | ||
|---|---|---|
| Boss(es) | Times fought | Notes |
| 4 | They are the first boss of Story Mode (fought as the final boss of Chapter 1), and are fought a few times in subsequent chapters. They share some of Whispy Woods' attacks from Kirby Star Allies, and are able to move around independently from each other. | |
| 4 | Consists of Gigant Edge and Ignite Edge, who fight together on The Empyrean. Their moves are retained from Super Kirby Clash. | |
| 3 | In the second Story Mode battle, Shadow Kirby uses a Copy Ability that corresponds to the selected buddy, and both the first and third battle has him mimicking the same selected ability as the player. His battle music changes on Very Hard of Single-Handed Mode and both battles in the Final Chapter of Story Mode: The Destined Rivals. | |
| 3 (technically 4) | This dual boss battle features King Dedede & Meta Knight, using combinations of their attacks to try and defeat Kirby and his buddy. They are fought as the final bosses of Chapter 2 (who are actually disguised Waddle Dees) and subsequent chapters. | |
| 1 | In their eagerness to finally defeat Kirby and his buddy, King Dedede & Meta Knight don the Mask of Dark Bonds to become a more powerful duo and finally overwhelm their rivals. This boss fight can be considered the true final boss of the game, if not counted as a second phase of the final fight. | |
Kirby and the Forgotten Land
| Bosses in Kirby and the Forgotten Land | ||||
|---|---|---|---|---|
| Boss | Location(s) | Description | HP values | Notes |
| Main game | ||||
| The Brawl at the Mall Gathering of the Beast Council Meta Knight Cup The Ultimate Cup |
A giant gorilla-like entity part of the Beast Pack's high council who first appears as the boss of Natural Plains, making him the first boss Kirby faces in the game. He primarily uses physical attacks, such as swinging his large hands and stomping, and sometimes pulls large rocks out of the ground to throw. | 1,000 (The Brawl at the Mall) 600 (Gathering of the Beast Council) 700 (Colosseum) |
||
| The Tropical Terror Meta Knight Cup The Ultimate Cup |
A large tropical spin-off of the Whispy Woods family, resembling both a palm tree and a pineapple who first appears as the boss of Everbay Coast. It primarily uses its large roots and explosive coconuts to attack. | 1,350 (The Tropical Terror) 945 (Colosseum) |
Tropic Woods is the only main game boss to not be refought in Redgar Forbidden Lands. | |
| Danger under the Big Top Gathering of the Beast Council Meta Knight Cup The Ultimate Cup |
An agile anthropomorphic leopard entity who is a part of the Beast Pack's high council and is of a relatively normal size compared to other bosses in the series. She first appears as the boss of Wondaria Remains, and primarily attacks with her greatly extending claws, throwing knives, and pounces/dashes. | 1,000 (Danger under the Big Top) 600 (Gathering of the Beast Council) 700 (Colosseum) |
||
| An Unexpected Beast King The Ultimate Cup |
The royal rival of Kirby who joins the Beast Pack and first appears as the boss of Winter Horns after being possessed, now with disheveled clothing and war paint. He primarily attacks with his hammer, large pillars, and attempts to slam/dash. | 1,600 (An Unexpected Beast King) 1,120 (The Ultimate Cup) |
||
| Collector in the Sleepless Valley Gathering of the Beast Council The Ultimate Cup |
A large armadillo with cartoonish features who is a part of the Beast Pack's high council and first appears as the boss of Originull Wasteland. It primarily attacks by rolling, shaking Kirby up in a cage if it catches him, and spinning around with a puppet partner. | 1,800 (Collector of the Sleepless Valley) 684 (Gathering of the Beast Council) 1,260 (The Ultimate Cup) |
||
| In the Presence of the King The Ultimate Cup |
The return of King Dedede who first appears as the boss of Redgar Forbidden Lands, now more strongly possessed, making him more versatile and powerful with a large hog mask and two hammers. He primarily uses more dangerous versions of several of his attacks from his original battle, in addition to throwing his hammers and pounding the ground to cause bouts of small flames. | 1,700 (800+900) (In the Presence of the King) 1,190 (560+630) (The Ultimate Cup) |
||
| Lab Discovera The Ultimate Cup |
A large possessed lion entity who is the leader over the Beast Pack and first appears as the first boss faced in Lab Discovera. He attacks primarily with claw strikes and pounces similar to that of Clawroline's, in addition to chomping, spewing a large beam out of his mouth, striking the air to send out crisscrossed beams, and slamming the ground to create shockwaves with his fists. | 1,800 (Lab Discovera) 1,260 (The Ultimate Cup) |
||
| Lab Discovera The Ultimate Cup |
An amalgamation of Leongar and many other members of the Beast Pack faced as the second boss in Lab Discovera, brought together after the "ID-F86" specimen is released from its confinement. It chases Kirby down a long pathway, attacking by reaching out its head of Leongar to chomp and throwing out globs of itself. | 1,600 (Lab Discovera) 1,120 (The Ultimate Cup) |
Fecto Forgo is unique compared to the rest of the bosses in the game, as it is fought in a long chase sequence instead of an open arena. | |
| Lab Discovera The Ultimate Cup |
The angelic complete form of "ID-F86", first faced as the final boss of the main game in Lab Discovera after having absorbed Elfilin. It attacks primarily with its mystically imbued polearm, making many aerial strikes with its ability to fly, in addition to creating homing projectiles, and tearing into other dimensions to bring in more dangerous hazards. It can also heal itself. | 2,500 (Lab Discovera) 1,750 (The Ultimate Cup) |
||
| Isolated Isles: Forgo Dreams (Extra Mode) | ||||
| Forgo Plains The Ultimate Cup Z |
A neon doppelgänger of Gorimondo who first appears as the boss of Forgo Plains. It is much stronger and harder to avoid, having every attack from the original battle fleshed out, such as throwing rocks which now home in, and swinging its hands in quicker succession. | 1,800 (Forgo Plains) 1,260 (The Ultimate Cup Z) |
||
| Forgo Bay The Ultimate Cup Z |
A neon doppelgänger of Tropic Woods who first appears as the boss of Forgo Bay. It is much stronger and harder to avoid, having every attack from the original battle fleshed out, such as dropping down much larger coconuts and Gordos, and forcing a maze out of the ground which Kirby has to navigate through in order to deal damage. | 2,000 (Forgo Bay) 1,400 (The Ultimate Cup Z) |
||
| Forgo Park The Ultimate Cup Z |
A neon doppelgänger of Clawroline who first appears as the boss of Forgo Park. She is much stronger and harder to avoid, having every attack from the original battle fleshed out, such as throwing knives more frequently, and creating three duplicates of herself who attempt to pounce on Kirby with her. | 1,600 (Forgo Park) 1,120 (The Ultimate Cup Z) |
||
| Forgo Horns The Ultimate Cup Z |
A neon doppelgänger of King Dedede who first appears as the boss of Forgo Horns. It is much stronger and harder to avoid, having every attack from the original battle fleshed out, such as attacking with its hammer and a pillar much quicker, and rolling Gordo Bars across the arena while attacking with an aforementioned pillar. | 1,700 (Forgo Horns) 1,190 (The Ultimate Cup Z) |
||
| Forgo Wasteland The Ultimate Cup Z |
A neon doppelgänger of Sillydillo who first appears as the boss of Forgo Wasteland. It is much stronger and harder to avoid, having every attack from the original battle fleshed out, such as sometimes throwing out a set of bombs instead of swinging a cage, and making a sandstorm appear. | 1,900 (Forgo Wasteland) 1,330 (The Ultimate Cup Z) |
||
| Forgo Zone The Ultimate Cup Z |
A neon doppelgänger of Forgo Dedede who first appears as the boss of Forgo Zone. It is much stronger and harder to avoid, having every attack from the original battle fleshed out, such as rocking the arena around to sink it into the surrounding lava, sometimes especially by raining down large meteors. | 2,040 (960+1,080) (Forgo Zone) 1,360 (640+720) (The Ultimate Cup Z) |
||
| Forgo Land The Ultimate Cup Z |
The return of Leongar who first appears as the first boss of Forgo Land, now fully possessed after having his soul fragments returned to him, making him more versatile and powerful by having every attack from the original battle fleshed out, such as raining meteors when spewing a beam, and striking beams out much faster and in new variants. In addition, he is now assisted with attacking by Soul Forgo. | 3,400 (1,400+2,000) (Forgo Land) 2,380 (980+1,400) (The Ultimate Cup Z) |
||
| Forgo Land The Ultimate Cup Z |
The sword-wielding caster of judgment who first appears as the final boss of Forgo Land and Forgo Dreams overall after absorbing Soul Forgo. It primarily attacks similarly to that of Meta Knight, but is much quicker and can teleport. In addition, it can send variants of flames across the arena, cast out homing soul forms of "ID-F86", use soundwaves to distort Kirby's perspective, and use two much larger forms of its sword. | 2,000 (Forgo Land) 1,500 (The Ultimate Cup Z) |
||
| Colosseum | ||||
| Meta Knight Cup The Ultimate Cup |
The caped swordsman who solely appears as a boss in the Colosseum. He primarily attacks by using Galaxia and the variety of sword beams and small fire bouts created by it, in addition to raising large rocks out of the ground to rain onto Kirby, and attempting to catch the puffball in his Upper Calibur. | 1,000 | ||
| The Ultimate Cup Z | A neon doppelgänger of Meta Knight who solely appears as a boss in the Colosseum. It is much stronger and harder to avoid, having every attack from the original battle fleshed out, such as striking out sword beams much more often, and making a duplicate of itself when attempting to catch Kirby in its Upper Calibur. | 1,000 | ||
| The Ultimate Cup Z | The ultimate divine entity of chaos, who absorbed the souls of the native beasts and the "ethereal butterfly" for one last shot at revenge. In addition to being much stronger than Fecto Elfilis and harder to avoid, having every attack from the original battle fleshed out, it has several new attacks, such as surrounding Kirby with angelic blades, creating large tornadoes and beams, making use of more dimensional rifts, and forming a colossal version of itself which swings at Kirby with its polearm.
Once this entity is defeated, the true spherical entity is removed from the physical body and faced. It attacks primarily by creating a black hole, quickly firing beams and globs of itself, and increasing its size to slam down and create shockwaves, in addition to using Deadly Sun Grazer, Impact Pound, and Blazar Cutter. |
3,400 (phase 1) 3,000 (phase 2) |
||
Profiles
Kirby's Dream Land 2
- 3DS Virtual Console manual bio (shared with mid-bosses): "Minibosses appear midway through certain stages. Main bosses appear in the last stage of each island. When a miniboss or boss appears, its life meter is displayed in place of your score. To defeat a boss, reduce its life meter to zero."
Trivia
- Kracko and Whispy Woods are tied as the most frequently appearing bosses in the series, with both having made numerous appearances as Bosses proper, or simply as cameos.
- Despite this, the first main-series title to feature neither of them is Kirby and the Forgotten Land, though a relative of Whispy Woods does appear in that game.
- In Kirby Super Star and its remake, Kirby Super Star Ultra, if two players are in play before the boss health bar appears, the boss will have their health increased by 30%. This can be prevented by summoning the Helper after the boss health bar appears.
- A Miiverse post regarding Kirby: Triple Deluxe revealed that bosses fought repeatedly gradually lose their maximum health and become slower and weaker. As such, each time Kirby fails to defeat the boss and tries again, the boss becomes slightly easier. This is meant to give relief to players struggling with the fights.[3] This mechanic has been present in all subsequent main-series Kirby games, as well as the spin-offs Kirby Fighters Deluxe and Kirby Fighters 2. It does not apply to battles in Boss Endurance modes, however.
- From Kirby's Return to Dream Land onward, main series bosses (and mid-bosses) have a variable defense multipler. The defense of bosses usually increases in the following scenarios:
- At the beginning of the battle when their health bar is filling up.
- When their phase is shifting.
- When they are performing certain attacks.
- When there is more than one player in the battle (in Kirby's Return to Dream Land and Kirby Star Allies), the players receive a decreased attack multiplier rather than bosses having an increased health or defense multiplier.
Names in other languages
| Language | Name | Meaning |
|---|---|---|
| Japanese | ボス bosu |
Boss |
| Traditional Chinese | 魔王 Mówáng |
Boss (lit. "Demon King") Monster |
| Simplified Chinese | 魔王 Mówáng 魔头 Mótóu | |
| Dutch | Eindbaas | Endboss |
| French | Boss | - |
| German | Boss | - |
| Italian | Boss | - |
| Korean | 보스 boseu |
Boss |
| Portuguese | Chefão | Big boss |
| Spanish | Jefe | Boss |
References
- ↑ Kirby & The Amazing Mirror: Enemy Data
- ↑ 2.0 2.1 Datamined from files\param\Archive.bin.cmp file
- ↑ Miiverse post about bosses (archive)
| ||||||||||||||
